
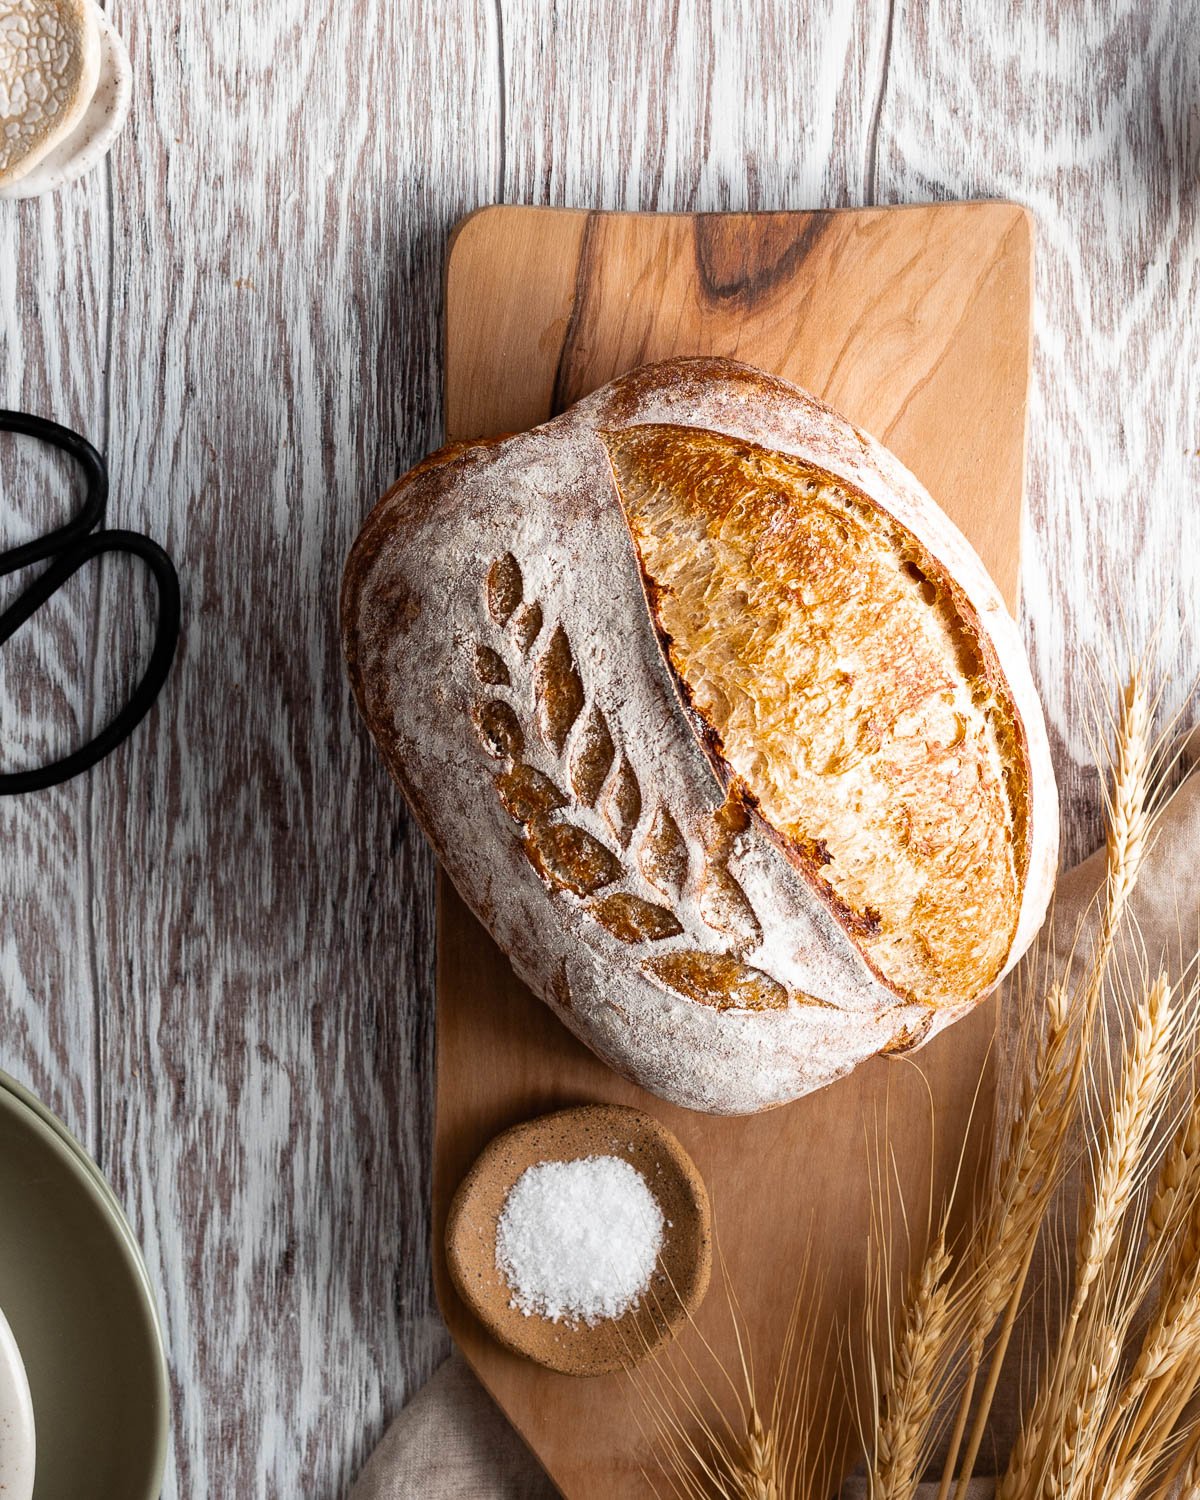
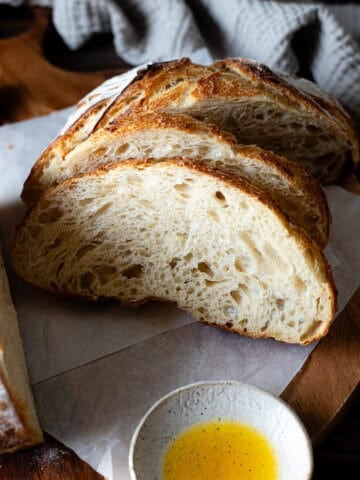
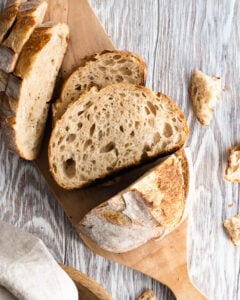
Basic Crusty Sourdough Bread with a creamy, airy crumb is one of the most rewarding bakes you will ever pull out of your oven. This step-by-step guide will show you exactly how to make a crusty sourdough bread with a few simple ingredients and your own sourdough starter in the comfort of your kitchen.
This recipe was originally published in 2018 and I have since updated it with new photos and more tips for success.
Jump to:
I don’t think I can count how many loaves of bread I’ve created since I published the first version of this recipe in 2018. I was a new baker and writing the blog post helped me make sense of the bread baking process. Since then, I’ve baked a sourdough loaf every week (sometimes multiple times a week) and each loaf of sourdough bread taught me a different lesson, helping me improve my understanding of baking and the magical world of fermentation.
I thought it was finally time to update this recipe and share those lessons with you! In most instances I’ve simplified my process, and in every case I’ve gained a deeper understanding of the purpose behind every step.
What is sourdough bread?
Sourdough bread is a type of bread made using a wild yeast culture called a sourdough starter, as opposed to commercial yeast.
Commercial yeast is primarily one species, S. cerevisiae, while sourdough starter is a diverse mix of wild yeasts, sometimes numbering in the thousands. Commercial yeast is cultivated for its predictability and efficiency. You can make bread using instant yeast in about 2 hours, while baking one loaf of sourdough can take up to two days.
Sourdough fermentation is a slow process, lasting several hours to days, which contributes to its unique flavor and texture. Although commercial yeast works faster, it sacrifices the complexity and depth of flavor that sourdough's extended fermentation provides. Additionally, sourdough bread often offers certain nutritional benefits, such as improved digestibility and potentially increased levels of bioavailable nutrients due to the fermentation process.
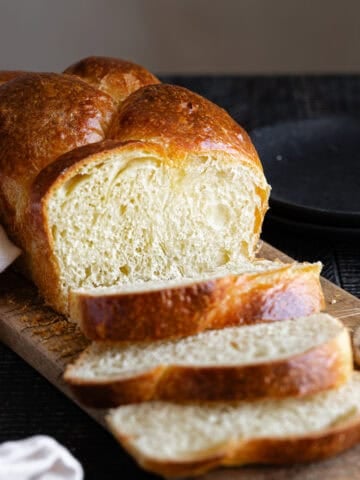
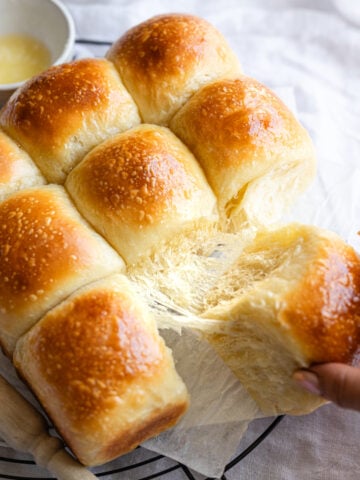
Although the popular image of sourdough is often linked to crusty, rustic artisanal bread, any naturally-leavened bread qualifies as "sourdough." In fact, you can create a wide range of delicious sourdough bread such as Sourdough Brioche, Sourdough Dinner Rolls, Sourdough Pretzels, and even Sourdough Pita Bread.
Benefits of baking with a sourdough starter
During the long fermentation period, yeast and bacteria transform sugars in flour into carbon dioxide, causing the dough to rise, and produce organic acids (lactic and acetic acids) which impart the unique tangy flavor of sourdough.
This is the secret behind the exceptional flavor of sourdough bread. As the dough ferments, the bread develops a deeper and more complex flavor profile. This is why sourdough bread is often considered to have a superior taste compared to conventional bread.
The benefits of fermentation extend beyond flavor and texture. During this period, enzymes breakdown phytic acid, also known as "phytates" which tend to block the absorption of healthy minerals found in wheat. This predigestion allows our bodies to unlock nutrients in wheat that our bodies cannot normally absorb. This makes sourdough bread naturally more nutritious compared to other types of bread.

What is fermentation?
Fermentation is the most pivotal step in the bread-making process, where dough rises as yeast consume sugars in flour into ethanol and carbon dioxide, resulting in light, airy and fluffy bread. It starts as soon as you mix your starter into your dough.
Allowing microorganisms to complete this process is crucial otherwise your bread will be dense and gummy. The timeframe varies with your environment; higher temperatures yield quicker fermentation, while colder ones slow it down. Optimal fermentation happens between 78 to 80F.
Signs of fermentation
- Dough looks bubbly
- Build up of air bubbles in your dough
- Dough is no longer overly sticky
- Edges of the dough look domed and not flat
- Dough easily releases from the sides of the bowl when you’re ready to shape
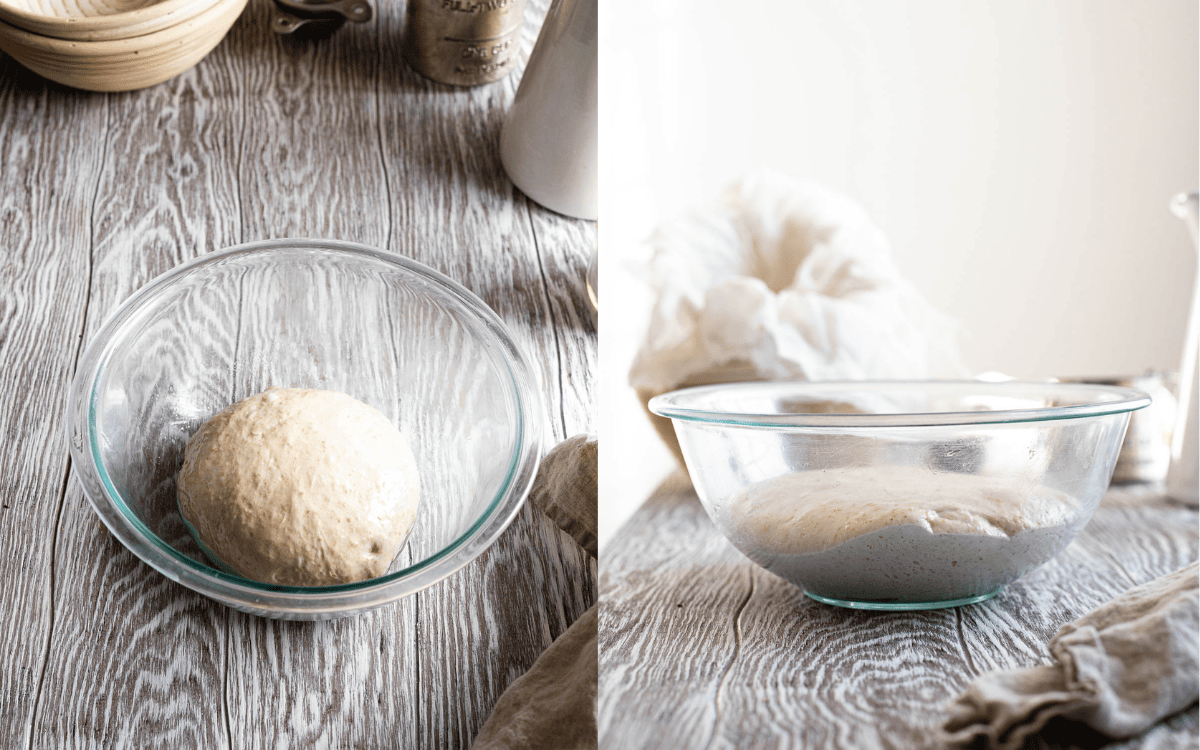
Right: Proofed dough, demonstrates a visible increase in volume, feels bubbly and looks relaxed.
Why I love this recipe
- Low hydration level (about 71%) which makes it perfect for beginners: Hydration level is the amount of water in a recipe relative to the amount of flour (this includes the water and flour in the sourdough starter as well).
- Dough is easier to work with: Low hydration level results in a dough that’s not too slack or sticky and is very easy to work with.
- Much of the recipe is hands off: In between the crucial steps of mixing and stretch and folds the dough undergoes a series of long rest periods before your sourdough is shaped.
Tip
If this is your first bake, or you’re new to sourdough, stick with recipes that have 75% hydration level or less.
What you need
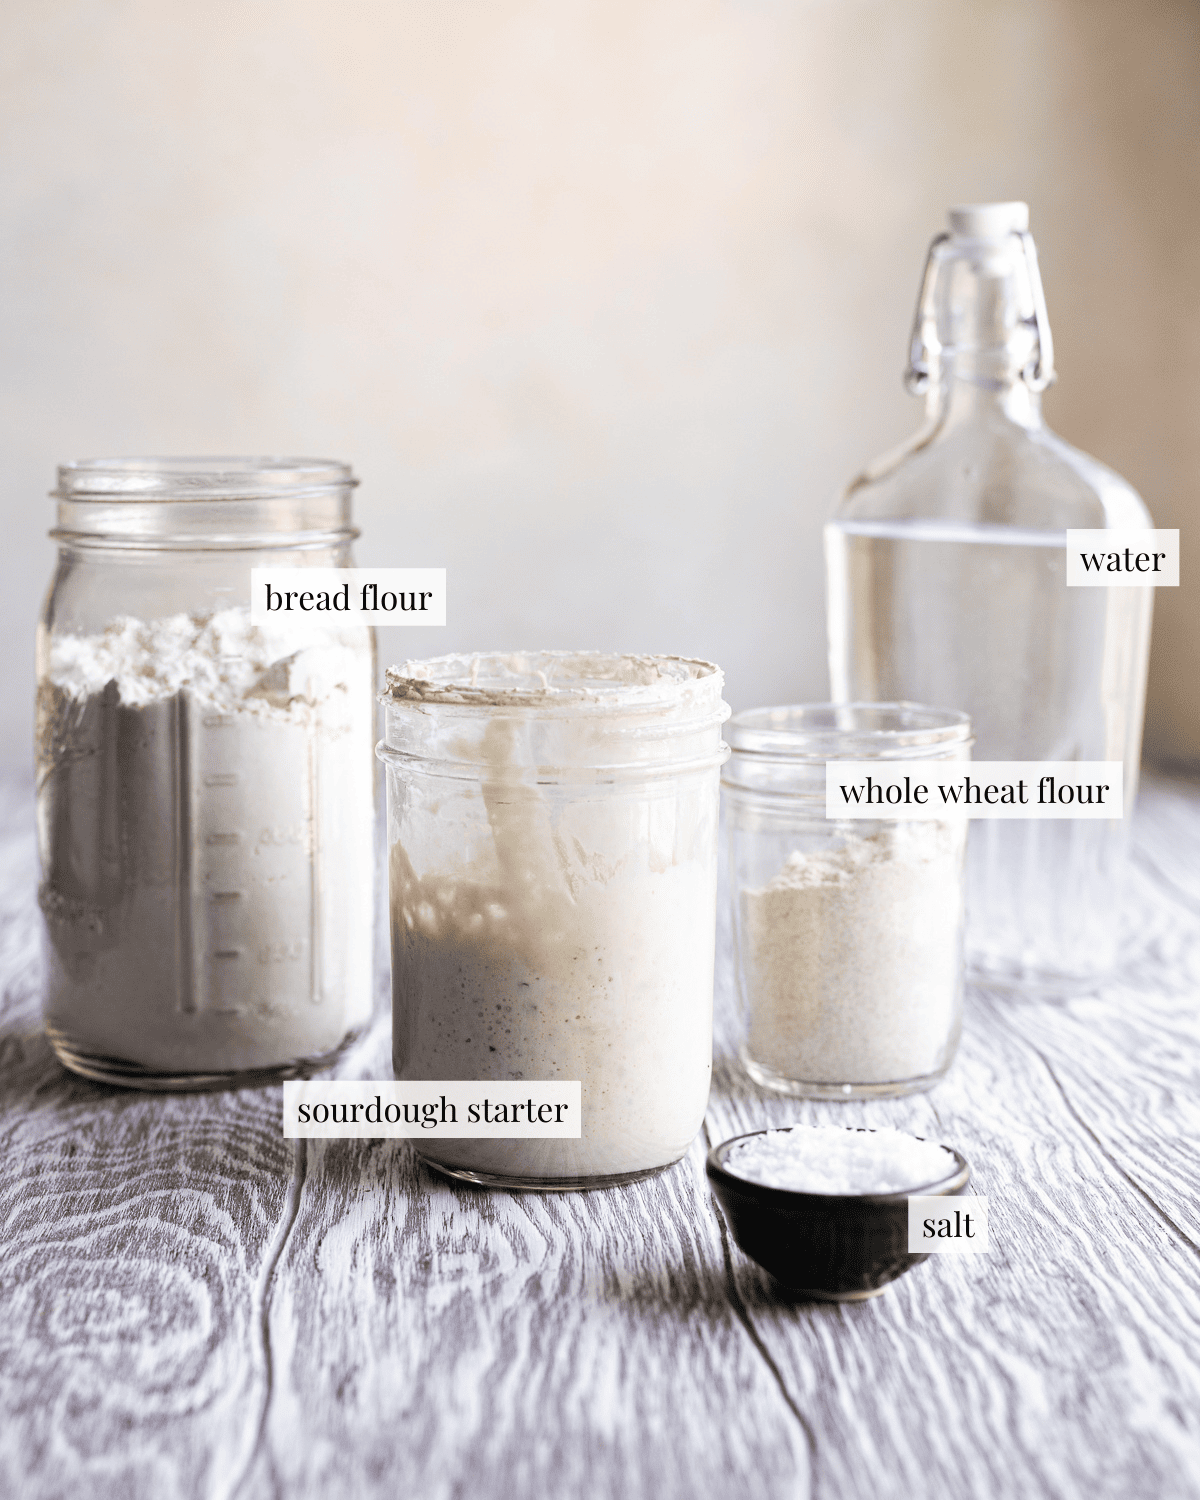
- Sourdough starter: The main leavener for your sourdough bread, it tenderizes your dough and causes your bread to rise. You'll need a good sourdough starter to create this recipe. If your starter is not mature and active, it won't be able to make your dough rise.
- Bread flour - Bread flour has a protein content of 12 to 14% and is made out of hard wheat varieties. Allows stronger gluten networks which allows your dough to hold its shape. You can substitute all-purpose flour in a pinch.
- Whole wheat flour - Whole wheat flour adds a lovely nuttiness and earthiness to bread. Avoid using 100% whole wheat flour in this recipe as it may yield denser bread. Whole wheat flour absorbs more liquid than white flour, and this recipe has a lower hydration level.
- Water - If possible try to use filtered, well or bottled water. It’s commonly thought that the chlorine and chemicals in tap water can negatively affect or even kill the microorganisms in sourdough.
- Salt - In addition to flavor, salt helps strengthen the gluten network in your dough. Leave it out and your bread may collapse as it bakes.
Useful bread making tools
- Dutch oven: steam is essential when baking sourdough bread. The easiest way to add steam in your oven is by using a Dutch oven. You can also use a specialty bread baker like the Challenger Bread Pan or Le Creuset Bread Oven.
- Kitchen scale: precision is key with bread baking, measuring by weight is much more accurate than volume measures.
- Lame fitted with a sharp razor blade: a specialized tool for scoring bread, if you don’t have one, use a sharp paring knife.
- Banneton: proofing basket, wicks excess moisture away from the dough as it proofs.
- Rice flour: prevents the dough from sticking to your proofing vessel and will not scorch in the oven.
- Proofing Box: a temperature controlled kitchen appliance that maintains a consistent temperature where fermentation can occur at an optimal level.
- Bench scraper or bench knife: useful for dividing, manipulating and picking up dough.
How to Make Sourdough Bread
Creating sourdough bread involves multiple steps, and although it might appear daunting initially, with practice, the process will become more intuitive. Over time, you'll develop an instinct for your dough. While your initial loaves might not be flawless, each baking experience will teach you valuable lessons, enhance your expertise, and refine your skills.
Still want delicious crusty bread but don't have two days to dedicate to bread baking? Try my Sourdough Discard Bread Recipe!
Step 1: Make the dough
Start with an active starter. Combine the ingredients together in a large mixing bowl and stir until no traces of dry flour remain. Cover the bowl with plastic wrap and let it rest for 1 hour
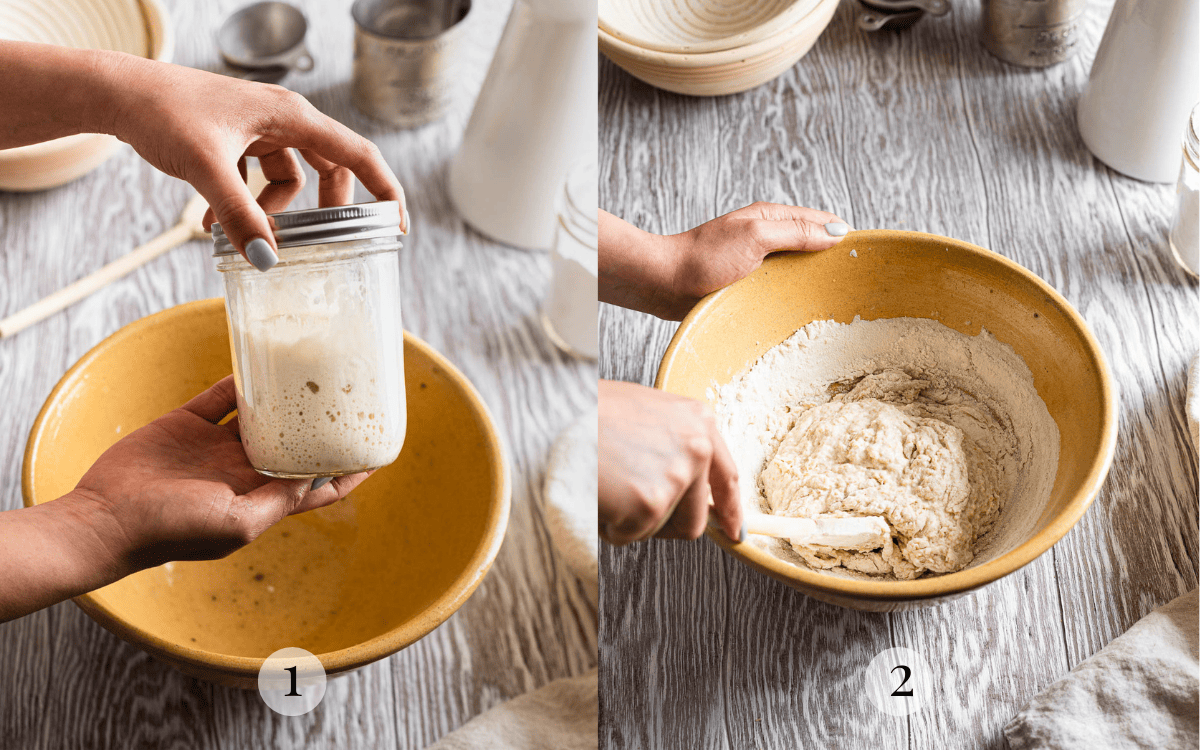
About Bulk Fermentation
Bulk fermentation is the first rise after mixing, when the dough ferments as a single mass and develops strength. During this stage, you'll perform stretch and folds or coil folds to strengthen the gluten network to capture the gasses (CO2) produced during fermentation.
Step 2: Stretch and fold
Lift the dough and gently stretch it as far as possible without tearing, then fold it over itself. Rotate the bowl 90 degrees and repeat this process three more times. This completes one set. Transfer the dough to a clean, lightly-oiled bowl. Cover and let the dough rest for 30 minutes.
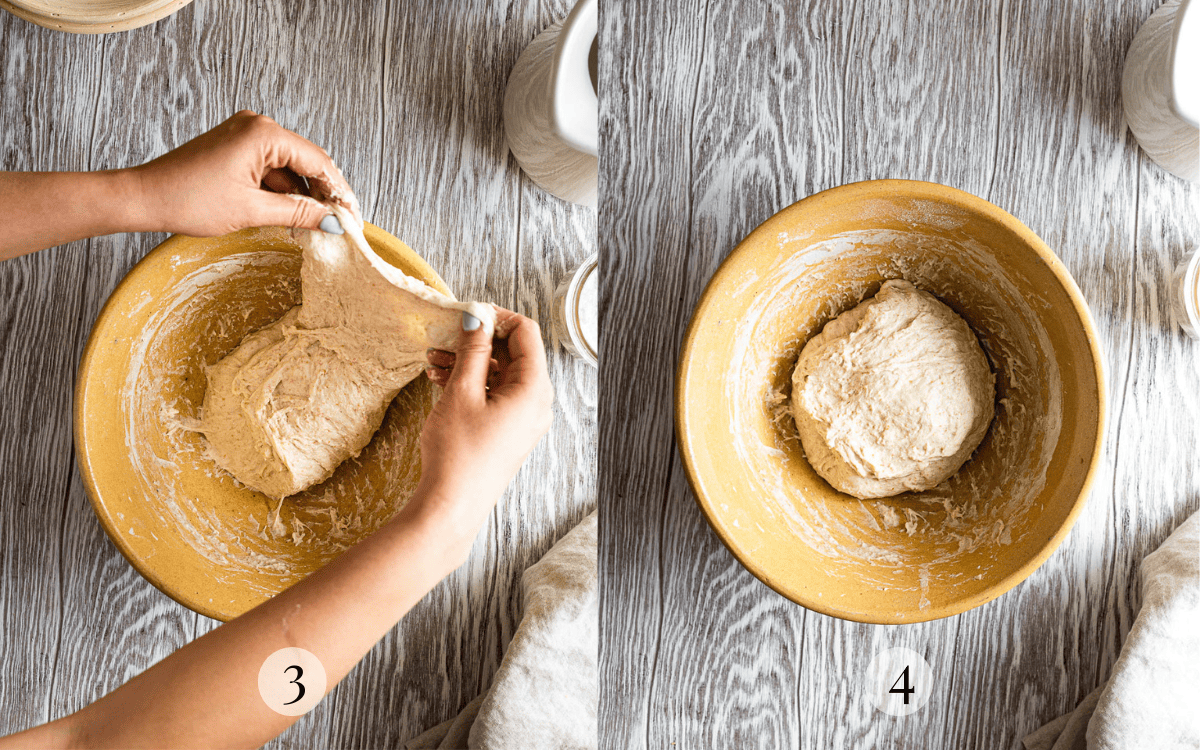
Step 3: Coil folds
Lift the center of the dough with your fingertips until the ends release from the bowl. Gently set it down, tucking the ends underneath to maintain tension. Complete 3 sets of coil folds in 30 minute intervals.
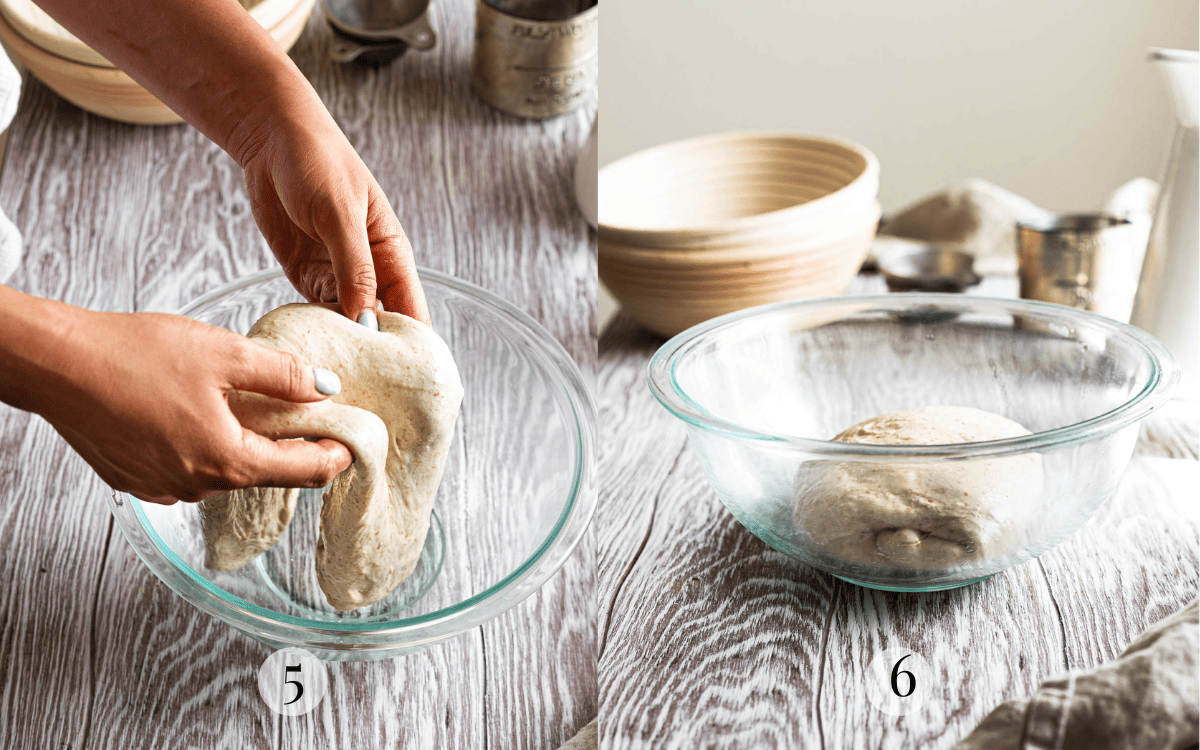
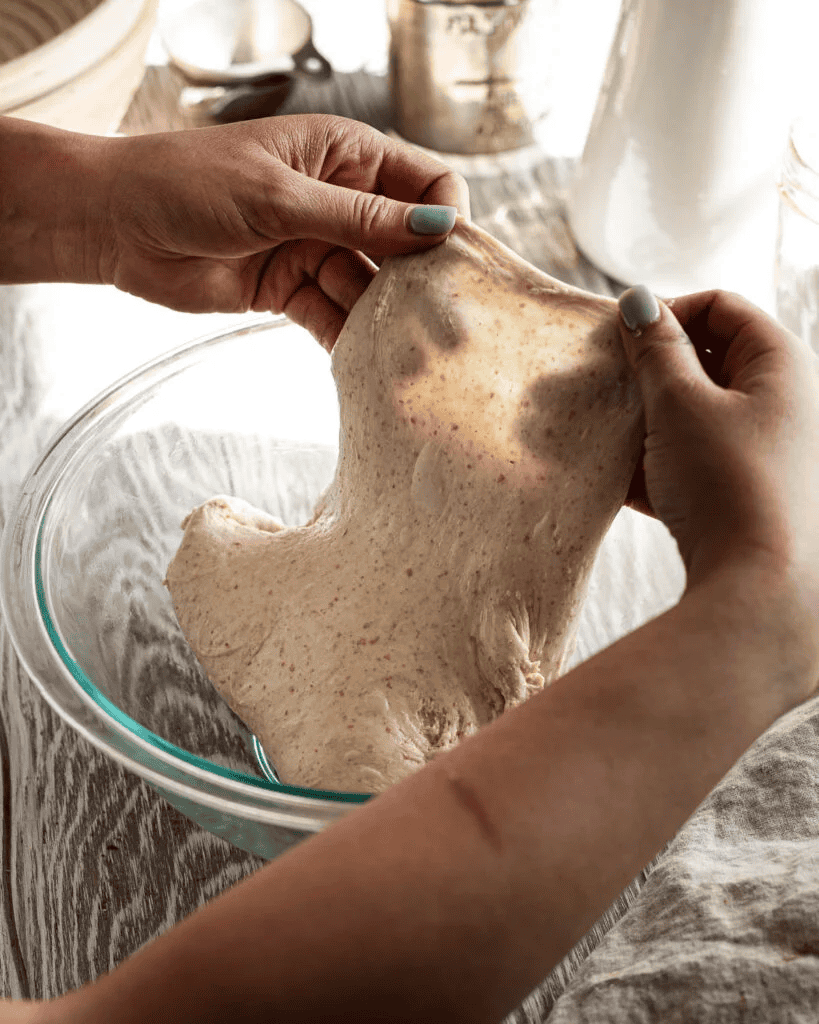
Use the windowpane test
The windowpane test is a great way of determining whether you've developed enough strength and structure in your dough.
To perform the windowpane test:
- Gently pinch a portion of your dough with damp fingertips.
- Stretch it as thin as possible until it appears translucent.
- If the dough can stretch enough to see the silhouette of your fingers without tearing: you've passed.
- Allow the dough to rest until proofed.
Step 4: Shape the dough
Turn the dough out on a clean work surface. Fold the bottom of the dough towards the middle and the top over that. Pick up the shorter sides of the cylinder and gather them towards the center. Place the dough inside your proofing basket with the seam side up. Pinch the seam shut and wrap your proofing basket in plastic wrap. Place the shaped dough in the refrigerator and proof overnight.
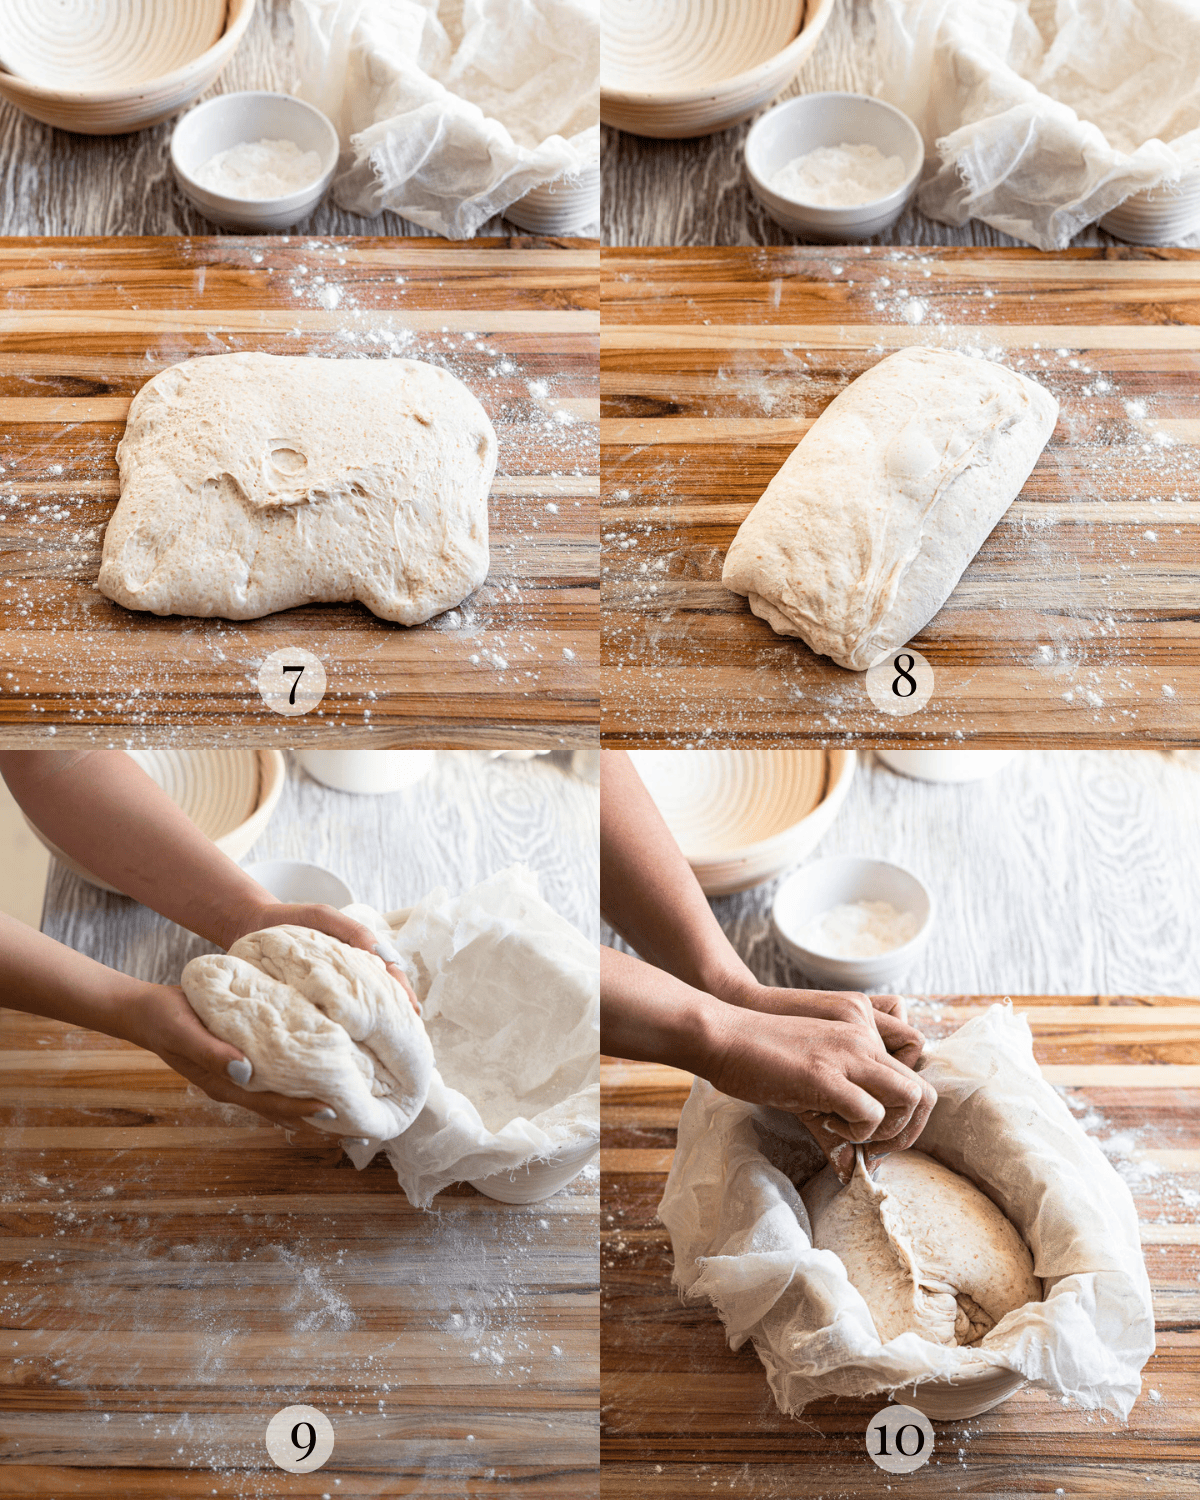
If you don't have a banneton, shape your dough into a boule and use an 8-inch mixing bowl lined with a clean tea towel dusted with rice flour.
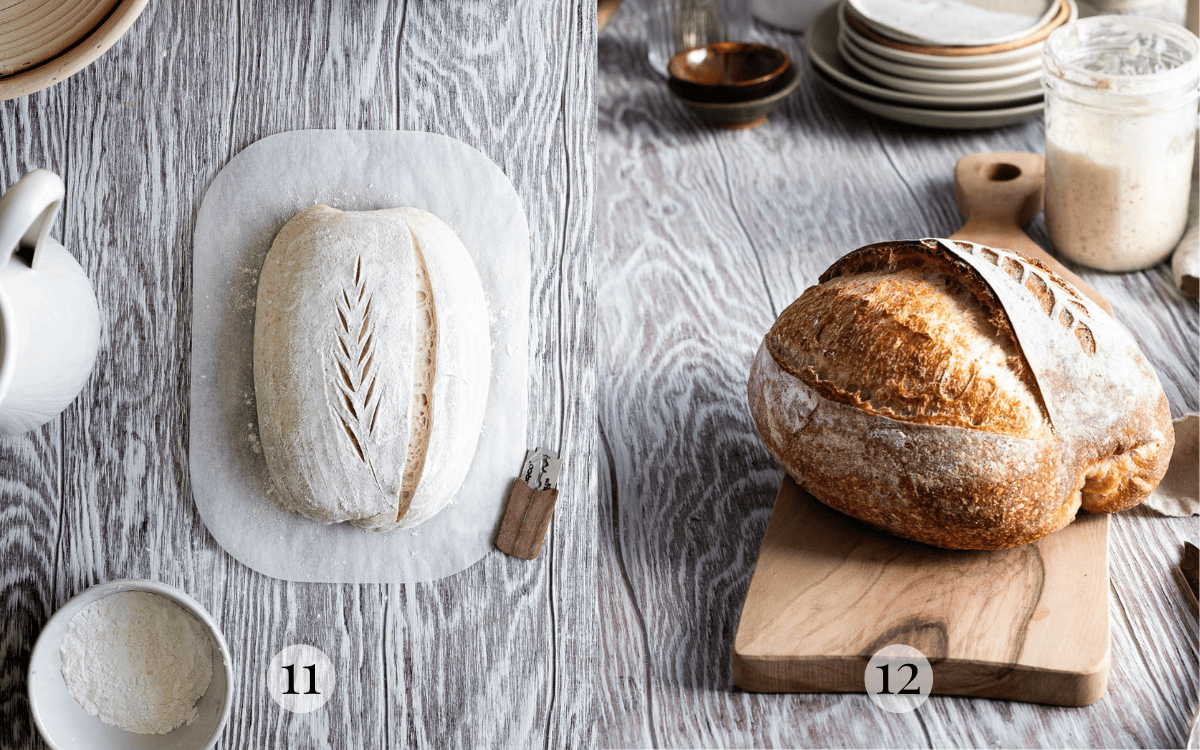
Step 5: Bake
The next day, preheat the oven to 500F with a Dutch oven inside. Using a lame fitted with a sharp razor blade, make a large, vertical gash, about ¼ to ½-inch deep, until you reach the other end. Bake for 30 minutes covered and 10 to 15 minutes uncovered.
Bread Baking Tips
- Use weight over volume measurements. Bread-making hinges on precise ratios, just a few grams of water can can greatly affect how challenging your dough is to work with. Measuring by weight is more accurate than volume, with tablespoons and cups.
- Watch the dough not your clock. Since fermentation depends on temperature, the rate at which your bake progresses may vary. Instead of relying solely on the clock, be sure to watch for the telltale signs of fermentation.
- Scoring is vital to bread baking. As dough bakes, water evaporates rapidly. Failure to score your dough sufficiently can lead to water vapor exploiting its weakest point, which will cause your dough to burst in unwanted spots. Check out my post about sourdough scoring for more info.
- Invest in an instant-read thermometer. The best way to tell if your bread is baked is by measuring the internal temperature. It should register about 190 F when its fully baked.
- Let your bread cool completely before slicing, at least 2 hours. Slicing bread prematurely can prevent the crumb from completely setting, and lead to quicker moisture loss, resulting in the bread drying out and becoming stale faster.

Test your bread baking skills on creative sourdough bread recipes, like Cranberry Walnut Sourdough Bread, Rosemary Lemon Sourdough Bread, Sourdough Spelt Bread or Sourdough Chocolate Bread.
Recipe FAQs
No, here’s why: whole wheat flour absorbs water at a different rate than white flour, and needs a lot more water. Substituting it for the bread flour here would make your bread heavier and tougher.
Dense and gummy bread is usually the result of under-fermenting. This is usually caused by using a starter that’s either immature or too weak. Before using it to make bread, make sure your starter has matured, is healthy and is rising dependably over the course of 4 to 6 hours.
If you don’t think your starter is the problem, it may be because you did not let your dough ferment for a long enough period of time. Try adding an hour or two to your bulk fermentation and making sure your dough has risen before shaping it.
You can bake your loaf on a baking sheet or a preheated pizza stone (if you have one).
Preheat your oven with a baking tray on the bottom rack of the oven. Once you're ready to bake, load your dough into the oven and pour boiling water into your baking tray. This will create steam. Bake for 25 to 30 minutes, then remove the tray and continue baking your bread for another 10 to 15 minutes depending on how dark you like your crust.
Check out my post on How to Bake Sourdough in a Loaf Pan for more information.
After baking with steam, transfer your bread to a parchment-lined baking sheet and continue baking until your bread reaches your desired color.
You may also like
Did this recipe rise to the occasion?
★★★★★
Please leave a star rating and a comment. Your feedback helps me create more delicious sourdough recipes. I read and truly appreciate every message.
Don't forget to PIN this recipe on Pinterest to save it for later!
Thank you for your support!
Basic Sourdough Bread Recipe
Equipment
- dough whisk optional
This section may contain affiliate links
Ingredients
Sourdough Starter
- 28 grams sourdough starter mature, unfed
- 56 grams water
- 56 grams all-purpose flour
Dough
- 270 grams bread flour
- 30 grams whole wheat flour
- 200 grams water
- 100 grams sourdough starter active
- 6 grams salt
Shaping
- 15 grams all-purpose flour
- 15 g rice flour
Click US Customary to view volume measurements
Instructions
- Activate your starter: Mix the unfed starter, water and all-purpose flour in a small container. Let your starter ferment until doubled or tripled in volume (about 4 to 6 hours).28 grams sourdough starter, 56 grams water, 56 grams all-purpose flour
- Mix your dough: In a large bowl, combine water and active sourdough starter. Stir until the starter is almost completely dissolved. Fold the whole wheat flour into the starter mixture. Add all of the bread flour and salt. Stir using a wooden spoon or your hands until no dry traces of flour remain.270 grams bread flour, 30 grams whole wheat flour, 200 grams water, 100 grams sourdough starter, 6 grams salt
- Fold the dough: Complete a set of stretch and folds by picking up one side of the dough and folding it over itself. Repeat until all sides are folded. Transfer the dough to a lightly-oiled bowl, cover with plastic wrap and let the dough rest for 1 hour.
- Strengthen the dough and bulk ferment: As your dough ferments, perform 3 to 4 sets of coil folds inside the bowl at 30 minute intervals, cover your bowl with plastic wrap after you complete each fold. Your dough should appear smooth and pass the windowpane test after the last fold.
- Bench rest: After your last fold, let the dough rest for 1 hour untouched in a warm place. Your dough should look puffy and should increase in volume during this period.
- Shape the dough: Prepare your proofing basket (you can use a small mixing bowl lined with a tea towel dusted with rice flour).15 g rice flour
- Turn your dough out on a lightly-floured work surface. Lightly flatten the dough out into a rectangle (be gentle so you do not pop the air bubbles build up during fermentation).15 grams all-purpose flour
- Fold the top of the dough towards the center and then fold the bottom of the dough over that, like you are folding a letter. Pick up the sides of the dough, fold it in half and place it in your proofing basket, seam-side up. Pinch the seam shut. Fold the tea towel over your dough.
- Cold proof: Place your dough inside the refrigerator and proof overnight.
- Prepare for baking: Preheat your oven to 500 F with a Dutch oven inside for at least an hour.
- Score: Turn your dough out on a piece of parchment paper. Cut a long slash with a sharp knife or a lame on the dough to let the steam escape.
- Bake: Place the dough with the parchment paper into the Dutch oven, turn. Bake for 30 minutes with the cover on and an additional 10 to 15 minutes with the cover off, depending on how dark you would like your crust.
- Serve: Transfer your baked loaf to a cooling rack. Let the dough cool completely, at least 2 hours, before slicing.
- Store: Store any leftover slices in a ziplock bag for up to 5 days at room temperature.
Tips
These recipes were developed and tested using grams for precise measurements. To increase your chances of success, I recommend investing in a kitchen scale. I've included rough volume estimates (in tablespoons and cups), but they might not be totally accurate.
Remember all ovens are unique, these recipes were tested in my oven which runs cooler than others. You might need to lower the temperature if your bake appears to be browning too quickly. Monitor your bake closely and make adjustments if needed.
Notes
Recipe Video
Nutrition
I am not a nutritionist or dietitian, any nutrition information provided is an estimate.

Lorraine says
Hi Hannah! I purchased your book and am on day 7 of the starter process. I want to make sure I'm following correctly. I only keep 14 grams of the starter each day...and throw out the rest?.....Please let me know.
Thanks,
Lorie
Hannah Dela Cruz says
Hi Lorraine, sorry for the late response. You can throw out the rest or keep it in a separate jar to use for the sourdough discard recipes in the book.
Discarding part of your sourdough starter helps control its size, which reduces the amount of flour and water needed to keep it active. If your starter grows too large, you'd have to feed it with significantly more flour and water to maintain its health. By keeping the starter at a manageable size, the amount of flour and water required for feeding stays minimal. Essentially, the amount of flour and water you feed should be in balance with the size of the starter, ensuring it stays strong and active without unnecessary waste.