

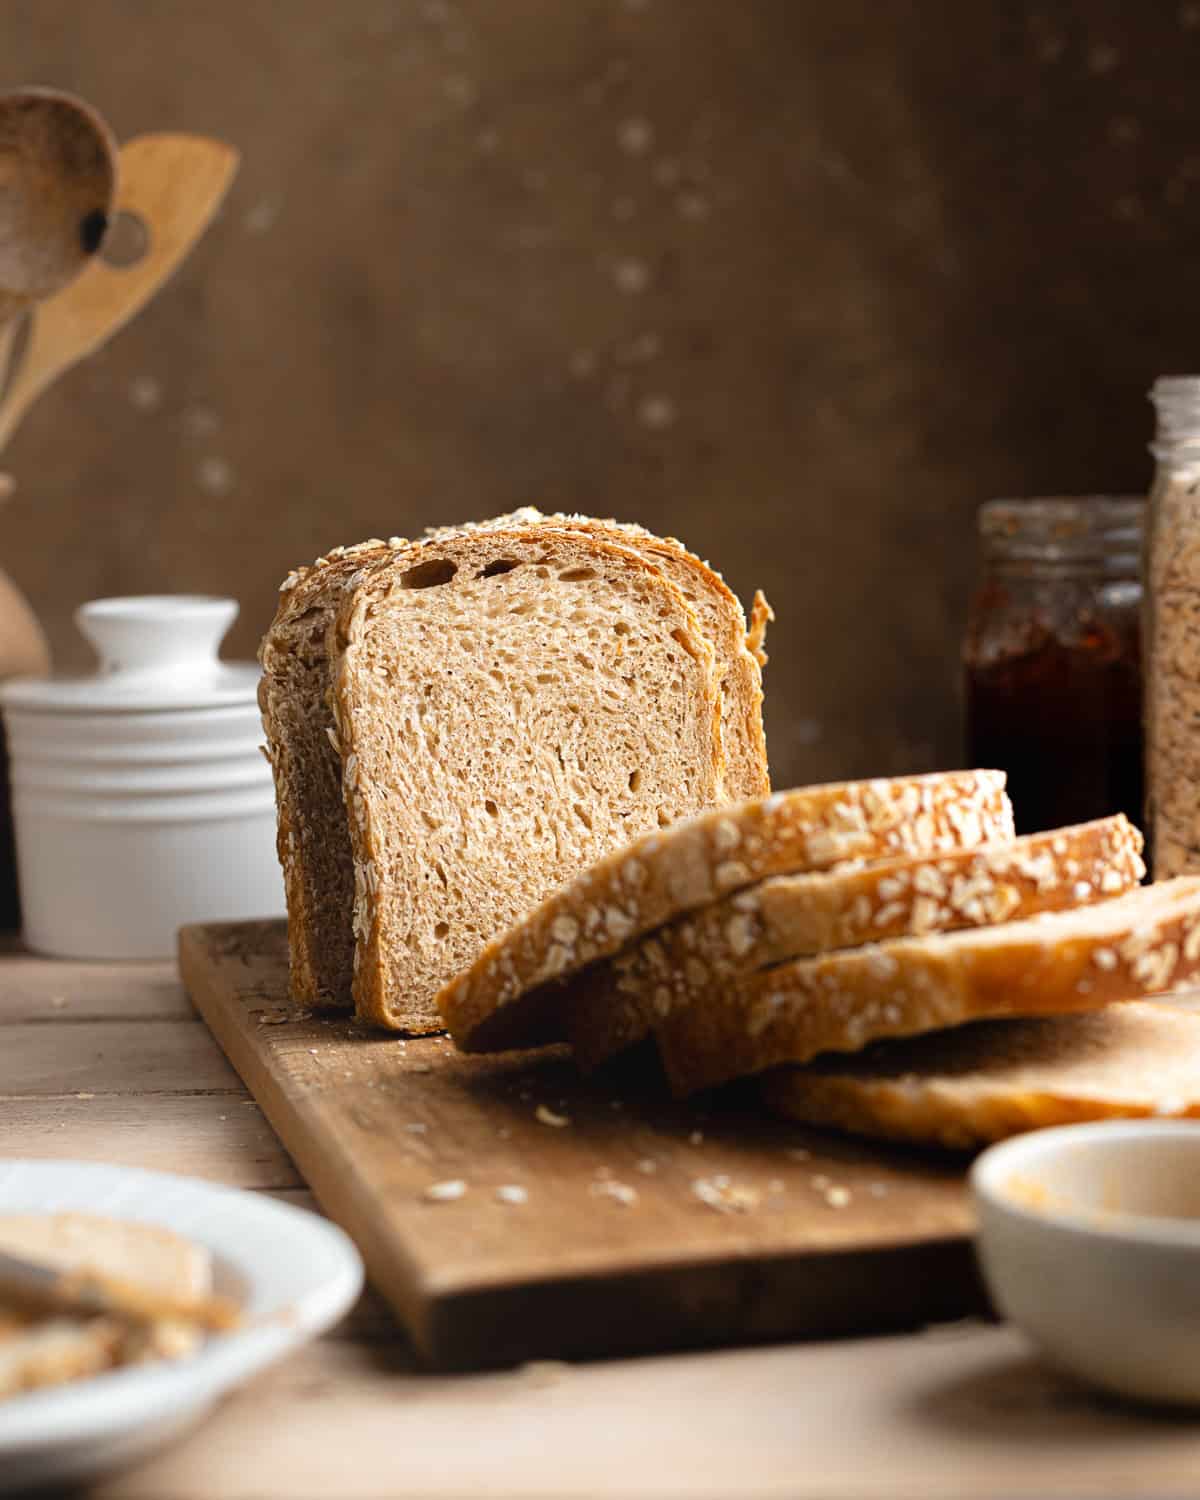
This bread tastes like my childhood. I still remember my mom bringing home a golden brown loaf dotted with oats. This Sourdough Oatmeal Sandwich Bread reminds me of the yummy sandwich bread I loved as a kid, but better since its homemade and made with sourdough starter. Adding oatmeal porridge into the dough makes it even softer and spongier.
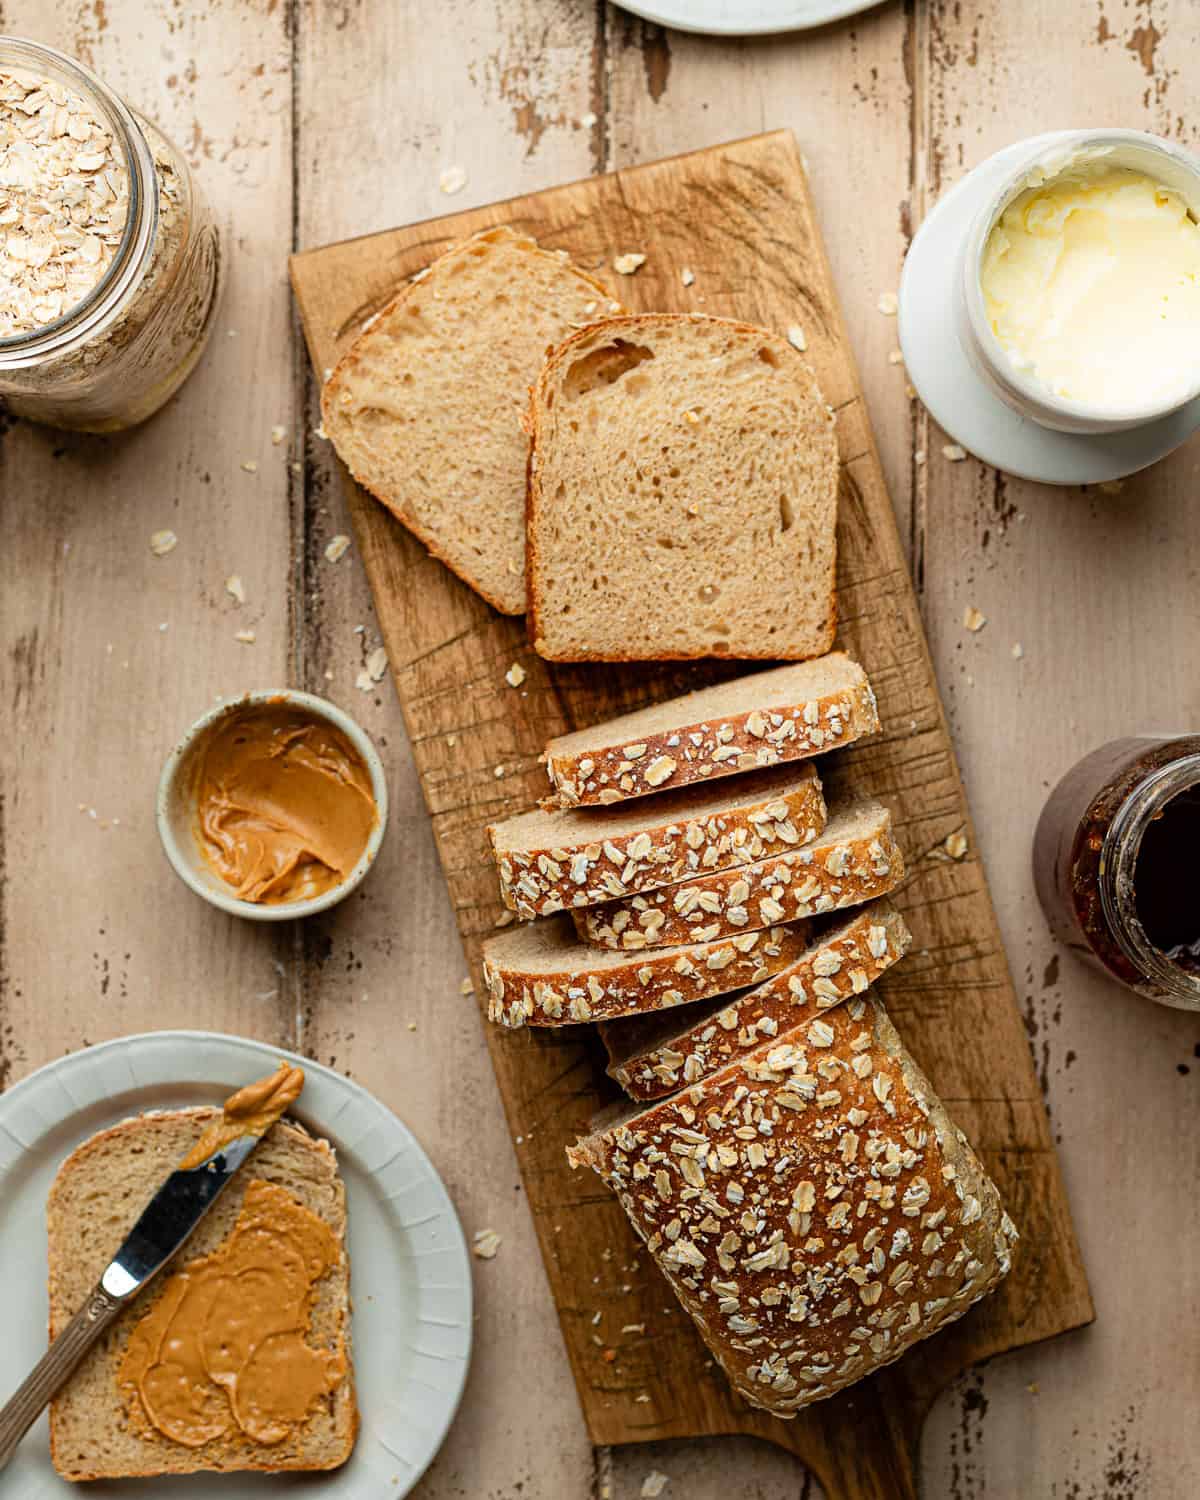
This bread has a soft texture and a nutty flavor that's perfect for peanut butter jelly and tall turkey sandwiches. I would have loved having this in my lunchbox as a kid!

5-STAR REVIEW
This was a great recipe that made a fantastic loaf of oat bread, very delicious. Well worth the time to make it...Thank you for sharing this most excellent recipe! We will definitely make this again & again!
Sky
Why add oatmeal to sandwich bread?
If you've seen my Sourdough Japanese Milk Bread recipe, you might already know about the Tangzhong method. This technique involves adding a cooked starch to the dough. This technique involves adding a cooked starch to the dough, helping it retain moisture without becoming too sticky or difficult to handle. Oatmeal porridge works the same way, increasing hydration to create a softer, plusher texture and extending the bread's shelf life.
What you need
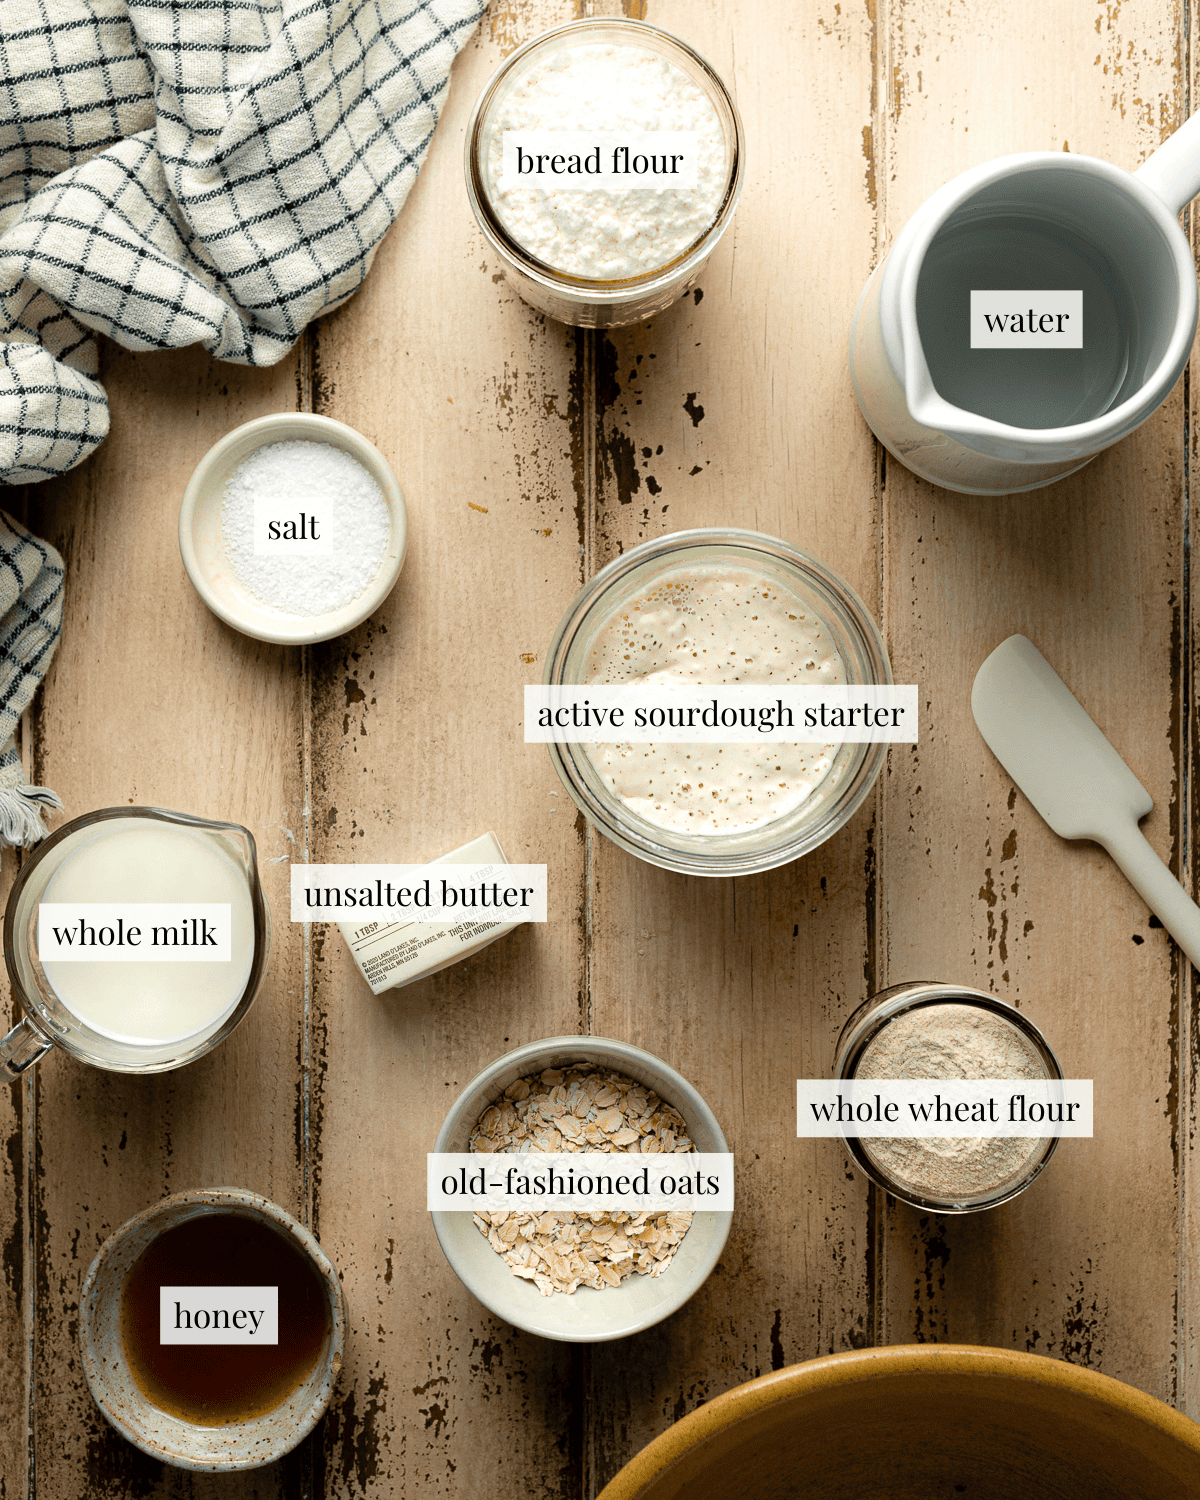
Active sourdough starter: Make sure your starter is mature and active before attempting this recipe or your dough will not rise and your bread will be gummy.
Old-fashioned oats: This recipe was tested using old-fashioned oats. Quick oats will work just fine if that's all you have on hand. The volume measurement may be different, but the gram measure should be the same.
Whole wheat flour: Adds an earthiness and a nutty flavor. You can leave it out and use all bread flour, or substitute other flours such as spelt, einkorn, kamut, or even oat.
Honey: Naturally complements the flavor of oats, sub maple syrup, molasses, brown sugar or white sugar for sweetness.
Step-by-step Instructions
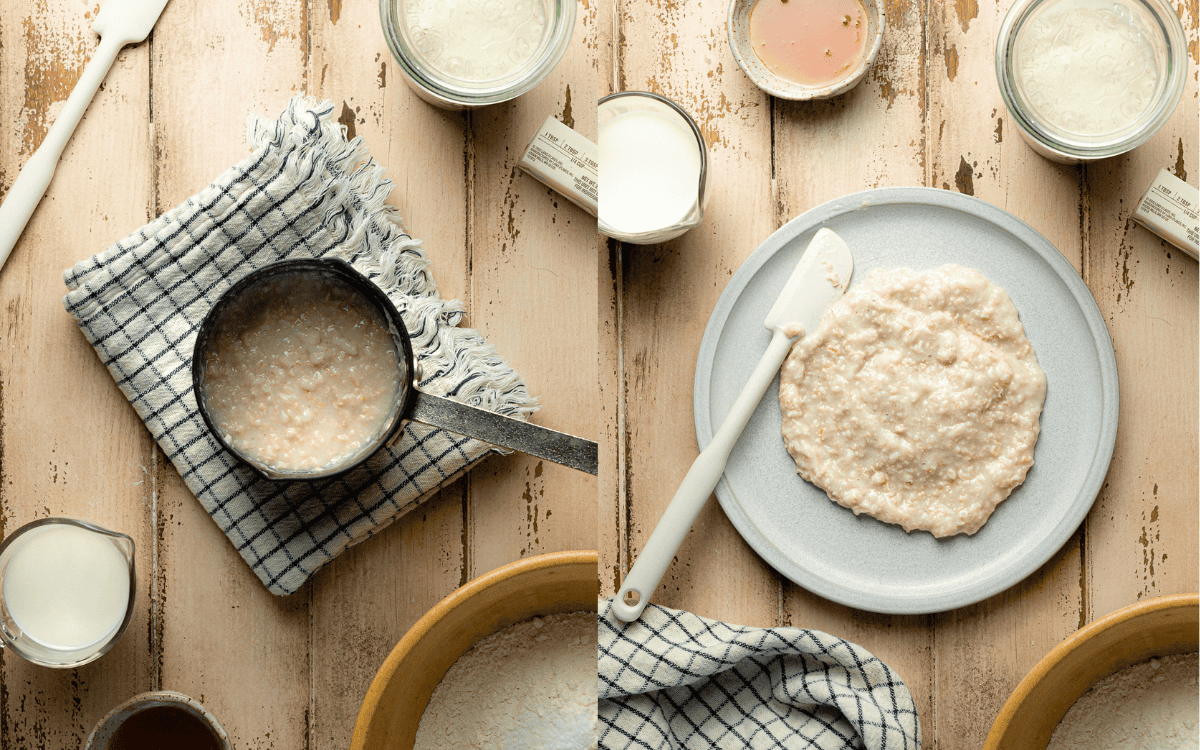
Step 1: Make the porridge
Bring oatmeal to a boil and cook for 5 minutes. Transfer to a plate and let it cool completely.
Step 2: Make the dough
Mix the ingredients with the oatmeal porridge until a shaggy dough forms. Knead the butter into the dough until it no longer feels greasy. Turn the dough out on a clean surface and knead until smooth and supple.
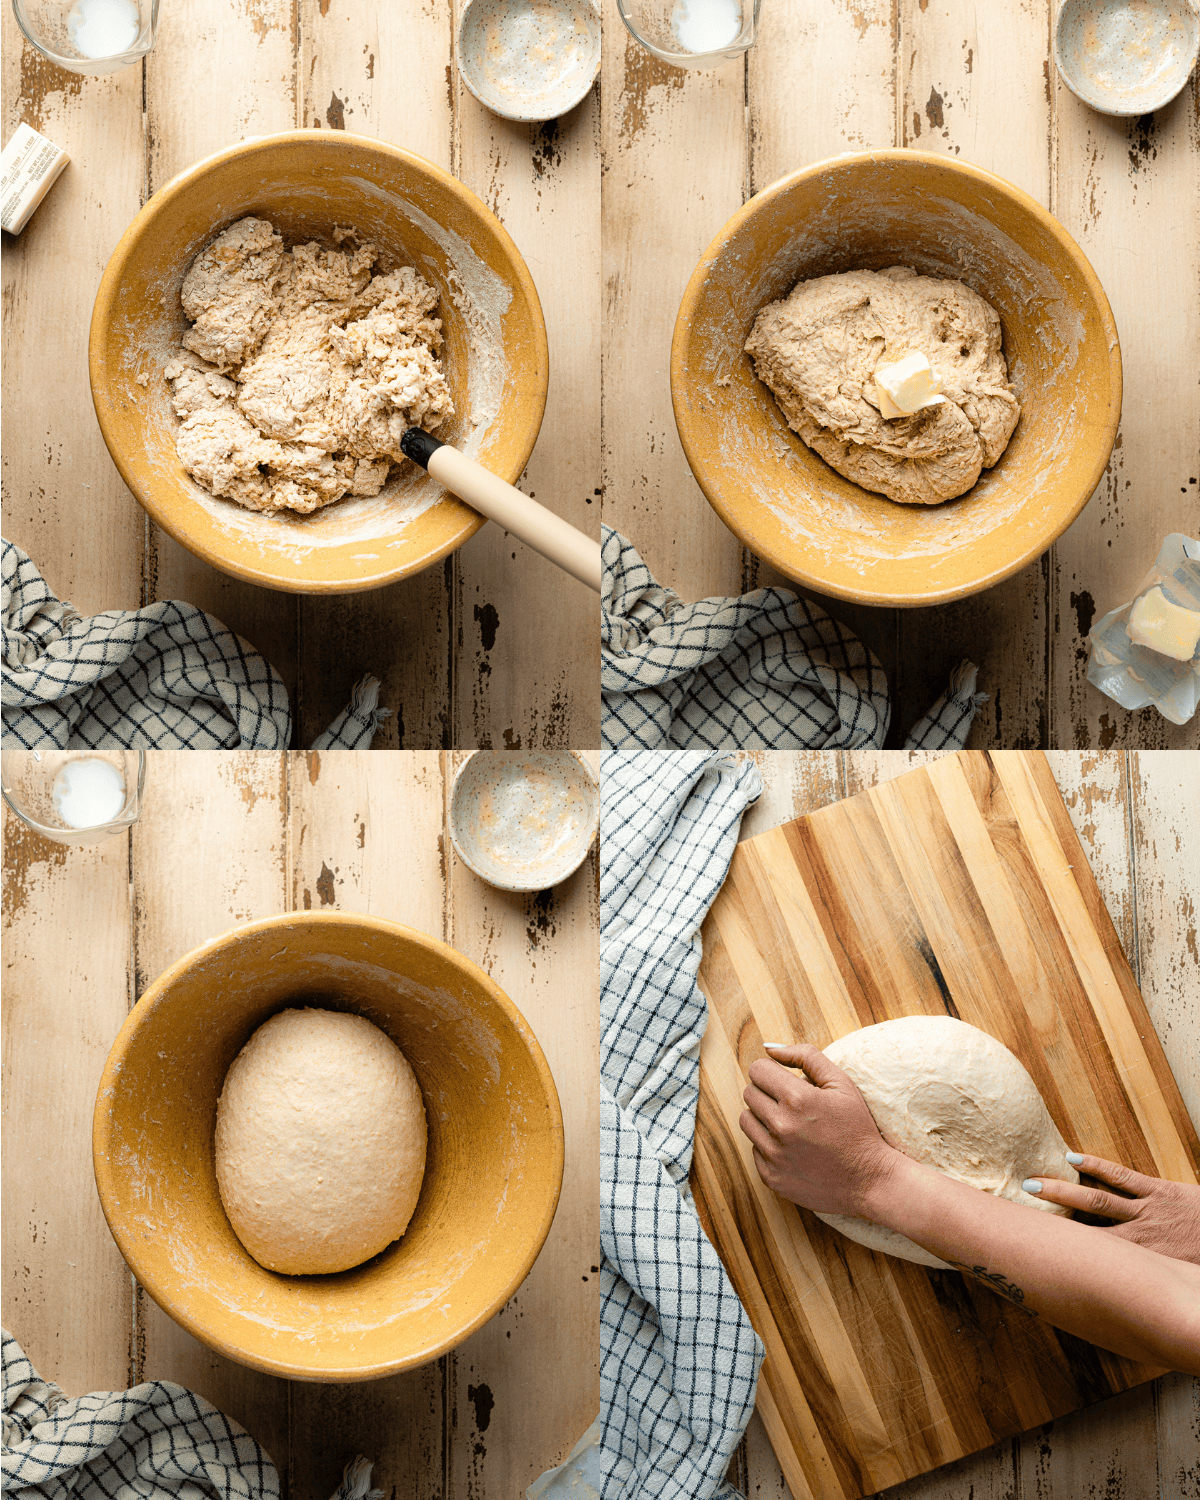
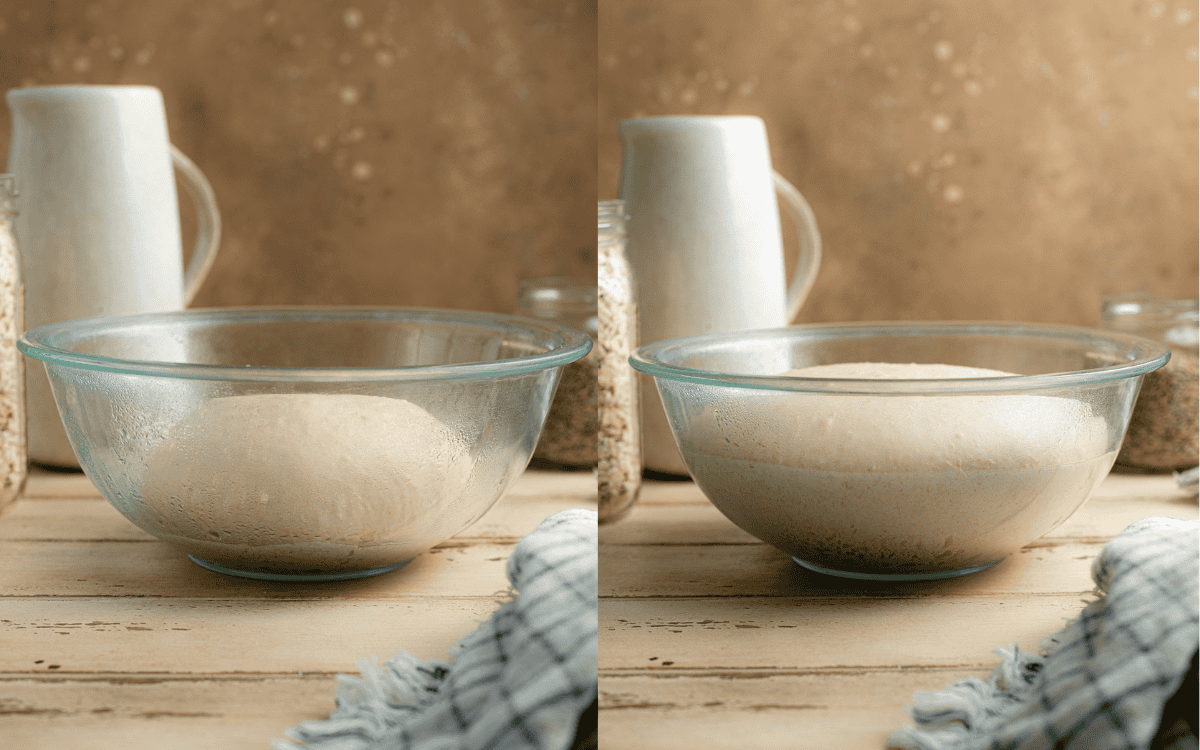
Step 3: Bulk fermentation
Let the dough rise in a warm place until doubled in volume, about 4 to 6 hours.
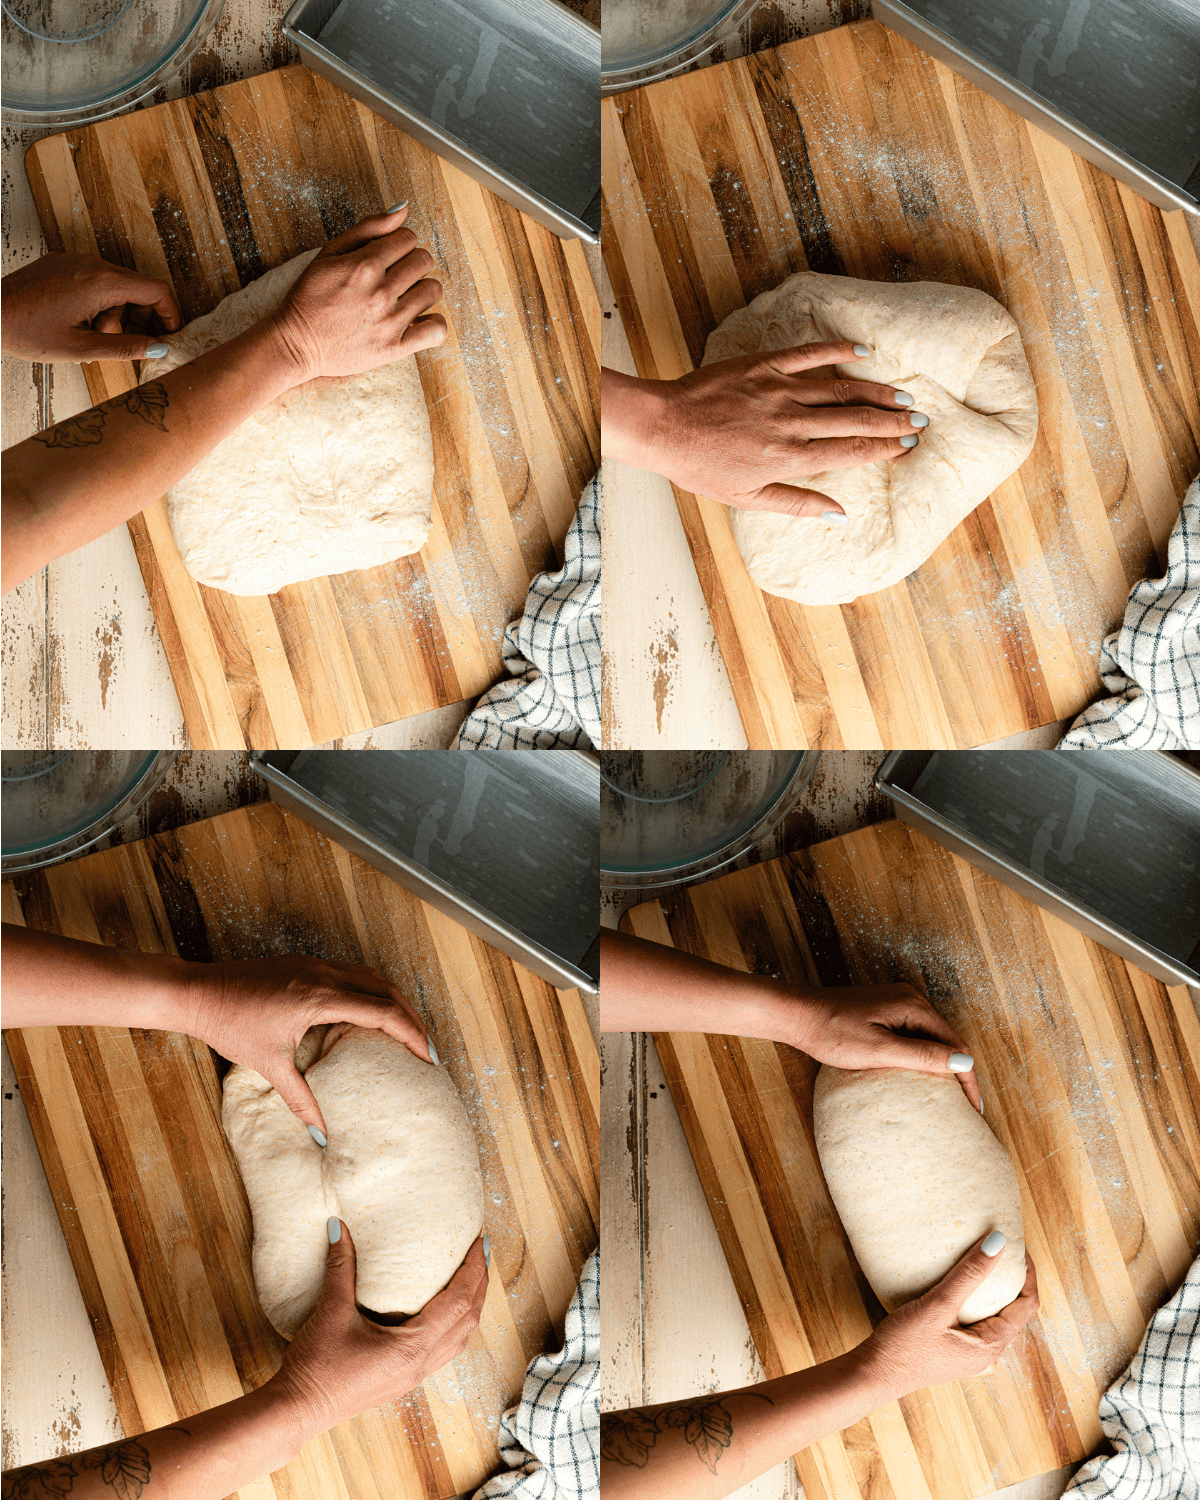
Step 4: Shape the dough
Turn the dough out onto a clean surface and flatten it into an 8-inch square. Fold the top edge toward the center, pressing it down with the bottom of your palm. Bring the top corners in toward the center, then roll the dough into a cylinder. Drag it along the work surface to seal the seam.
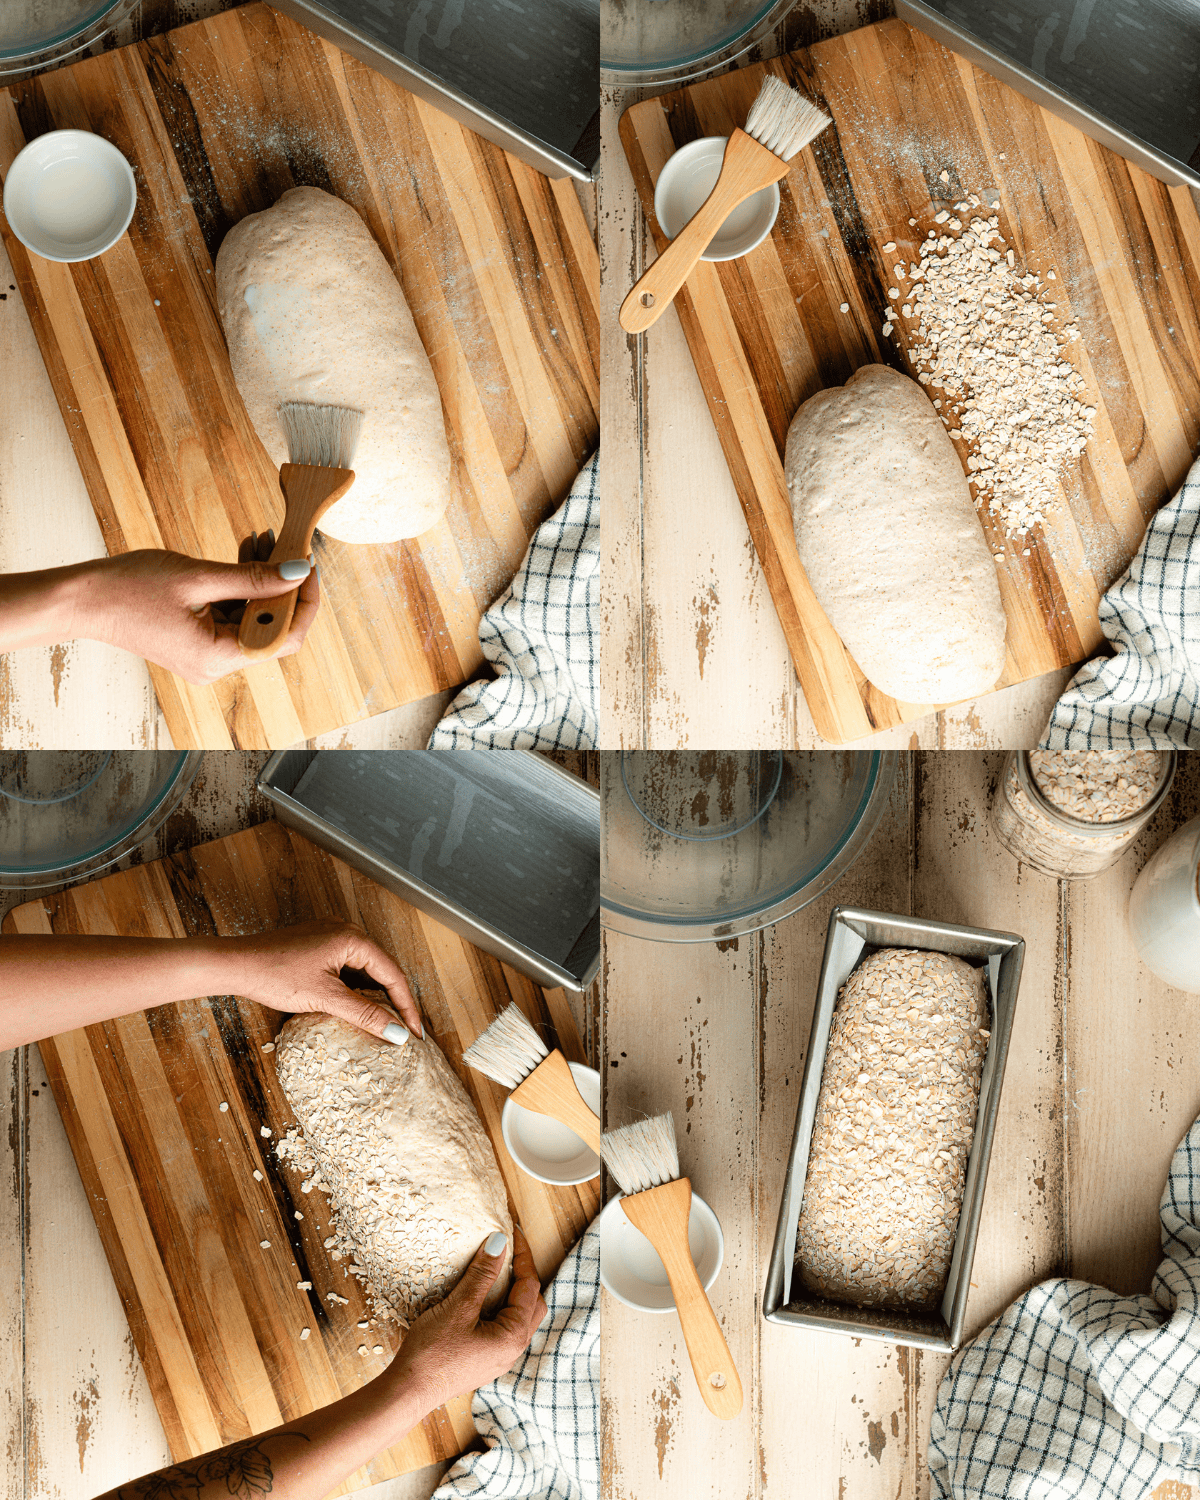
Step 5: Cold proof
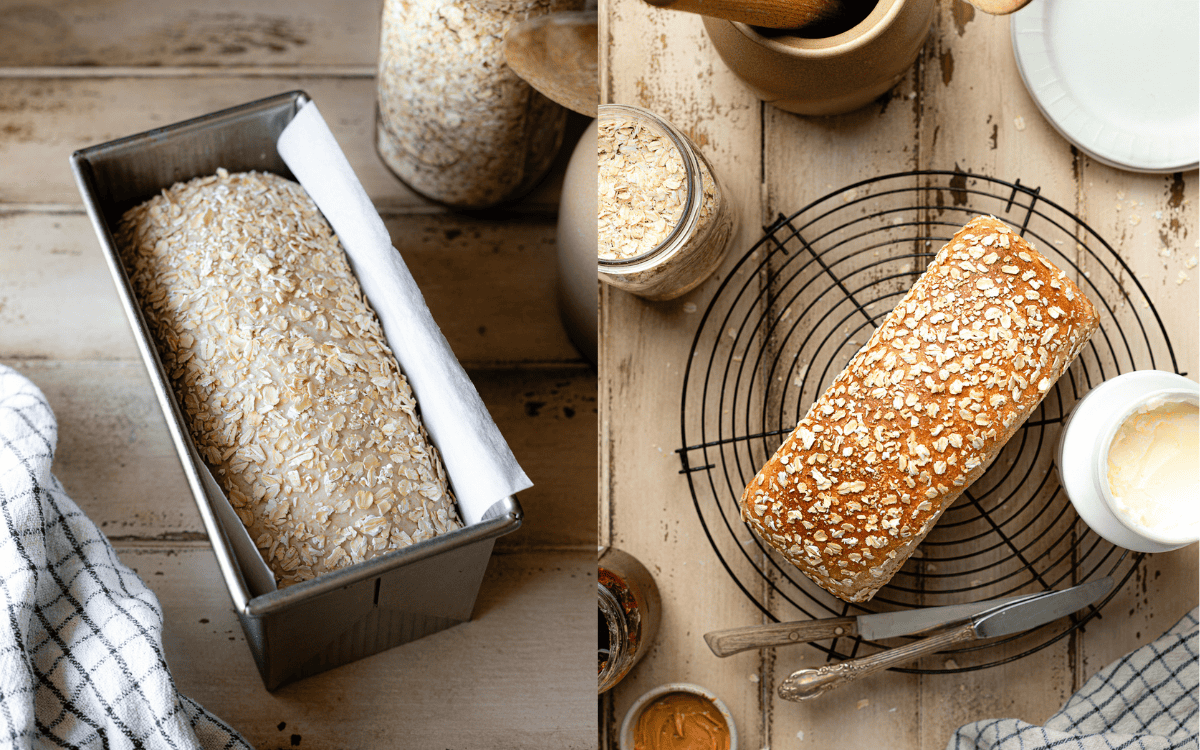
Brush the top of the dough with milk. Spread a thin layer of oats on a plate, then roll the dough over them to coat. Transfer the dough to a parchment-lined Pullman pan. Place the dough in the refrigerator and cold proof overnight.
Can I bake this bread the same day?
Yes! Skip the cold proofing and let the dough complete its final rise at room temperature. Bake once it has fully risen, this should take about 2 to 4 hours.
Step 6: Bake
Take the dough out of the refrigerator and let it rise at room temperature until the dough fills the pan, about 2 to 4 hours. Bake at 375 F for 45 to 50 minutes.
Tips from Hannah's Test Kitchen
- Oat porridge can slow down fermentation, make sure your sourdough starter is strong and active before attempting this recipe. Otherwise your dough may not rise and your bread will turn out gummy and dense.
- The best way to check if the bread is done is with an instant-read thermometer. It should read 190°F when fully baked.
- Let the bread cool completely before slicing. While it may be tempting to tear into this bread right out of the oven, slicing it while it's still hot will cause all of the moisture to escape and cause your bread to dry out faster.
- This recipe makes one 9 by 4 inch loaf. Using a pullman pan with high sides ensures a taller loaf. You can also use a regular 8 by 5-inch loaf pan if that's all you have, just know that your loaf may look as tall as mine when it bakes (don't worry it will be just as delicious).
Did this recipe rise to the occasion?
★★★★★
Leave a star rating and a comment. Your feedback inspires future recipes and helps others feel confident choosing what to bake next. I read and respond to every message.
If you're looking for additional ways to support my work, share this recipe or buy me a Ko-fi. Every little bit helps me keep creating the recipes and guides you enjoy.
Thank you for your support!

Sourdough Oatmeal Sandwich Bread Recipe
This section may contain affiliate links
Ingredients
Oat Porridge
- 30 grams old-fashioned oats
- 226 grams water
Dough
- 280 grams bread flour
- 120 grams whole wheat flour
- 113 grams active sourdough starter
- 170 grams whole milk
- 56 grams unsalted butter softened
- 42 grams honey
- 8 grams salt
Topping
- 14 whole milk
- 20 grams old-fashioned oats
Click US Customary to view volume measurements
Instructions
Day 1
- Combine oat porridge ingredients into a small saucepan and cook on medium high heat until the mixture comes to a boil. Lower the heat and continue to simmer until the oats have cooked and porridge has thickened noticeably, around 3 to 5 minutes. Your porridge will continue to thicken as it cools so you don't want it to dry out completely as you are cooking it, set aside and allow to cool completely.30 grams old-fashioned oats, 226 grams water
- Once your porridge has cooled to room temperature, combine dough ingredients with porridge into a large mixing bowl. Mix with a wooden spoon or a bread whisk until the a shaggy dough forms.280 grams bread flour, 120 grams whole wheat flour, 113 grams active sourdough starter, 170 grams whole milk, 42 grams honey, 8 grams salt
- Knead the butter into the dough until completely absorbed. Your dough will start out greasy and get progressively smoother and less sticky.56 grams unsalted butter
- Cover the bowl with plastic wrap and let it rest for 30 minutes. This will allow the flour to hydrate fully, making your dough less sticky and easier to work with.
- After your dough rests, turn it out onto a clean work surface and knead for 10 minutes. Your dough is ready once it feels strong, only slightly sticky and passes the windowpane test
- Place the dough back into the oiled container, cover and allow the dough to ferment in a warm spot (78 F) until the dough has doubled, this can take anywhere from 4 to 6 hours.
- Once bulk fermentation has completed, knock the air out of your dough.
- Line a Pullman pan with parchment paper.
- Turn the dough out onto a lightly floured surface and flatten it into an 8-inch square. Fold the top edge of the dough towards the middle.
- Bring the top corners in toward the center, then roll the dough into a cylinder. Drag it along the work surface to seal the seam.
- Place oats on a plate, brush the top of your dough with milk. Gently pick up your dough and roll the top of it onto the oats.14 whole milk, 20 grams old-fashioned oats
- Place your dough seam side down into your loaf pan, cover the pan with plastic wrap. Transfer the dough to the fridge and cold proof overnight.
Day 2
- Take the loaf pan out of the refrigerator and let it rise in a warm spot until doubled in volume or the dough almost fills the tin, about 2 to 4 hours. You may be able to skip this step if your dough rose in the refrigerator*
- Once your dough is close to being ready, preheat your oven to 375 F and bake for 45 to 50 minutes or until it is golden brown and the center registers at 190 F/87 C when measured with an instant read thermometer.
- Remove the baked loaf from the oven and turn it out of the pan onto a wire rack to cool. Allow the loaf to cool completely, about 2 hours before slicing.
Tips
These recipes were developed and tested using grams for precise measurements. To increase your chances of success, I recommend investing in a kitchen scale. I've included rough volume estimates (in tablespoons and cups), but they might not be totally accurate.
Remember all ovens are unique, these recipes were tested in my oven which runs cooler than others. You might need to lower the temperature if your bake appears to be browning too quickly. Monitor your bake closely and make adjustments if needed.
Notes
- Use a mature active starter, you'll want a healthy starter that's strong enough to efficiently ferment the dough and allow it to rise.
- The best way to check if the bread is done is with an instant-read thermometer. It should read 190°F when fully baked.
- Let the bread cool completely before slicing. While it may be tempting to tear into this bread right out of the oven, slicing it while it's still hot will cause all of the moisture to escape and cause your bread to dry out faster.
Nutrition
I am not a nutritionist or dietitian, any nutrition information provided is an estimate.


Lora says
The family loves this bread! Mine turns out wetter than what I see on yours pictures. I do use a scale. Should I add a little more flour when I knead it?
Hannah Dela Cruz says
Hi Lora! I’m so happy you love this recipe and that your family does too. This one was inspired by my mom, so it really warms my heart to hear you’re sharing it with your kids.
I wouldn’t recommend adding more flour, since that can change the texture of the loaf and make it denser. Instead, you could try cooking the oatmeal a little longer or letting the dough rest for a longer period right after mixing. This gives the flour more time to fully hydrate, which can make the dough feel less wet and much easier to handle.
Peg says
Fantastic. Best sourdough bread I have ever made; moist, soft and tasty. Usually I would only have one slice for lunch but today I had three 😋. Thanks.
Hannah Dela Cruz says
This one is definitely hard to resist! Thanks so much for making it!