

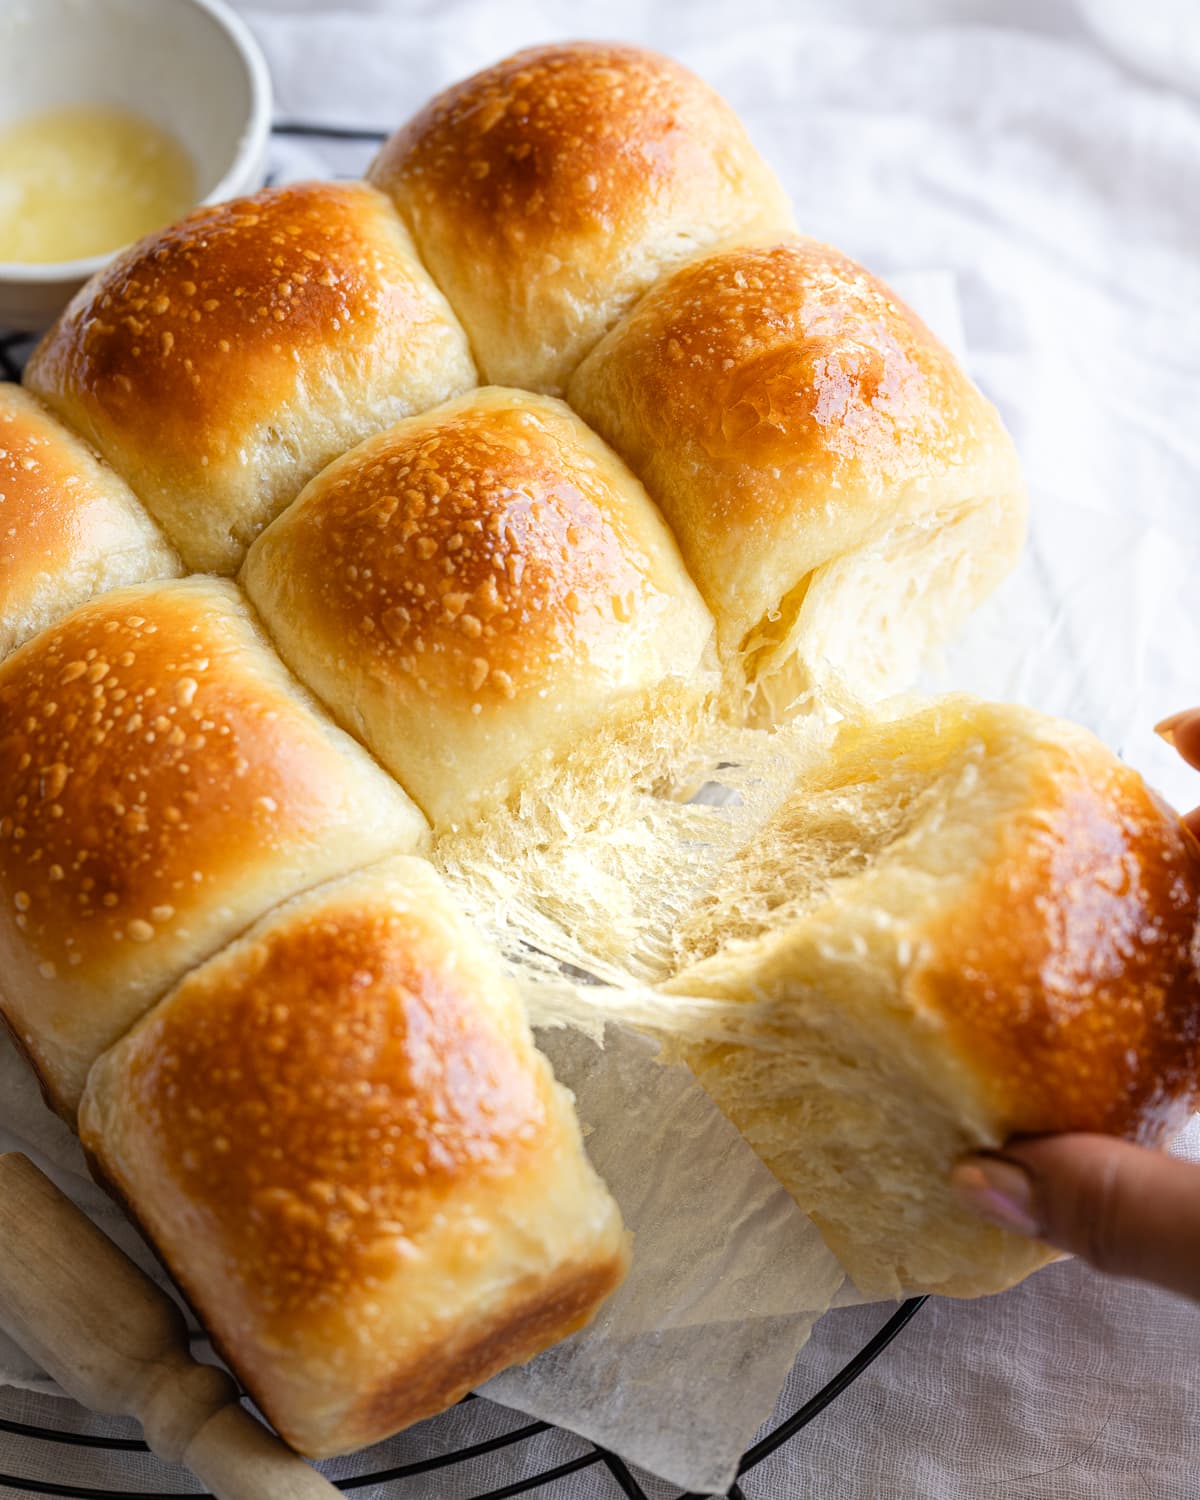
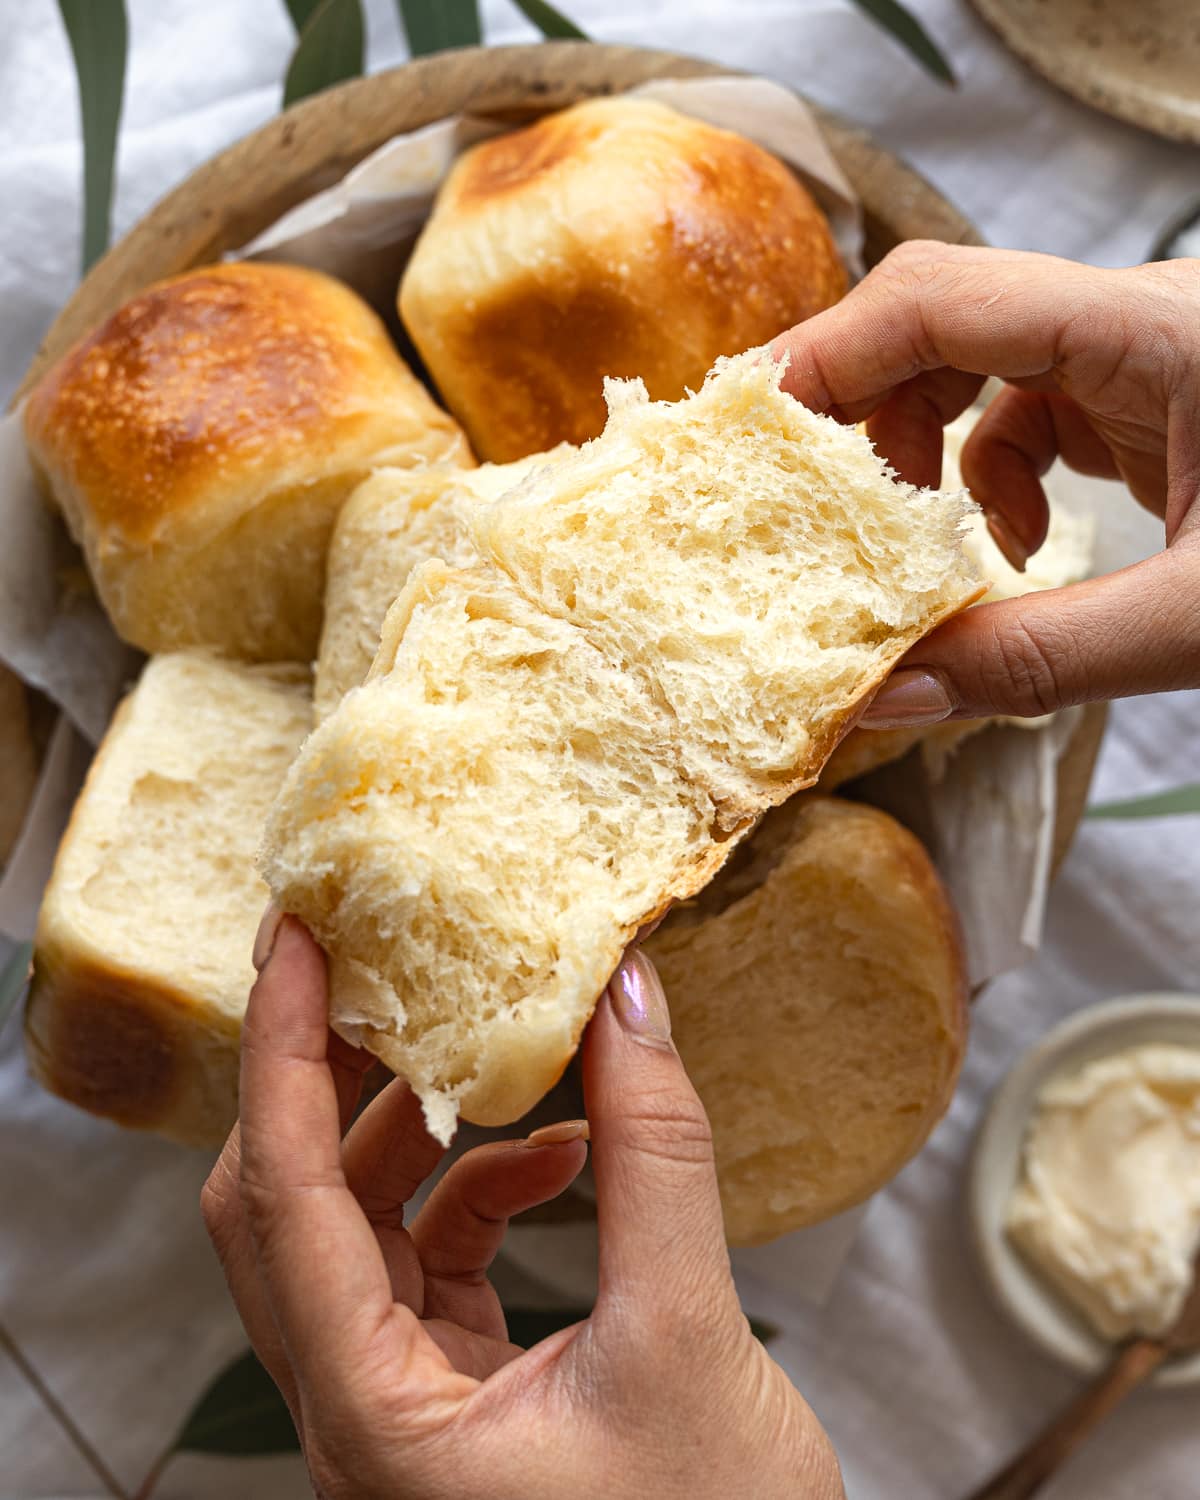
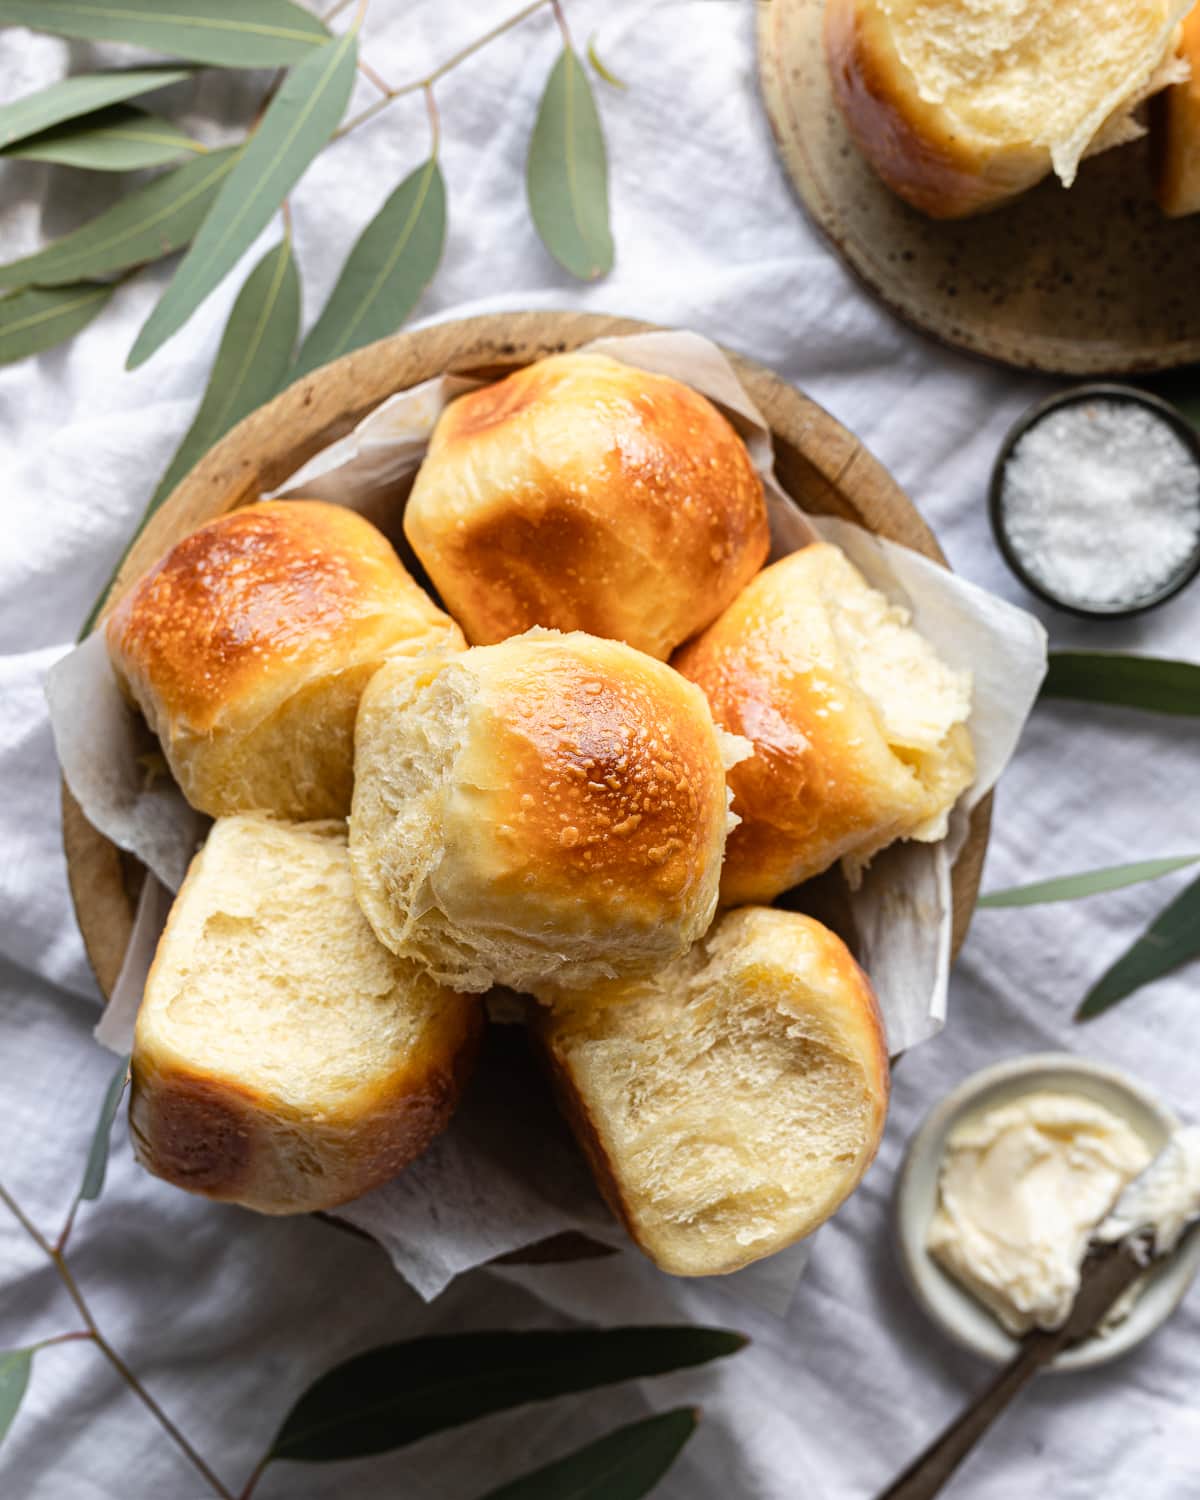
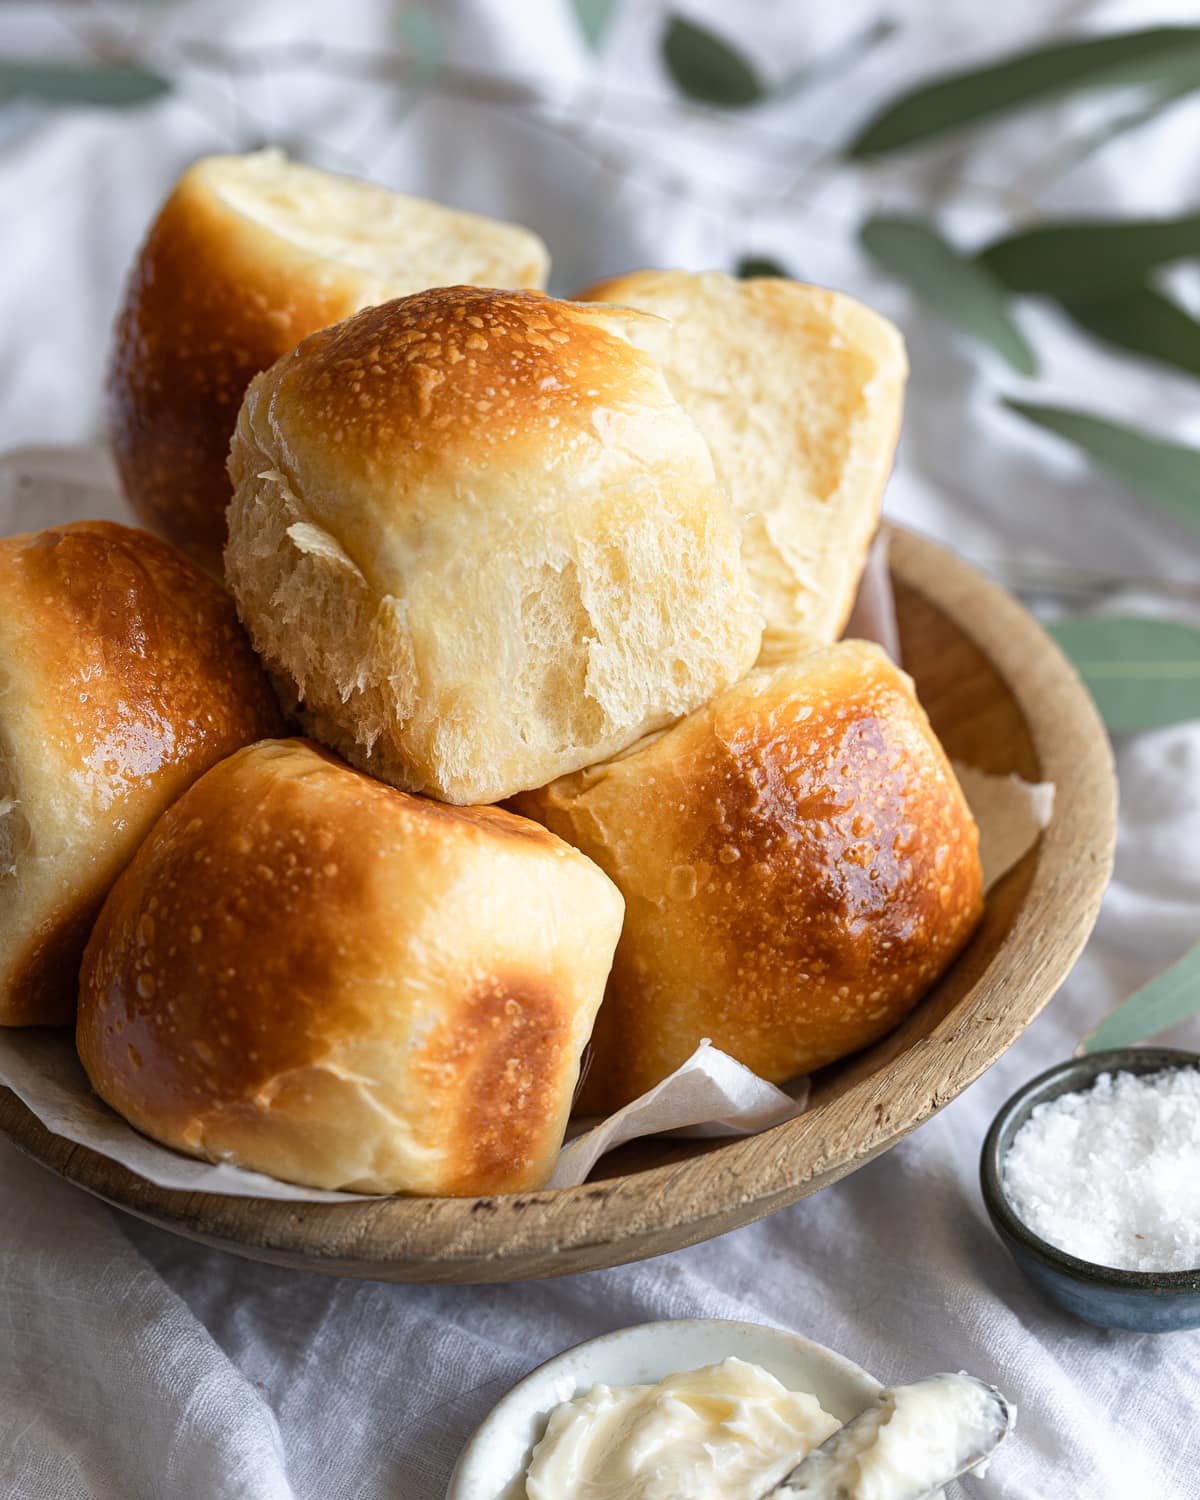
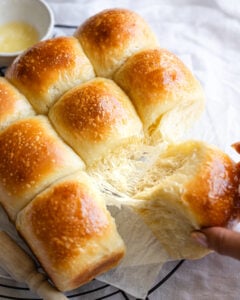
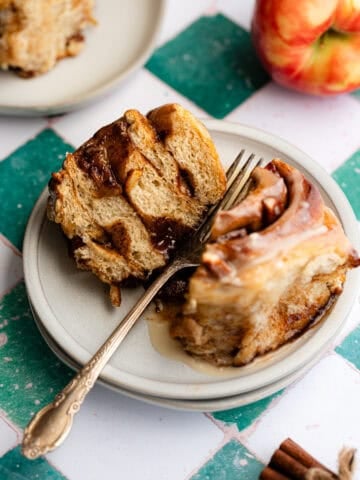
These Sourdough Dinner Rolls are soft and fluffy with a golden-brown crust brushed with melted butter. Sourdough and a long fermentation impart a deep and delicious flavor to these buttery rolls. They might steal the show at your next get-together.
Jump to:
What makes these rolls so special
These rolls are extra special because they are made with sourdough instead of commercial yeast. Aside from the delicious and distinctive flavor that it imparts, sourdough also makes bread healthier and easier to digest. That's because sourdough ferments dough much slower than commercial yeast, so while this means that the process to make these rolls is a bit longer (about 2 ½ days), the results are totally worth it.
I had given up on any sourdough rolls being soft and anything near a yeast roll until this recipe! They came out great!
- Deanna
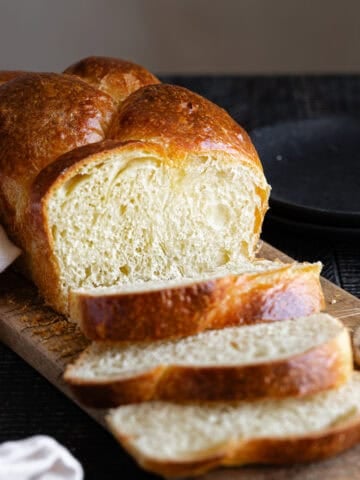
Short on time but still want fresh bread? Try out my Sourdough Discard Rolls, Sourdough Discard Hot Dog Buns and Sourdough Discard Sandwich Bread.
Benefits of sourdough and long fermentation
During fermentation, wild yeast consumes the sugar in flour, producing carbon dioxide that leavens the dough and ethanol, which imparts the distinctive flavors and aromas in freshly-baked bread that we know and love. Benefits include:
- Depth of flavor that can't be achieved with rolls made only with commercial yeast.
- Wild yeast effectively pre-digests flour, reducing the impact of phytic acid found in grains.
- Yeast acts as a second stomach, unlocking nutrients in wheat-like magnesium, iron, and zinc-that humans typically struggle to absorb.
Why I love this recipe
- The dough is mixed by hand - no special equipment required!
- Rolls have a soft and pillowy texture.
- Naturally-leavened with sourdough starter (no commercial yeast).
- Versatile dough that can be made into Sourdough Hamburger Buns or rolled into a Sourdough Babka!
Ingredients and Substitutions

All-purpose: You can substitute bread flour but your rolls will be a bit chewier, don't use whole wheat flour or your rolls may become dense and dry.
Milk: This recipe was developed using whole milk it adds richness and tenderizes the bread, substitute your favorite plant-based milk.
Cane sugar: I've been using organic cane sugar over granulated sugar because it's produced using more sustainable methods. I use it in almost all of my recipes, from my Sourdough Discard Chocolate Shortbread Cookies to my Sourdough Discard Soft Pretzels.
See recipe card for detailed ingredient list.
Tip
Using a mature, active sourdough starter is crucial when making enriched bread. A weak starter, would make fermentation occur too slowly potentially leading to acidification that breaks down the dough's gluten. This causes the dough to tear as it rises and prevents it from capturing and retaining the carbon dioxide produced during fermentation. The end result: dense, heavy, and gummy rolls.
What is a sweet stiff starter?
Unlike a 100% hydration or liquid starter, a stiff starter has a higher flour content. Since most of the liquid in these rolls comes from eggs and milk, a low-hydration starter lets me manage the extra liquid I introduce into the recipe. It also allows for a larger proportion of starter in the dough, speeding up the rising process. The inclusion of sugar in the starter curbs bacterial activity and acid buildup, reducing sourness and resulting in sweet, fluffy, buttery rolls.
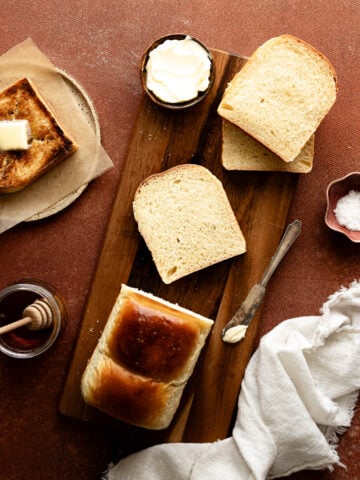
Looking for more soft, fluffy bread recipes made with sourdough? Try my Sourdough Brioche Bread, Sourdough Japanese Milk Bread, Sourdough Babka, Sourdough Sticky Buns and Sourdough Monkey Bread.
Step-by-step process
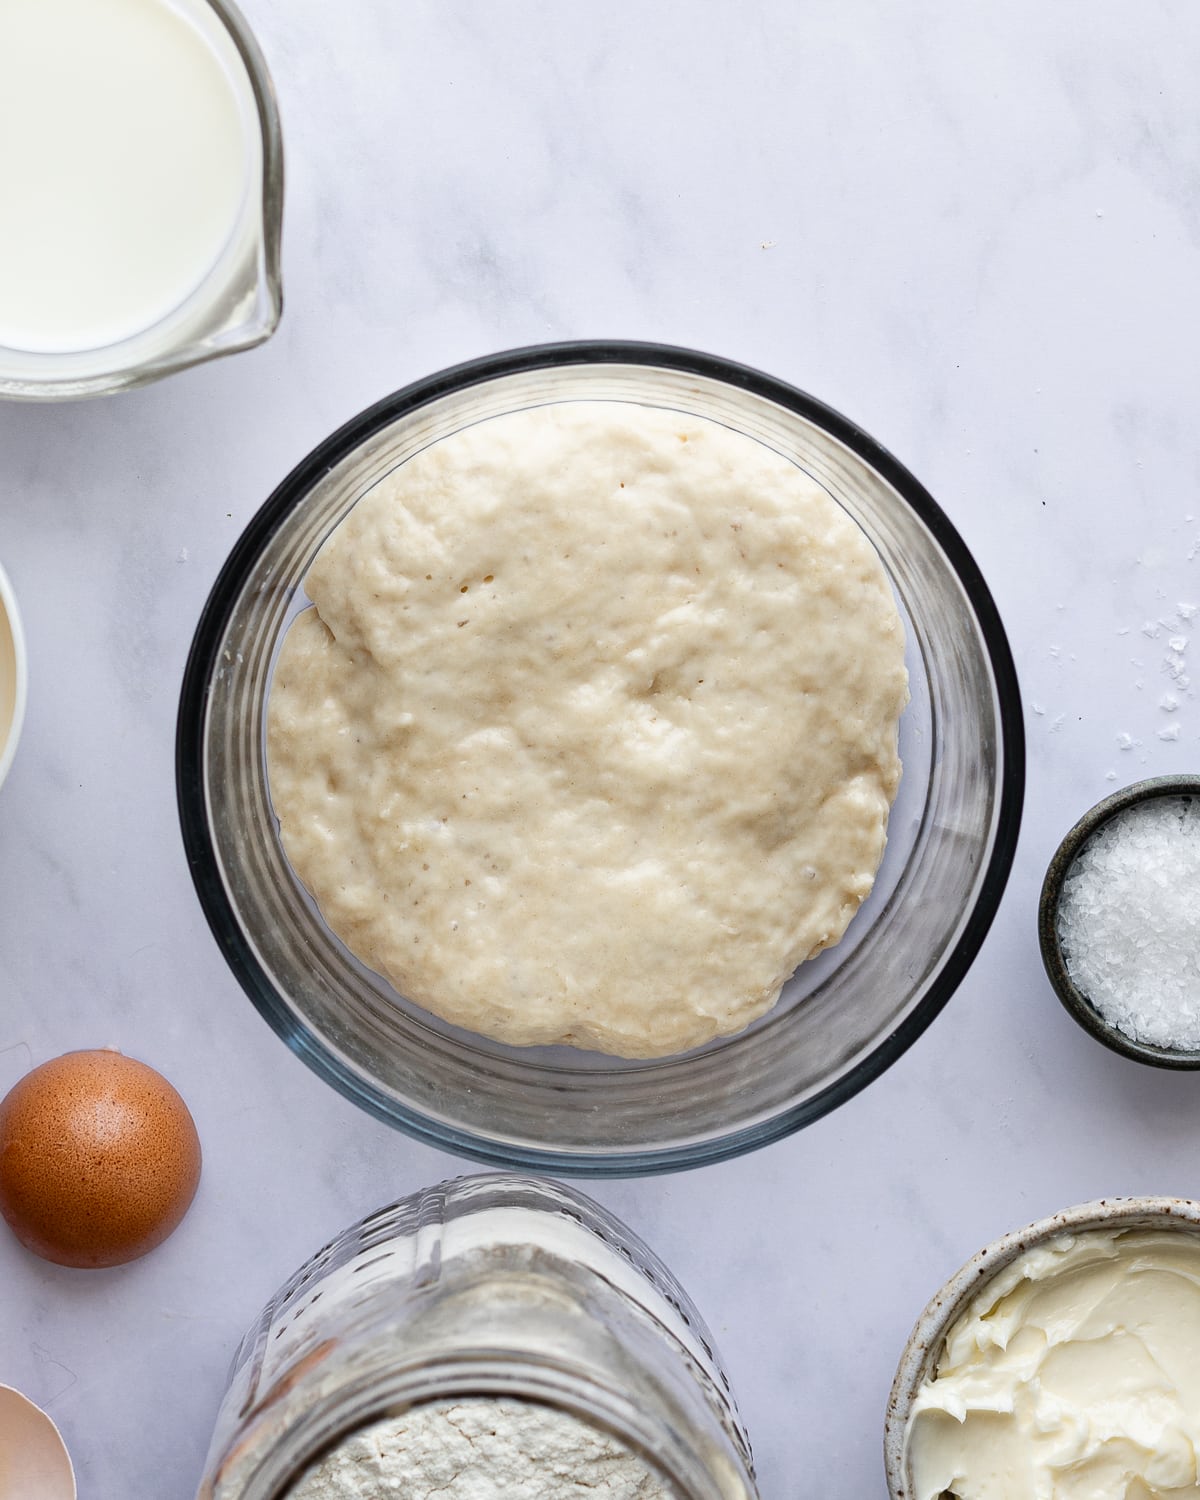
STEP 1: Make the sweet stiff starter

STEP 2: Mix all the dough ingredients together with the sweet stiff starter.
Tip
Make sure your starter is mature and active before trying this recipe or your dough may not proof properly, resulting in dense and gummy rolls.
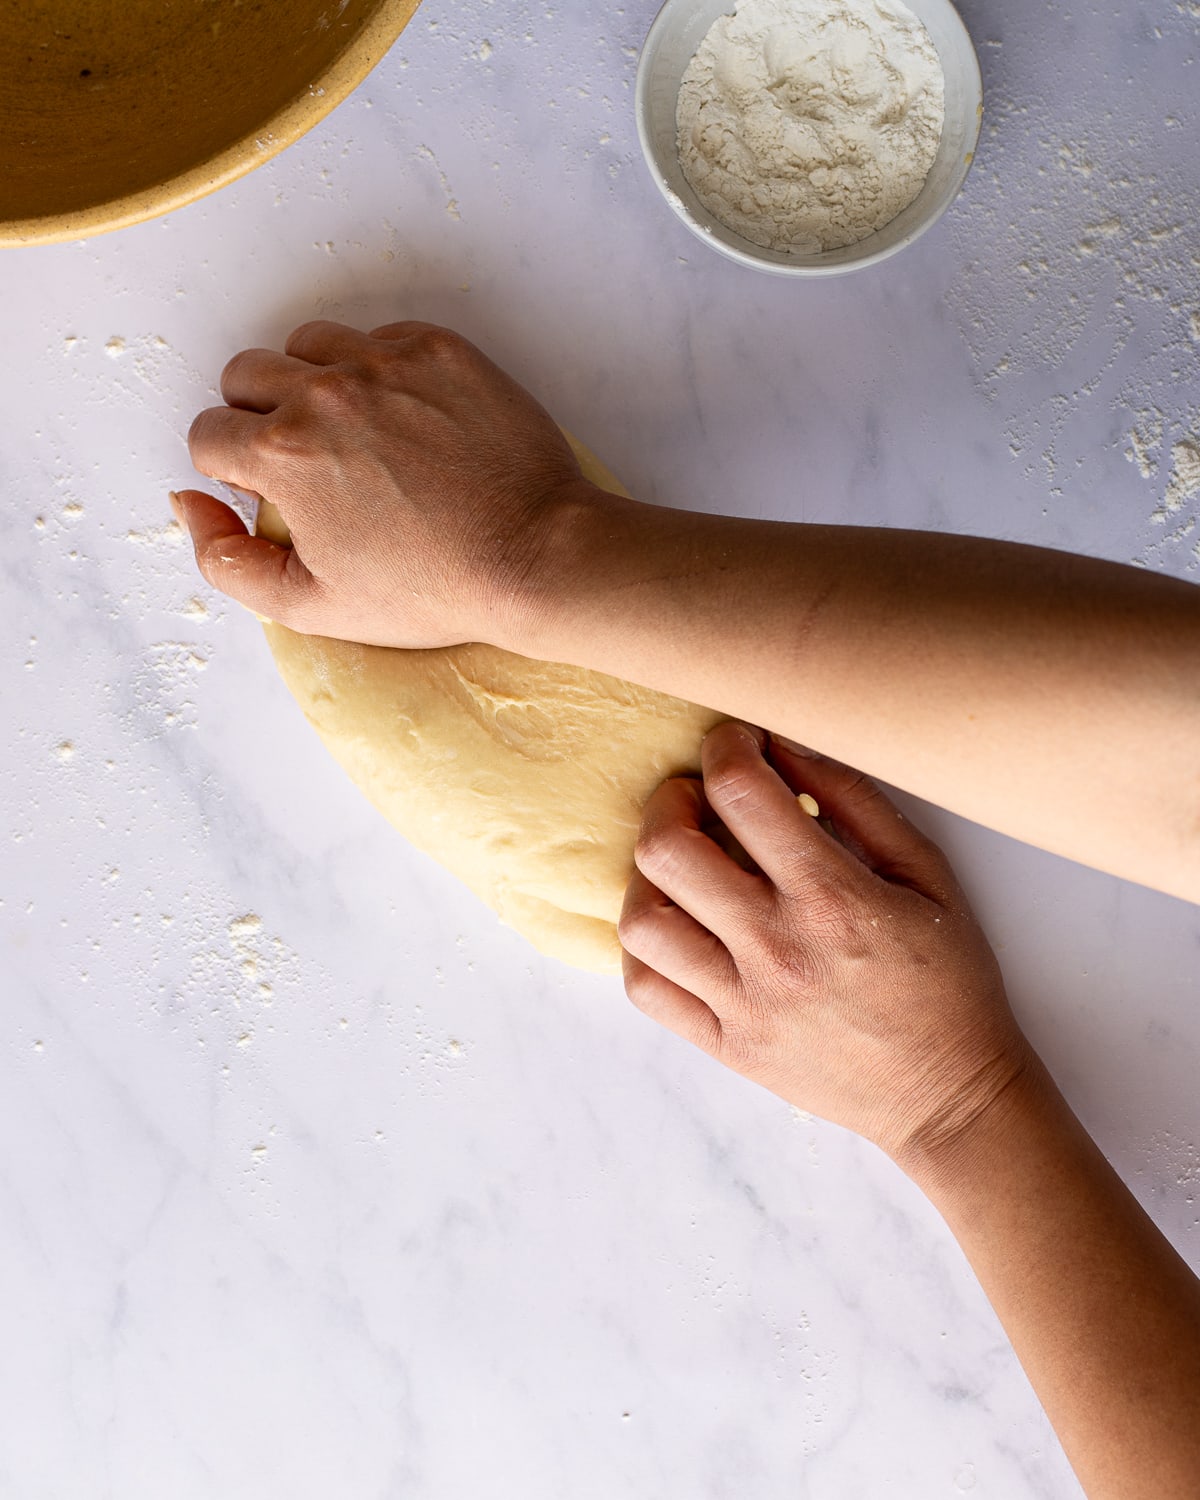
STEP 3: Knead the dough until it looks smooth and cohesive.
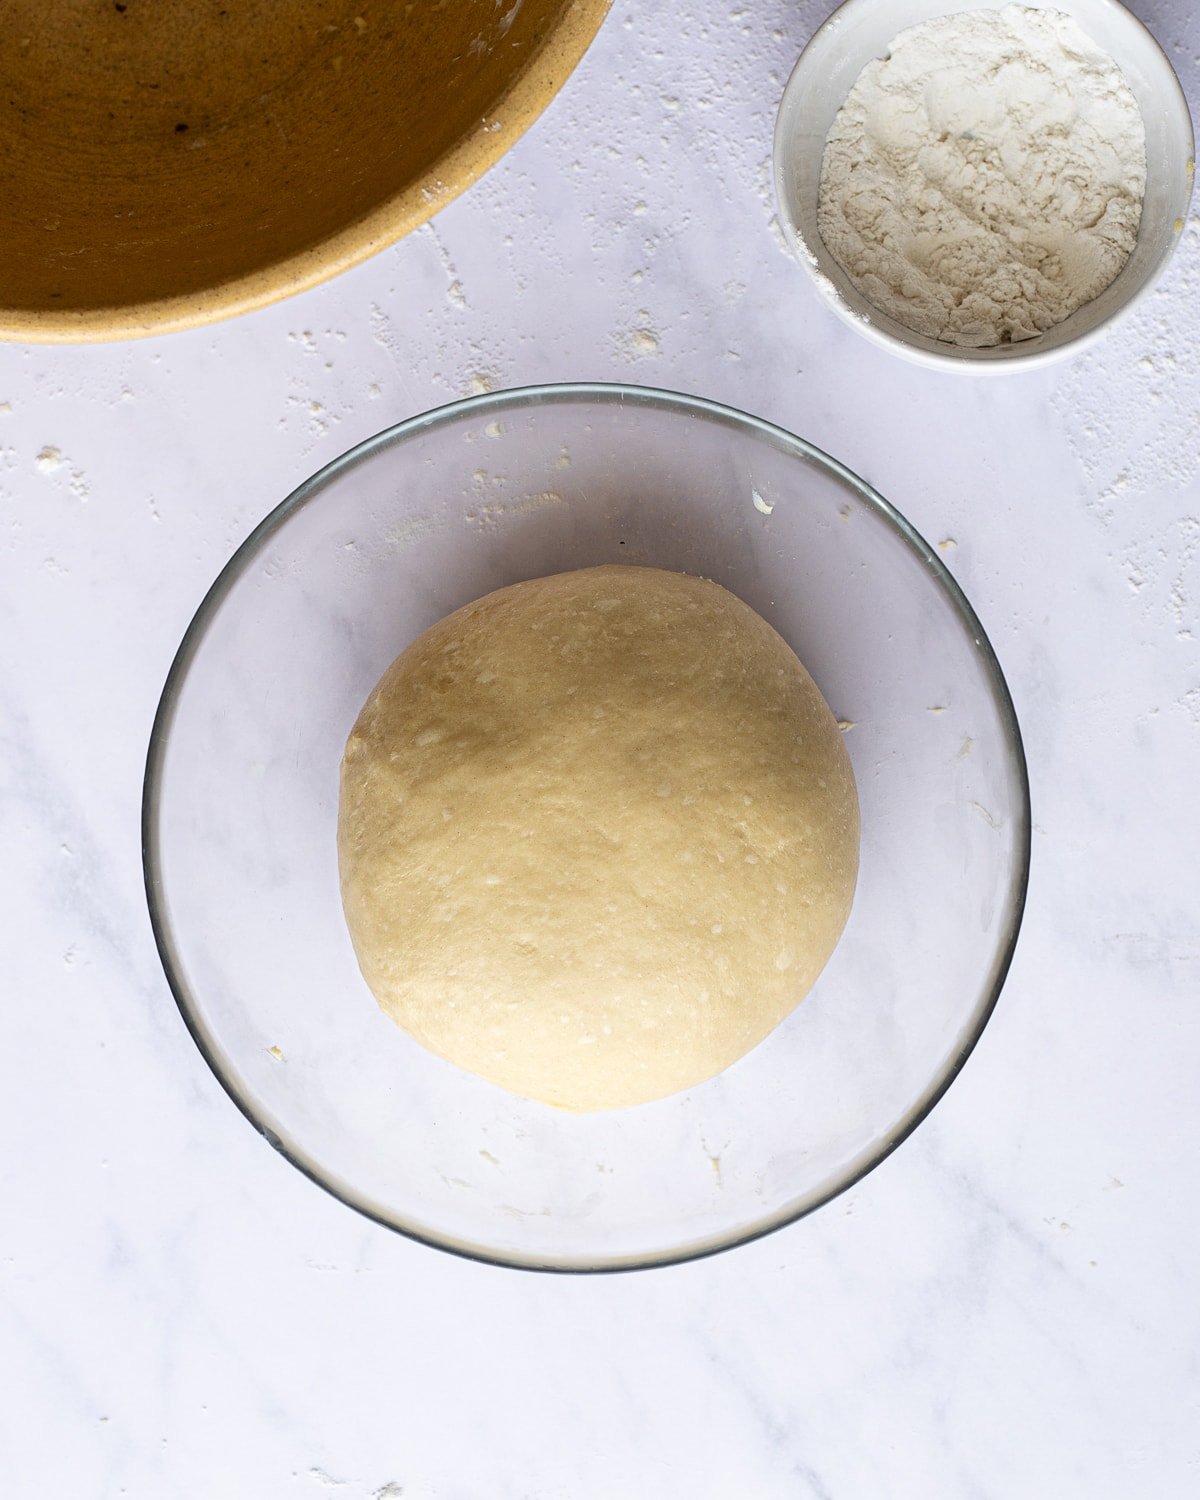
STEP 4: Allow the dough to rise in a warm place (>72 F) until doubled in volume.
Tip
Enrichments like eggs, milk and butter impart tenderness to bread but they the effect of slowing down fermentation. It's important to be patient. Wait until your dough has doubled in volume before shaping, this could take 4 to 6 hours.
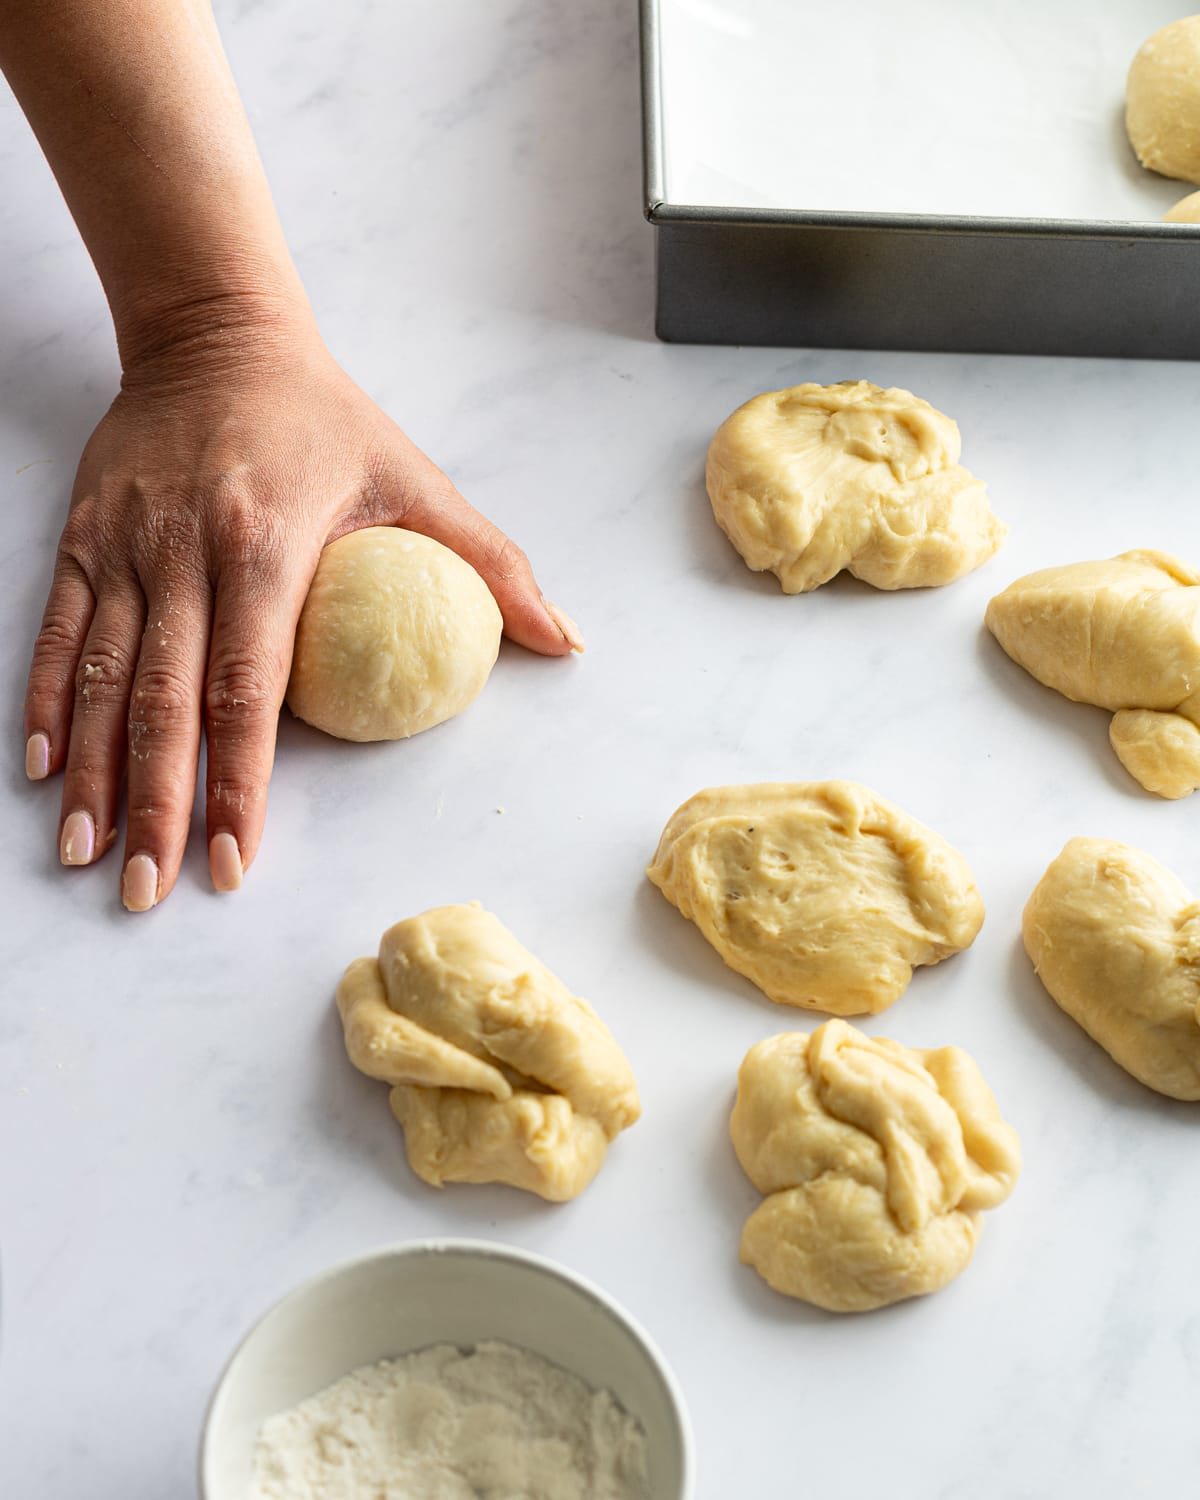
STEP 5: Divide the dough into 9 portions and shape them into tight balls.
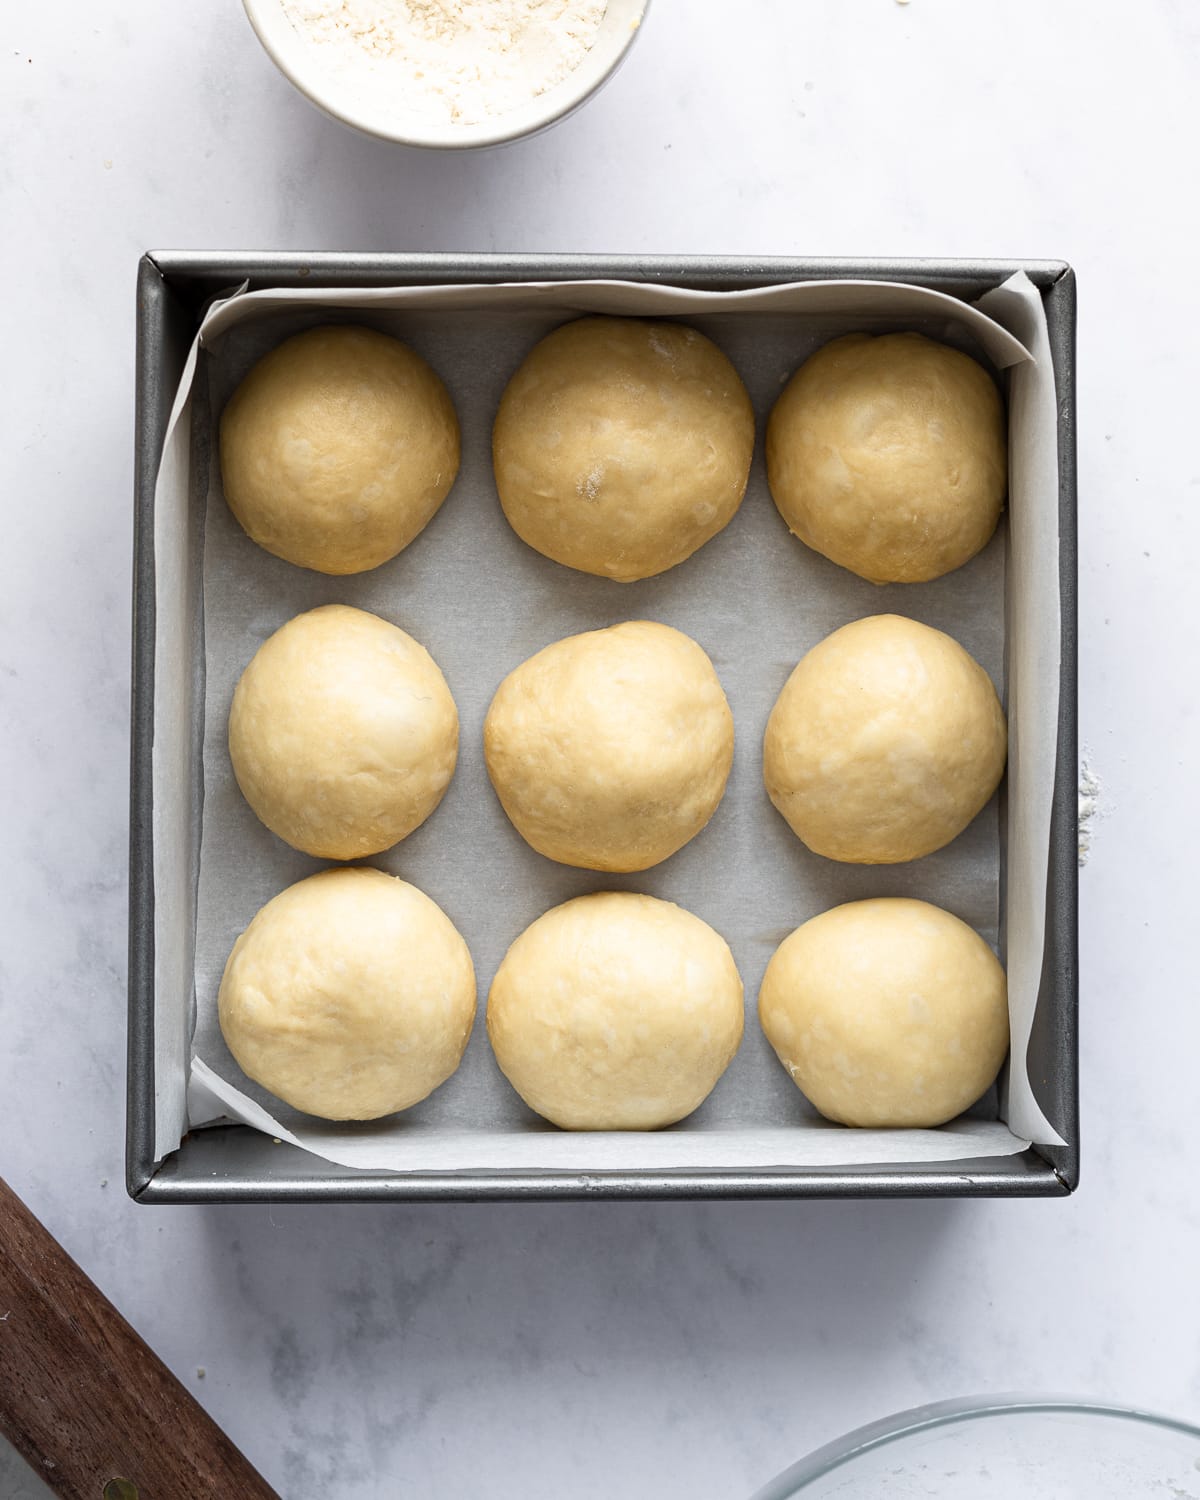
STEP 6: Cover the baking pan with plastic wrap and cold proof overnight.
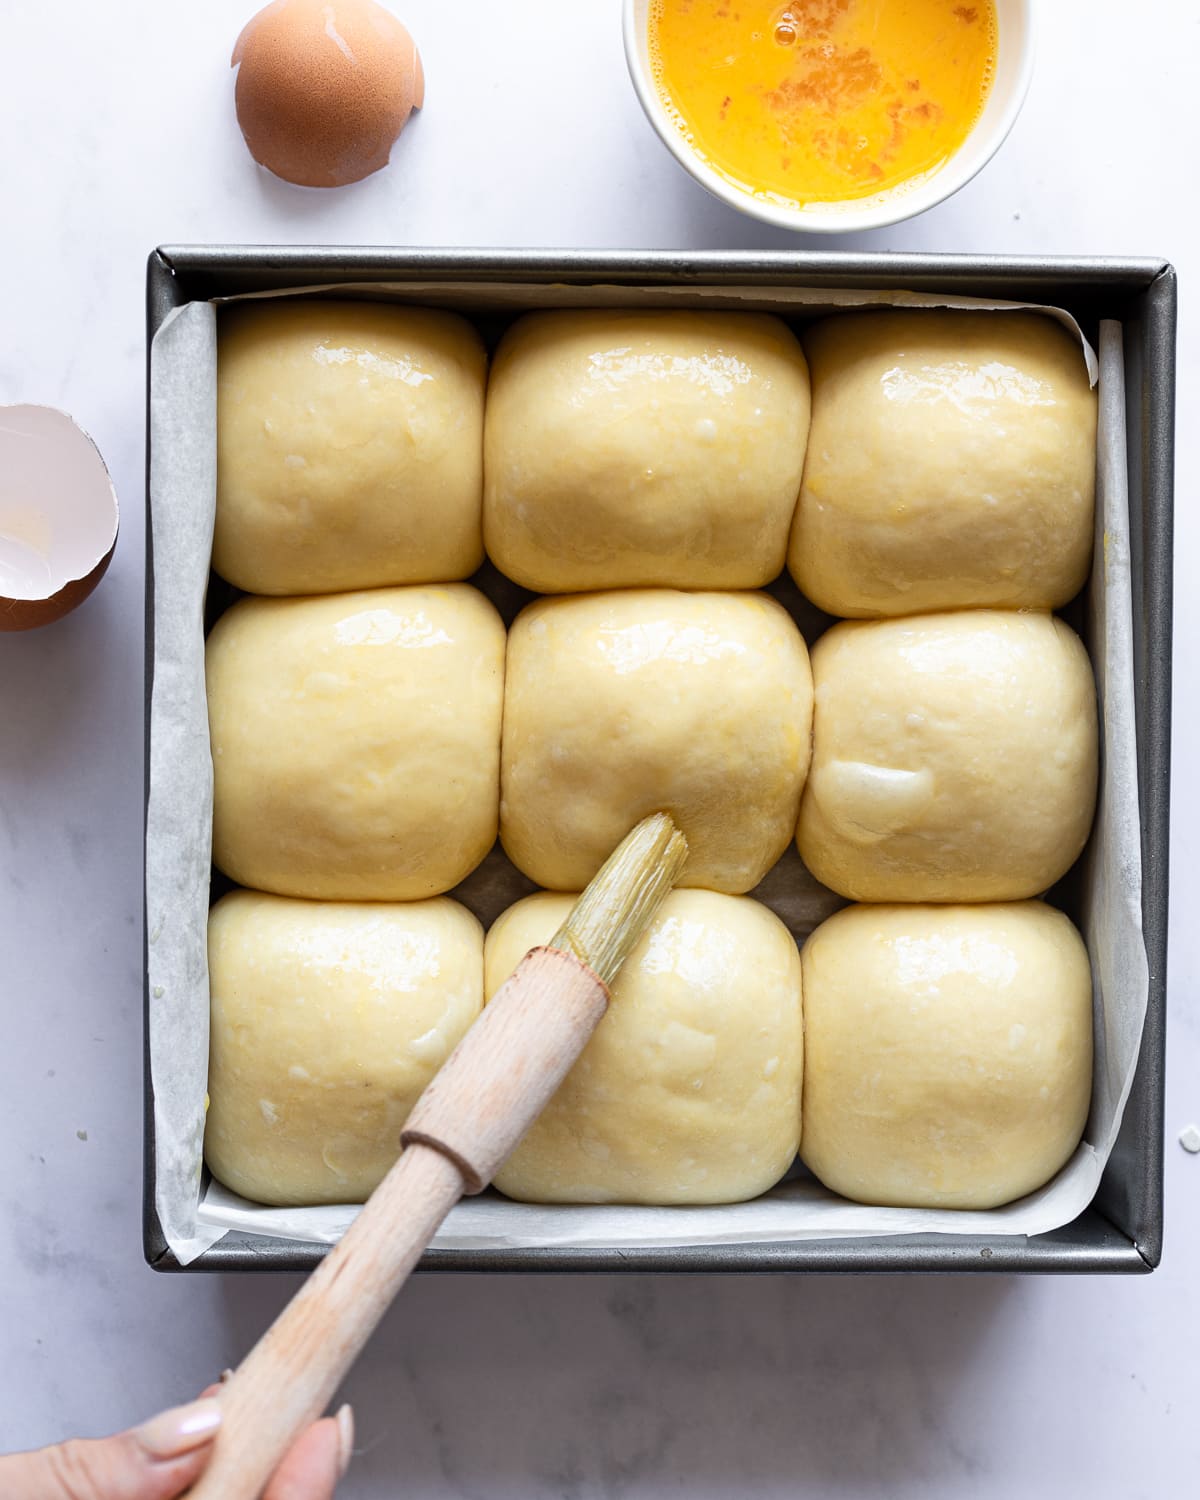
STEP 7: Let the dough rise until it fills the pan. Brush the dough with egg wash.
STEP 8: Bake at 350 for 20 to 25 minutes or until golden brown
Baker's Tips
Weigh your ingredients: It will increase your chances of a great bake since measuring with a scale is much more accurate than using cups and tablespoons.
Knead the dough until smooth: Gluten development is essential for these rolls. A strong gluten network will allow the dough to capture and retain carbon dioxide during the fermentation process. This results in tender, pillowy rolls.
Let the dough rest before kneading: A short rest period allows flour to fully hydrate and makes dough easier to work with. If your dough feels too sticky at any point, stop kneading it let it rest for 15 minutes.
Bake the dough side-by-side: Baking the dough nestled together instead of as individual rolls prevent them from becoming too crusty and let them retain their pillowy texture on all sides.
Let the dough rise fully before baking: If your dough didn't rise in the refrigerator, take the pan out and let the dough rise in a warm place. They should fill the pan before you bake them.
Brush the baked rolls with melted butter: Brushing the top of the rolls with melted butter softens the crust and imparts a rich buttery flavor to this bread. Take these rolls up a notch by brushing them with homemade honey butter.
Don't refrigerate leftover rolls: The refrigerator has a tendency to dry out bread, it's best to store any leftover rolls in an airtight container at room temperature.
Stand Mixer Instructions
- Combine the ingredients in the bowl of a stand mixer, use a paddle attachment to stir the ingredients together.
- Once the dough appears cohesive, switch to a dough hook and mix until the dough clings to the hook and away from pulls away from the sides of the bowl.
- Turn the dough out on a clean surface. Knead the dough for 1 to 2 minutes until smooth and pliable.
- Round the dough into a ball and place into a clean bowl to proof.
- Proceed with the recipe as instructed.
Recipe FAQs
Your starter may not have been active. Make sure you use a mature starter before you make this recipe. The sweet stiff starter should look bubbly before you make your dough. If you're baking in a cold kitchen, your dough may take much longer to rise. Try mixing your dough using warm water (less than 115 F) and allowing your dough to bulk ferment in a warmer spot, like inside the microwave or inside an oven that's turned off but with the light turned on.
These rolls are a great side for Thanksgiving or Christmas. You can also serve them with bbq, grilled meats, or as the base for breakfast sandwiches or sliders.
No, these rolls will taste buttery and slightly sweet. Using a sweet stiff starter helps prevent these rolls from becoming too acidic. A higher percentage of flour provides more nutrients to your starter and prevents it from producing too much acid. Furthermore adding sugar to sourdough creates osmotic stress and limits bacteria cell generation, which prevents further reduces sourness.
To use a 100% hydration starter you'll need to change the recipe slightly. Use 56 grams active sourdough starter, 113 grams milk and 300 grams flour. Keep the remaining dough ingredients the same.
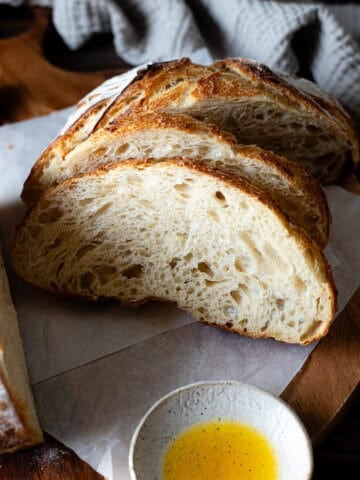
More sourdough bread recipes you'll love
Did this recipe rise to the occasion?
★★★★★
Leave a star rating and a comment. Your feedback inspires future recipes and helps others feel confident choosing what to bake next. I read and respond to every message.
If you're looking for additional ways to support my work, share this recipe or buy me a Ko-fi. Every little bit helps me keep creating the recipes and guides you enjoy.
Thank you for your support!
Sourdough Dinner Rolls Recipe
Equipment
- 8-inch metal baking pan
This section may contain affiliate links
Ingredients
Sweet stiff starter
- 60 grams all-purpose flour
- 28 grams water
- 14 grams cane sugar
- 14 grams sourdough starter mature
Dough
- 2 eggs large
- 113 grams whole milk
- 36 grams cane sugar
- 270 grams all-purpose flour
- 6 grams salt
- 56 grams unsalted butter softened
Toppings
- 1 egg
- 28 grams unsalted butter melted
Click US Customary to view volume measurements
Instructions
- Make the sweet stiff starter: Combine the sweet stiff starter ingredients together, stir until all the flour is hydrated, the mixture may appear a little dry. Continue mixing until it comes together into a shaggy dough. Transfer the starter to an airtight container, set it in a warm place, and let the starter activate overnight.60 grams all-purpose flour, 28 grams water, 14 grams cane sugar, 14 grams sourdough starter
- Make the dough: Whisk the eggs, milk, and sugar together in a large mixing bowl until no traces of egg whites remain.2 eggs, 113 grams whole milk, 36 grams cane sugar
- Tear the sweet stiff starter into small pieces and add it into the large mixing bowl with the flour and salt. Stir all the ingredients together until the mixture looks like a cohesive dough.270 grams all-purpose flour, 6 grams salt
- Knead the butter into the dough one tablespoon at a time, wait until each portion is incorporated before adding more. Cover the bowl with plastic wrap and let it rest for 1 hour.56 grams unsalted butter
- Strengthen the dough: Turn the dough out on a lightly floured work surface and knead until it appears smooth and elastic. Round the dough into a tight ball and place it into a clean, lightly-greased bowl.
- First rise: Cover the bowl with plastic wrap and let it rise in a warm spot until doubled in volume, about 4 to 6 hours.
- Shape the dough: Line an 8-inch square baking pan and line it with parchment paper. Divide the dough into 9 portions. Round each piece of dough into a tight ball and arrange them in your prepared pan.
- Second rise: Cover the baking pan with plastic wrap and transfer the dough to the refrigerator and proof overnight (8 to 16 hours).
- Prep: Remove the rolls from the refrigerator and set them on the counter. Preheat the oven to 350 F.
- Egg wash: Once the rolls look ready (they should look well risen, fluffy and fill the pan), beat the egg to make your egg wash. Using a pastry brush, brush the tops of the dough with egg wash.1 egg
- Bake: Bake the rolls for 20 to 25 minutes or until the rolls are golden brown and register at least 190 F when probed with an instant-read thermometer.
- Brush with butter: Remove the baked rolls from the oven and brush them with melted butter.28 grams unsalted butter
- Enjoy and store: These rolls are best enjoyed on the day they are baked. Store leftover rolls in an airtight container at room temperature for up to 3 days.
Tips
These recipes were developed and tested using grams for precise measurements. To increase your chances of success, I recommend investing in a kitchen scale. I've included rough volume estimates (in tablespoons and cups), but they might not be totally accurate.
Remember all ovens are unique, these recipes were tested in my oven which runs cooler than others. You might need to lower the temperature if your bake appears to be browning too quickly. Monitor your bake closely and make adjustments if needed.
Notes
- Knead the dough until smooth for soft and pillowy rolls.
- If your dough feels too sticky at any point, stop kneading it let it rest for 15 minutes.
- Baking the dough nestled together instead of as individual rolls prevent them from becoming too crusty and let them retain their pillowy texture on all sides.
- Feel free to bake these rolls in another baking vessel of your choice, a cast iron skillet, ceramic, or glass baking dish would work well.
- If your dough didn't rise in the refrigerator, take the pan out and let the dough rise in a warm place. They should fill the pan before you bake them.
- Brushing the top of the rolls with melted butter softens the crust and imparts a rich buttery flavor to this bread.
- The refrigerator has a tendency to dry out bread, it's best to store any leftover rolls in an airtight container at room temperature.
Nutrition
I am not a nutritionist or dietitian, any nutrition information provided is an estimate.
Lena says
Help! This dough is very high moisture content compared to other sourdough recipes. I am in the first rise stage, and even after kneading it with additional flour, it’s still really soft and goopy. The levain turned out well, I followed the recipe exactly with weighed grams. Will additional flour ruin it?
Hannah Dela Cruz says
Hi Lena — sorry this one gave you a hard time. A common mistake, especially if you’re not used to working with wetter doughs, is adding more flour. It seems like it would help, but it actually makes the dough feel stickier because the flour doesn’t have time to fully hydrate or allow the gluten to develop properly. It can also lead to rolls that turn out dense and dry.
Instead, let the dough rest for about 30 minutes after mixing. This gives the flour time to hydrate and the dough will become much easier to handle. If it still feels sticky, knead it lightly, then let it rest again before continuing.
Jenny says
I am following the recipe for the sweet stiff starter and mixed it all last night and left on the counter in sealed container all night like the recipe stated. I used just room temp water because the recipe didn’t specify temp (which I usually do 101-105° water for my levain but last night it was probably 70 something degrees). Anyways, left out all night (our house stays pretty cold) and it didn’t rise or do anything. I have to go to work now and am wondering if I left it out longer, will it be ok? Like at whatever point it’s ready, can it still stay out longer than that or will it make the bread different if it goes a ways past bubbling/rising? My usual levain for SD boules is 6-10 hours and up to 24 hours and it’s fine to use. Just curious your thoughts.
Hannah Dela Cruz says
Hi! Sorry you're having trouble with your stiff starter. It should be just fine since the starter has more nutrients than usual. If it looks bubbly when you're ready to mix your dough it should be ready. Try doing your proofing in the oven (off with the light on) and hopefully your dough will rise quicker.
Evy McChesney says
How long can the sweet stiff starter stay in the fridge before I use it? can it be 24 hours?
Hannah Dela Cruz says
That should work just fine. Take it out of the fridge for 20 or so minutes to take the chill off before mixing it into your dough.
Brittney says
can I use bread flour instead of all purpose?
Hannah Dela Cruz says
Yes! You can sub bread flour for all-purpose in a pinch but your rolls may not be as soft. They will still be good but a little chewier.
Jodi Harner says
How do I reheat these rolls so that they are warm and soft?
Hannah Dela Cruz says
Hi Jodi! I usually like to wrap the rolls in foil and reheat them at 350F until warmed through. This prevents the crust from hardening and steams the rolls slightly so they stay fluffy.