

If I had to recommend just one recipe to someone new to sourdough, it would be this sourdough discard focaccia. It's low-stress and incredibly rewarding, with a golden, crisp crust, delicious olive oil flavor and a light, bubbly interior. Best of all, there's no complicated shaping and you can bake it in a single afternoon so its ready in time for dinner! A small amount of commercial yeast gives the dough a boost so it rises faster, while the sourdough discard still brings plenty of tang and the chewy sourdough texture that we know and love.

This recipe was originally published in Sept. 2023. I've since updated it to include clearer instructions and streamlined steps.

This recipe is usually where I tell people to start, and from there it's easy to branch out into my other staples like sourdough discard English muffins, sourdough discard bagels, or even sourdough discard pretzels. There's so many delicious possibilities!
Absolutely phenomenal. I just got a starter last week so this was my first discard recipe and I am OBSESSED. The bread is pure perfection and I couldn't be any happier with it. Keeping this recipe F O R E V E R!!!! Thank you!
- Amber
Ingredients and substitutions
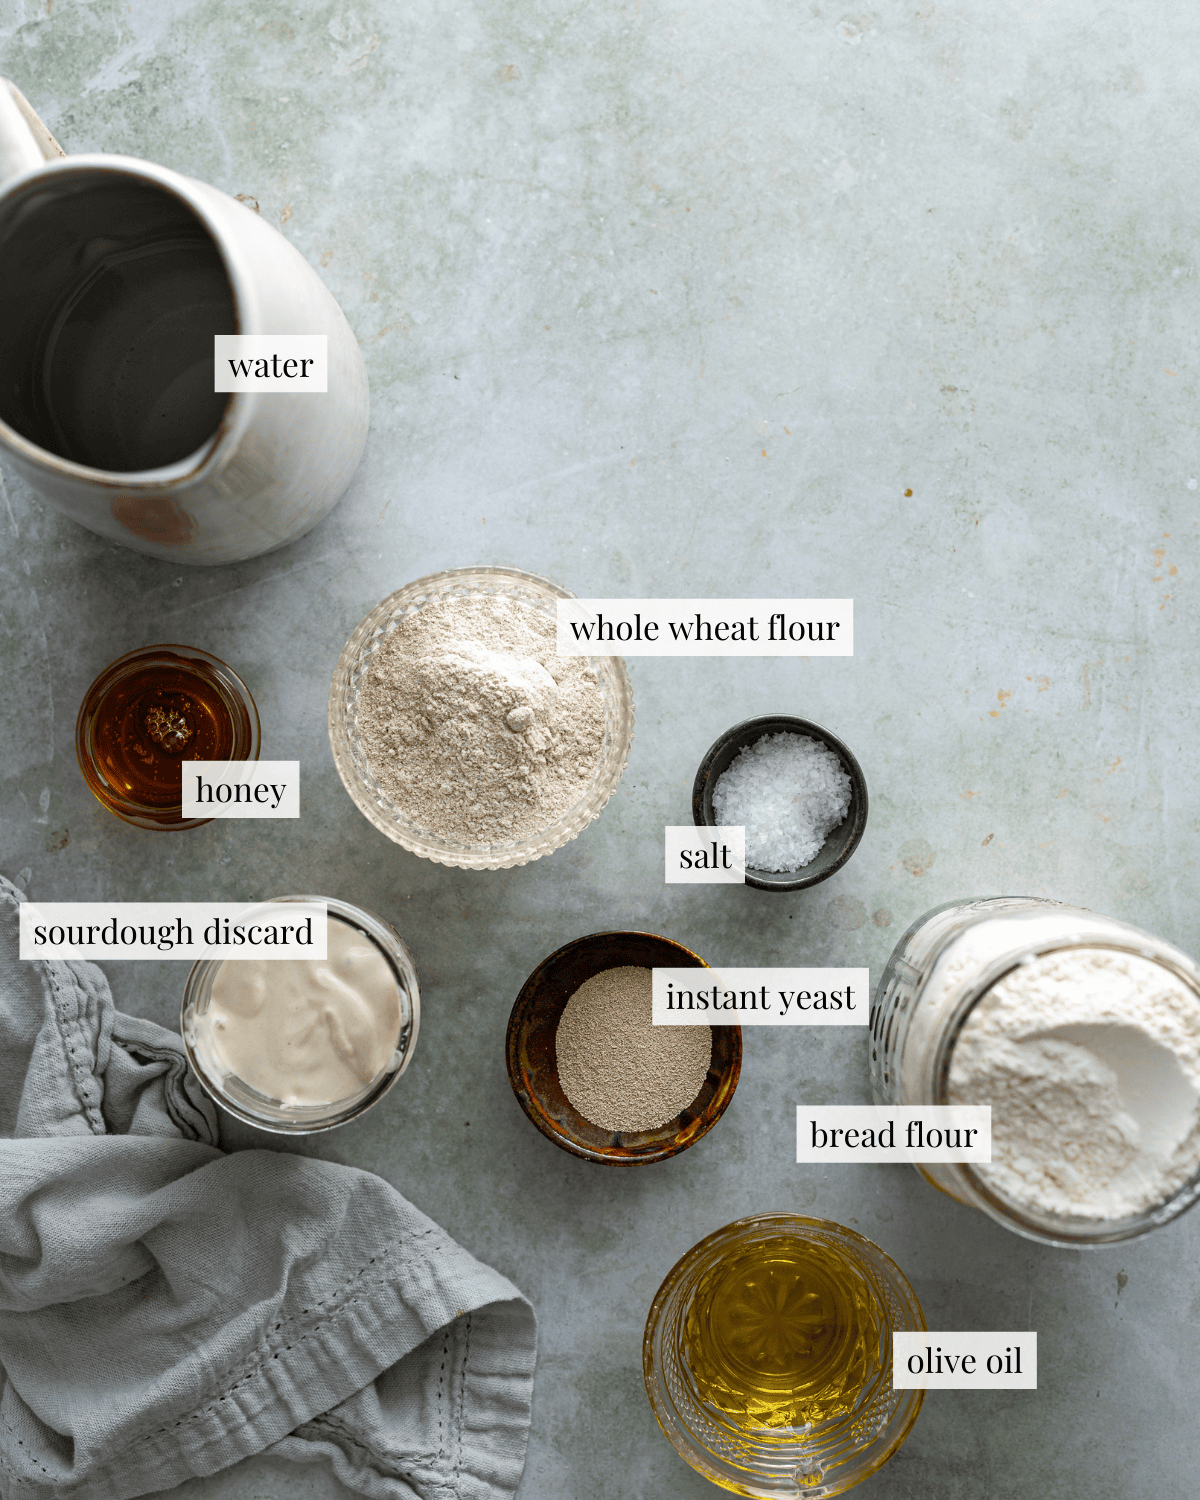
Flour: All-purpose flour will work in place of bread flour or whole wheat in this recipe. Don't attempt to use 100% whole wheat flour for this recipe or your focaccia may turn out dry and gummy.
Sourdough discard: You can use your starter directly from the fridge. If you don't have a starter, you can still make this recipe by adding 113 grams of flour and 113 grams of water to your dough.
Olive oil: Splurge on a high-quality olive oil. Unfortunately, there is no substitute for this ingredient.
See the recipe card for detailed ingredient information.
Step-by-step instructions
STEP 1 Make the dough
Whisk the yeast, honey and water together in a large bowl. Add the flour, salt and discard to the yeast mixture. Knead the olive oil into the dough. Transfer the dough into a clean, lightly-oiled bowl and let the dough rest.
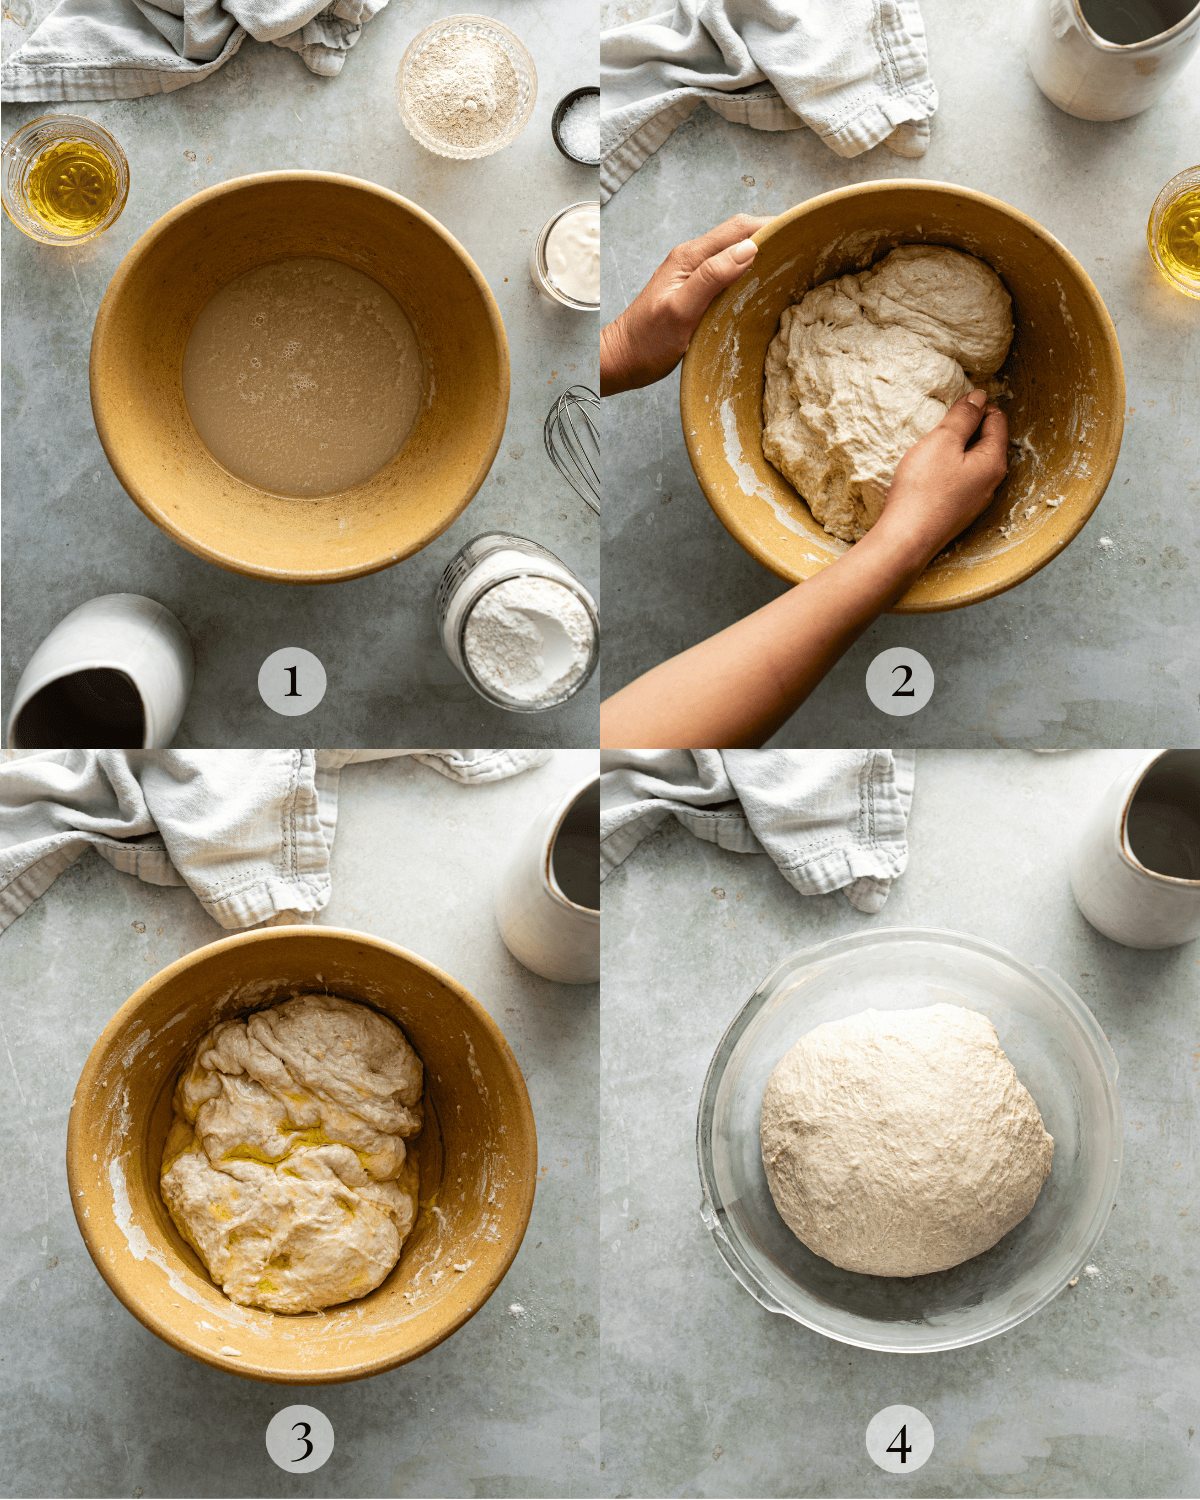
STEP 2 Stretch and fold
Using your fingertips pick up one side of the dough and stretch it as far as you can without tearing. Fold the dough over itself, turn the bowl 90 degrees, and repeat 3 more times or until all of the sides are folded.
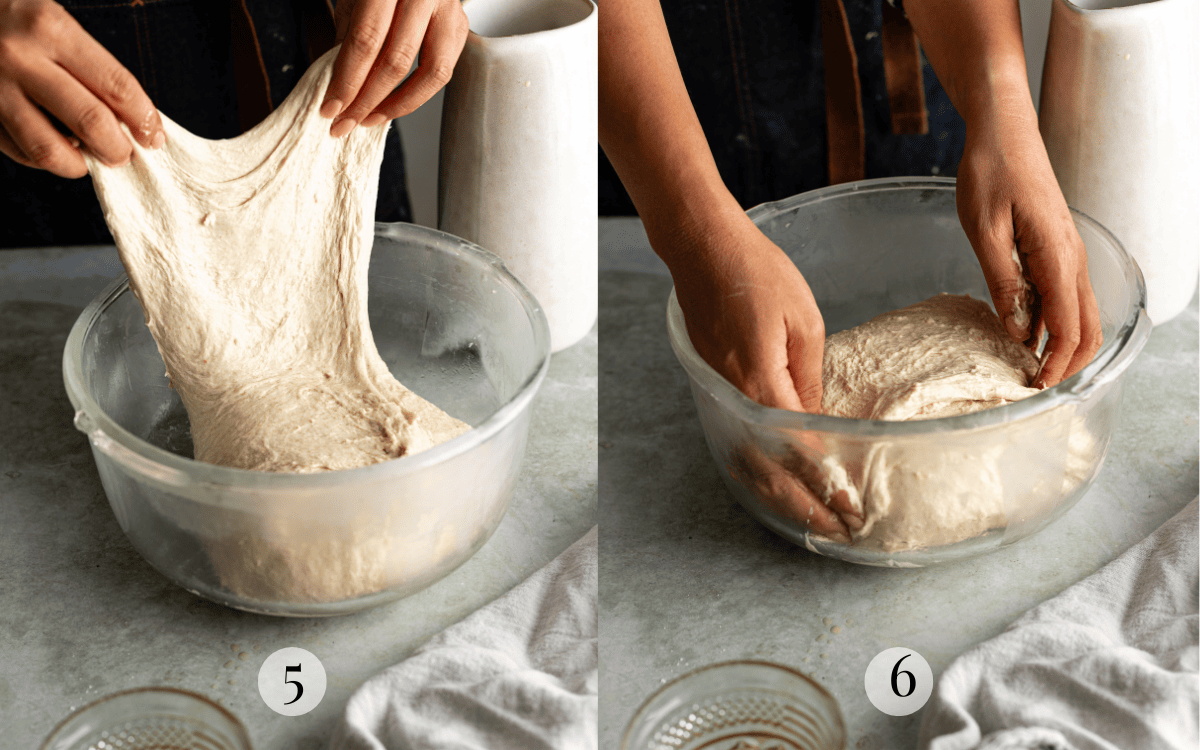
Tip
This dough can initially feel quite wet and sticky. If it feels too difficult to handle, work with wet hands and use your fingertips when completing your stretch and folds.
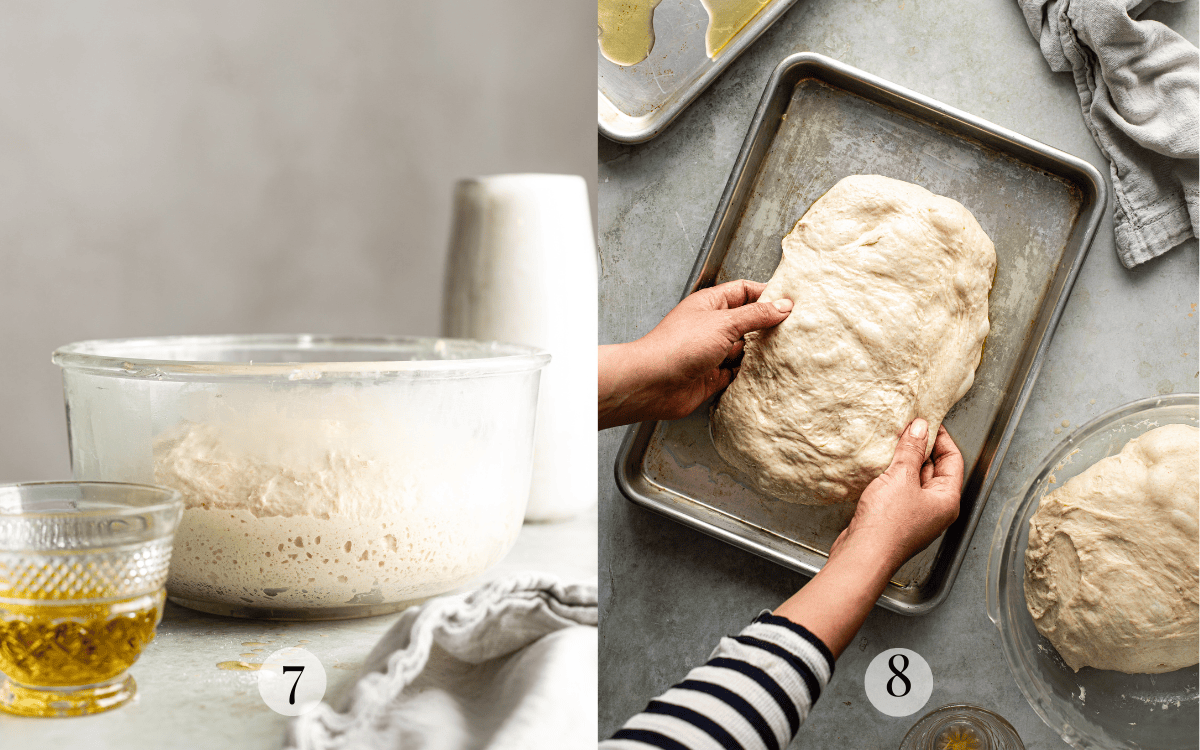
STEP 3 Proof the dough
Cover the bowl and let the dough proof until bubbly and doubled in volume, about 30 to 45 minutes. Divide the dough and transfer to a baking sheet coated in olive oil, gently stretching it to reach the edges of the pan. Cover the pans until puffy and bubbly, about 30 minutes.
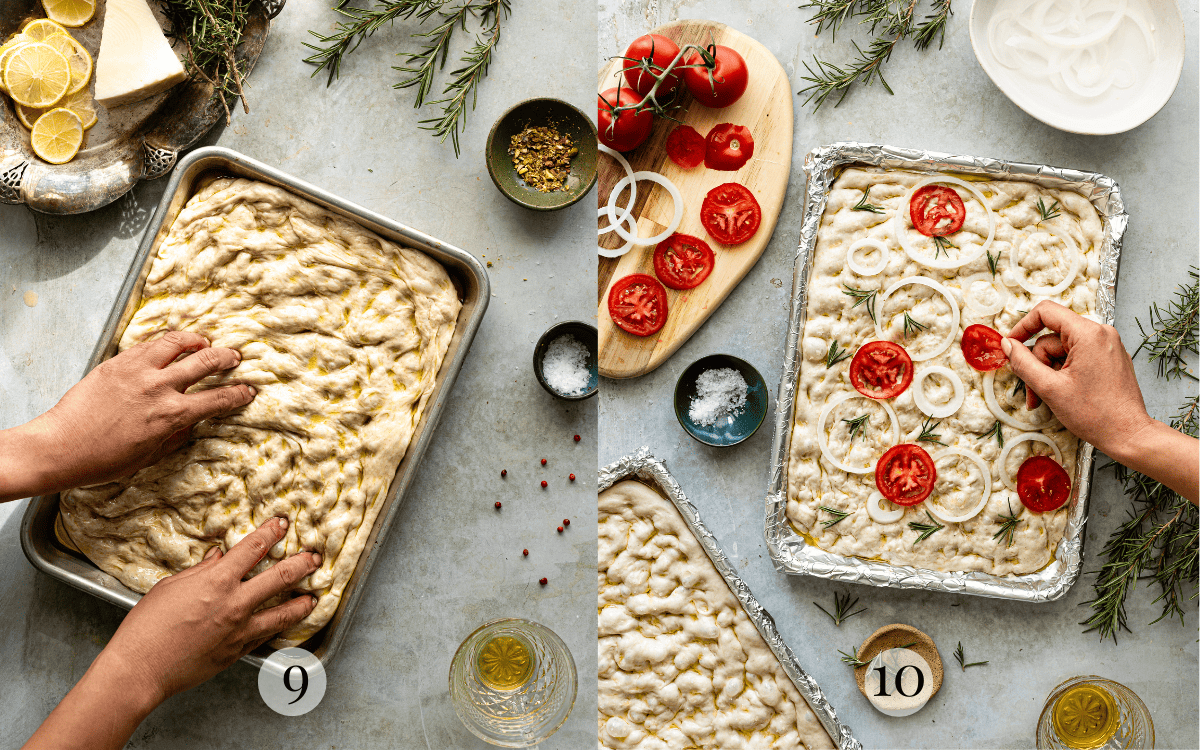
STEP 4 Bake
Dock the dough by using your fingertips to press on the surface multiple times until it reaches a consistently even thickness, then delicately stretch it towards the edges of the baking sheet. Sprinkle sea salt on top of the dough (add other toppings, if using) and bake at 425 for 25 to 30 minutes.
Tips from Hannah's Test Kitchen
- Coat the bottom of the pan with lots of olive oil. This fries the dough as it bakes resulting in a delicious crispy crust. It also prevents your dough from sticking to the bottom of your baking sheet!
- When in doubt use parchment paper. I've baked in plenty of pans with questionable non-stick surfaces, so now I don't take chances. Lining your pan is the simplest way to ensure your focaccia doesn't get stuck and actually makes it to the table.
- If the dough won't spread to the edges of your pan, cover it with a greased piece of plastic wrap and let it rest for 15 minutes before proceeding. This helps the gluten to relax, making the dough more pliable and easier to stretch.
- Don't use too many toppings or your focaccia may become soggy.
Did this recipe rise to the occasion?
★★★★★
Leave a star rating and a comment. Your feedback inspires future recipes and helps others feel confident choosing what to bake next. I read and respond to every message.
If you're looking for additional ways to support my work, share this recipe or buy me a Ko-fi. Every little bit helps me keep creating the recipes and guides you enjoy.
Thank you for your support!

Sourdough Discard Focaccia Recipe
Equipment
This section may contain affiliate links
Ingredients
Dough
- 452 grams water
- 7 grams instant yeast 1 packet
- 42 grams honey or cane sugar
- 170 grams sourdough discard
- 540 grams bread flour
- 90 grams whole wheat flour
- 12 grams salt
- 56 grams olive oil
Toppings
- 56 grams olive oil
- 7 grams flaky sea salt
Suggested Toppings
- tomatoes sliced
- fresh rosemary
- onions sliced
- ground pistachios
- lemons sliced
- olives
- ground pepper
- garlic
- grapes
Click US Customary to view volume measurements
Instructions
- Make the dough: Mix the water, instant yeast, honey and sourdough discard in a large bowl until no traces of discard remains.452 grams water, 7 grams instant yeast, 42 grams honey, 170 grams sourdough discard
- Fold in the bread flour, whole wheat flour and salt. Mix with a wooden spoon or your hands until all of the flour is hydrated.540 grams bread flour, 90 grams whole wheat flour, 12 grams salt
- Knead the olive oil into the dough until it is absorbed. It will gradually feel less greasy as it absorbs the oil.56 grams olive oil
- Cover the bowl with plastic wrap and let the dough rest in a warm place for 15 minutes.
- Stretch and fold: After the 15 minute rest period, complete 1 set of stretch and folds.
- To complete a stretch and fold, with the dough inside your bowl, pick up the side of the dough closest to you using your fingertips. Stretch the dough out as much as you can without it tearing and fold it over itself. Turn the bowl 90 degrees and repeat 3 more times.
- Cover the bowl with plastic wrap. Set it in a warm place and let the dough rest for 15 minutes.
- Complete 1 more set of stretch and folds. Cover the bowl with plastic wrap.
- First rise: Let the dough rise at room temperature until doubled in volume. The dough should double in volume and appear bubbly, about 30 to 45 minutes.
- Prep: Line two 9 by 13 baking sheets aluminum foil or parchment paper. Coat the bottom of the sheet pans with about 1 tablespoon of olive oil (14 grams). Preheat the oven to 425 F. (Coat bottom of the pan with 28 grams of olive oil if you're baking 1 large focaccia)
- Second rise: Divide the dough into two portions. Transfer each portion of dough on the prepared pans. Cover the pans with plastic wrap and let the dough rest for 15 minutes.
- After the rest period, stretch the dough out to the edges of the pan. Cover the dough once more and let it rise for another 20 minutes or until it looks bubbly.
- Assemble and top: Working with one portion of dough at a time, pour about 1 tablespoon (14 grams) of olive oil over the dough. Spread the oil on the dough using the palm of your hand. Using your fingertips, dimple the dough all over until it looks completely flat.7 grams flaky sea salt
- Sprinkle sea salt and arrange toppings on the dough (if using). Repeat with the remaining portion of dough.
- Bake: Transfer the baking sheets to the oven and bake for 25 to 30 minutes or until the focaccia looks golden brown.
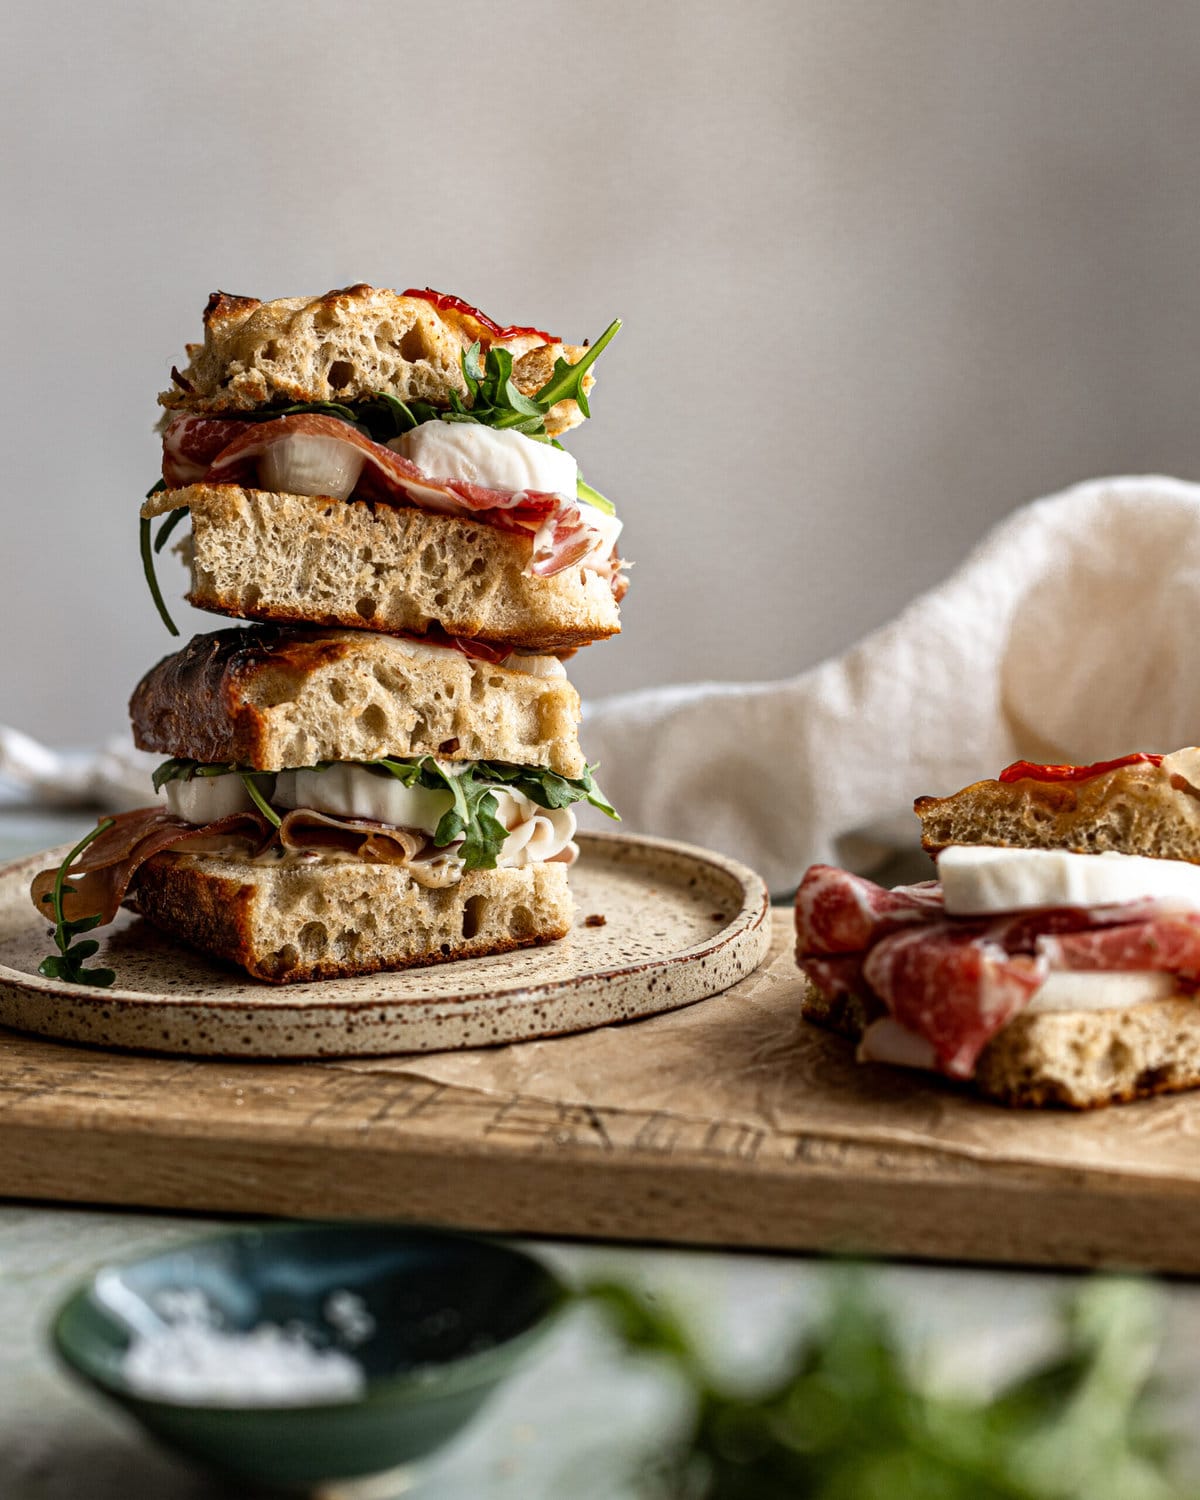
- Enjoy: Transfer the focaccias to a cooling rack. Let the bread cool for 10 minutes before slicing, more if you're using it for a sandwich.
- Store: This bread tastes the best the day it is baked, but will store well for up to 3 days in an airtight container at room temperature. Refrigerate leftover slices in an airtight container if you used toppings.
Tips
These recipes were developed and tested using grams for precise measurements. To increase your chances of success, I recommend investing in a kitchen scale. I've included rough volume estimates (in tablespoons and cups), but they might not be totally accurate.
Remember all ovens are unique, these recipes were tested in my oven which runs cooler than others. You might need to lower the temperature if your bake appears to be browning too quickly. Monitor your bake closely and make adjustments if needed.
Notes
- two 9 by 13 baking pans
- one 18 by 13 inch baking sheet
- three 8-inch square baking pans
- three 9-inch cake pans
- two 12-inch skillets
Nutrition
I am not a nutritionist or dietitian, any nutrition information provided is an estimate.


Miriam Attard says
10/10. This was incredibly good. Easy & delicious. I topped mine with garlic & black salt.
Hannah Dela Cruz says
Hi Miriam! Ooh that sounds so good. The black salt probably looked beautiful!
Hayleigh Magdaleno says
Can I use more discard to avoid using instant yeast?
Hannah Dela Cruz says
Hi Hayleigh — if you want to omit the yeast, you’ll need to use an active sourdough starter instead. Keep in mind that sourdough isn’t as efficient at leavening, so your dough will take longer to rise—about 4 hours for bulk fermentation and again during the final proof.
I wouldn’t recommend increasing the amount of discard to compensate for the lack of yeast. Discard isn’t strong enough to properly leaven the dough, and its higher acidity can weaken the gluten structure, which will result in a dense and gummy bake.
Amanda says
love this recipe! im trying to make the dough ahead of time...can I do all the steps, put dough in my aluminum pans, olive oil on top, do the finger dimples, add toppings and then put it in the fridge and bake next day?
Hannah Dela Cruz says
Hi Amanda! My advice would be to make the dough in advance and refrigerate in the pan. I would wait to add the olive oil and toppings until right before baking.
Linda says
I am very new to sourdough and I have successfully made your focaccia once. It turned out beautifully. thankyou.
I want to make it again but refrigerate it overnight this time. Do I proceed with your instructions up to the assembly stage before I put it in the fridge, including oiling the top?
Hannah Dela Cruz says
Hi Linda! So glad you enjoyed this one. You're absolutely right. Assemble the dough and refrigerate it right away and it will rise in the fridge.
Danielle says
Exceptionally delicious, easy, and very forgiving too. Will be keeping this one forever. It's great in a pinch when you forgot to start a traditional sourdough focaccia the night before, as I did. Thank you!!
Hannah Dela Cruz says
You're so welcome, Danielle! I am so glad you tried this one and love it.
Angela Freda says
Can I let it rise overnight?
Hannah Dela Cruz says
Hi Angela! Absolutely. You can refrigerate it after transferring to the pan. Make sure you oil the plastic wrap to prevent it from sticking to the dough. Bake as instructed, no need to bring the dough to room temp.
Christal says
This was so, so good. I got the dough through the first rise, and popped it in the fridge before work. I let it come to room temp, baked and we enjoyed it with soup for dinner. So good, will make again and again.
Hannah Dela Cruz says
Hi Christal! I agree this focaccia dough is so flexible, and I love that you can break up the baking process with a little cold proof. I bet it made your focaccia even more flavorful! I’m so glad you were able to enjoy it with your dinner.
Lorraine says
Fantastic recipe! I like my focaccia thicker, so baked the entire recipe in my 9"x13" pan. Beautiful, puffy and delicious. Topped with rosemary, garlic and parmesan. Absolutely a winner!
Hannah Dela Cruz says
Yum! Great toppings!