

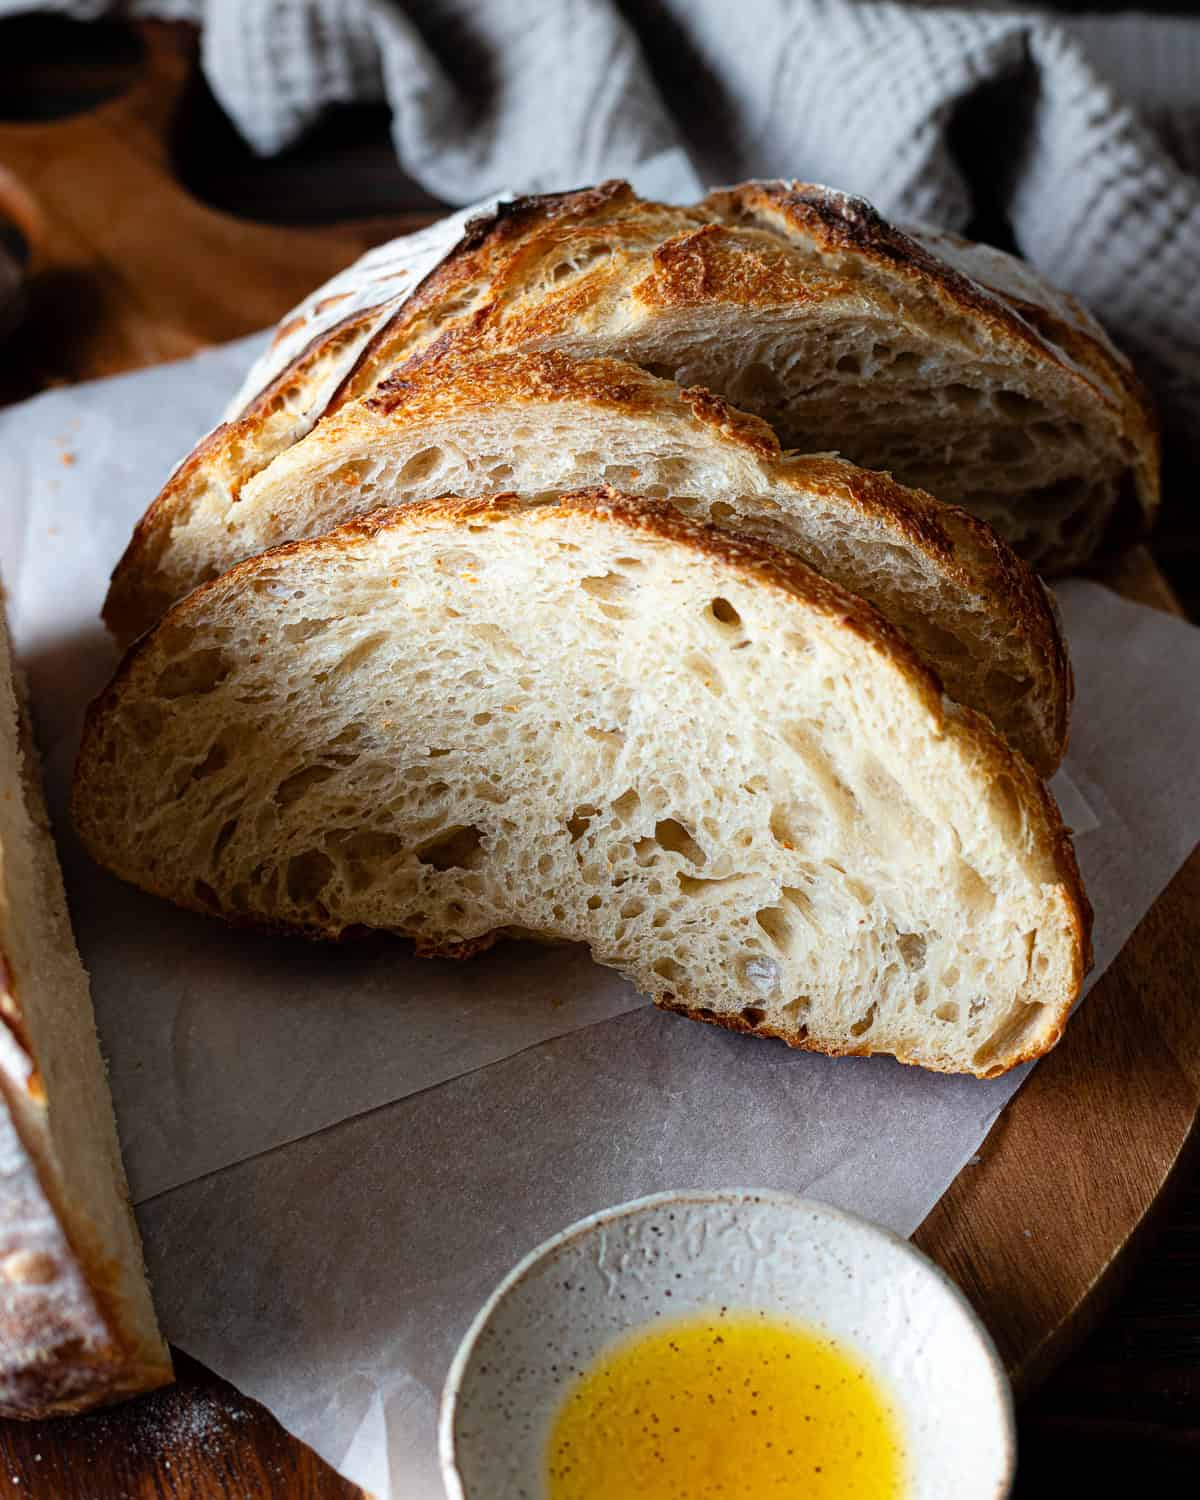
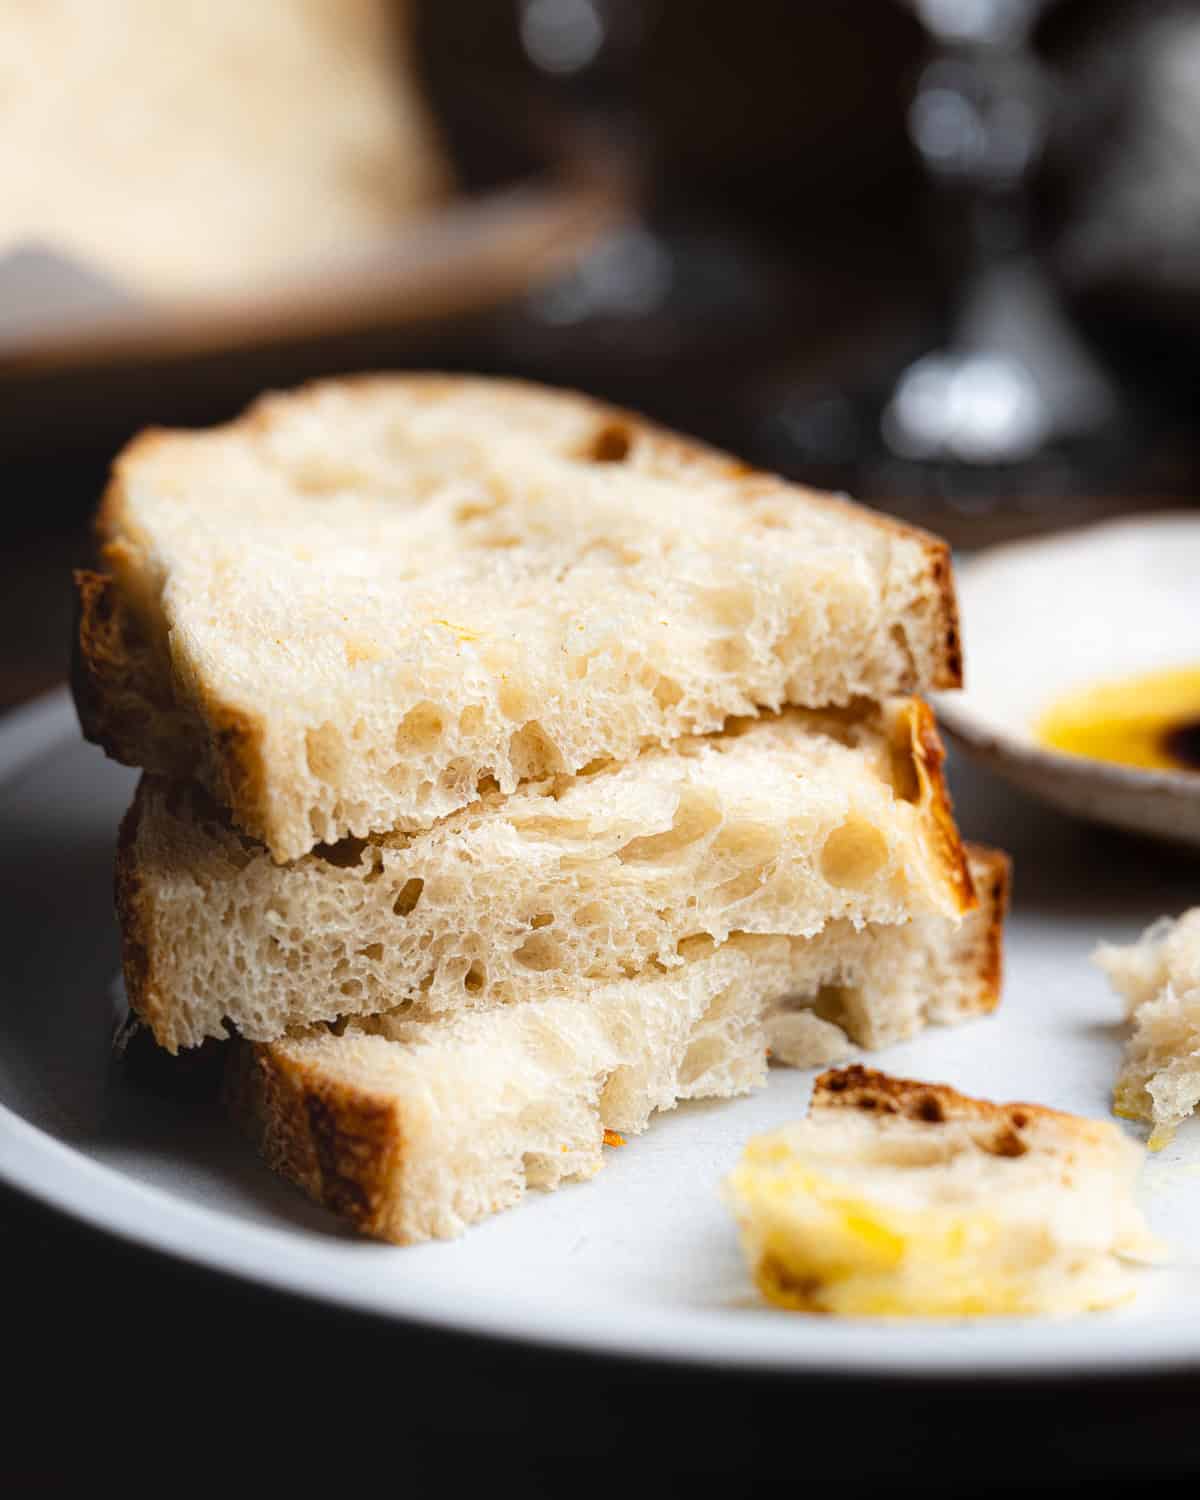
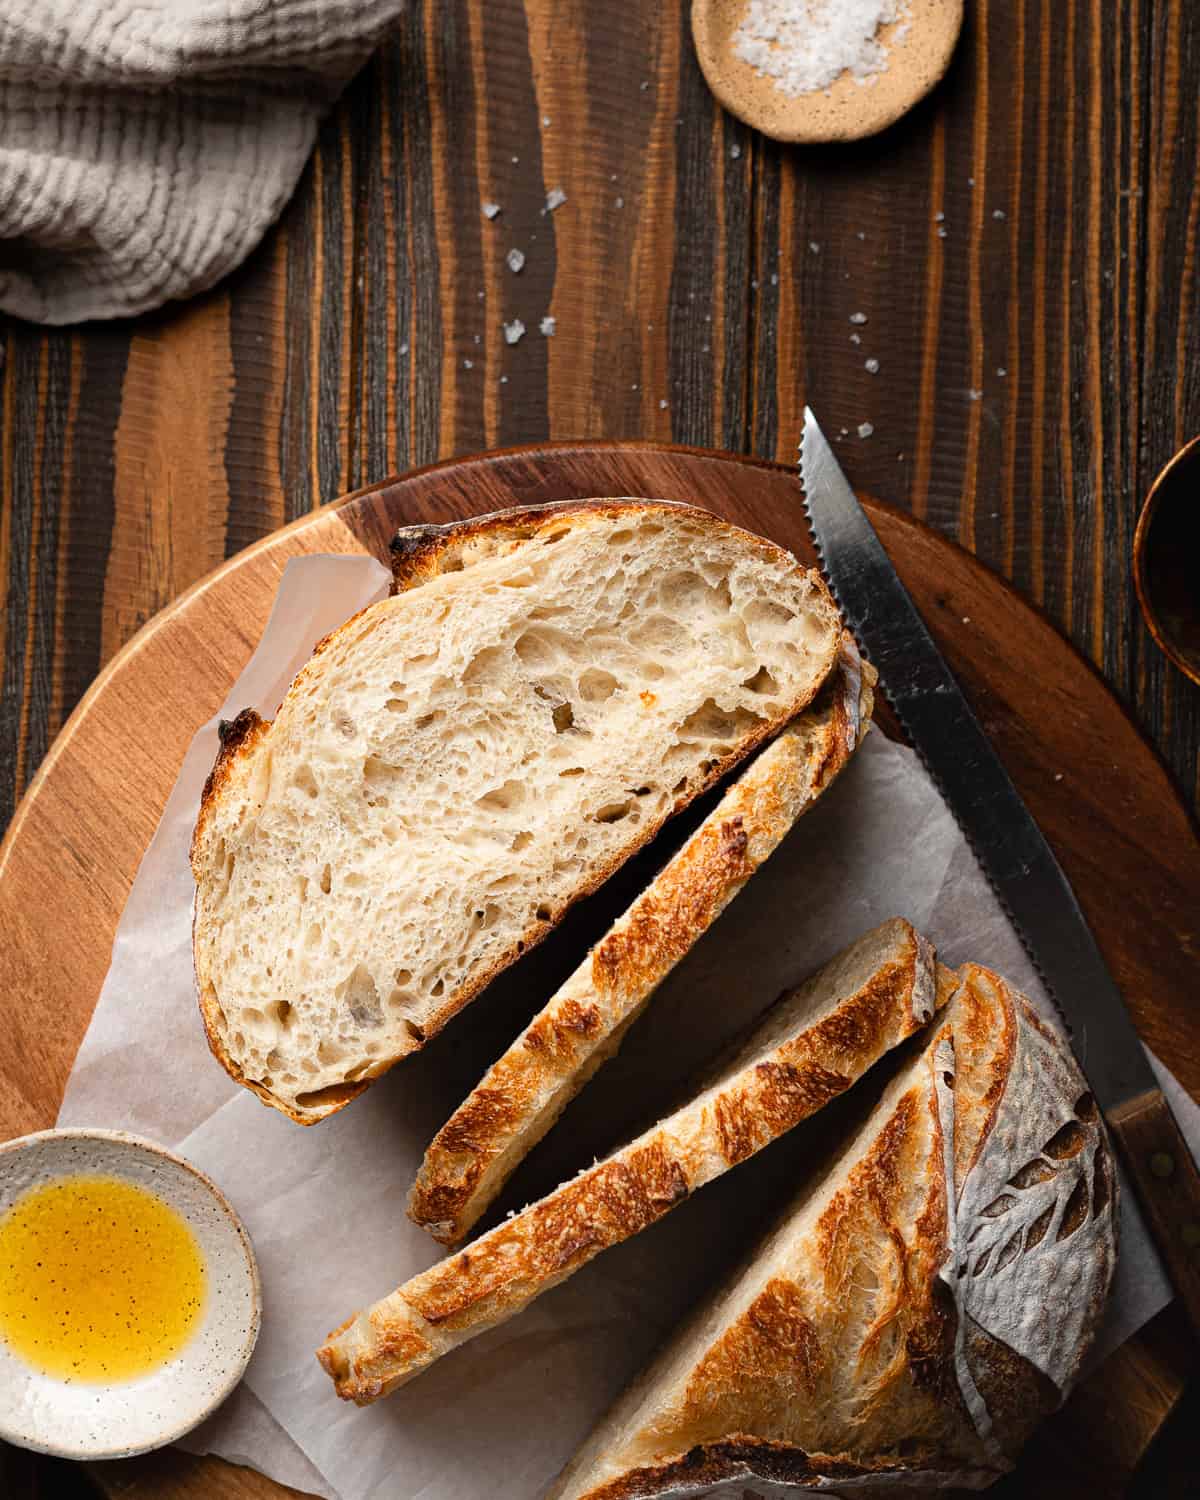
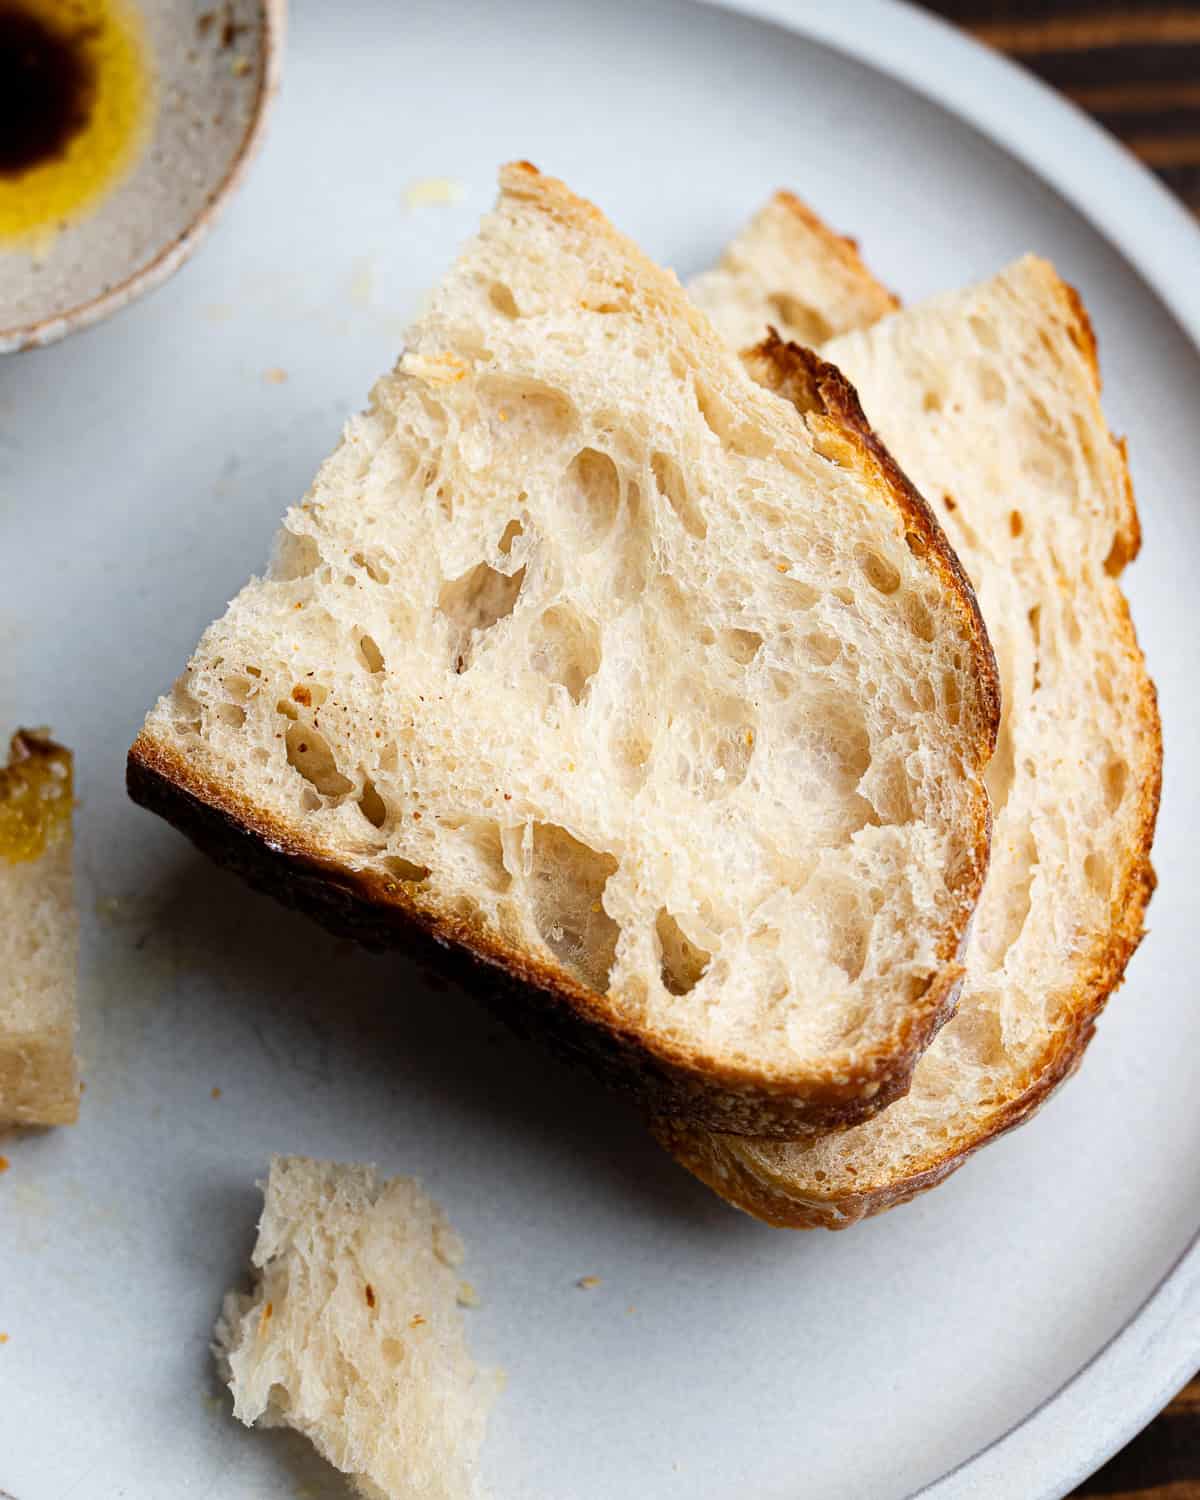
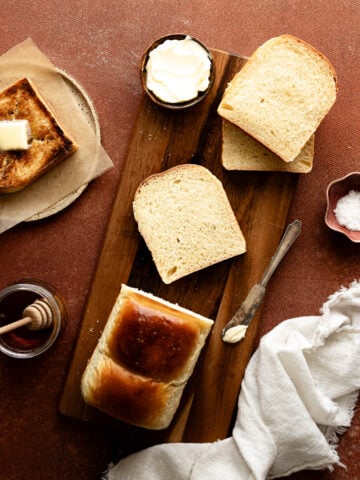
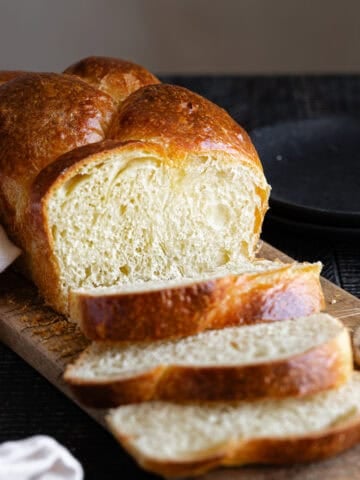
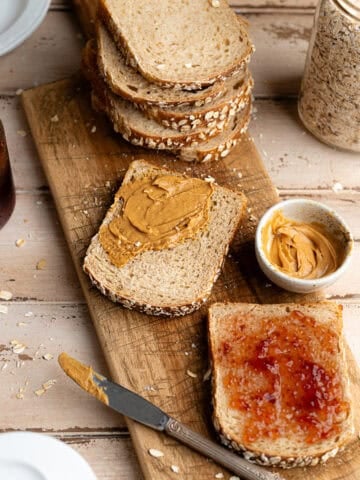
Only have one type of flour in your kitchen? Don't run to the grocery store to stock up on specialty fours. You can totally bake soft, flavorful sourdough bread using all-purpose flour. This All-Purpose Flour Sourdough Bread recipe is one of my favorites, it yields a loaf with an airy, open crumb, delicious flavor and a creamy texture. Great for sandwiches, toast or on its own with a little bit of olive oil and balsamic vinegar.
This recipe was originally published in April 2019. I have since updated it with new photos and additional tips for success.
Jump to:
When I started baking sourdough, I was drawn to heritage and whole wheat flour. But without a solid grasp of bread baking, my loaves kept falling short. Whole grain and heritage flours can be quite an investment so my failed experiments started to feel a little wasteful.
I focused on mastering one recipe with a single flour, and my baking skills and most importantly my bread improved. Since I already fed my sourdough starter with all-purpose flour, it naturally became my first choice. Making sourdough bread with ap flour is a great option since it is affordable, versatile, easily accessible and has enough protein content to make soft, delicious bread. Plus, it works for everything from Sourdough Chocolate Chip Cookies to Sourdough Biscuits.
Why I love this recipe
- Stock just one type of flour in your pantry.
- Made with only 4 ingredients!
- Airy, open crumb and a creamy texture.
- Mixed by hand with no special equipment needed.
Ingredients
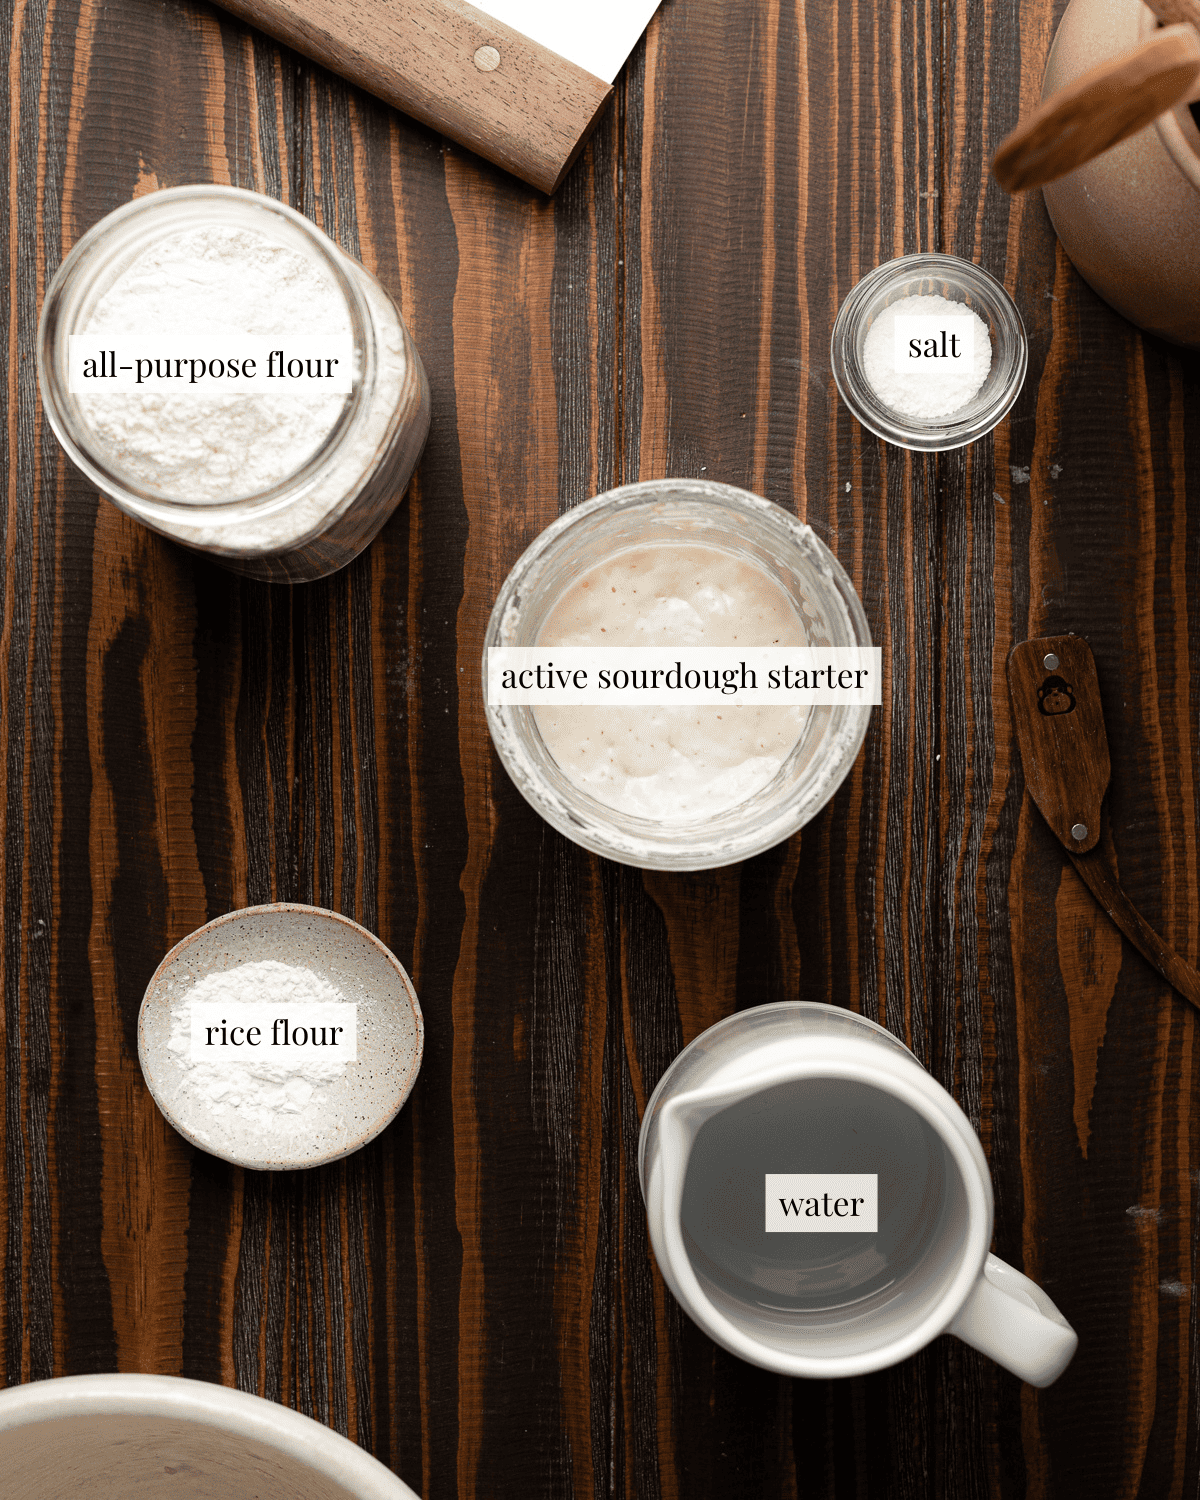
All-purpose flour: All-purpose flour contains 10-12% protein, depending on the brand. This is enough to build a strong gluten network and bake a delicious loaf of bread.
Active sourdough starter: Make sure your sourdough starter is mature, healthy and active before attempting this recipe.
Water: Use filtered water that's around 80 to 90 F for the best results.
Salt: Not just for flavor, salt is also essential for dough strength-without it, your bread may spread and lose structure during baking.
Rice flour: Totally optional, but it helps prevent the dough from sticking to your proofing basket. Lightly dust the top of your dough to highlight your scoring patterns.
Can you substitute all-purpose flour for bread flour?
Not always! Different types of flours have different qualities. High-protein bread flour creates a stronger dough with more chew, while lower-protein all-purpose flour yields bread with a softer crumb. This is why choosing the right flour for your recipe matters. The flour you use affects everything.
Bread flour has a protein content of around 12-14%, depending on the brand. While all-purpose flour has a protein content of about 10-12%, this works well for Sourdough Brioche and even crusty artisanal loaves, it's not the best choice for breads like bagels or pretzels. These require stronger gluten network, which all-purpose flour can't always provide. Without a strong gluten network these breads may develop a wrinkled appearance and a softer texture than expected (think more like Sourdough Dinner Rolls).
Conversely, bread flour should not be substituted for a recipe that calls for all-purpose flour because its high protein level creates a really strong gluten network which can make bread overly chewy. Unless I'm making specific recipes, like Sourdough Pretzels or Sourdough Bagels, I always combine whole wheat or all-purpose flour with bread flour (like in my Basic Sourdough Bread recipe). These flours lend their tenderizing qualities which results in bread with a balance of chewiness and softness.
Curious about how different types of flour impact your bread? Check out my post on The Best Type of Flour for Sourdough.
How to make Sourdough Bread with All-purpose Flour
Step 1: Make the dough
Dissolve the active sourdough starter in water. Mix the flour and salt into the water. Continue mixing until no dry traces of flour remain and the dough looks cohesive. Cover with plastic wrap and let the dough rest for 30 minutes.
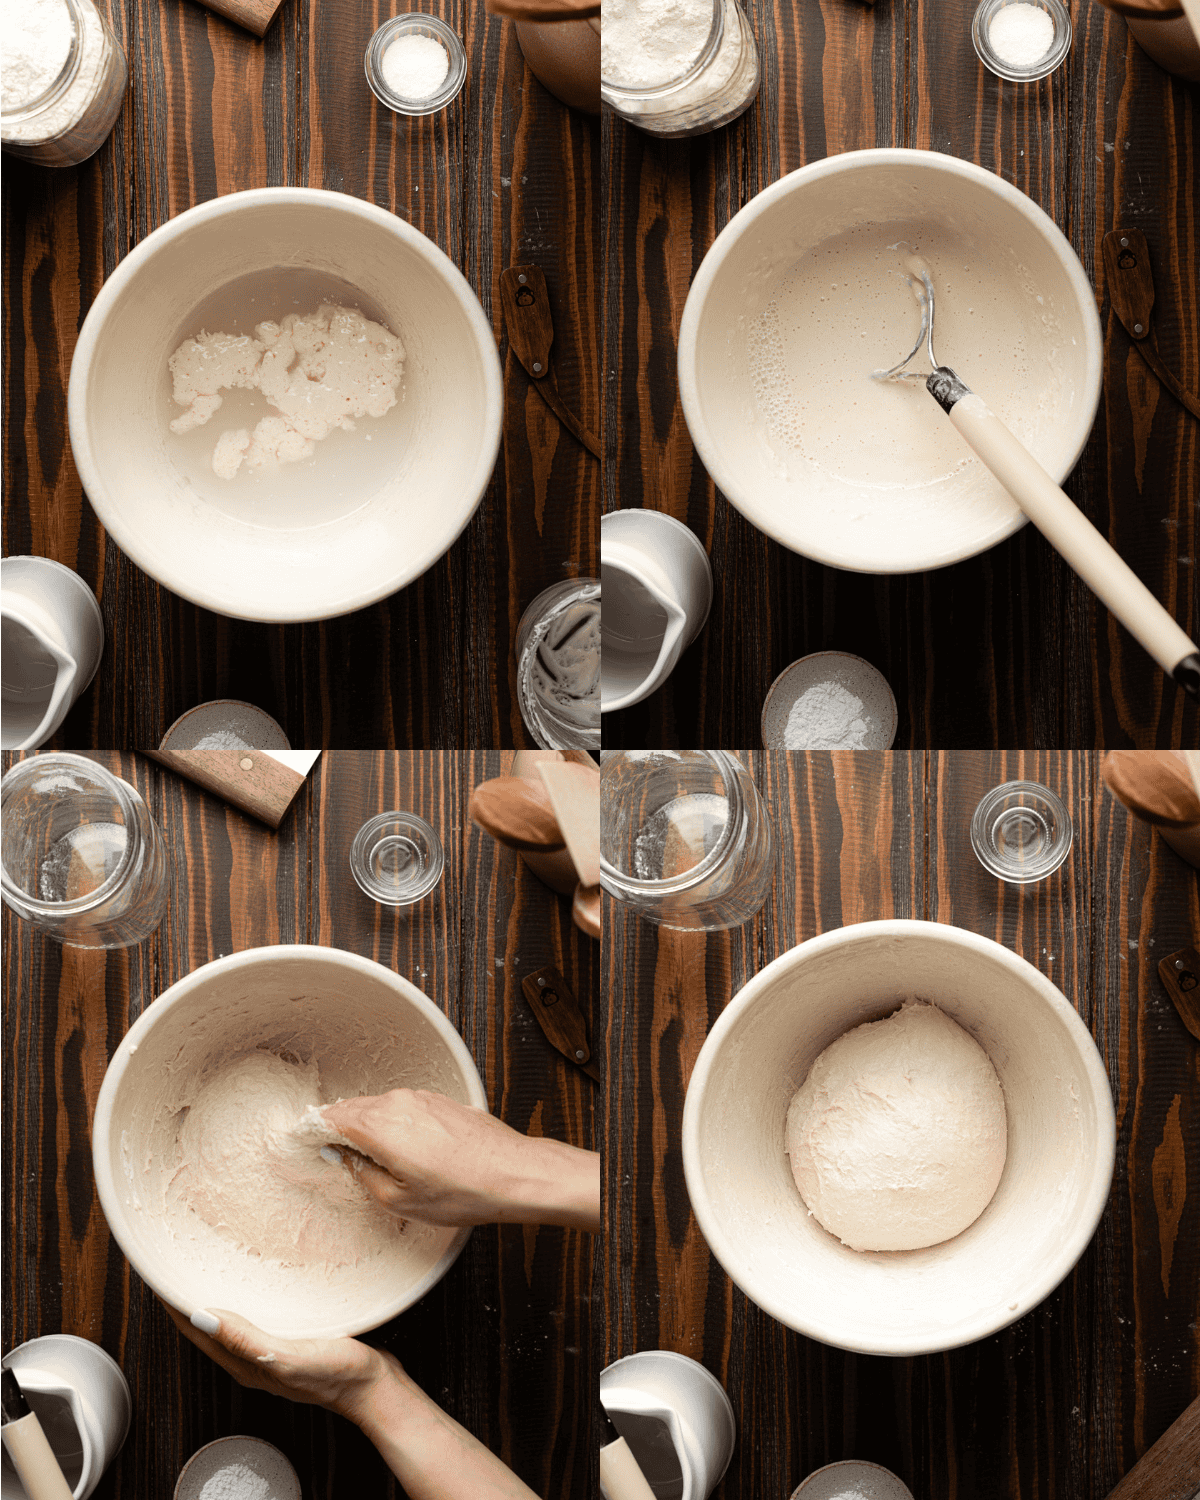
Step 2: Stretch and fold
Working inside the bowl, pick the dough up gently using your finger tips. Fold the dough over itself. Give the bowl a quarter turn and repeat. Transfer the dough to a clean bowl, cover and let the dough rest for 30 minutes.
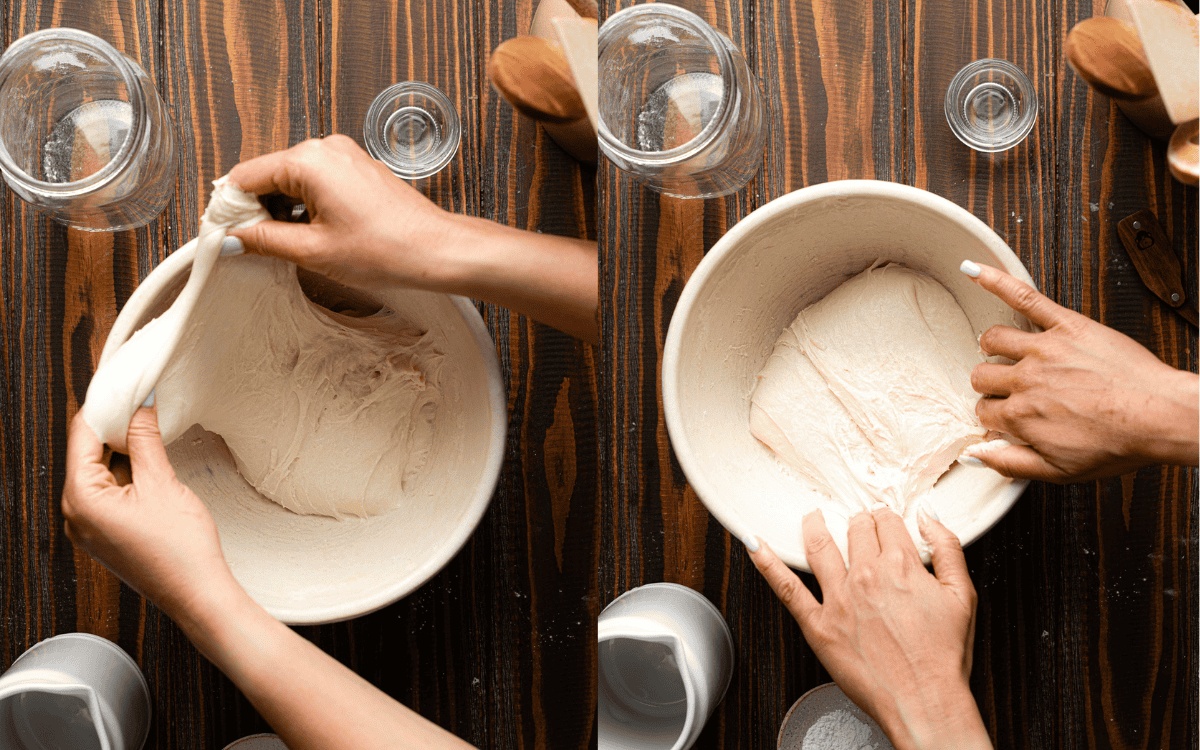
Step 3: Coil fold
Pick up the center of the dough with your fingertips and gently lift it until the dough releases from the bowl. Lightly set the dough back down, tucking the ends under. Give the bowl a quarter turn and repeat. Cover the bowl and let the dough rest for 30 minutes. Then, repeat the coil folding process two more times, allowing the dough to rest for 30 minutes between each fold.
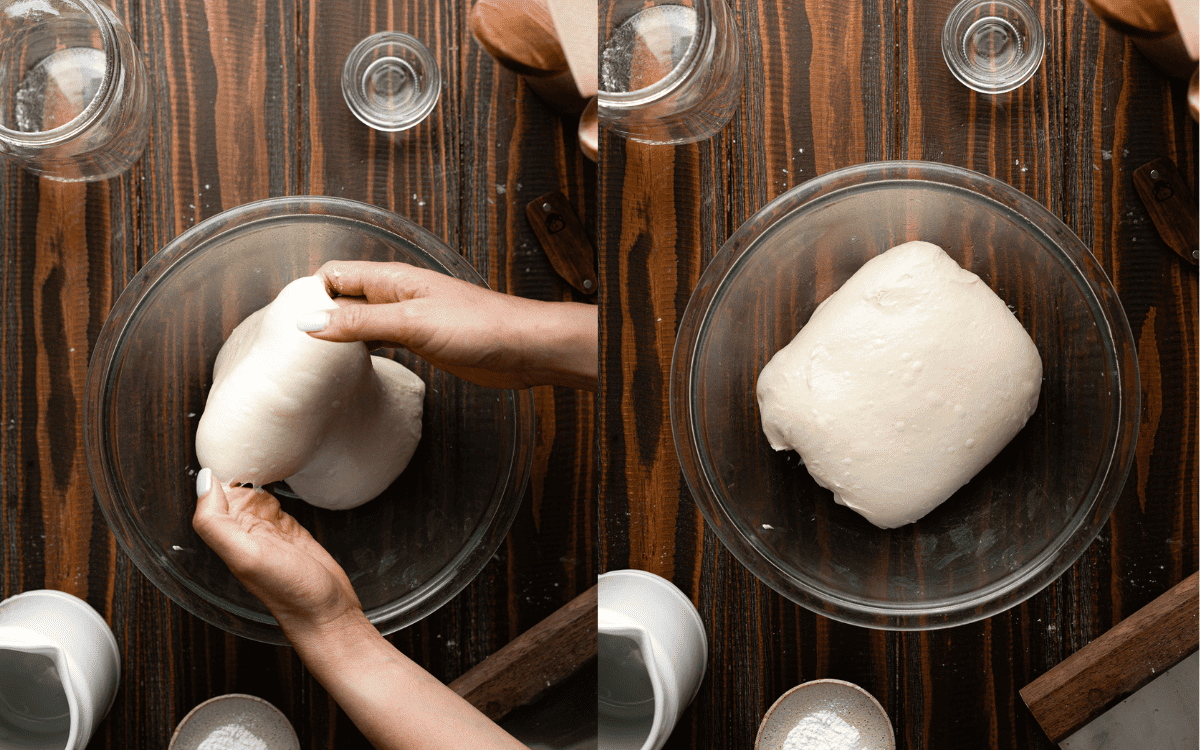
All about bulk fermentation
Bulk fermentation starts the moment the sourdough starter is mixed into the dough and continues through the folding process. This is the most crucial stage of bread baking, as proper timing directly impacts the final texture. If the dough is underproofed or overproofed, the bread may turn out dense and gummy. Paying attention to fermentation cues ensures the best results.
The photo on the left shows the dough after the first stretch and fold and the one on the right was taken about 2 hours following the last coil fold. The dough should be noticeably bubbly and doubled in volume before you move to the next step.
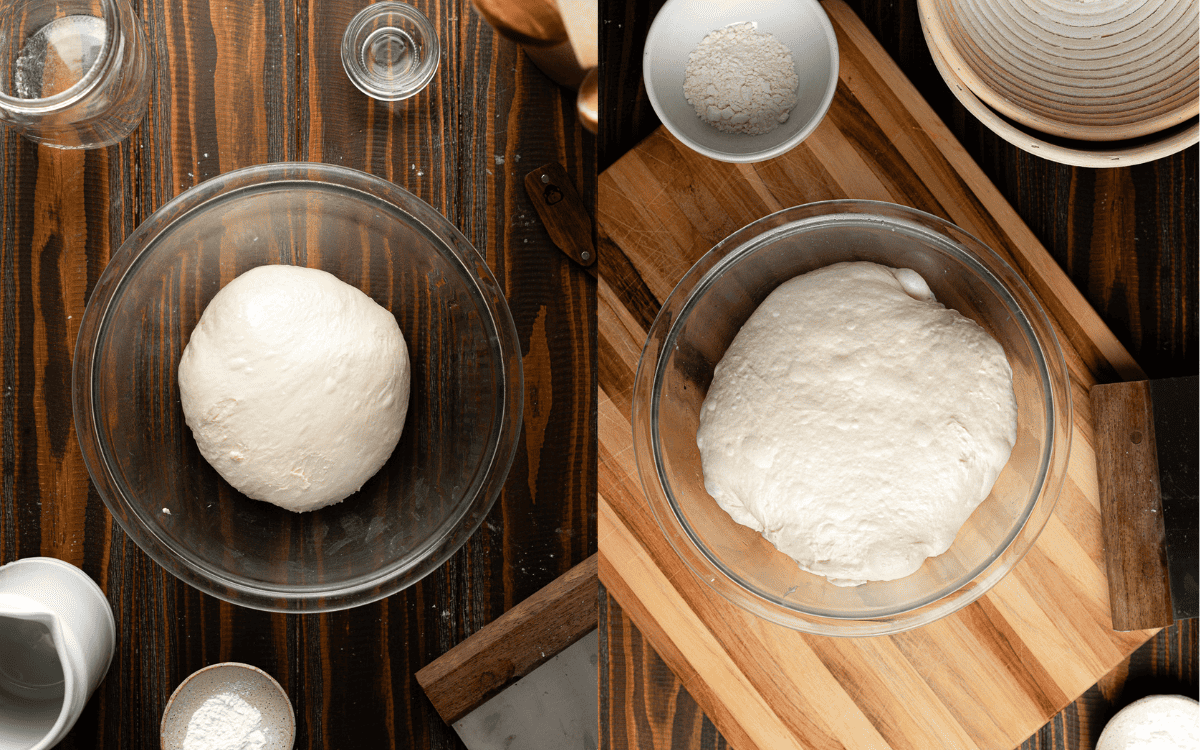
Step 4: Pre shape
Turn the dough out onto a clean surface and flip it so the top of the dough during proofing is facing up again. Gently round the dough into a tight ball. Cover with plastic wrap or a damp tea towel. Let the dough rest for 15 minutes.
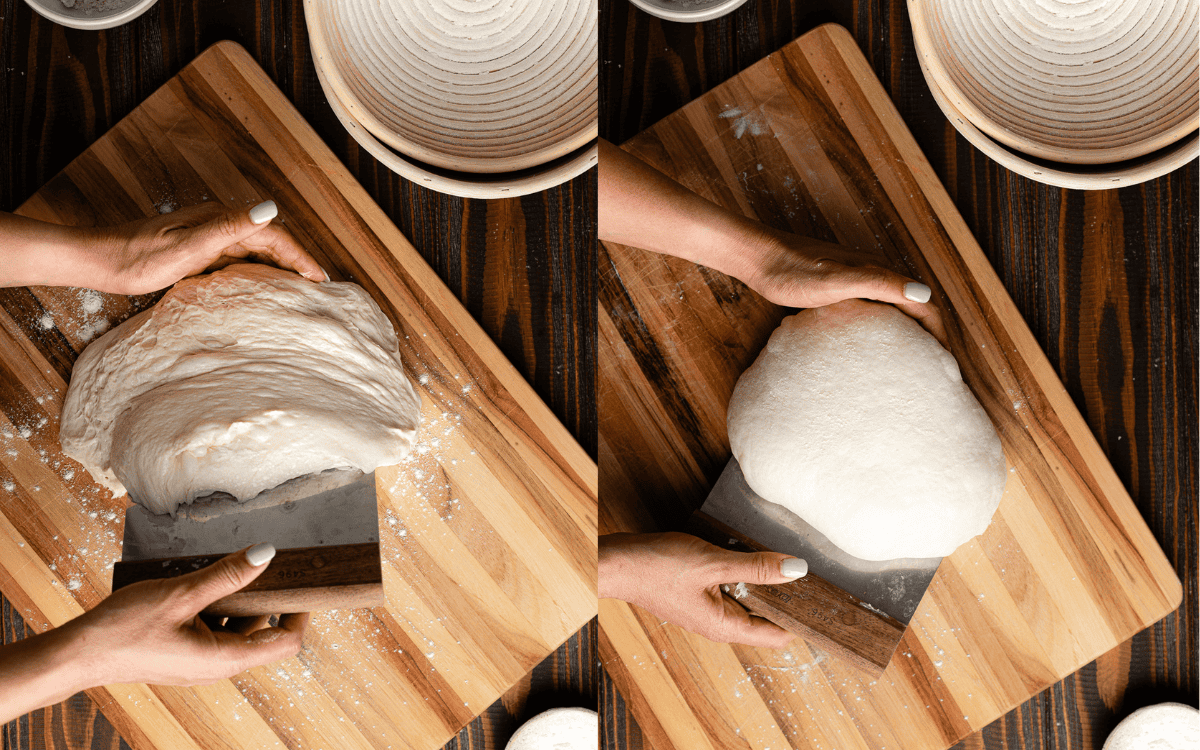
Can I skip preshaping?
Pre shaping is especially important for sourdough bread made with all-purpose flour because the dough has a weaker gluten structure than dough made with bread flour. This step coaxes the dough into its final shape, creates surface tension, and helps build structure, allowing for a better rise and improved final texture.
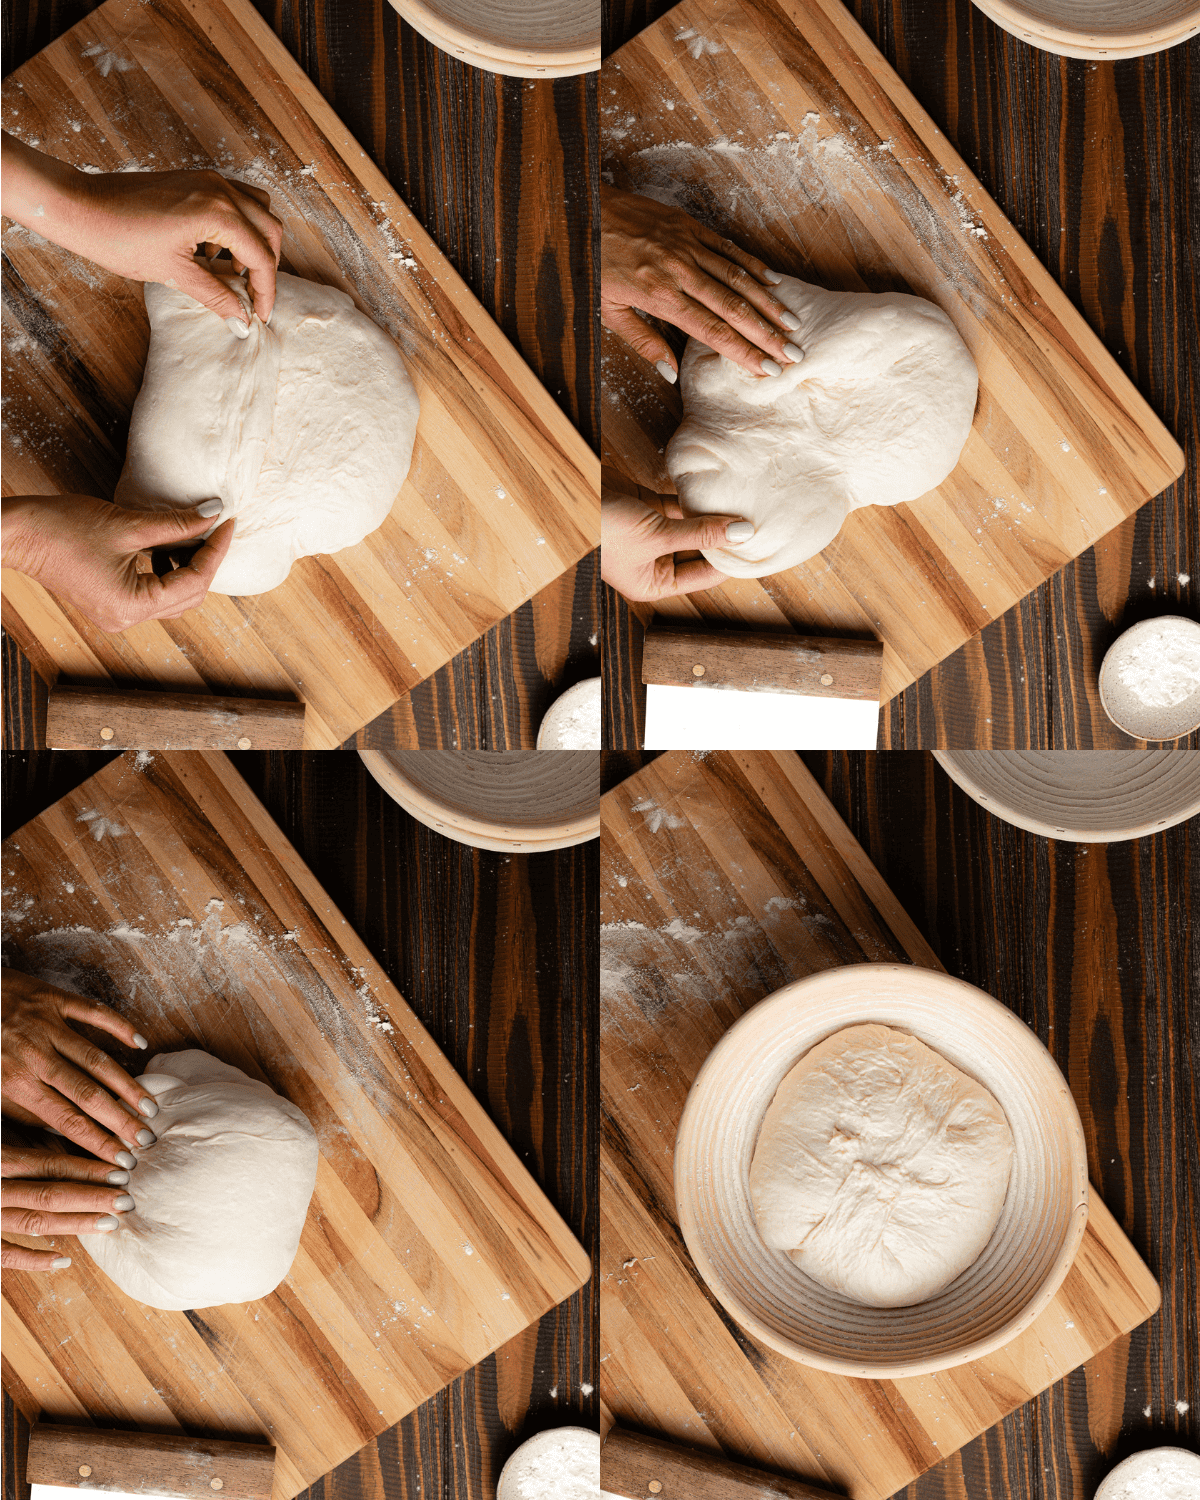
Step 5: Shape the dough
Lightly dust your work surface with flour and flip the dough over so the top is facing down. Gently flatten the dough into a rough rectangle. Fold the bottom of the dough closest to you towards the center, then fold the left and right sides towards the center. Fold the top of the dough over itself and gently flip the dough over. Round the dough into a tight ball and transfer it to a banneton with the seam side up. Cover the dough with plastic wrap and place the dough in the refrigerator to proof overnight.
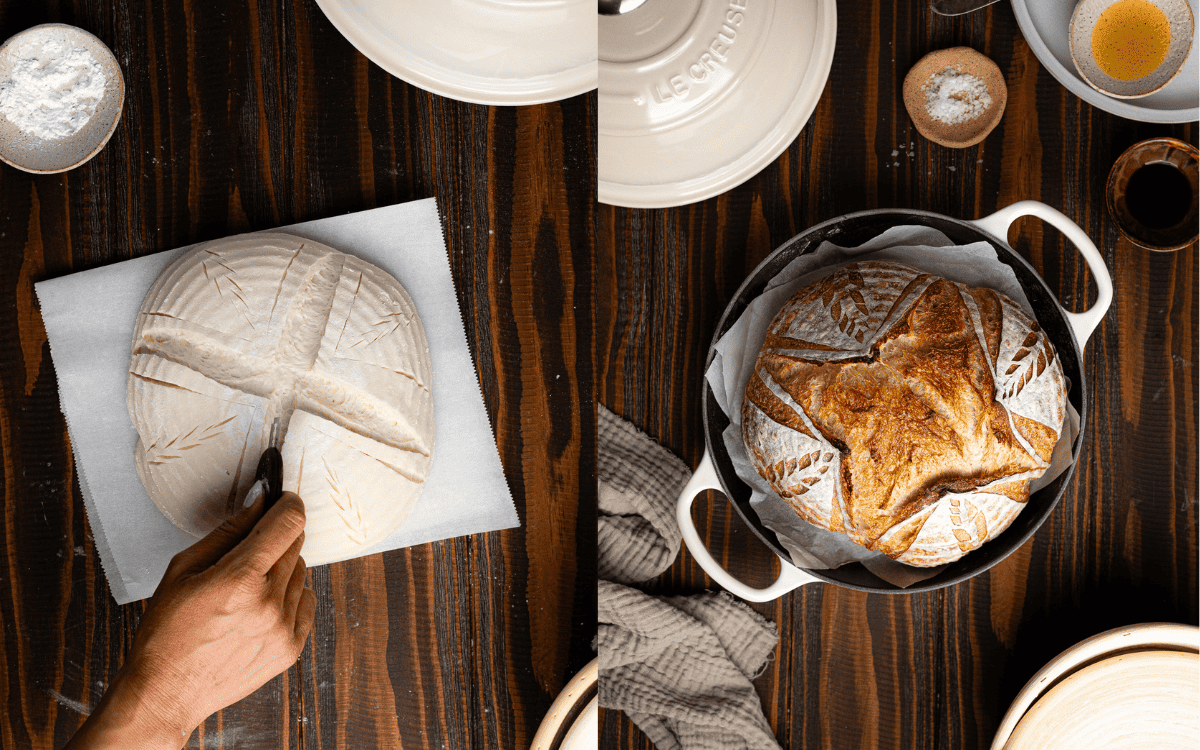
Step 6: Bake
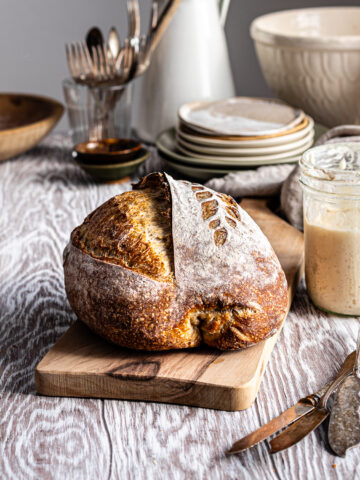
The next day, transfer the dough to a piece of parchment paper and score the top. Bake in a covered Dutch oven at 450°F for 25 to 30 minutes. Then, remove the lid and bake uncovered for an additional 5 to 10 minutes until the crust is golden brown.
Baker's Tips
- Weigh your ingredients: Using a scale is far more accurate and consistent than relying on tablespoons or cups. This helps ensure the success of your bakes and produces reliable much more reliable results.
- Use the windowpane test: A great way to check if your dough has developed enough strength. After the last coil fold, stretch a small piece of dough between your fingers-if it forms a thin, translucent membrane without tearing, the dough is ready for the next step.
- Start with a lower hydration level: All-purpose flour has less gluten than bread flour, making it weaker and less able to handle high moisture levels. This dough has a hydration level of 66%, slightly lower than my Basic Sourdough Bread. The reduced hydration helps strengthen the dough's structure and prevents it from spreading too much during baking.
- Watch the dough not the clock: Fermentation is highly dependent on temperature and the health of your starter. Instead of relying on timed guidelines, look for key visual cues: a well-proofed dough should be airy and doubled in volume.
- Temp your bread: The best way to check if the bread is done is with an instant-read thermometer. It should read 190°F when fully baked.
- Let the bread cool completely: Allow the bread to cool for at least 2 hours before slicing. This allows the crumb to set properly and prevents the bread from drying out. Always use a good quality bread knife to slice your loaves.
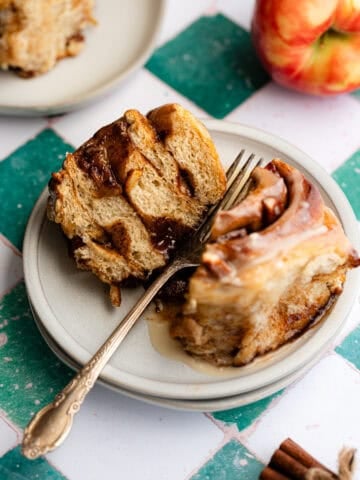
Feeling adventurous? Once you've mastered baking bread using all-purpose flour, try my recipe for Spelt Sourdough Bread, Cranberry Walnut Sourdough or Chocolate Sourdough Bread.
Recipe FAQs
This hydration level of this bread is 66%.
Absolutely! I personally make and feed my starter exclusively with all-purpose flour. It's a great, affordable option and it makes the most versatile starter. Just make sure you use unbleached all-purpose flour.
Each starter is unique so the reasons why they aren't as active can differ. If your sourdough starter isn't rising, start by placing it in a warm spot, such as your oven with the light on or inside the microwave.
You can also experiment with refreshing it less frequently. Wait until your starter looks very bubbly, this indicates a strong, healthy population of yeast, before feeding it again. This may take around 24 hours.
Your bread is most likely underproofed. With more practice, you will become more familiar with understanding the signs of fermentation and how long to proof your dough. While recipes like this one provide a timeline, this is more of a guide since fermentation is highly dependent on your unique environment.
Here are a few tips you can try if your bread consistently turns out underproofed:
1. Proof your dough in a warmer spot.
2. Extend the fermentation period.
3. Watch the dough, not the clock. Wait until the dough is bubbly and noticeably risen before moving to the next step.
You may also like
Did this recipe rise to the occasion?
★★★★★
Leave a star rating and a comment. Your feedback inspires future recipes and helps others feel confident choosing what to bake next. I read and respond to every message.
If you're looking for additional ways to support my work, share this recipe or buy me a Ko-fi. Every little bit helps me keep creating the recipes and guides you enjoy.
Thank you for your support!

All-purpose Flour Sourdough Bread
This section may contain affiliate links
Ingredients
Dough
- 90 grams active sourdough starter
- 226 grams water
- 360 grams all-purpose flour
- 6 grams salt
Topping
- rice flour optional
Click US Customary to view volume measurements
Instructions
Day 1
- Make the dough: Dissolve the active sourdough starter in water.90 grams active sourdough starter, 226 grams water
- Add the flour and salt to the water and mix until no dry flour remains, and the dough is cohesive.360 grams all-purpose flour, 6 grams salt
- Cover the bowl with plastic wrap and let the dough rest for 30 minutes.
- Strengthen the dough: Inside the bowl, gently pick up the dough with your fingertips. Fold the dough over itself, give the bowl a quarter turn, and repeat.
- Transfer the dough to a clean bowl, cover, and let it rest for 30 minutes.
- Perform coil folds: Working inside the bowl, Pick up the center of the dough with your fingertips and gently lift it until the dough releases from the bowl. Lightly set the dough back down, tucking the ends under. Give the bowl a quarter turn and repeat. Cover the bowl and let the dough rest for 30 minutes.
- Repeat the coil folding process two more times, resting for 30 minutes between each fold.
- Bench rest: Let the dough rise untouched for 1 to 2 hours in a warm spot. The dough should be bubbly and doubled in volume before you move to the next step.
- Pre shape: Turn the dough out onto a clean surface and flip it so the top of the dough during proofing is facing up again. Gently round the dough into a tight ball. Cover with plastic wrap or a damp tea towel and let the dough rest for 15 minutes.
- Shape the dough: Lightly dust your work surface with flour and flip the dough over so the top is facing down. Gently flatten the dough into a rough rectangle.
- Fold the bottom of the dough closest to you towards the center, then fold the left and right sides towards the center. Fold the top of the dough over itself.
- Gently flip the dough over and round it into a tight ball. Transfer the dough to a proofing basket or a banneton dusted with rice flour with the seam side up.
- Cold proof: Cover the dough with plastic wrap and place it in the refrigerator to proof overnight (at least 8 to 16 hours)
Day 2
- Prep: Preheat the oven to 500F with a Dutch oven inside.
- Score the dough: Turn the dough out on a piece of parchment paper. Dust the top of the dough with rice flour (optional). Score the dough using a bread lame fitted with a sharp blade.
- Bake: Transfer the dough to the Dutch oven. Reduce the temperature to 450 F for 25 to 30 minutes with the cover on.
- Remove the cover and continue baking for 5 to 10 minutes, until the crust is golden brown or reaches your preferred level of darkness.
- Enjoy and store: Transfer the loaf to a cooling rack and allow it to cool completely, about 2 hours, before slicing. This helps the crumb set properly, prevents moisture from evaporating, and keeps the bread from drying out.
- Store any leftover slices in an airtight container for up to 1 week.
Tips
These recipes were developed and tested using grams for precise measurements. To increase your chances of success, I recommend investing in a kitchen scale. I've included rough volume estimates (in tablespoons and cups), but they might not be totally accurate.
Remember all ovens are unique, these recipes were tested in my oven which runs cooler than others. You might need to lower the temperature if your bake appears to be browning too quickly. Monitor your bake closely and make adjustments if needed.
Notes
- Weigh your ingredients: Using a scale is far more accurate and consistent than relying on tablespoons or cups. This helps ensure the success of your bakes and produces reliable much more reliable results.
- Use the windowpane test: A great way to check if your dough has developed enough strength. After the last coil fold, stretch a small piece of dough between your fingers-if it forms a thin, translucent membrane without tearing, the dough is ready for the next step.
- Watch the dough not the clock: Fermentation is highly dependent on temperature and the health of your starter. Instead of relying on timed guidelines, look for key visual cues: a well-proofed dough should be airy and doubled in volume.
- Start with a lower hydration level: All-purpose flour has less gluten than bread flour, making it weaker and less able to handle high moisture levels. This dough has a hydration level of 66%, slightly lower than my Basic Sourdough Bread. The reduced hydration helps strengthen the dough's structure and prevents it from spreading too much during baking.
- Temp your bread: The best way to check if the bread is baked is with an instant-read thermometer. It should read 190°F when fully baked.
- Let the bread cool completely: Allow the bread to cool for at least 2 hours before slicing. This allows the crumb to set properly and prevents the bread from drying out. Always use a good quality bread knife to slice your loaves.
Nutrition
I am not a nutritionist or dietitian, any nutrition information provided is an estimate.
Leslie B says
I’m glad I doubled the recipe because the boule was gone in 36 hours. The other loaf I shaped and put into a loaf pan, and used it for a breakfast casserole which was also devoured in under 2 days. Easiest & tastiest sourdough that I’ve made so far. I just started 16 months ago, and I keep coming back to your recipes, especially the discard sandwich bread…they are by far the simplest that I’ve found and seemingly fool proof. Thank you!
Hannah Dela Cruz says
This makes me so happy to hear! I'm glad the recipes are working for you.
Cheree says
It’s so interesting to read how other bakers go about their process. This method is practically what I do. I’ll have to look up one of these FB groups, it sounds like fun 🙂
Make It Dough says
You definitely should! I really liked this method and I think I'll stick to some of the methods I learned here. Check out these groups:
Perfect Sourdough - https://www.facebook.com/groups/perfectsourdough/
Sourdough Bread Baking - https://www.facebook.com/groups/SourdoughBreadBaking/