

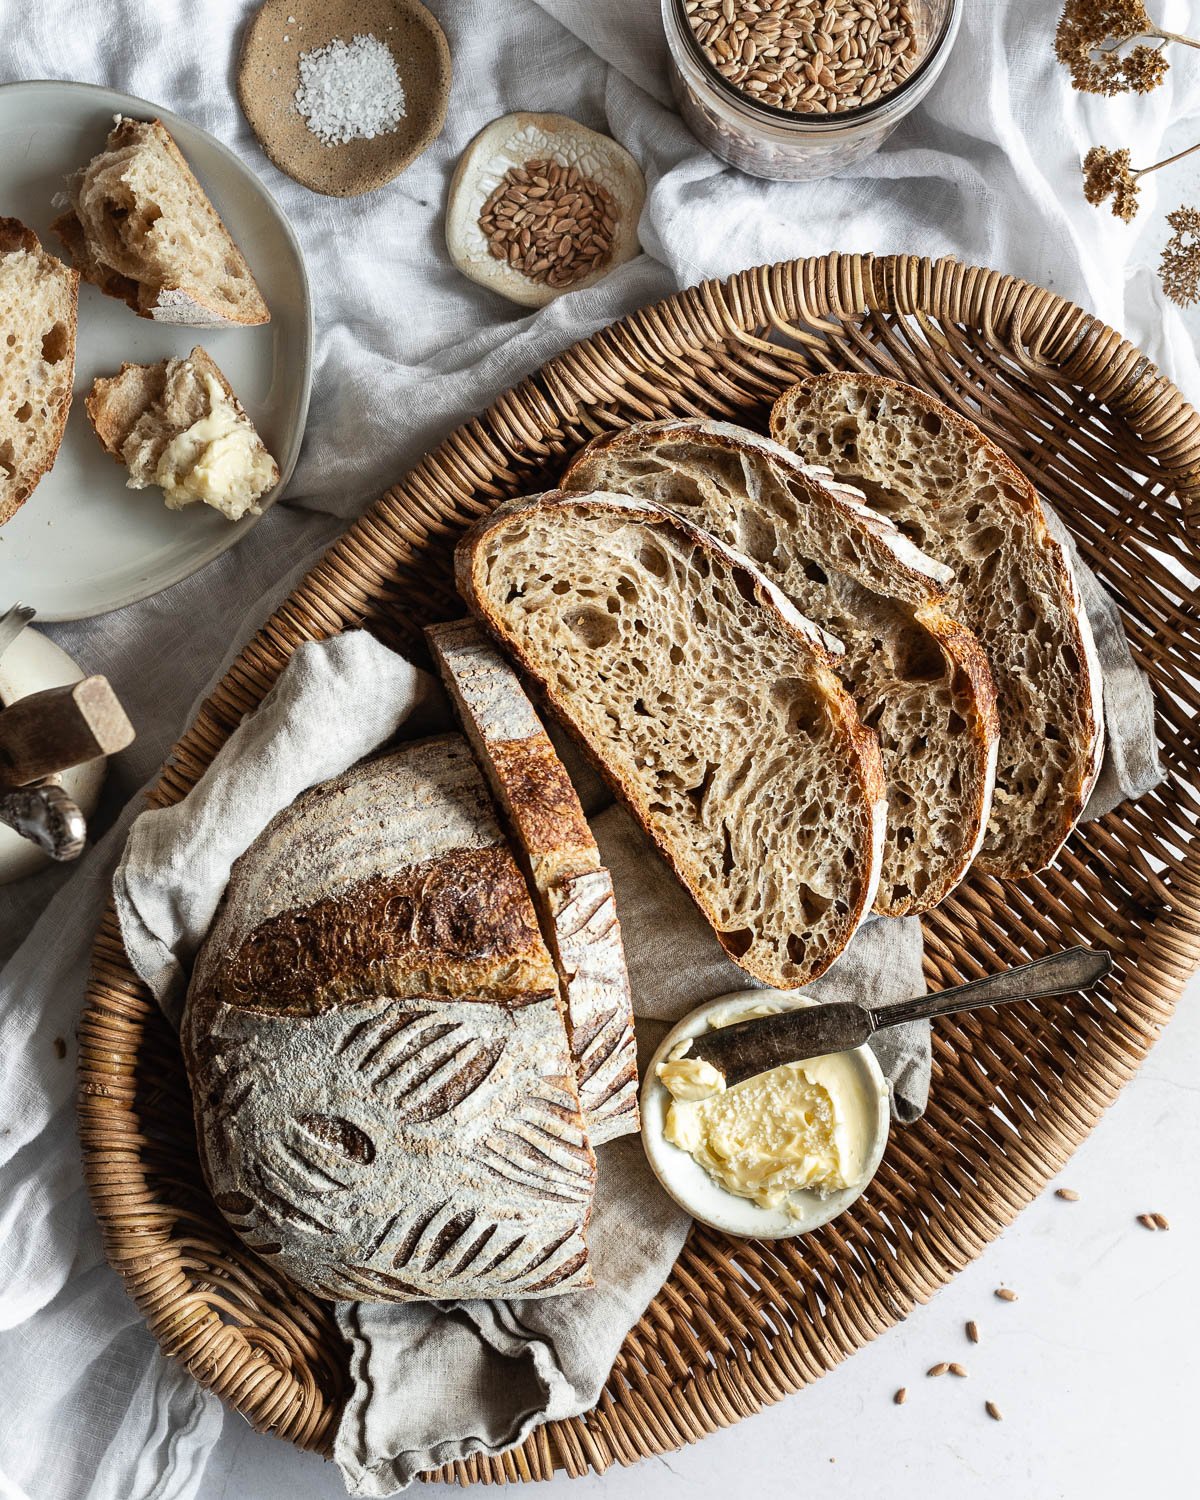
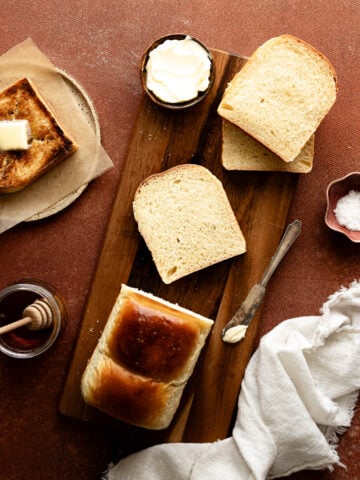
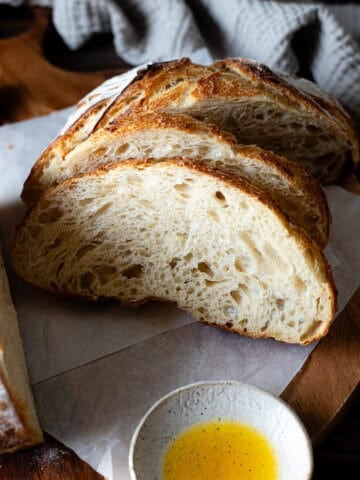
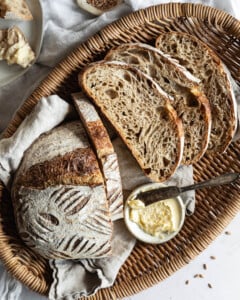
Spelt Sourdough Bread is a tasty, crunchy bread with a naturally sweet and nutty flavor. Spelt is an excellent introduction to ancient grains because of its inherent sweetness. Adding a bit of bread flour makes the bread fluffy and airy, highlighting spelt's soft texture. You'll love this bread in sandwiches, smeared with salted homemade butter or just tear off a chunk and eat it on its own.
Jump to:
What is spelt?
Spelt is a type of wheat. It's considered an ancient grain since it has been farmed in its present form for thousands of years and hasn't been selectively bred for hardiness and productivity (source: The Whole Grains Council). Unlike white flour which only consists of the endosperm, spelt flour is usually not sifted and is sold with all parts of the grain; the bran and germ included. This makes it more nutritious and higher in fiber.
Spelt is one of my favorite grains. This recipe doesn't use 100 percent spelt flour, which can make bread a bit dense, it combines spelt with bread flour to create a lighter loaf with a creamy, honeycomb crumb. While it takes about 2 days to make, most of the process is hands-off. The natural sweetness and nuttiness of spelt perfectly complements the delicious tang of sourdough. Letting the dough ferment for a long time results in a light, airy texture that makes the most of spelt's inherent softness.
Try substituting spelt for whole wheat in your favorite crusty sourdough bread recipe for added softness and sweetness.
Is Spelt Gluten Free?
Like all wheat, spelt contains gluten. It is quite high in protein, however, because of the molecular structure of gluten in spelt (it has more gliadin than glutenin), it forms weaker bonds that are more water soluble. This results in a dough that's more extensible, stretchier and more prone to spreading. While spelt is easier to digest than conventional wheat, it is not gluten-free and may not be safe to consume for people with gluten intolerance or celiac disease.
Curious about ancient grain and other types of flour? Check out this guide on the 12 Best Flours to Bake With.
What you need
Spelt flour - Spelt imparts a natural sweetness and softness to bread
Water - The main source of hydration
Active starter - Main leavener for this recipe, it allows dough to rise and imparts a tangy flavor
Salt - Enhances the flavor of these bagels and strengthens the gluten structure
Step-by-step instructions
- Mix the dough: Combine ingredients and mix until no dry bits of flour remain. Let the mixture rest for 30 minutes.
- Strengthen the dough: Perform 4 to 5 sets of stretch and folds in 30 minute intervals.
- Rest: Let the dough rest untouched in bowl covered with plastic wrap for 1 hour.
- Pre-shape: Round the dough into a tight ball, cover and let the dough rest for 15 minutes. Pre-shaping will create additional tension and prepares the dough to hold its final shape.
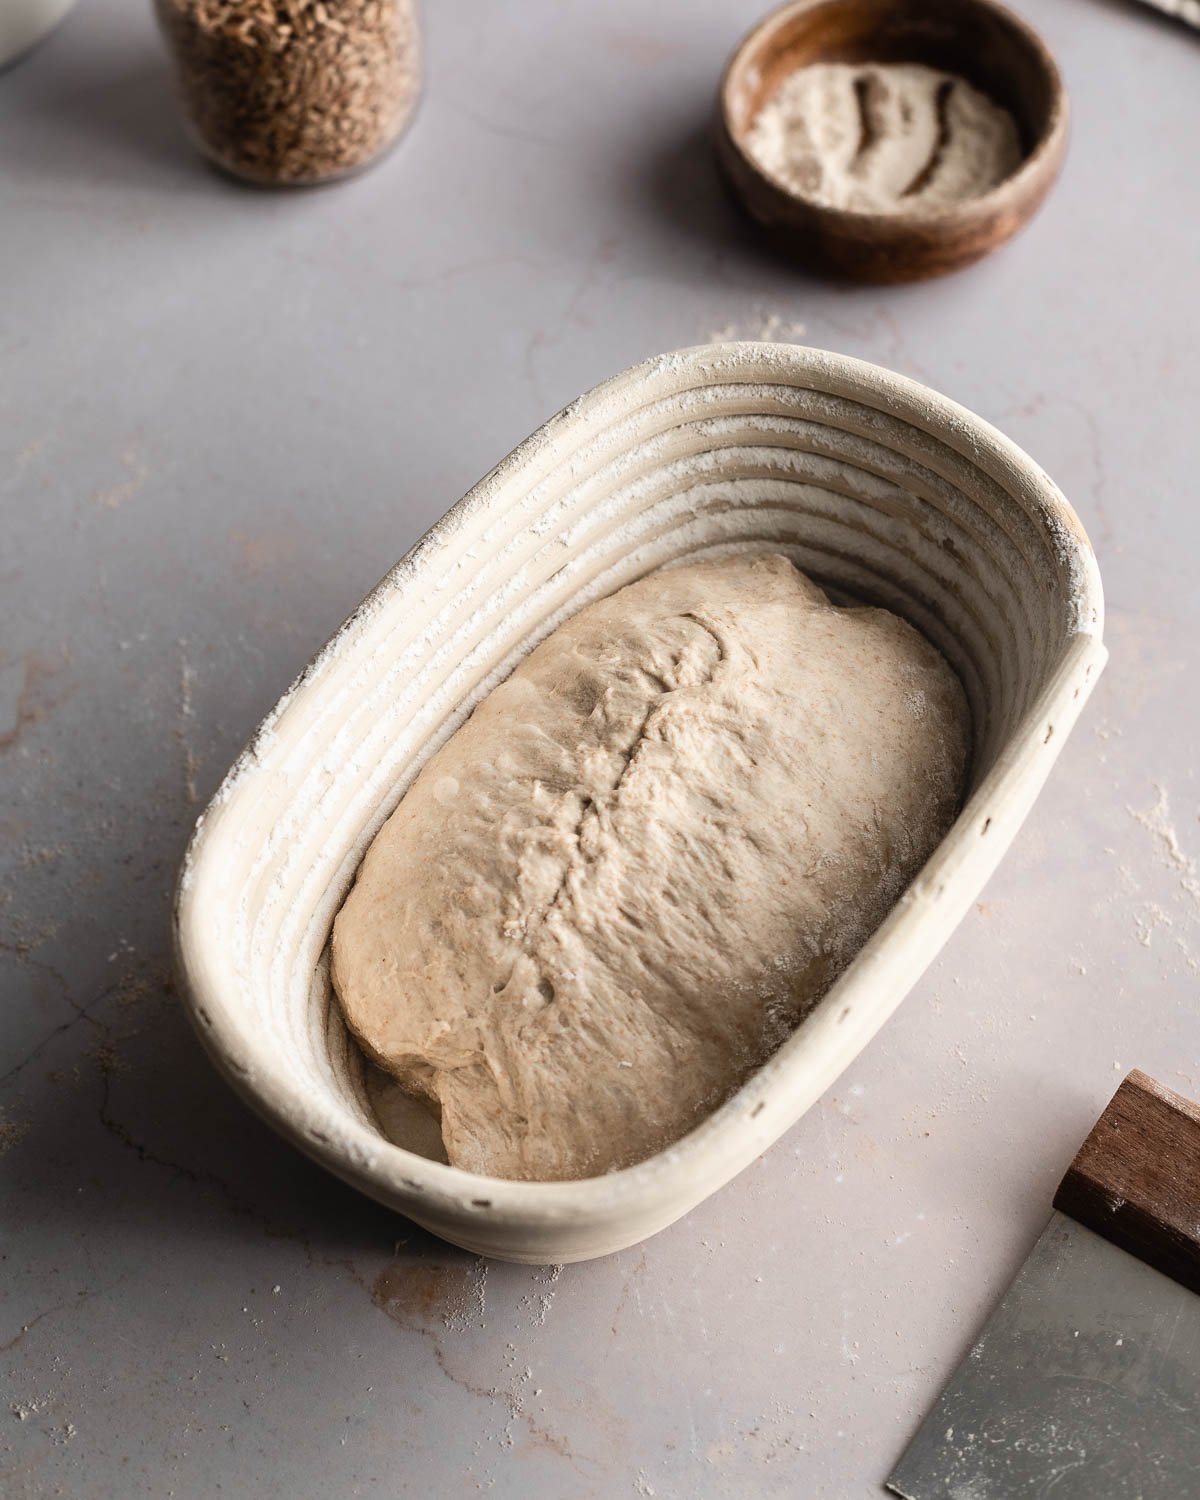
- Shape: Shape the dough and place it in the proofing vessel of your choice.
- Cold proof: Place the dough into the refrigerator overnight. This will allow your dough to further develop flavor while preventing it from becoming over proofed.
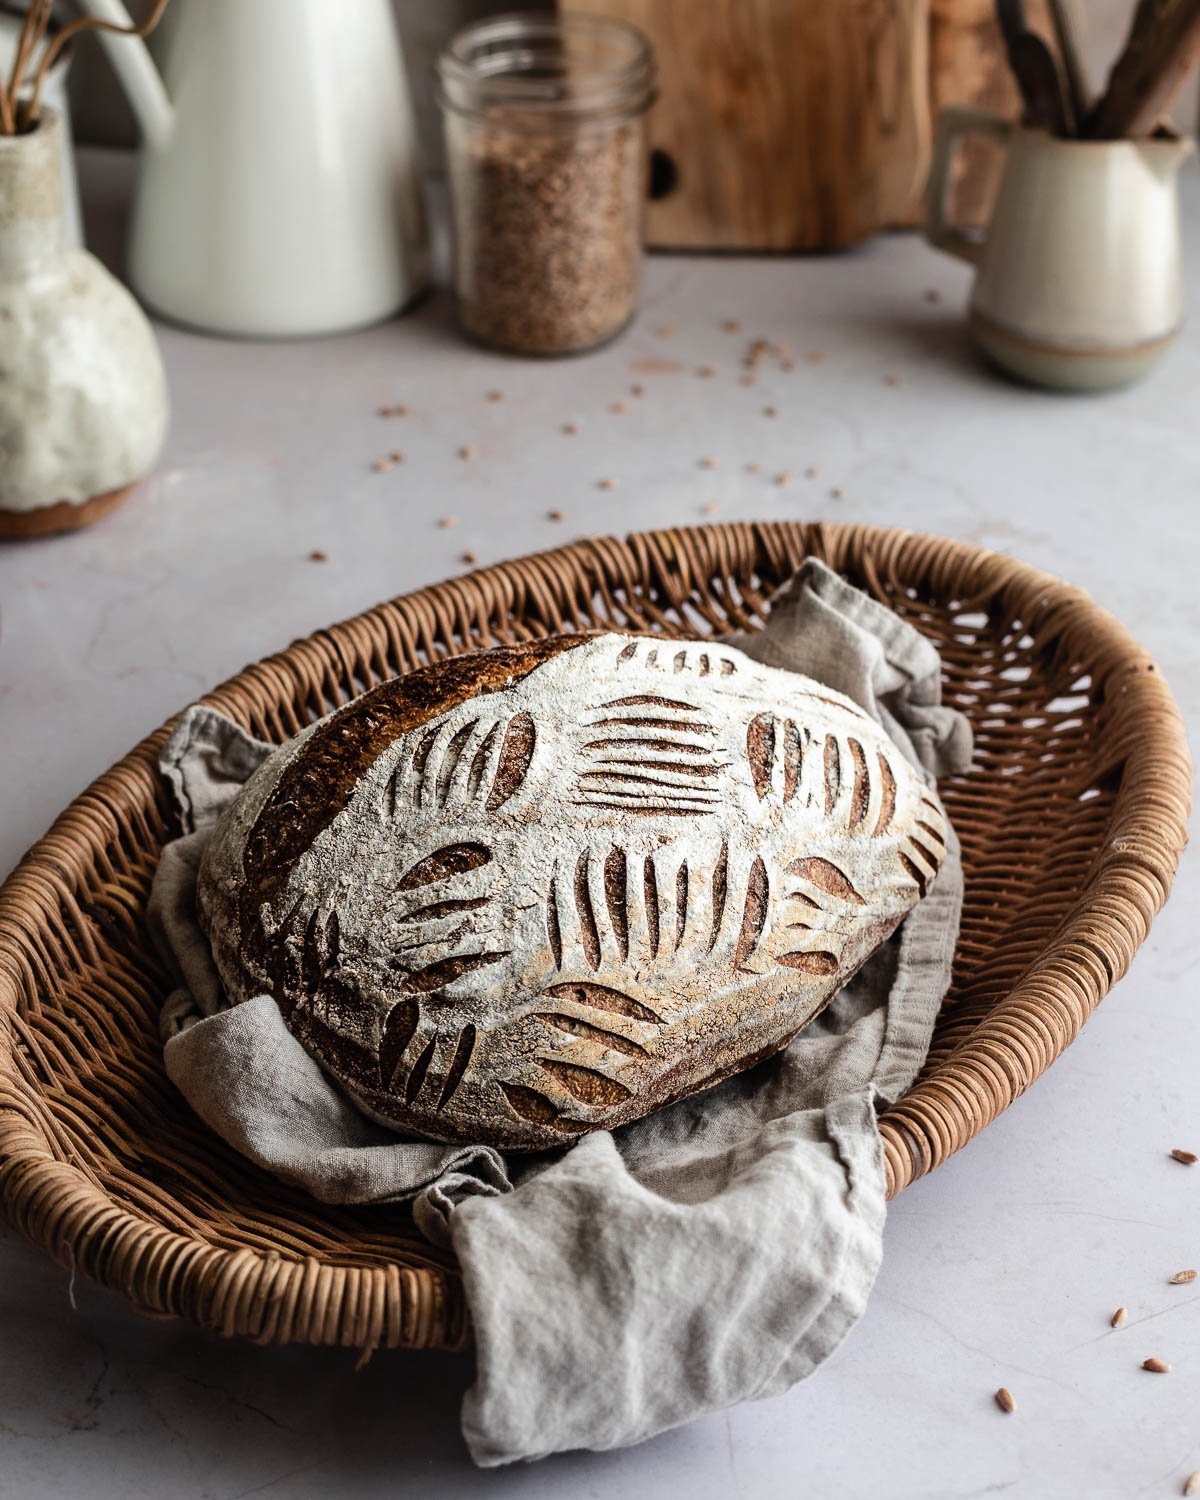
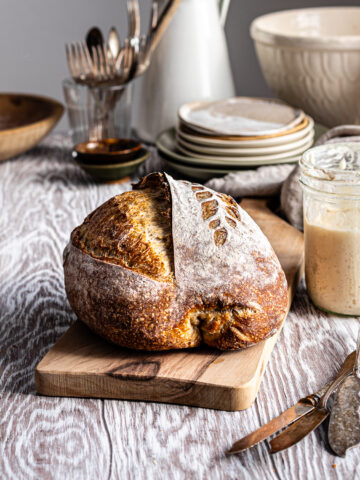
- Score: Cut a large gash on the dough to direct the release of steam and expansion of the bread.
- Bake: Bake the dough in a Dutch Oven covered for 30 minutes and uncovered for 10 to 15 minutes depending on how dark you want your crust.
Need more detailed step-by-step bread making explanations? Check out my Sourdough Bread 101 virtual course!
Bulk fermentation
Fermentation begins as soon as the starter is mixed into your dough. In my experience, spelt dough ferments a little faster than dough made with white flour. This step of the process usually takes about 4 to 4 and a half hours for me. However, this process is highly variable, depending on the activity of your starter and your environment. I'll be giving time cues here but keep in mind that fermentation may occur at a different pace in your home kitchen. I like to start a 4 hour timer as soon as I mix my starter to my dough, then I observe my dough as the end of my timer gets close. If my dough looks airy, bubbly and has increased in volume then I proceed to shaping. Pay attention to how your dough is progressing, feel free to subtract or add time depending on how it looks.

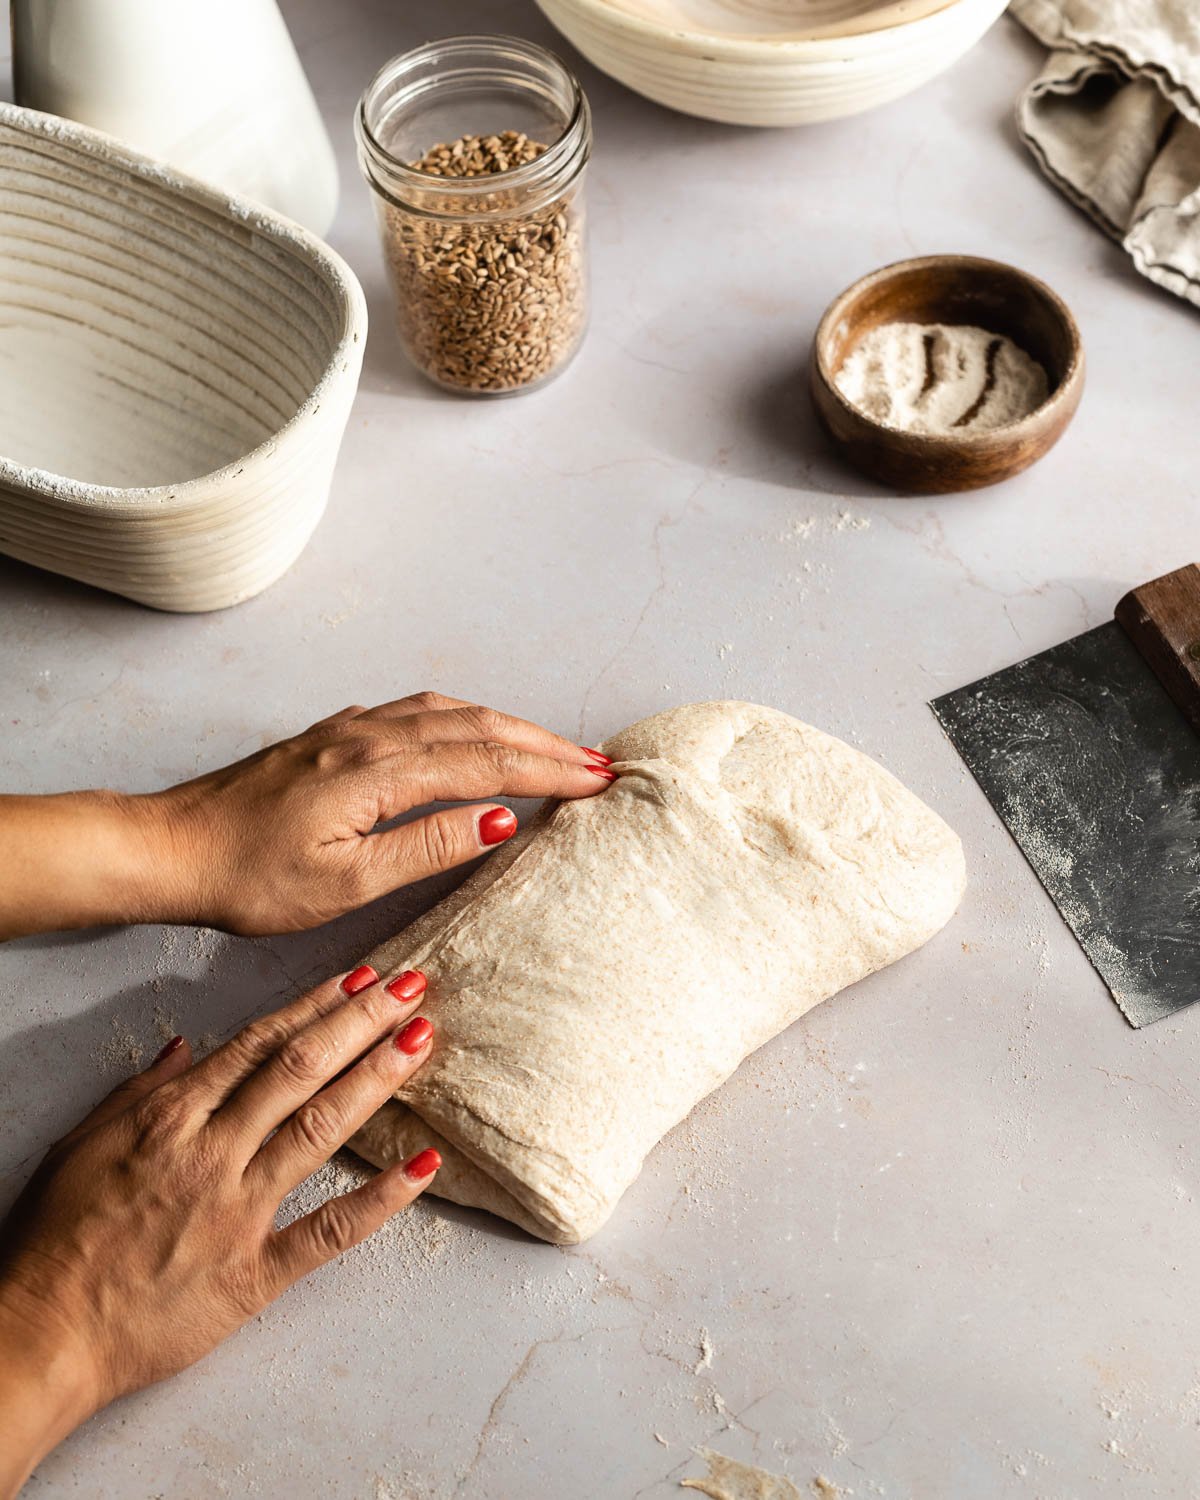
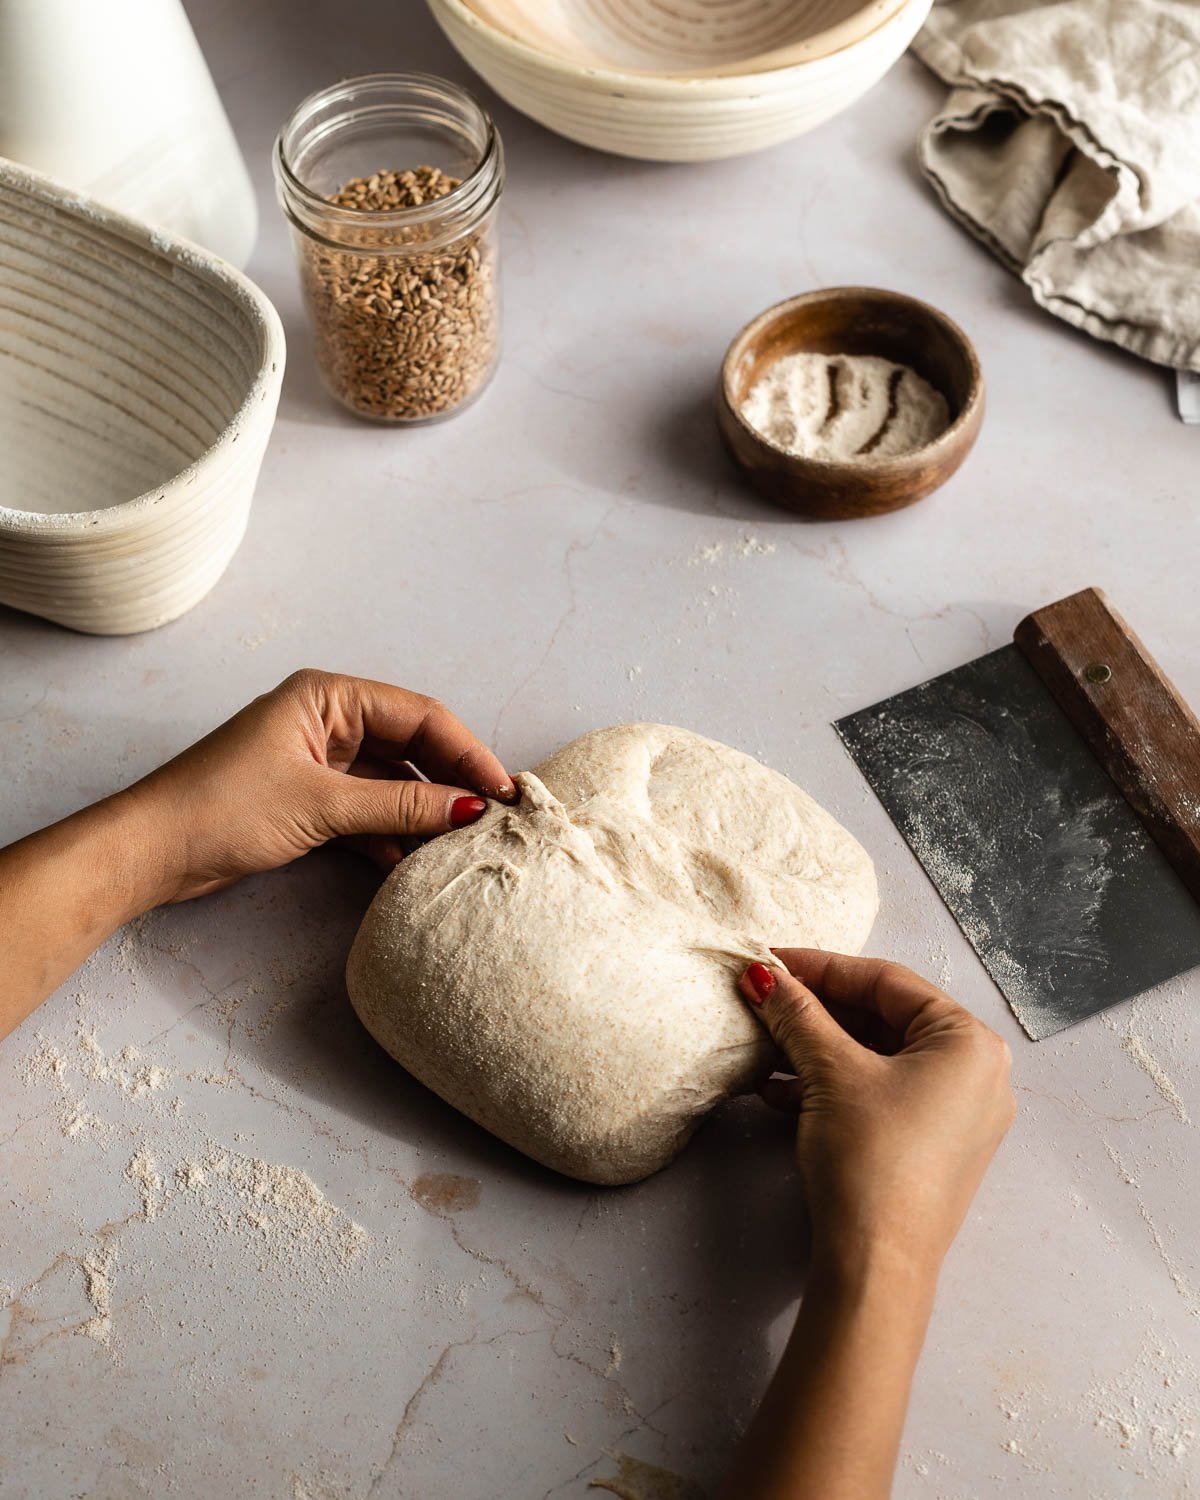
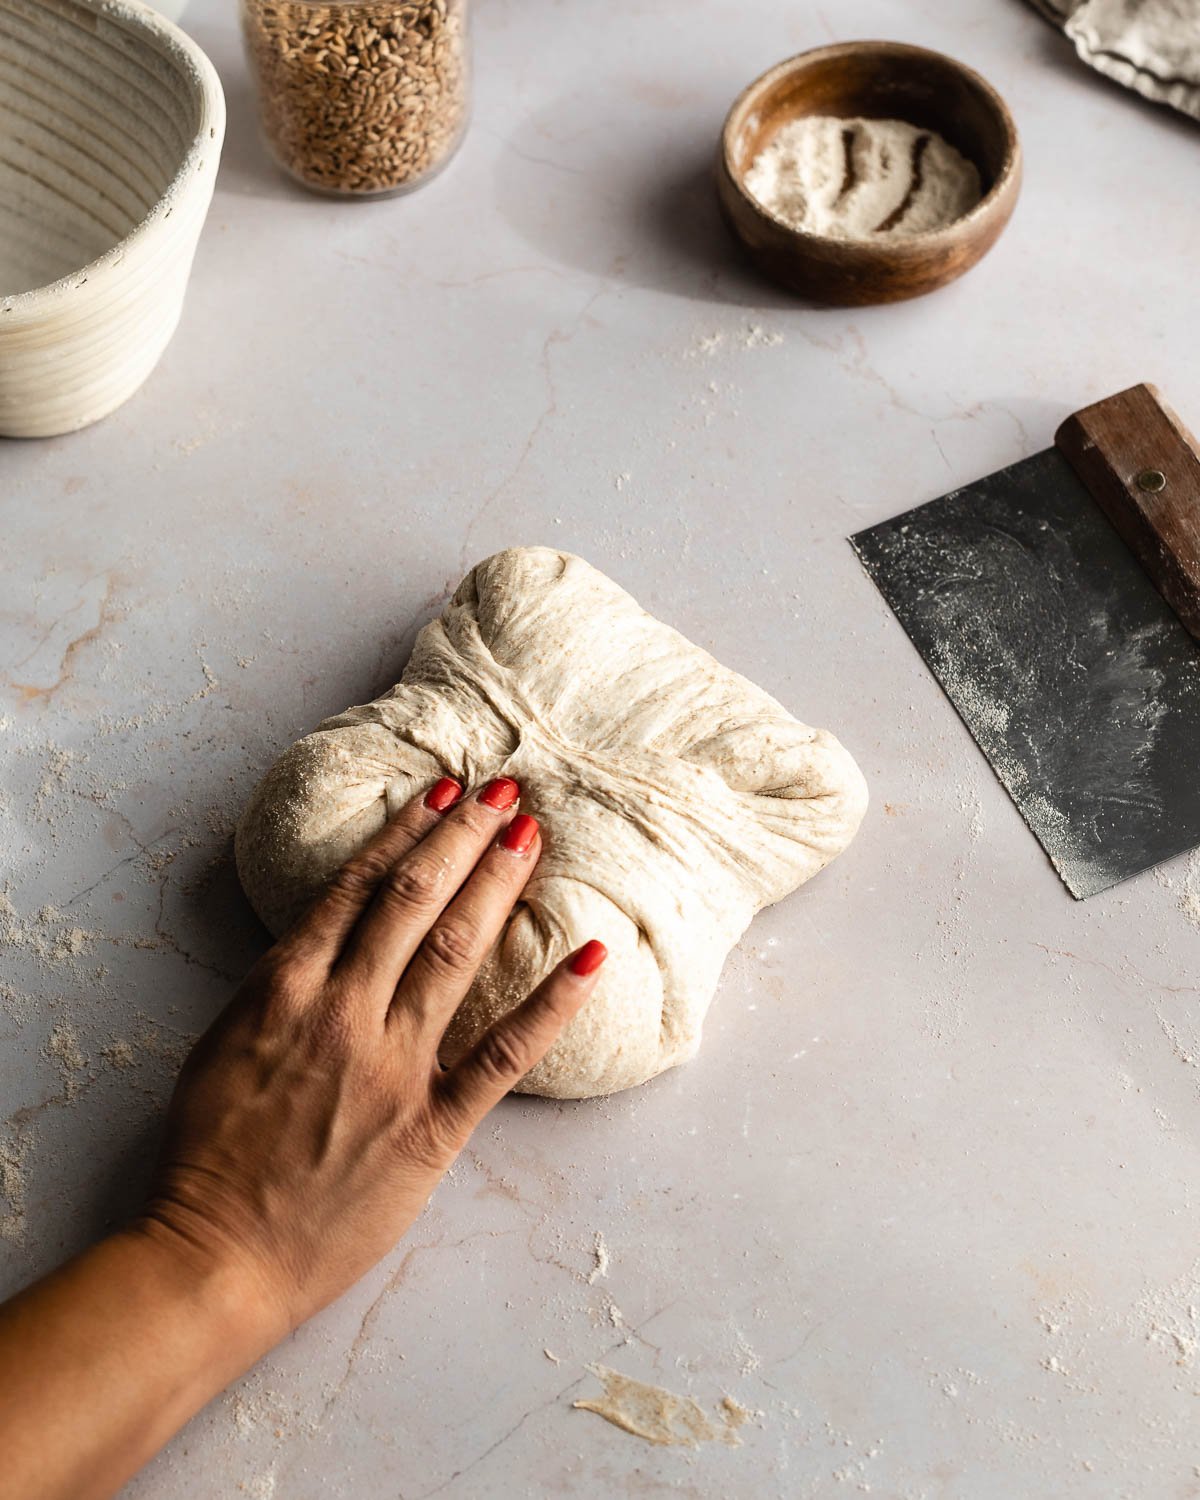
Shaping
Because of the structure of this dough, it requires more aggressive shaping.
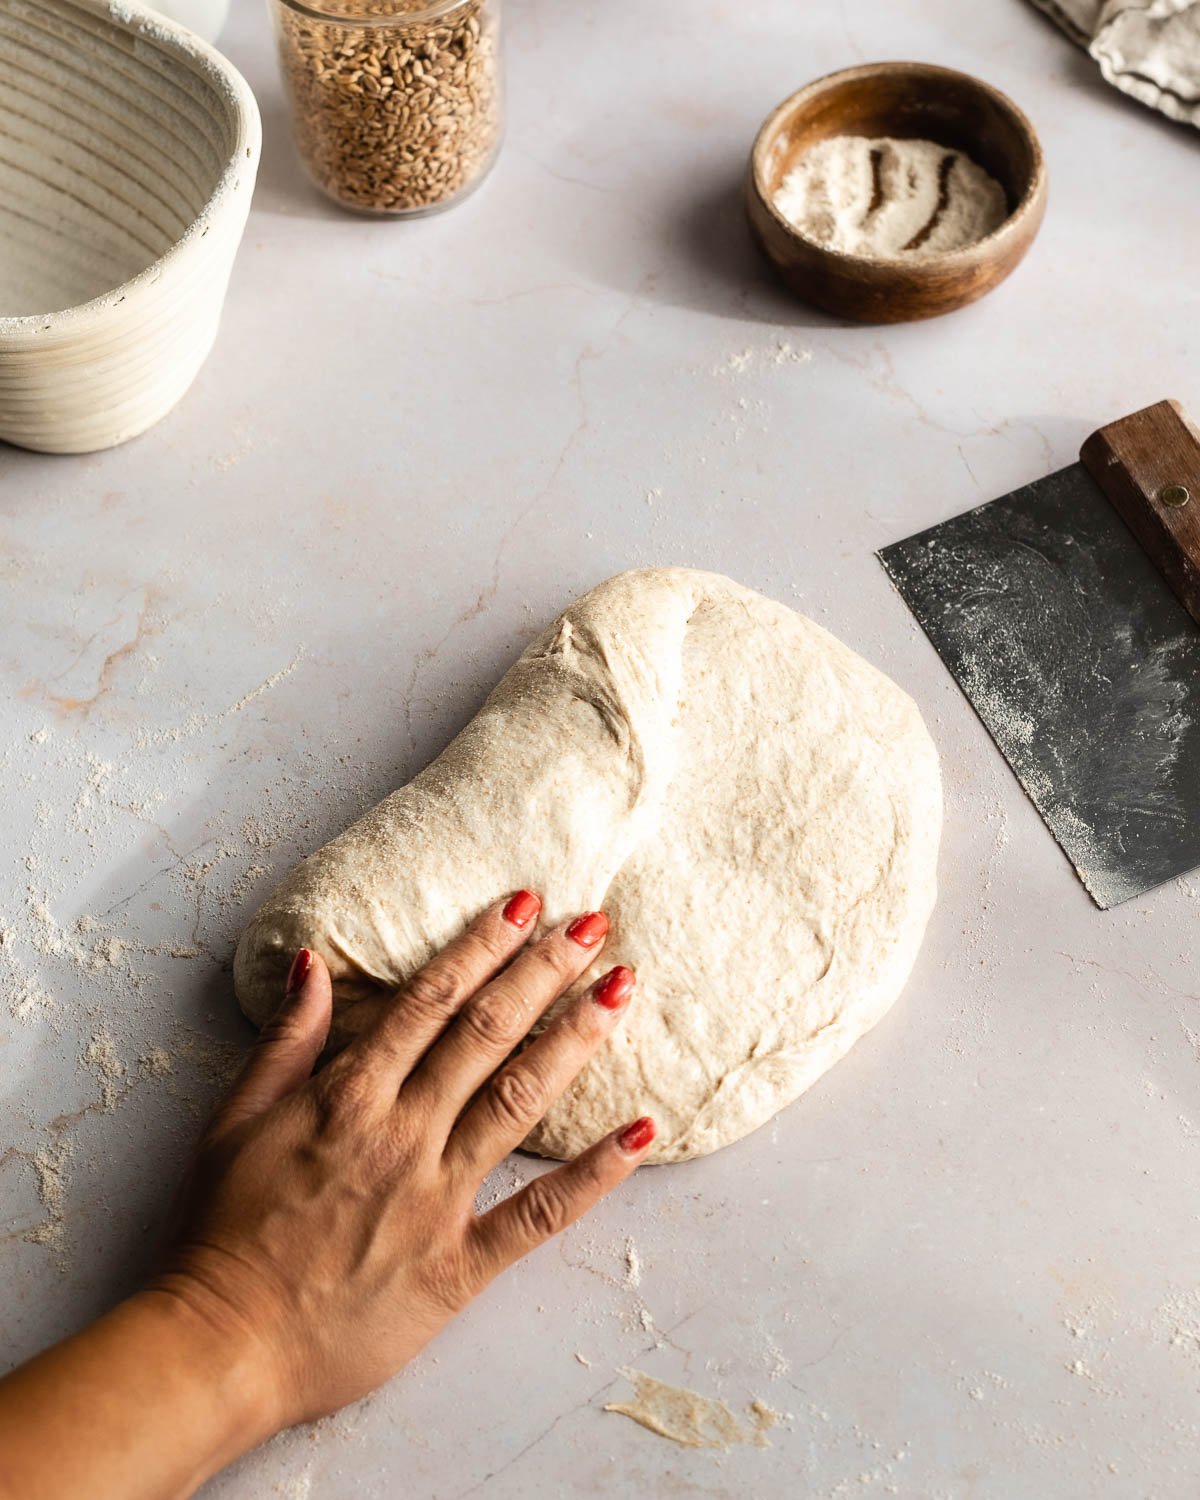
1 Fold left side of the dough towards the center
2 Fold the right side over the left
3 Fold the bottom up towards the center

4 Fold the top of the dough over
5 Stitch the dough beginning with the center of the dough
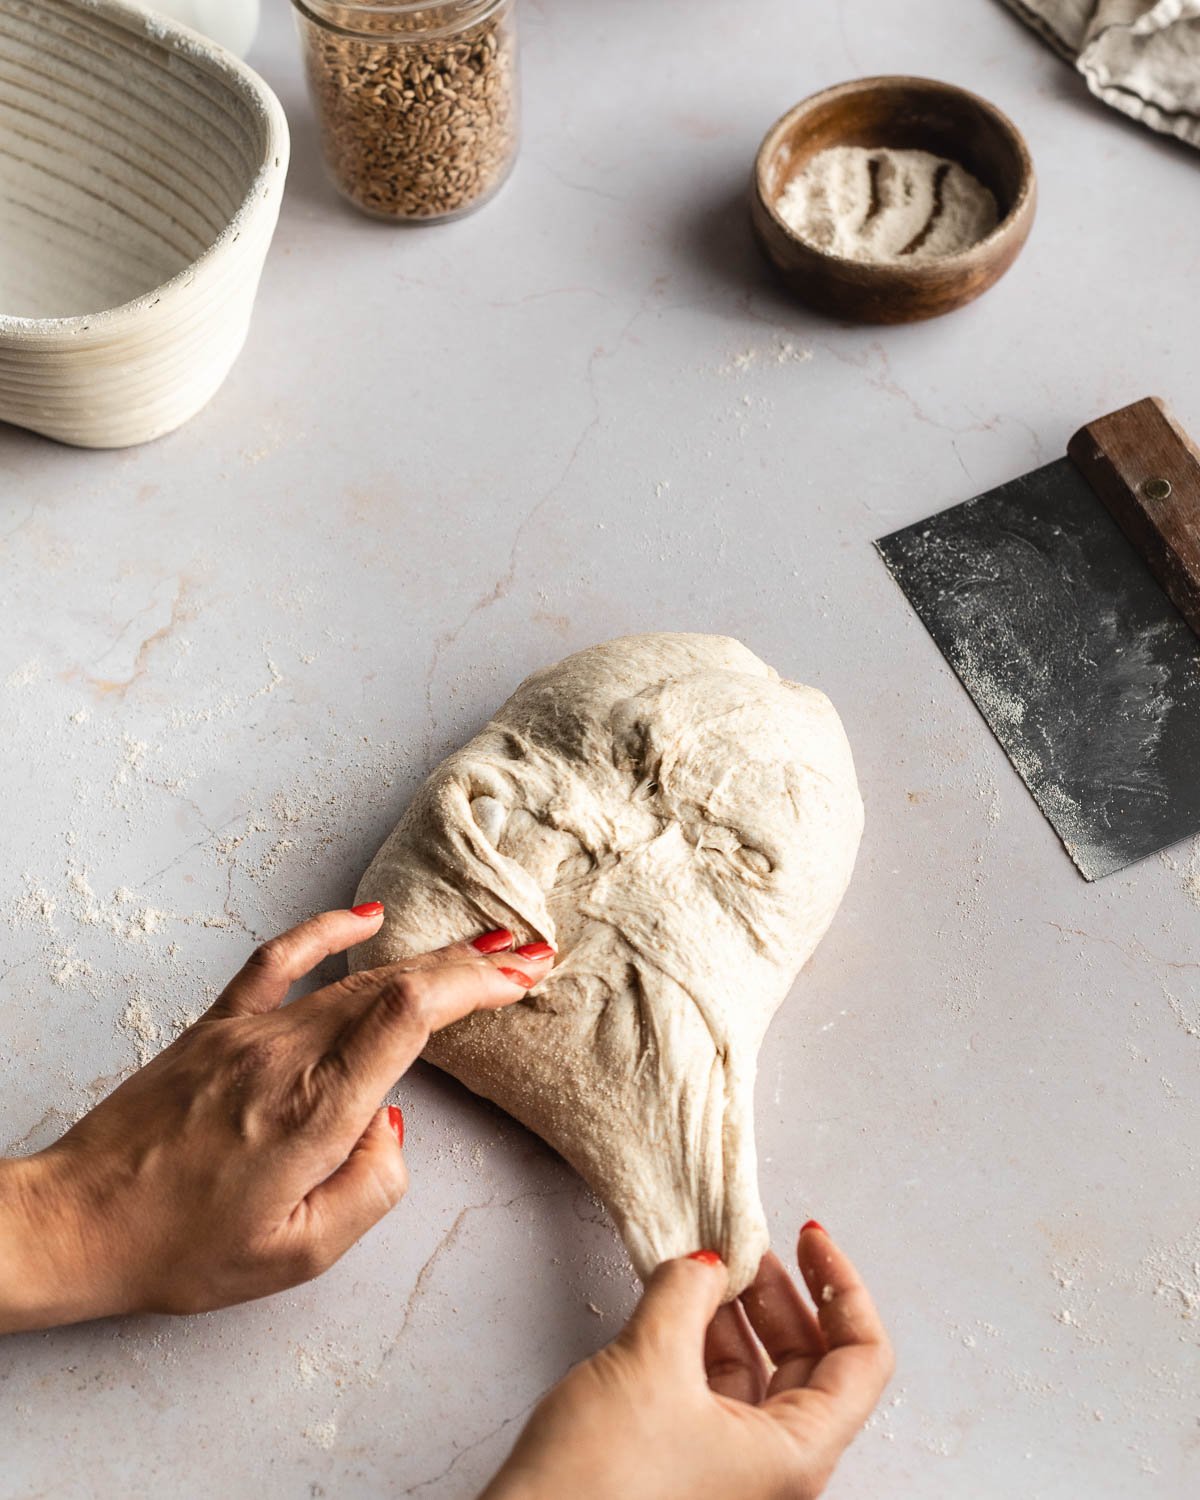
6 Stitch the top and bottom
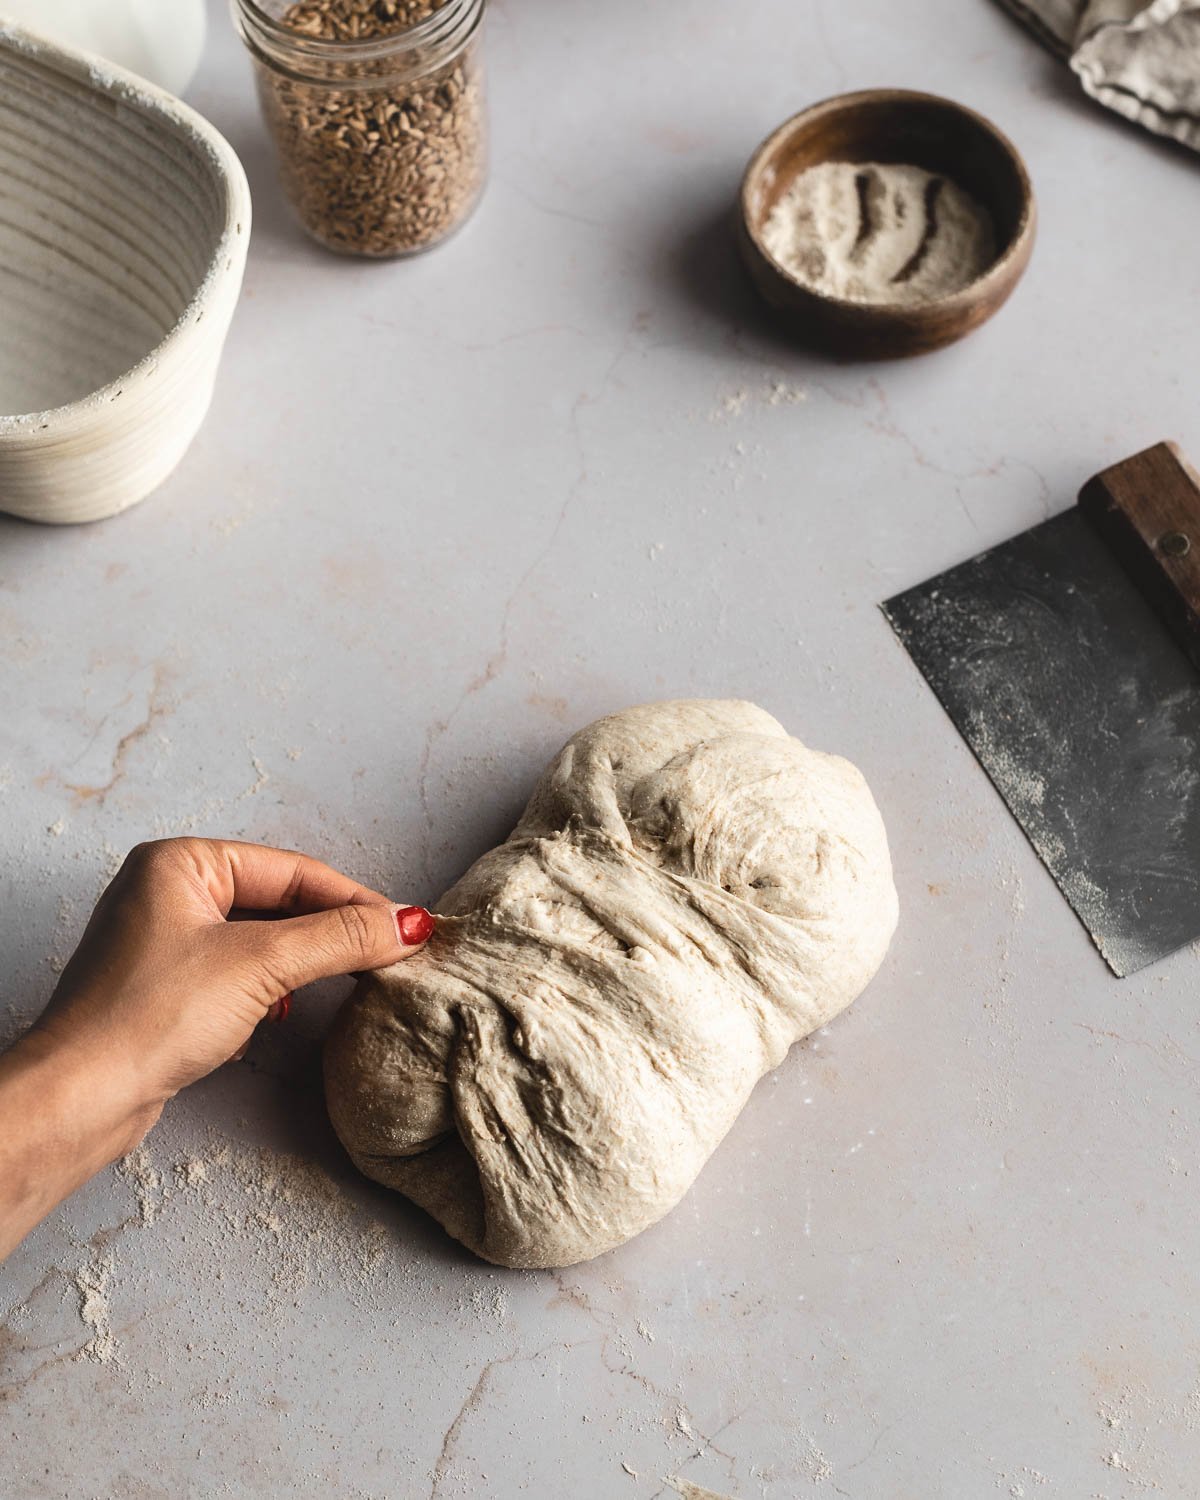
7 Fold the top of the dough and gently flip the dough over so the seam is in the bottom

8 Use a bench scraper or your fingertips to drag the dough towards yourself to gently increase the tension without tearing the surface of the dough
Want to learn more about shaping sourdough? Check out my detailed guides on How to Shape a Boule and How to Shape a Batard.
Scoring
Scoring bread has a very important purpose, it directs the expansion of the dough and gives the steam a way to escape while it bakes in the oven. Since this bread will not rise in the oven as dramatically as a normal sourdough loaf, it's the perfect candidate for decorative sourdough designs. Just make sure not to cut the dough too deep so it will hold its shape. Use a lame or a sharp paring knife, if you don't have one.
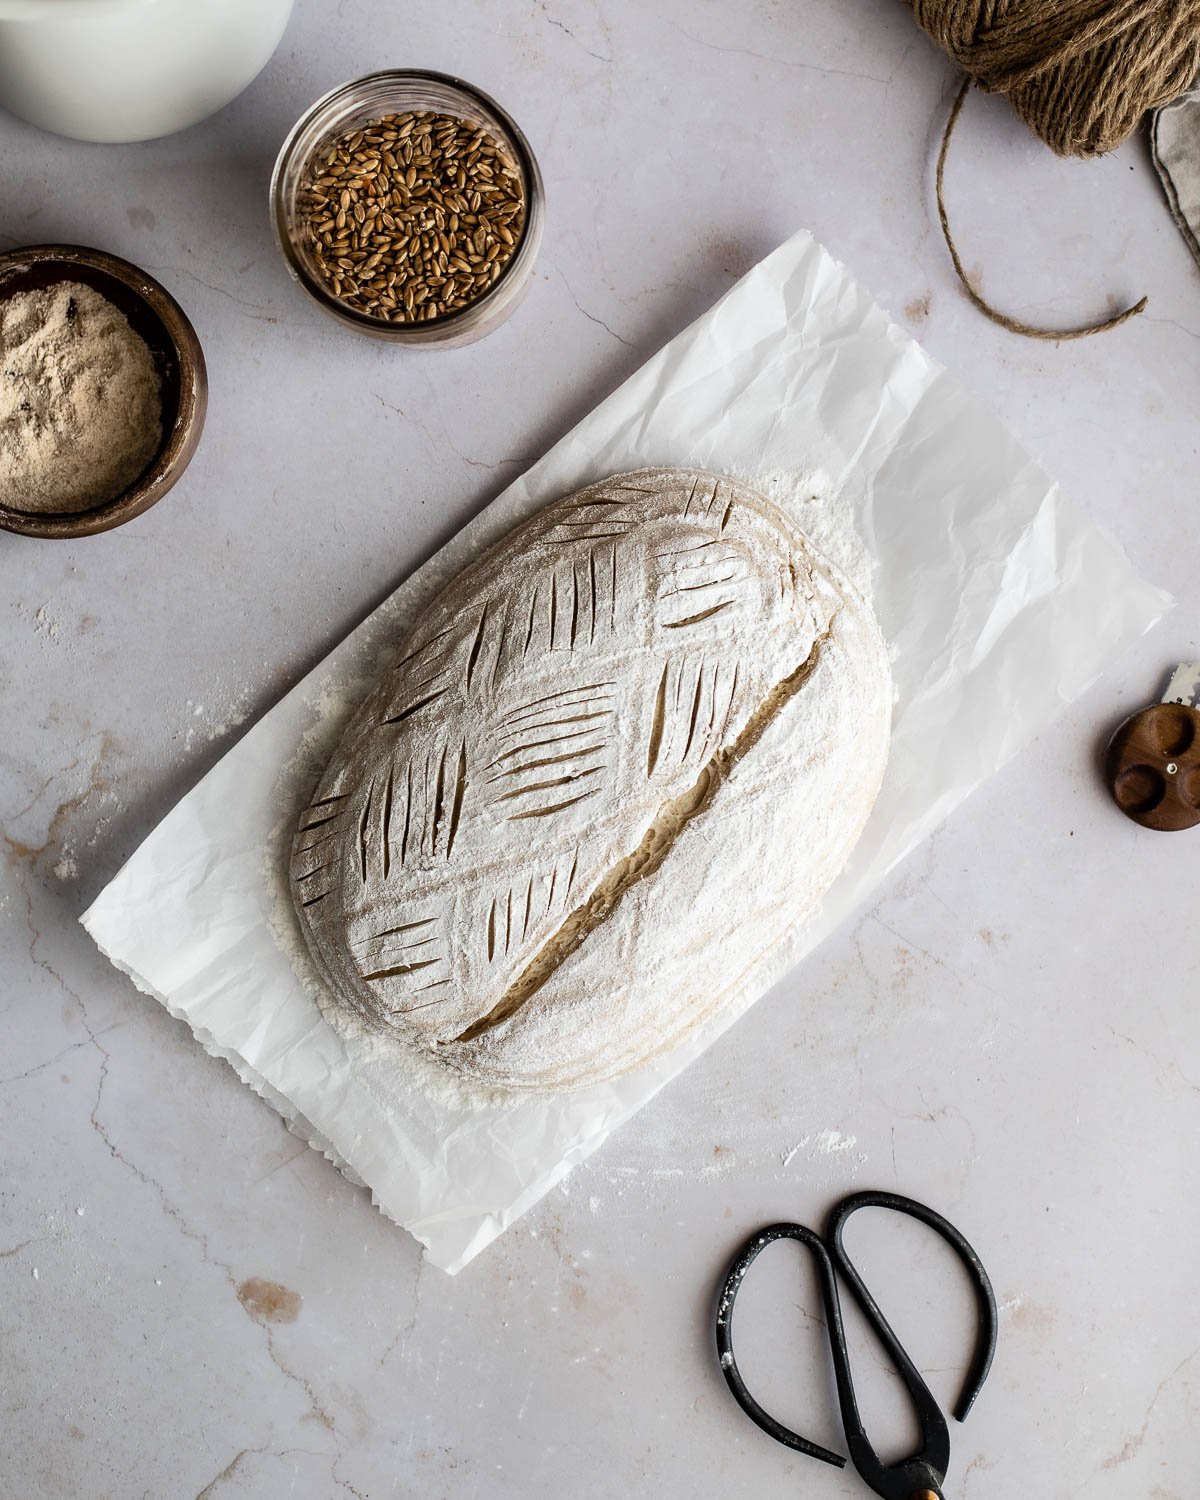
Check out this video to see how I scored this loaf.
Recipe FAQs
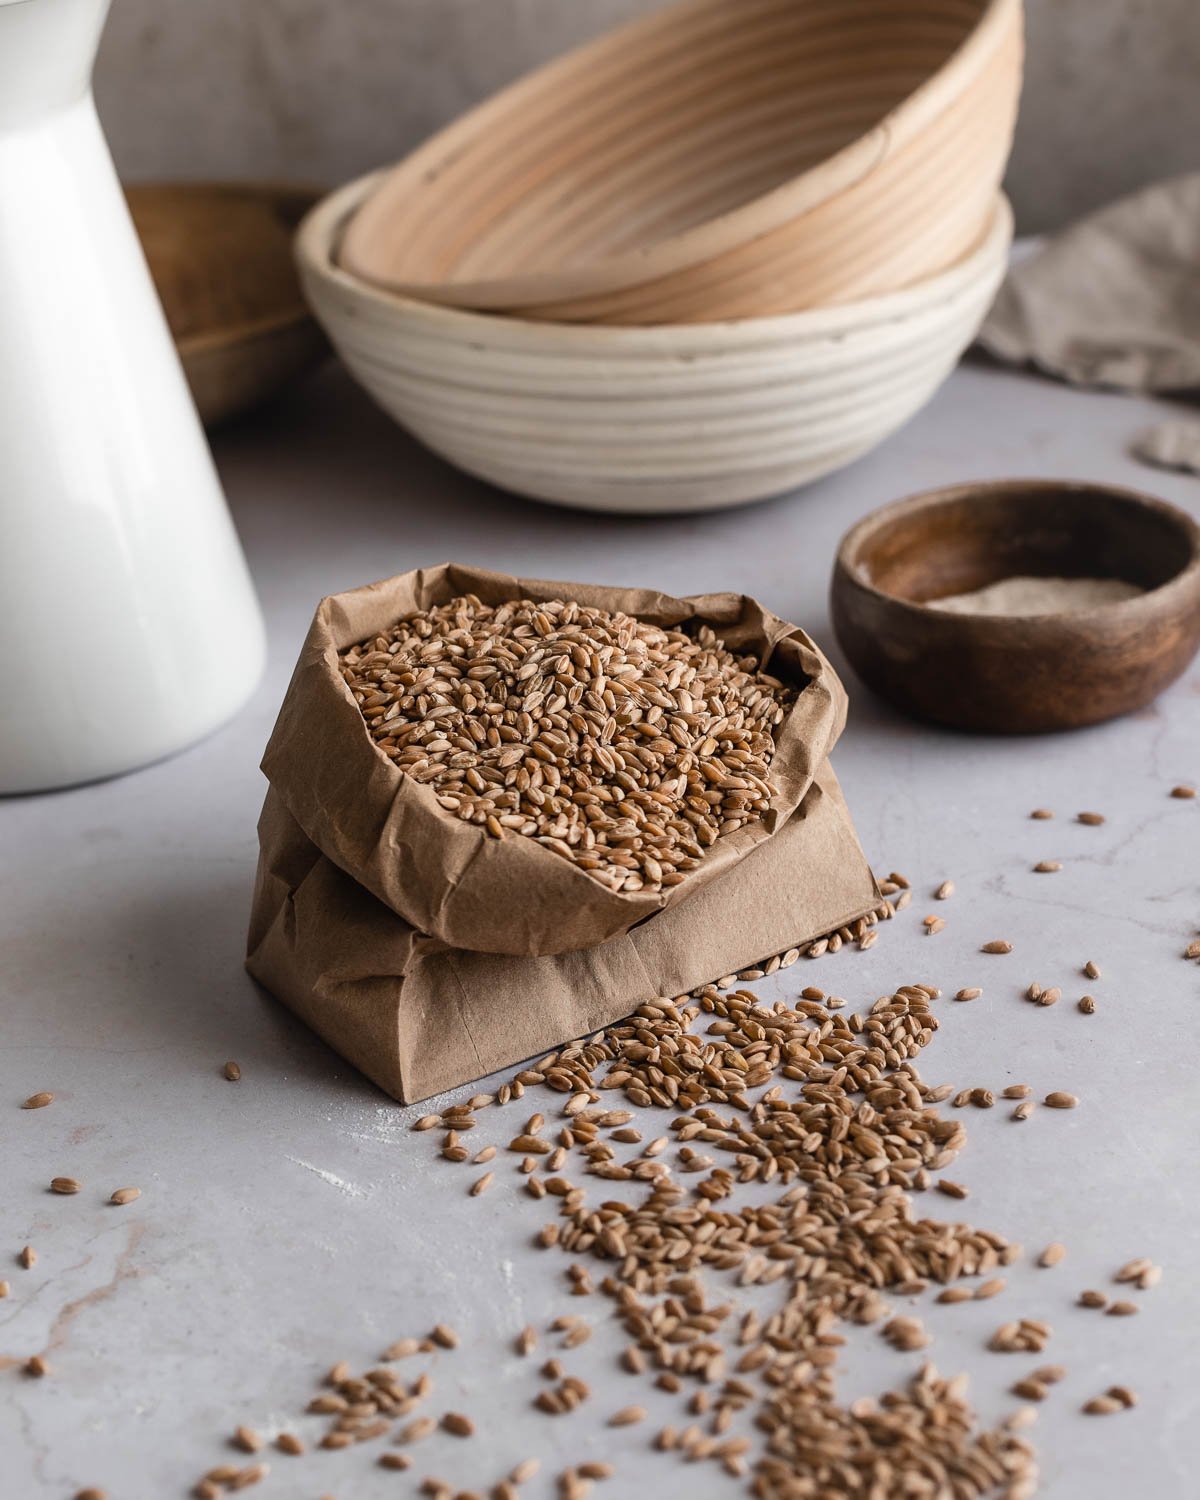
Spelt used to be exceedingly difficult to find, however, due to the growing interest in heritage and ancient grains, it's become more widely available. You can definitely purchase it online, at a specialty store or I've even found it in the baking aisle at my local grocery store!
Brands of Spelt Flour I love and recommend are Central Milling, Azure Standard and Bob's Red Mill.
Yes! I tested this recipe using both store-bought spelt flour and freshly-milled spelt berries. Both worked great, but the sweetness and nuttiness was more pronounced in the bread made with freshly-milled flour. Fermentation tends to occur at a faster rate when using fresh flour, so just be sure to watch your dough to prevent it from becoming over proofed.
I purchased my spelt berries from Azure Standard and ground them using my Mockmill.
More sourdough bread recipes you'll love
Did this recipe rise to the occasion?
★★★★★
Leave a star rating and a comment. Your feedback inspires future recipes and helps others feel confident choosing what to bake next. I read and respond to every message.
If you're looking for additional ways to support my work, share this recipe or buy me a Ko-fi. Every little bit helps me keep creating the recipes and guides you enjoy.
Thank you for your support!
Spelt Sourdough Bread
This section may contain affiliate links
Ingredients
- 240 grams bread flour
- 120 grams spelt flour
- 274 grams water
- 56 grams sourdough starter mature and active
- 7 grams salt
Click US Customary to view volume measurements
Instructions
- Make the dough:Combine ingredients and mix until no dry bits of flour remain and you can't feel the salt grains in the dough anymore. Let the mixture rest for 30 minutes. Cover the bowl with plastic wrap and let it rest untouched for 30 minutes.
- Strengthen the dough: Using your middle finger and pointer finger, pick your dough up in the center and lift it completely out of the container until the ends release. Transfer the dough to a clean, lightly oiled bowl, coiling the ends under. Cover with plastic wrap and let the dough rest for another 30 minutes.
- Complete 4 coil folds in 30 minute intervals. To perform a coil fold, use your middle finger and pointer finger to gently lift the center of the dough until the ends release from the container. Let the ends naturally tuck under the dough, turn your bowl 90 degrees and repeat. Cover your bowl with plastic wrap and let it rest for 30 minutes.
- After performing the last coil fold, let the dough rest untouched for 1 hour.
- Pre shape: Turn your dough out on a lightly floured surface. Gently flip the dough over and round it into a tight ball. Cover the dough with a tea towel and let it rest for 15 minutes.
- Shape: Shape your dough into a batard. Place it in a banneton dusted with rice flour and cover with a shower cap or a plastic bag.
- Cold proof: Place the dough in the refrigerator and let it proof overnight.
- Prep: Preheat the oven to 500 F with a dutch oven inside.
- Score the dough: Take your dough out of the refrigerator, unwrap the proofing basket and gently turn the dough out on a piece of parchment paper. Using a lame or a sharp paring knife, cut a large but shallow gash on the dough, about ⅛-inch deep.
- Bake: Place the dough inside the Dutch Oven. Bake the dough covered for 30 minutes and 10 to 15 minutes uncovered depending on how dark you prefer your crust.
- Cool: Let the bread cool for at least 2 hours and let the crumb set before slicing.
- Store: Store bread in a zip top bag for up to 5 days.
Tips
These recipes were developed and tested using grams for precise measurements. To increase your chances of success, I recommend investing in a kitchen scale. I've included rough volume estimates (in tablespoons and cups), but they might not be totally accurate.
Remember all ovens are unique, these recipes were tested in my oven which runs cooler than others. You might need to lower the temperature if your bake appears to be browning too quickly. Monitor your bake closely and make adjustments if needed.
Notes
Nutrition
I am not a nutritionist or dietitian, any nutrition information provided is an estimate.
Roberta Tracy says
The bread was beautiful and delicious. I appreciated the pictures showing folding the dough. Can the recipe be doubled? I’d like to make 2 loaves next time.
Thank you,
Roberta Tracy
Hannah Dela Cruz says
I'm so glad you loved this recipe! It's one of my favorites. Yes it doubles easily!
Rita Renae Miller says
I loved how this bread turned out! I'm a sourdough newbie but learning fast. I'd love to make this for my sister but she wants a gluten free version. Is there another flour that I could substitute for the bread flour? I'm loaded up with whole grain spelt, white spelt, rye, rice and oat. Any suggestions would be deeply appreciated!
Rita
Hannah Dela Cruz says
Unfortunately, I'm not super informed with gluten-free baking but I have heard great things about King Arthur Gluten-free Bread Flour. I don't know what adjustments you'd have to make to the recipe to accommodate the change.
S says
What if you don't have a Dutch oven?