
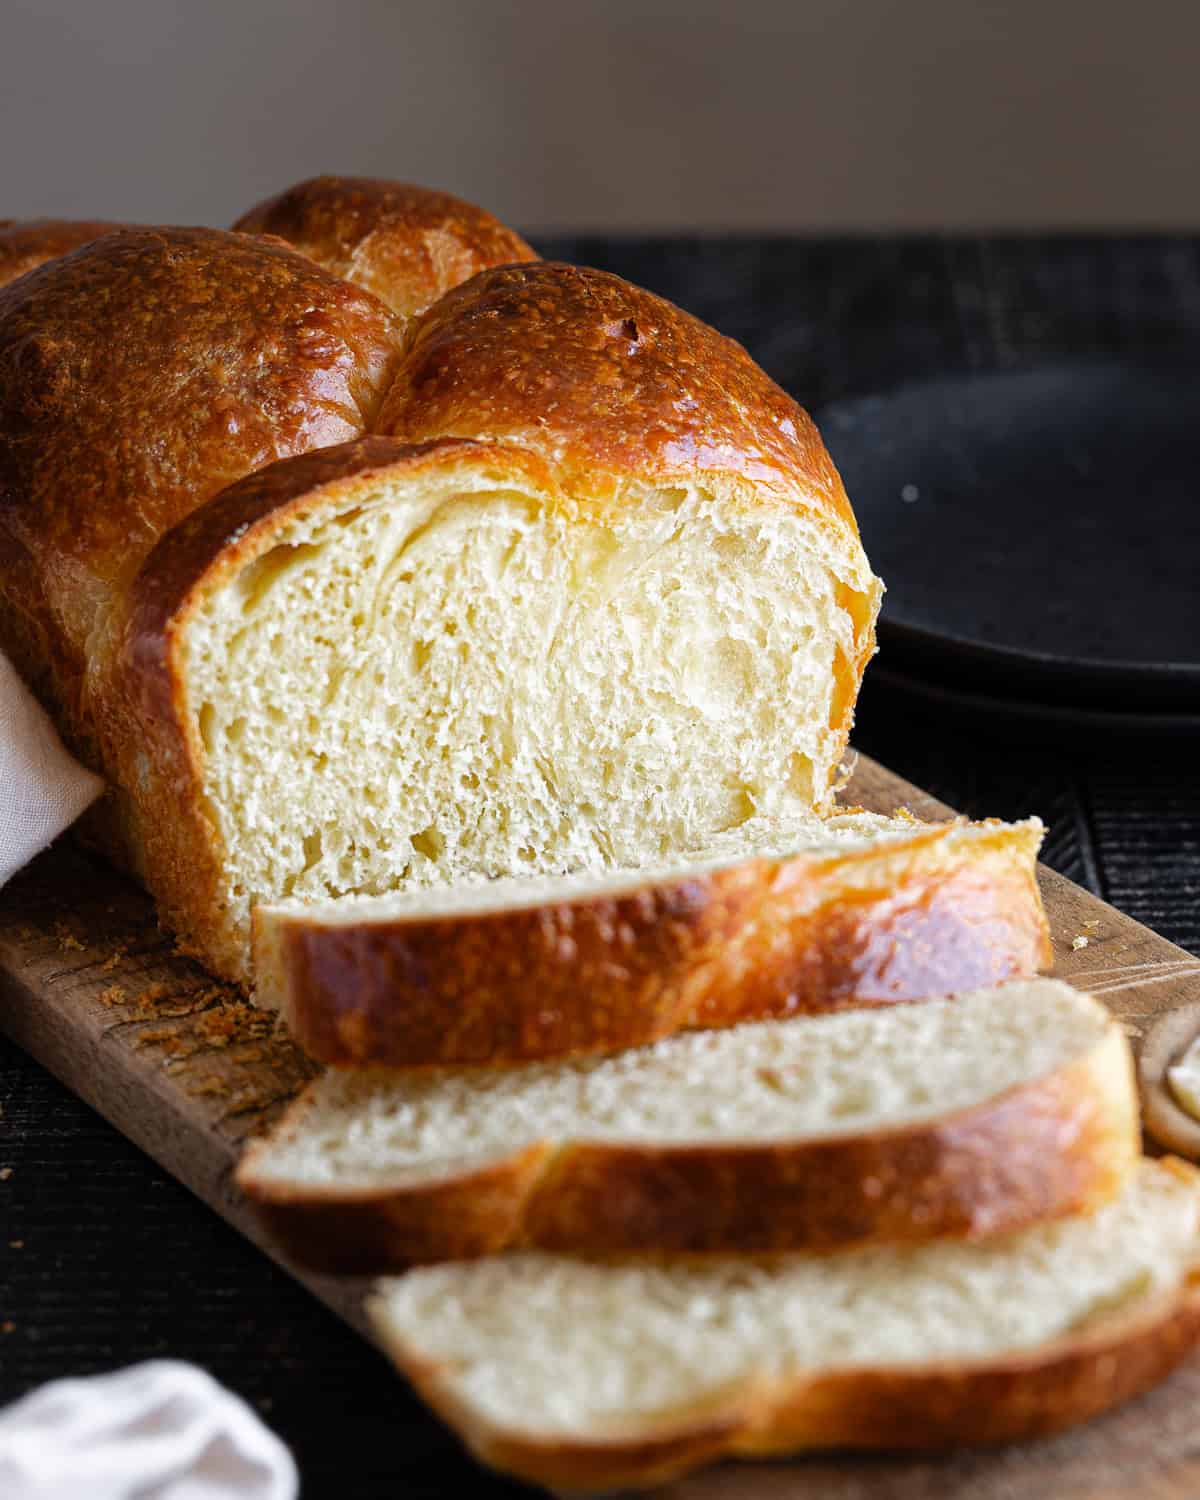
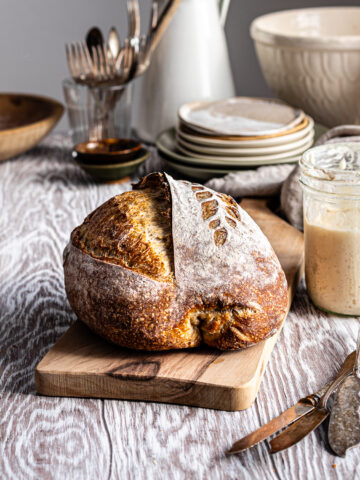
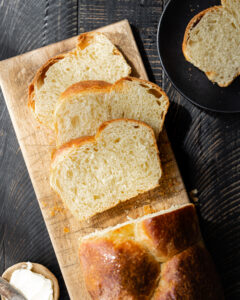
Soft Sourdough Brioche made without yeast, using only active sourdough starter. Brioche is one of the richest French breads, and I wanted to create a naturally leavened version with a soft, pillowy texture. While this bread takes time to make, the airy, buttery results are well worth the wait.
This recipe was originally published in Sept. 2023. I have since updated it with an easy-to-follow format, new photos and additional tips for success.
Jump to:
Creating this brioche recipe was quite an achievement. A lot of people think you can't make tender bread using a sourdough starter - but this couldn't be further from the truth. With a healthy, active starter and lots and lots of patience you can absolutely bake a naturally-leavened pillowy soft brioche loaf.
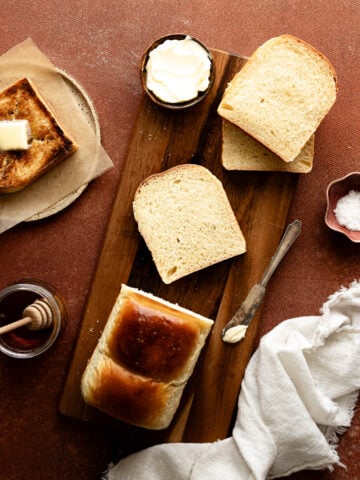
Mastering brioche dough opens up a world of possibilities so many delicious baked goods are made with brioche dough (think donuts and cinnamon rolls). While I love tearing chunks of this bread and eating it plain, it also makes a great base for sourdough babka or sourdough sticky buns. Leftover slices make the best French toast or almond bostock!
Why I love this recipe
- Made with active starter and no commercial yeast
- Pillowy soft texture
- Long fermentation helps deepen the flavor
- Made by hand with no special equipment required
Brioche ingredients

Active Sweet Stiff Starter: Make sure your sourdough starter is active before making this recipe! Your brioche will be too sour, heavy, and dense if you use a weak starter. I like to mix my starter the night before creating this recipe.
Bread Flour: The high protein content of bread flour provides structure and allows dough to hold its shape as it rises even with all of the enrichments in the dough, substitute all-purpose flour if that’s all you have. Do not use whole wheat or rye flour or your brioche will turn out too dense.
Milk: Softens gluten and imparts richness. Substitute your favorite plant-based milk.
Baking brioche with sourdough starter
Sourdough deepens the flavor of any bread but it especially transforms the flavor of buttery brioche. Eggs, milk, sugar and butter have a tenderizing effect on gluten which impart characteristic soft, pillow texture of brioche. These ingredients also drastically slow down fermentation. Expect sourdough brioche dough to rise slower than usual, the initial rise for my dough normally takes about 8 hours, twice the amount of time I usually bulk ferment a basic loaf of sourdough.
Short on time? Try my Sourdough Discard Challah recipe!
How to make Sourdough Brioche
Step 1: Make the dough
The night before, make your sweet stiff starter. Whisk the wet ingredients. Add in the stiff starter and dry ingredients. Knead the butter into the dough until completely absorbed.

What is a stiff starter?
A stiff starter has more flour than water—for example, a 50% hydration starter has half as much water as flour, while a 100% hydration starter has equal parts of both.
Since brioche gets most of its moisture from eggs and milk, using a low-hydration starter lets me add more starter to the dough without making it too wet. This helps the dough rise faster while keeping it easy to handle.
Step 2: Strengthen the dough
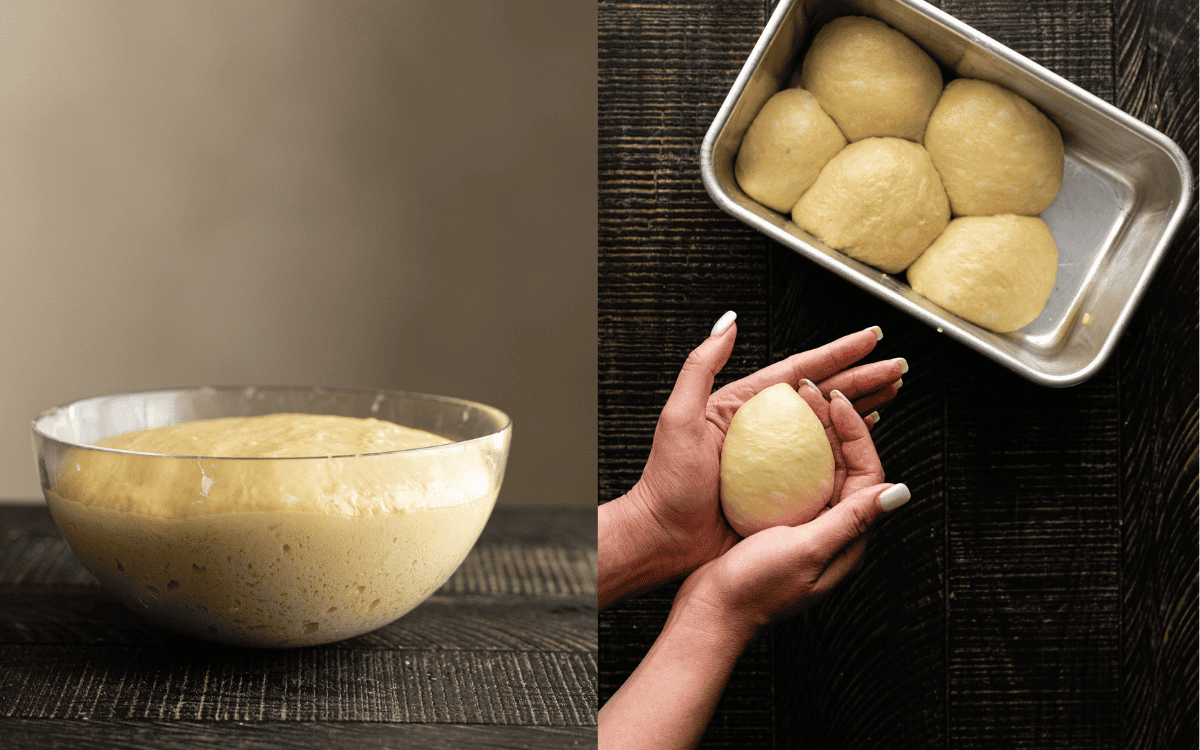
This dough is quite sticky, so slap and folds are the best way to build strength. Place the dough on a clean surface, lift one side, slap it down, then fold it over. Repeat 5-6 times until the dough feels tight. Shape it into a ball, cover, and let it rest for 30 minutes. Repeat this 4 times until the dough passes the windowpane test.

What is the Windowpane Test?
The windowpane test demonstrates the strength of the gluten network. To see if your dough is strong enough, you should be able to stretch a piece of dough thin enough to see the outline of your fingers through it without tearing.
Step 3: First proof and shape
Allow the dough to ferment until it has doubled in volume. Divide the dough into 5 even portions. Round each portion into a tight ball and arrange them in a lightly-oiled 9 by 5-inch loaf pan. Cover loaf pan with plastic wrap and cold proof overnight
Step 4: Final proof and bake
Let the dough warm up to room temperature. Allow the dough to rise until it fills the baking tin, about 2 to 3 hours. Brush tops of the dough with egg wash and bake at 350F for 40 to 45 minutes

Baker's Tips
- Weigh your ingredients: Measuring by weight is much more accurate than by volume (with tablespoons and cups).
- Watch the dough not the clock: I’ll be giving time cues throughout the recipe, but since fermentation is highly dependent on temperature, this may differ based on the conditions of your kitchen.
- Be patient: Be patient and wait until your dough is bubbly and well-risen. Otherwise, your bread will be dense and gummy
- Use an instant-read thermometer: The best way to determine whether your loaf is fully baked is to probe the center of the cinnamon loaf with an instant-read thermometer. The internal temperature of your loaf should be between 180F to 190F.

How to make sourdough brioche in a stand mixer
If you’re uncomfortable with working with sticky, slack dough, use a mixer.
- Add eggs, milk, sugar, salt and sourdough starter into the mixing bowl and stir to combine with the paddle attachment.
- Switch to the dough hook, and with the mixer on, add the flour in a third at a time.
- Once the dough comes together into a cohesive mass, add the butter in a tablespoon at a time with the mixer on.
- Continue mixing until the dough looks smooth and begins to climb on the hook, this could take up to 15 minutes, don’t be tempted to add more flour.
- Gather the dough into a tight ball and transfer it into a clean bowl, cover it with plastic wrap, and ferment.
Recipe FAQs
If your dough is feeling very sticky. Leave the dough alone, messing with it will only destroy the gluten network and make your dough much stickier. Cover and let it rest for 45 minutes to 1 hour. Then go back to slap and folds or switch to stretch and folds.
If your dough is slow to rise, it might be too cold. Fermentation depends on temperature, so try placing the dough in a warm spot, like your oven with the light on or your microwave.
There are a few reasons your brioche did not turn out light and fluffy.
1. Your starter is too weak
2. You did not give your dough enough time to rise
3. Your dough was not kneaded enough and the dough is too weak
4. Your dough has acidified and the gluten has broken down
You May Also Like

Did this recipe rise to the occasion?
★★★★★
Please leave a star rating and a comment. Your feedback helps me create more delicious sourdough recipes. I read and truly appreciate every message.
Don't forget to PIN this recipe on Pinterest to save it for later!
Thank you for your support!
Sourdough Brioche
Equipment
- 8 by 4 inch loaf pan
This section may contain affiliate links
Ingredients
Sweet Stiff Starter
- 60 grams all-purpose flour
- 42 grams water
- 14 grams cane sugar
- 14 grams sourdough starter mature and active
Brioche Dough
- 75 grams whole milk
- 3 eggs large
- 30 grams cane sugar
- 300 grams bread flour
- 6 grams salt
- 113 grams unsalted butter softened and cold
Egg Wash
- 1 egg large
Click US Customary to view volume measurements
Instructions
- Make the sweet stiff starter: The night before, combine sweet stiff starter ingredients together. Stir until well combined, cover with a piece of plastic wrap and set in a warm place.60 grams all-purpose flour, 42 grams water, 14 grams cane sugar, 14 grams sourdough starter
- Make the dough: Whisk together the milk, eggs and cane sugar until completely incorporated.75 grams whole milk, 3 eggs, 30 grams cane sugar
- Stir in the bread flour, salt and all of the sweet stiff starter. Mix until the dough comes together in a cohesive mass.300 grams bread flour, 6 grams salt
- Add the butter: Knead the butter into the dough, one tablespoon at a time. Your dough will feel less greasy as the butter soaks into the dough. Wait until each addition is incorporated completely before adding more.113 grams unsalted butter
- Strengthen the dough: Turn the dough out on a lightly-oiled work surface. Complete a set of slap and folds, to do this pick the dough up with your fingertips, slap it on your work surface with some force and fold it over itself. Repeat this process 5 to 6 times, until the dough begins to feel tighter. Gather the dough into a tight ball and transfer it into a clean, lightly-oiled bowl. Cover the bowl with plastic wrap and set in a warm place.
- Complete 3 to 4 sets of slap and folds in 30-minute intervals, until your dough passes the windowpane test. (You don’t need to replace the bowl every time).
- Bulk Fermention: Let the dough rise until it has doubled in volume. The dough should look bubbly and feel like it is full of air. This could take between 6 to 8 hours. Give your dough enough time to rise and do not shape it until it has risen noticeably.
- Shape the dough: Grease an 8 by 4-inch loaf tin with butter, or line it with parchment paper. Turn the dough out on a lightly floured surface. Divide the dough into 6 equal pieces using a bench scraper. Round each into a tight ball. Place each dough ball into your prepared pan.
- Cold proof: Cover the pan with plastic wrap and place it in the refrigerator overnight. You should see your dough rise slowly in the refrigerator.
- Prep: The next day, preheat the oven to 350 F. Beat the egg until no traces of egg white remain. If your dough has not risen, set it out and let it rise at room temperature until it is about ¼-inch from the top of the pan.1 egg
- Bake: Brush the tops of the dough with egg wash. Bake for 40 to 45 minutes or until the loaf is golden brown.
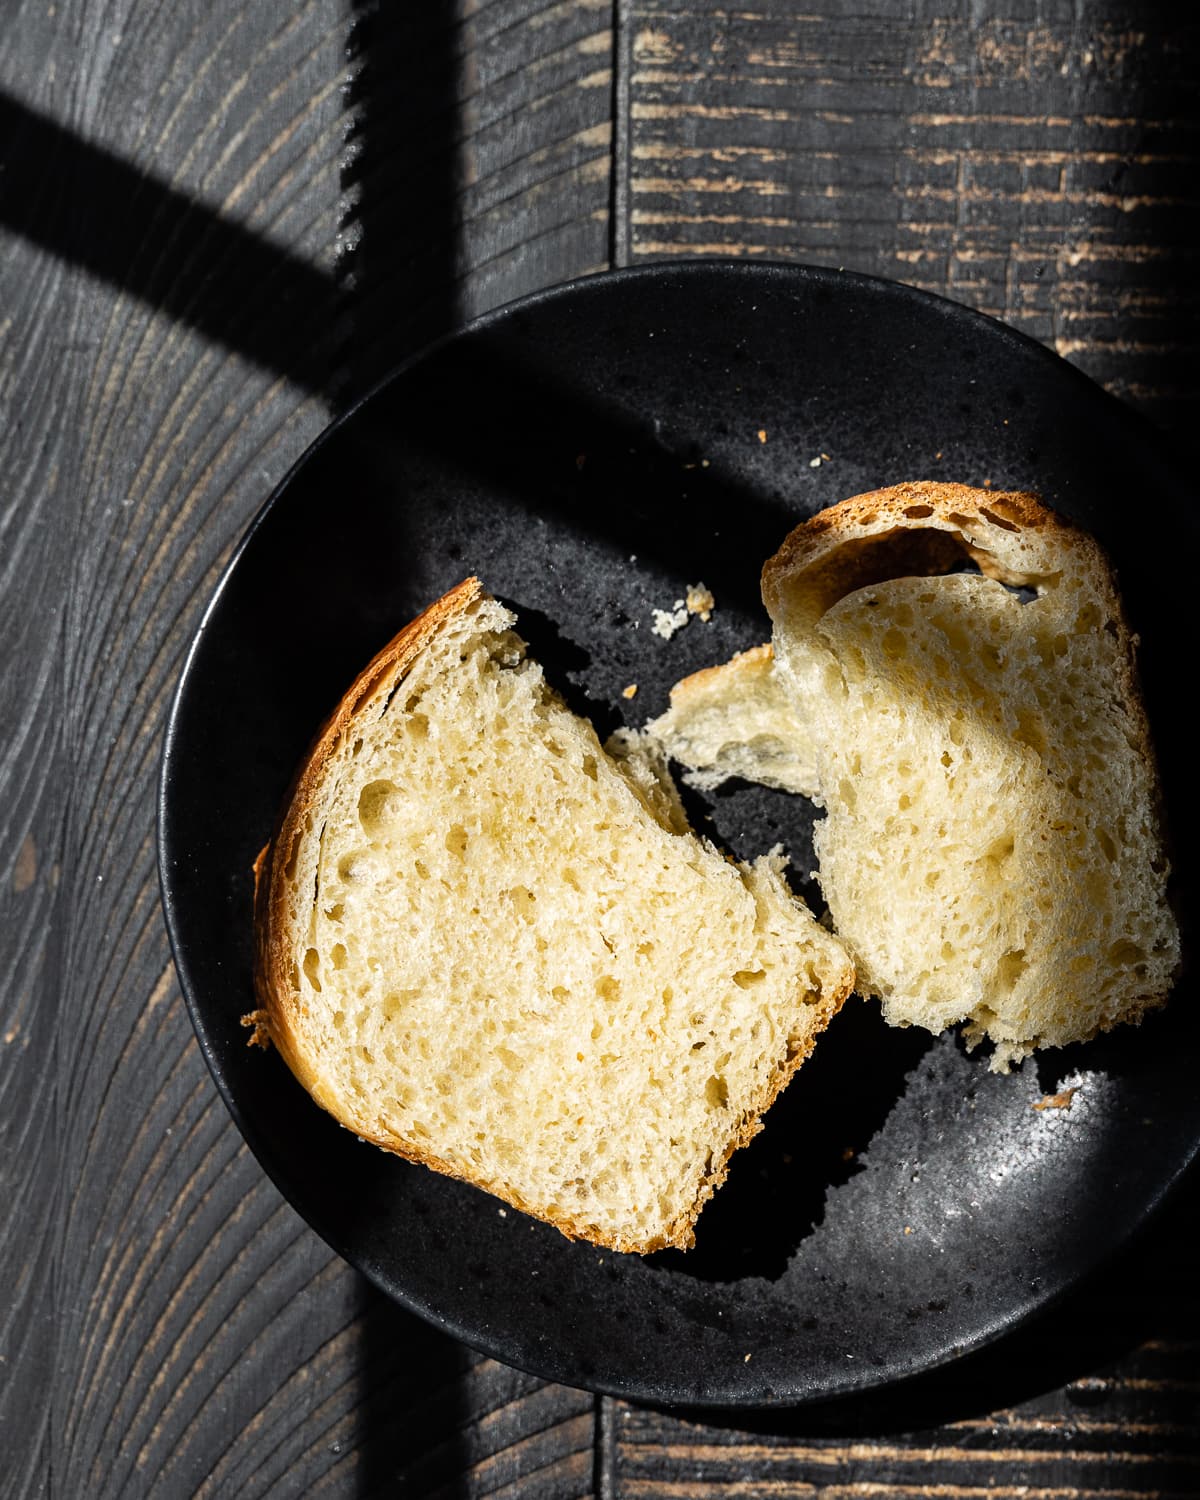
- Enjoy and store: Let the loaf cool for 15 minutes before slicing. Store leftover slices in an airtight container at room temperature for up to 5 days.
Tips
These recipes were developed and tested using grams for precise measurements. To increase your chances of success, I recommend investing in a kitchen scale. I've included rough volume estimates (in tablespoons and cups), but they might not be totally accurate.
Remember all ovens are unique, these recipes were tested in my oven which runs cooler than others. You might need to lower the temperature if your bake appears to be browning too quickly. Monitor your bake closely and make adjustments if needed.
Notes
- When in doubt, use gram over volume measures
- If you're uncomfortable with handling wet dough, use a stand mixer instead of making this dough by hand
- Use a mature active starter before making this recipe
Nutrition
I am not a nutritionist or dietitian, any nutrition information provided is an estimate.


Jaime McCabe says
Does the stand mixer replace the slap and folds? Or do you use the stand mixer and then do slap and folds (and then proceed with the rest of the recipe as written)? Thank you!!
Hannah Dela Cruz says
Yes! You can strengthen the dough with the mixer. Turn it out and give it a few kneads before rolling it into a ball and letting it rise.
Hazel says
Hi! I am a new sourdough home baker and so far have only been successful with your recipes! I do have a question on this one, if I use a stand mixer, should I do the slap and fold still? Meaning I only use the mixer to incorporate the butter at most?
Hannah Dela Cruz says
You can totally do all the kneading in your mixer! Use a dough hook to knead until the dough clings to the hook. Then turn it out and knead a few times or slap and fold if the dough is too sticky before rounding it into a ball and letting it rise. It should turn out perfectly! I only slap and fold because I usually like to make dough by hand and this one can be quite sticky.
Briana says
I’m making this right now and find that the dough is still very sticky and hard to work with for the fold and slap section :/
Hannah Dela Cruz says
If your dough is feeling very sticky. Leave the dough alone, messing with it will only destroy the gluten network and make your dough much stickier. Cover and let it rest for 45 minutes to 1 hour. Then try stretch and folding or coil folding only until it looks smooth. Good luck with the recipe!
Romi Shamai says
Thank you! Delicious! Will make it again.
Hannah Dela Cruz says
Thank you for the feedback! This is one of my absolute favorites and I'm so glad you enjoyed it as well.
Tamara says
This recipe works so well for me and is delicious so I want to keep using it. However, I would like to add chocolate! Any suggestions how to do that?
Hannah Dela Cruz says
Absolutely! You can knead it into your dough after adding the butter.
Matt says
Hi!
Is cold proofing after shaping a neccessity?
Will proofing it in room temp. for less hours change anything? thank you!
Hannah Dela Cruz says
Hi Matt! Great question. You can totally complete your second proof at room temp, if you'd like to do a same day bake. Proofing will still take a few hours.
Jill says
I see that the Azure Standard flour you mentioned has been discontinued. Have you found anything similar to it or do they have a new similar option?
Make It Dough says
Hi Jill! I've been using Azure's Whole Wheat Unifine Flour and it's worked great as a substitute :https://www.azurestandard.com/shop/product/food/flour/whole-wheat/hard-red/bread-flour-100-whole-red-wheat-unifine-organic/8428?package=FL011&a_aid=dec9a9af1d
Carol says
Hi, Thanks for your detailed process - I will be giving it a try shortly. I have a question on converting yeasted recipes to sourdough. I understand that you need to decrease the amount of water (or liquid) and flour from the recipe because it is in your starter but I want to now how do you decide how much starter to use - I see your brioche uses 40% but most (non sweet) sourdough bread recipes use between 10 and 20% but again, this isn't always the case. Does it have anything to do with the amount of yeast in the original recipe? I see that lots of sweet yeasted Swedish doughs use a huge amount of yeast. I look forward to hearing from you (if you have time).
Regards,
Carol
Make It Dough says
Hey Carol — I think the jury is out on how much of a percentage of starter you need to use in each recipe. I usually stick with 30-40% even in my lean dough recipes! Sorry I can’t offer a more scientific answer 😅
Carol says
No worries - thanks for the reply. I was hoping you would not give me a too scientific reply.