

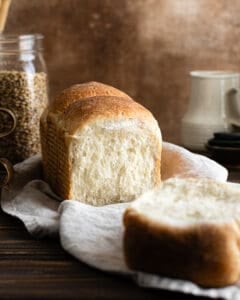
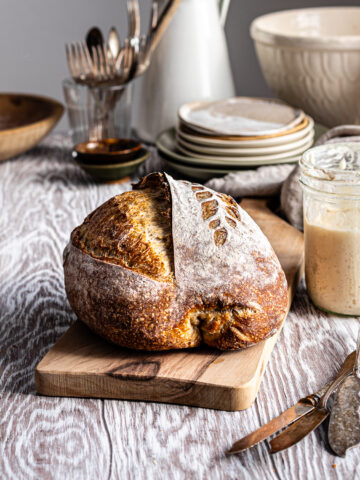
If you love a good white bread with a chewy crumb and soft crust, you need to make this Sourdough Potato Bread. Made with sourdough starter and long-fermented, it's full of flavor and has just the right amount of tang.
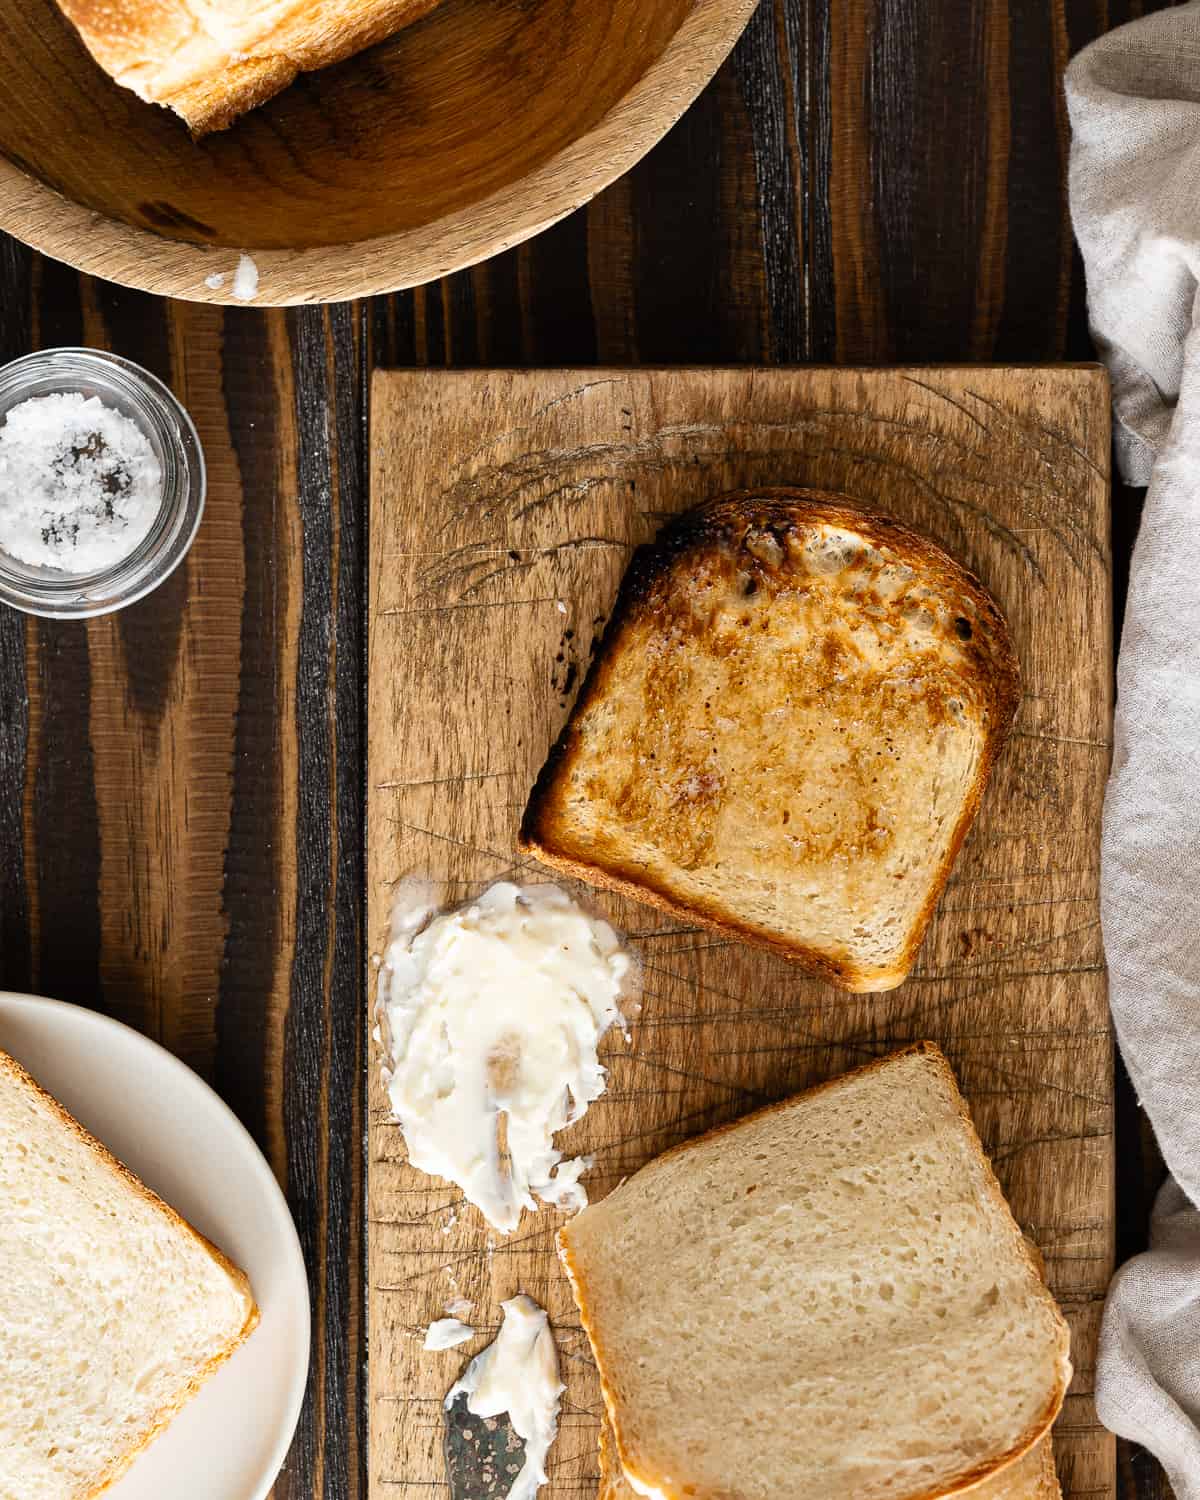
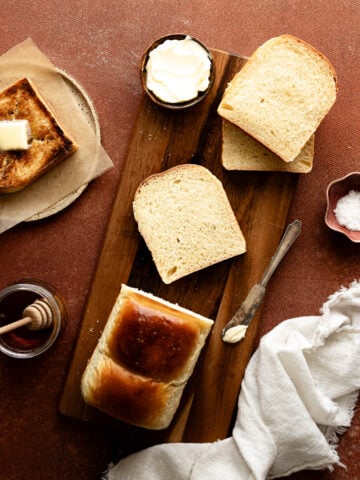
Adding starchy potatoes keeps the crumb extra soft and moist, so the bread stays fresh for days. It's perfect for sandwiches or toasted slathered with cultured butter and raspberry preserves. If you've tried my sourdough discard sweet potato sandwich bread or sourdough milk bread, this loaf is another one you'll want to try.

5-Star Review ★
This recipe is the one I use all of the time. It is very close to the bread my Grandma baked. Great multipurpose loaf without all of the hard crust.
Cathy Smith
What You Need
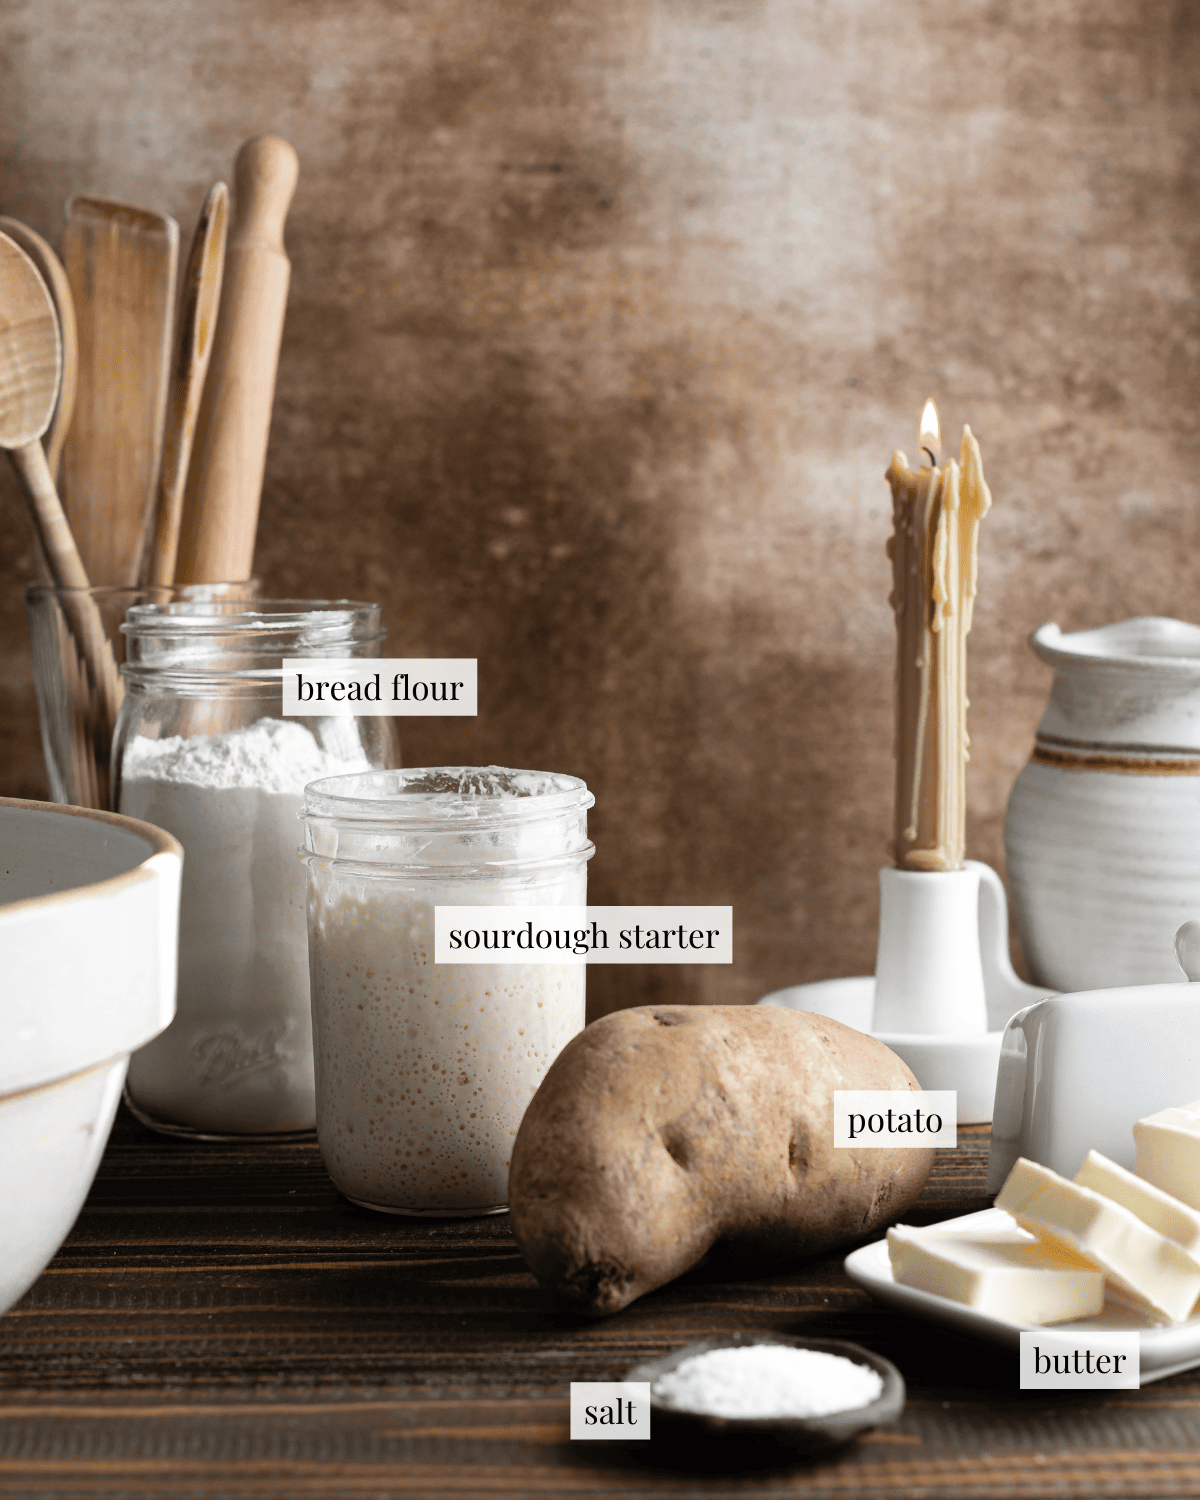
Bread flour - A higher protein content gives this loaf a lovely chewiness, if you don't have any on hand, all-purpose will work as well (do not substitute whole wheat flour).
Russet potato - Starch locks in a lot of water resulting in softer bread, it's best to use Russets since they are higher in starch, but you can substitute any other type of potato, even sweet potatoes.
Potato cooking water - Don't toss this the water you cook your potatoes in. It will have a lot of starch in it, which will increase the starch content of your dough even more.
See recipe card for detailed ingredient information.
Step-by-step Instructions
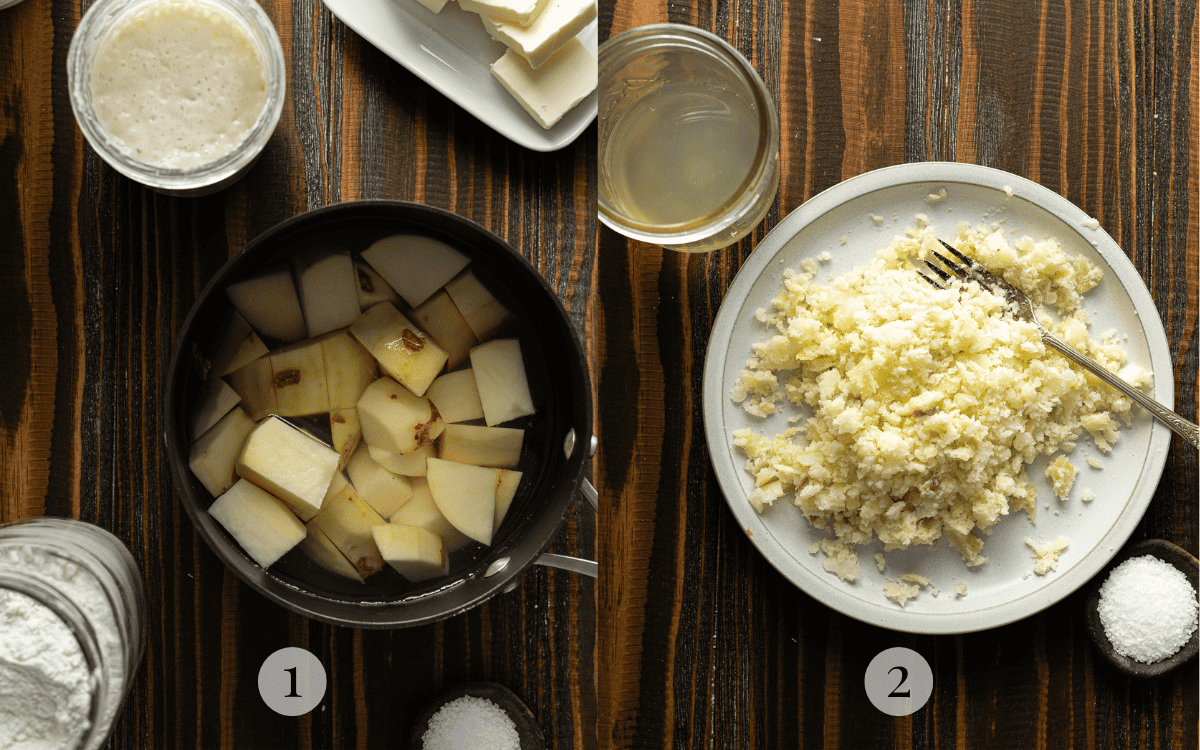
Cook the potatoes
Cook the potatoes until fork tender, save a little bit of the potato cooking water. Mash the potatoes and allow them to cool.
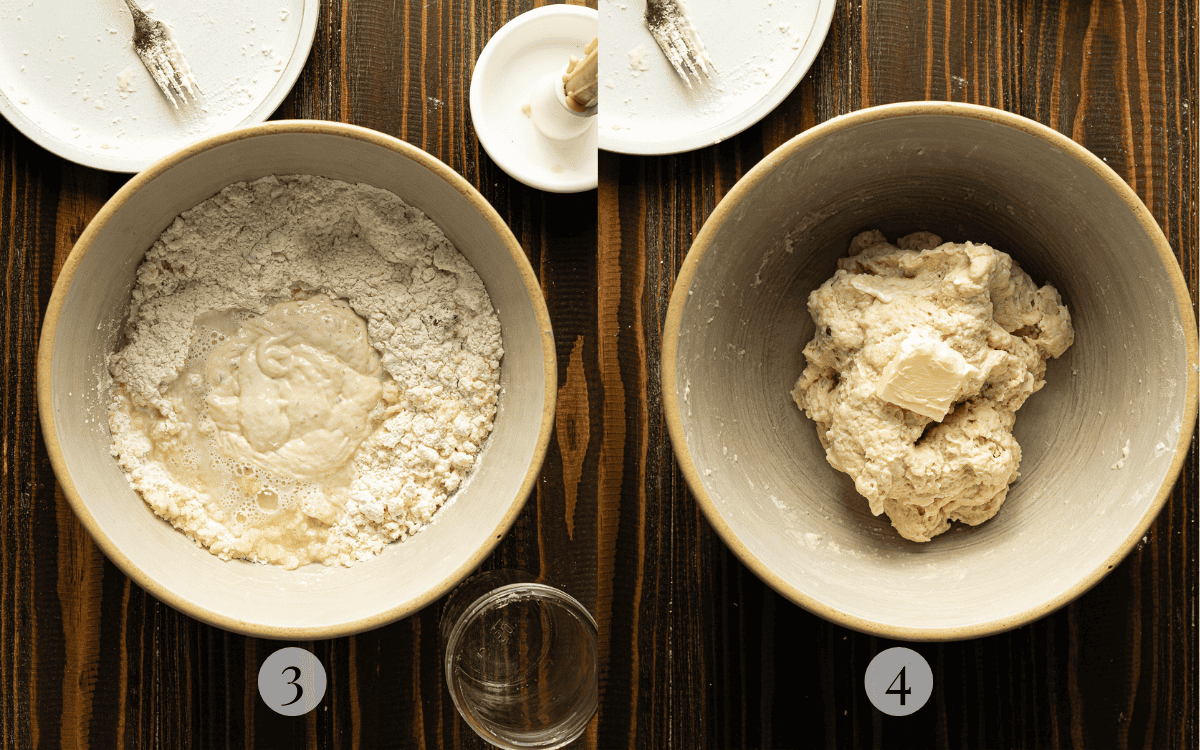
Make the dough
Mix the dry ingredients, potatoes, starter and potato cooking water in a large bowl. Knead the butter into the dough until completely absorbed.
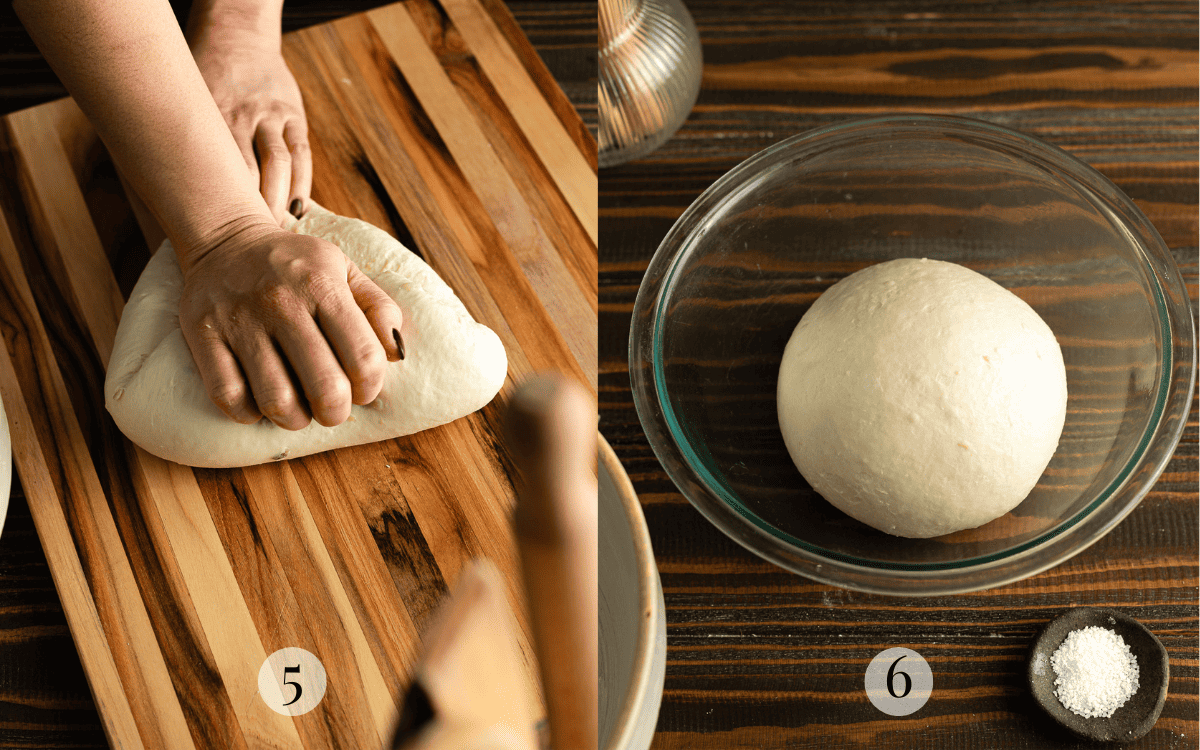
Knead the dough
Knead the dough for 5 to 10 minutes. When you start kneading, the dough may feel rough and uneven. However, as you continue to knead, the gluten strands become more organized and elongated giving it a uniform texture and appearance.
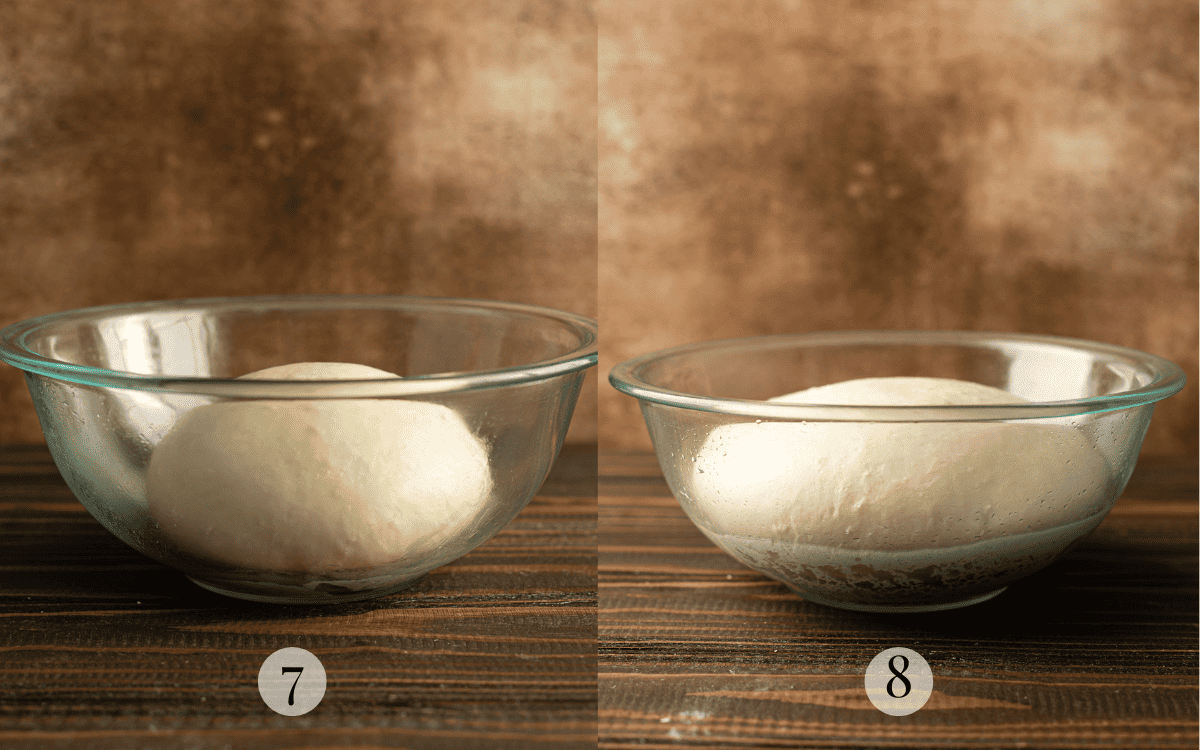
First proof
Let the dough rise untouched for 3 to 4 hours. At the end of bulk fermentation, the dough should look like it has doubled in volume and feel like it's full of air.
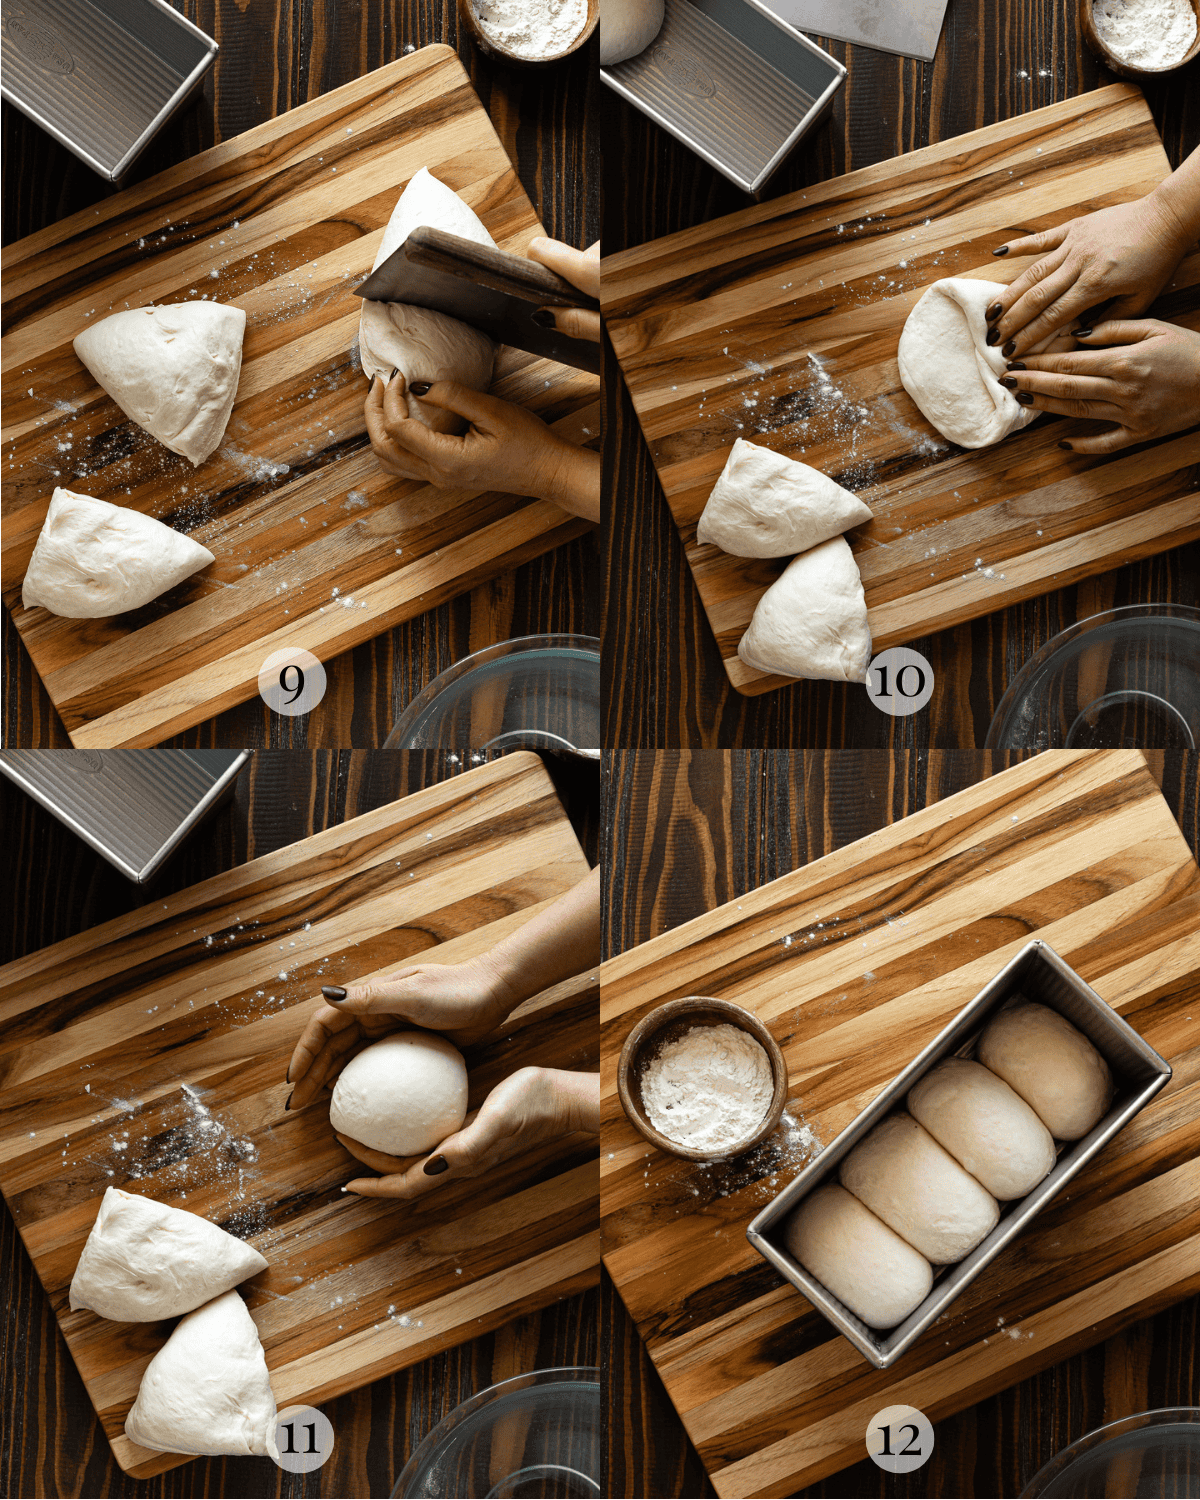
Shape the dough
Divide the dough into 4 portions. Flatten the dough into a rough circle. Fold the corners into the center. Turn the dough over and round it into a tight ball. Nestle the dough into a loaf pan.
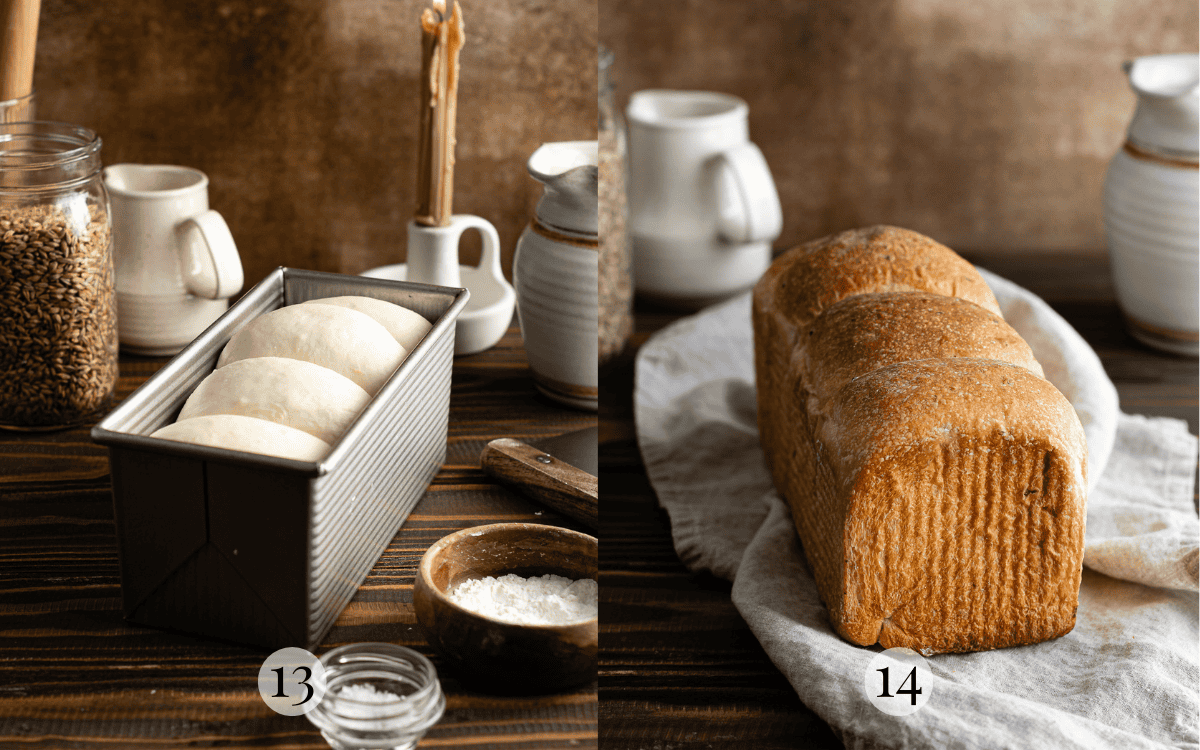
Final proof and bake
Proof until the dough has filled the pan, about 2 hours. Bake at 375 for 30 to 45 minutes or until golden brown.
Notes from Hannah's Test Kitchen
- I'll be giving time cues in this recipe, but rising times will depend on the activity of your starter and the temperature in your kitchen. Be flexible and look for the signs of fermentation, instead of depending totally on the times stated here.
- Let the dough rest for 30 minutes after mixing. This allows the flour to fully hydrate, making it less sticky and much easier to handle.
- You can shape this loaf in any way. I find that using this method helps prevent the sandwich loaf from splitting as it bakes. This loaf can be baked in either a 9 by 4-inch Pullman pan or 8.5 by 4.5-inch (1 lb) Loaf pan.
- Let the bread cool completely before slicing, while it may be tempting to tear into this bread right out of the oven, slicing it while it's still hot will cause all of the moisture to escape and cause your bread to dry out faster.
Did this recipe rise to the occasion?
★★★★★
Leave a star rating and a comment. Your feedback inspires future recipes and helps others feel confident choosing what to bake next. I read and respond to every message.
If you're looking for additional ways to support my work, share this recipe or buy me a Ko-fi. Every little bit helps me keep creating the recipes and guides you enjoy.
Thank you for your support!
Sourdough Potato Bread Recipe
Equipment
- 9 by 4-inch Pullman pan or 8.5 by 4.5-inch Loaf Pan
This section may contain affiliate links
Ingredients
- 200 grams Russet potato about half of a large potato
- 113 grams potato cooking water cooled
- 420 grams bread flour
- 6 grams salt
- 50 grams granulated sugar
- 113 grams sourdough starter mature and active
- 56 grams unsalted butter softened
Click US Customary to view volume measurements
Instructions
- Cook the potatoes: Dice the potatoes into 2-inch cubes, add potatoes to a small saucepan and cover completely with water. Bring the potatoes to a boil, cook over medium heat for 15 minutes or until the potatoes are fork tender. Set aside 113 grams (½ cup) of potato cooking water. Mash the cooked potatoes. Set the mashed potatoes and water aside until they are completely cool. Do not proceed until your potatoes have cooled completely. Mixing your dough with hot potatoes could kill the yeast in your sourdough starter.
- Make the dough: Combine the potatoes and potato cooking water with the remaining ingredients except for the butter. Stir the ingredients together until your mixture forms a shaggy dough. Knead the butter into the dough one tablespoon at a time, waiting until each addition is fully incorporated before adding more. Cover your bowl with plastic wrap and set in a warm place for 30 minutes. Letting your dough rest will make it much easier to knead and handle.
- Strengthen the dough: Turn your dough out on a lightly floured work surface, knead the dough until completely smooth and elastic, about 5 to 10 minutes.
- Bulk ferment: Round the dough into a tight ball, place it in a clean, lightly-oiled bowl, cover with plastic wrap and set it in a warm place until doubled in volume (about 3 to 4 hours).
- Cold proof: Degas the dough and round it into a tight ball. Cover the bowl with plastic wrap and let it proof in the fridge overnight.
- Shape: Take your dough out of the fridge. Divide the dough into 4 portions, round each portion into a tight ball and nestle them into a 9 by 4-inch Pullman pan.
- Second rise: Cover the pan with plastic wrap and let the dough rise until the dough is puffy and almost fills the pan.
- Bake: Once your dough is almost ready, preheat the oven to 425 F. Once your oven has reached temperature, place your dough into the oven and immediately turn the temperature down to 375 F. Bake for 30 to 45 minutes or until the bread is golden brown and registers at 200 F when probed with an instant-read thermometer.
- Enjoy: Remove your loaf from the pan and transfer to a wire rack. Let your bread cool for at least 30 minutes before slicing.
- Store and reheat: Store leftover slices in a zip lock bag at room temperature for up to 3 days.
Tips
These recipes were developed and tested using grams for precise measurements. To increase your chances of success, I recommend investing in a kitchen scale. I've included rough volume estimates (in tablespoons and cups), but they might not be totally accurate.
Remember all ovens are unique, these recipes were tested in my oven which runs cooler than others. You might need to lower the temperature if your bake appears to be browning too quickly. Monitor your bake closely and make adjustments if needed.
Notes
Nutrition
I am not a nutritionist or dietitian, any nutrition information provided is an estimate.
Jenny Brooks says
Do you weigh the potatoes before they’re cooked or after they’re cooked?
Hannah Dela Cruz says
I measure the potatoes before they are cooked!
Jean Ann bolton says
Hello, It's my first time to find you. I've made sourdough whole wheat bread for years. In NM, I failed making bread every time I tried. What I learned is essential for new bread makers: if you live in an arid climate, or if the air in your house is dry in the winters, your bread recipe may need additional liquid to compensate for the extra dryness in your flour. Your dough has enough moisture in it if you can press your finger into the ball & the dough is slightly sticky. My recipe takes @ 6gm extra water in a recipe of 320gm of flour, yours would depend on your own recipe. If your bread recipe makes bricks, this is a possible solution to an over dry flour.
Hannah Dela Cruz says
Hi Jean Ann! Thank you for the info. I also live in an arid climate and it's all I know.
Kelsey says
thanks for this feedback. I mixed my dough together and noticed it was extremely dry. queue checking all my numbers one more time. I measured everything correctly, but in order to get this to come together into a smooth, pliable dough I had to add an extra 200-ish grand of water.
Hannah Dela Cruz says
Ooh - sorry your dough did not turn out quite right. That seems like a lot of water to add to this recipe. I hope the bread still turned out delicious!