

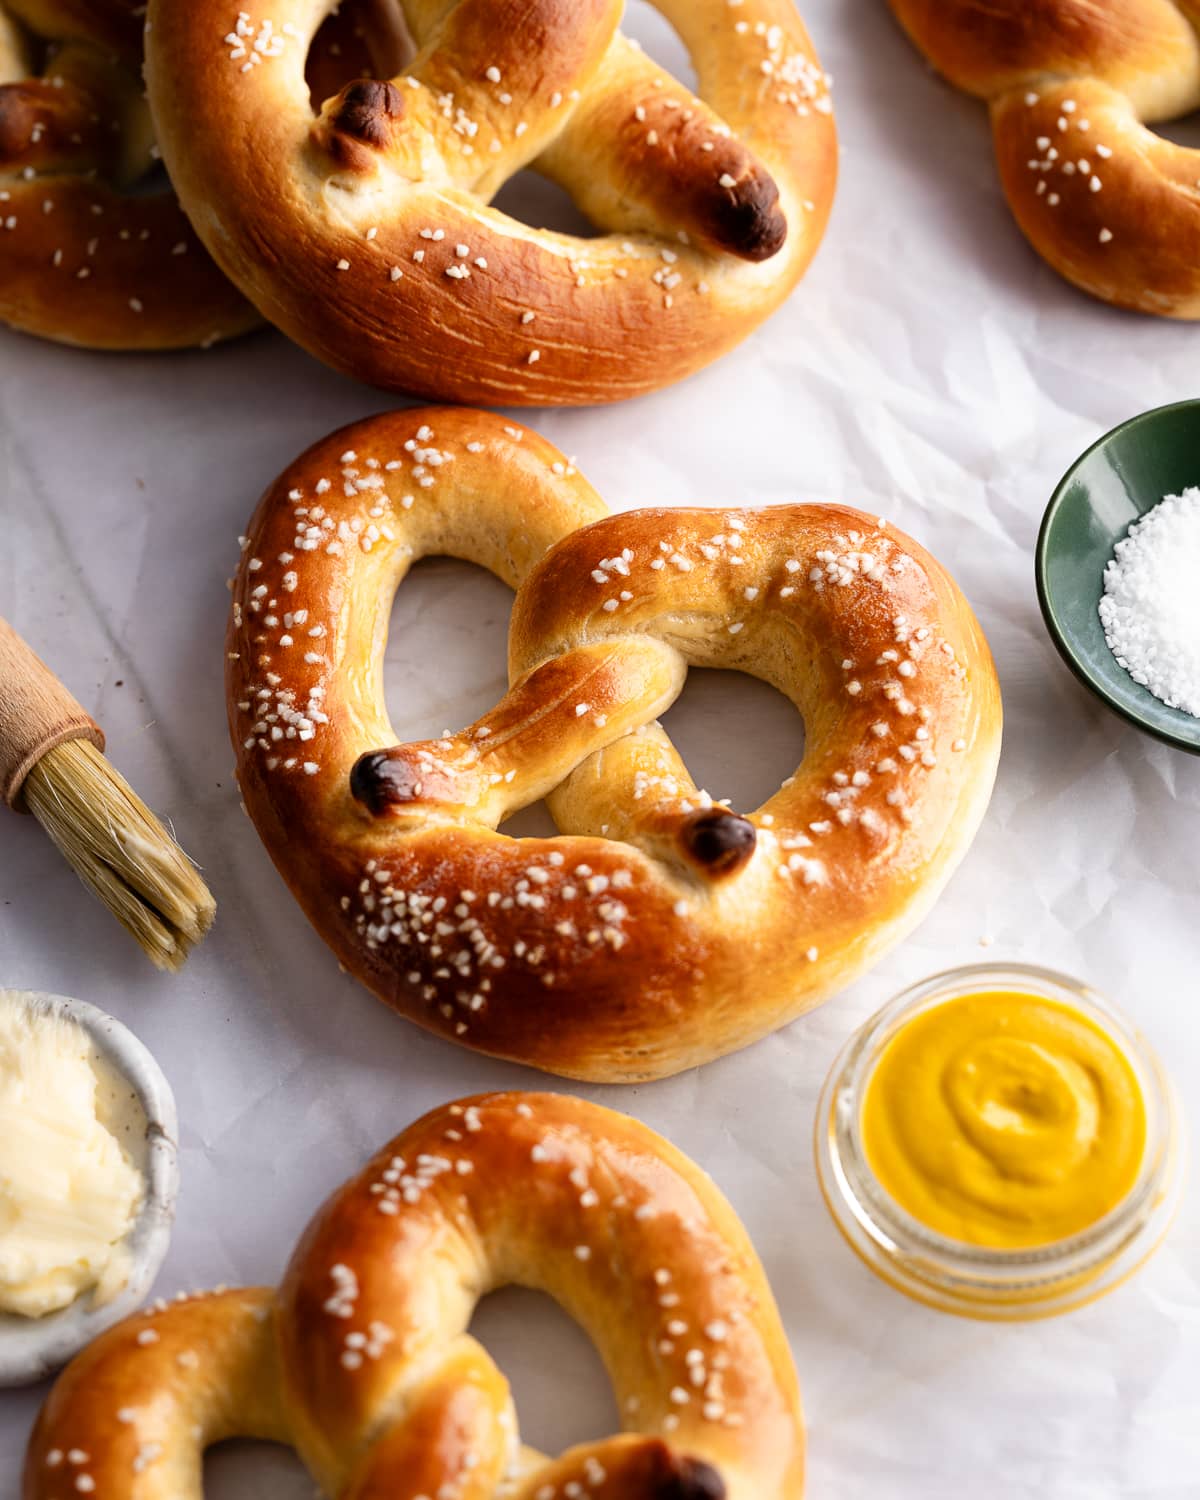
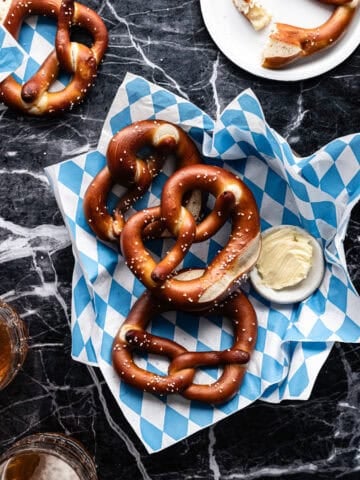
Baking these Sourdough Discard Soft Pretzels will make your kitchen smell like heaven. Sourdough discard adds a delicious flavor to these pretzels, while a plush, pillowy crumb and melted butter brushed on the still hot, golden brown crust takes them over the top. Since they are made with commercial yeast, you can bite into a freshly baked pretzel in just over an hour!
Jump to:
- What makes these sourdough soft pretzels unique
- Why use commercial yeast with sourdough discard?
- Why use a baking soda bath?
- Ingredients and Substitutions
- Baking with sourdough discard
- How to Make Sourdough Discard Soft Pretzels
- Don't let the dough overproof!
- Baker's Tips
- Make Ahead Instructions
- Recipe FAQs
- You may also like
- Sourdough Discard Soft Pretzel Recipe
What makes these sourdough soft pretzels unique
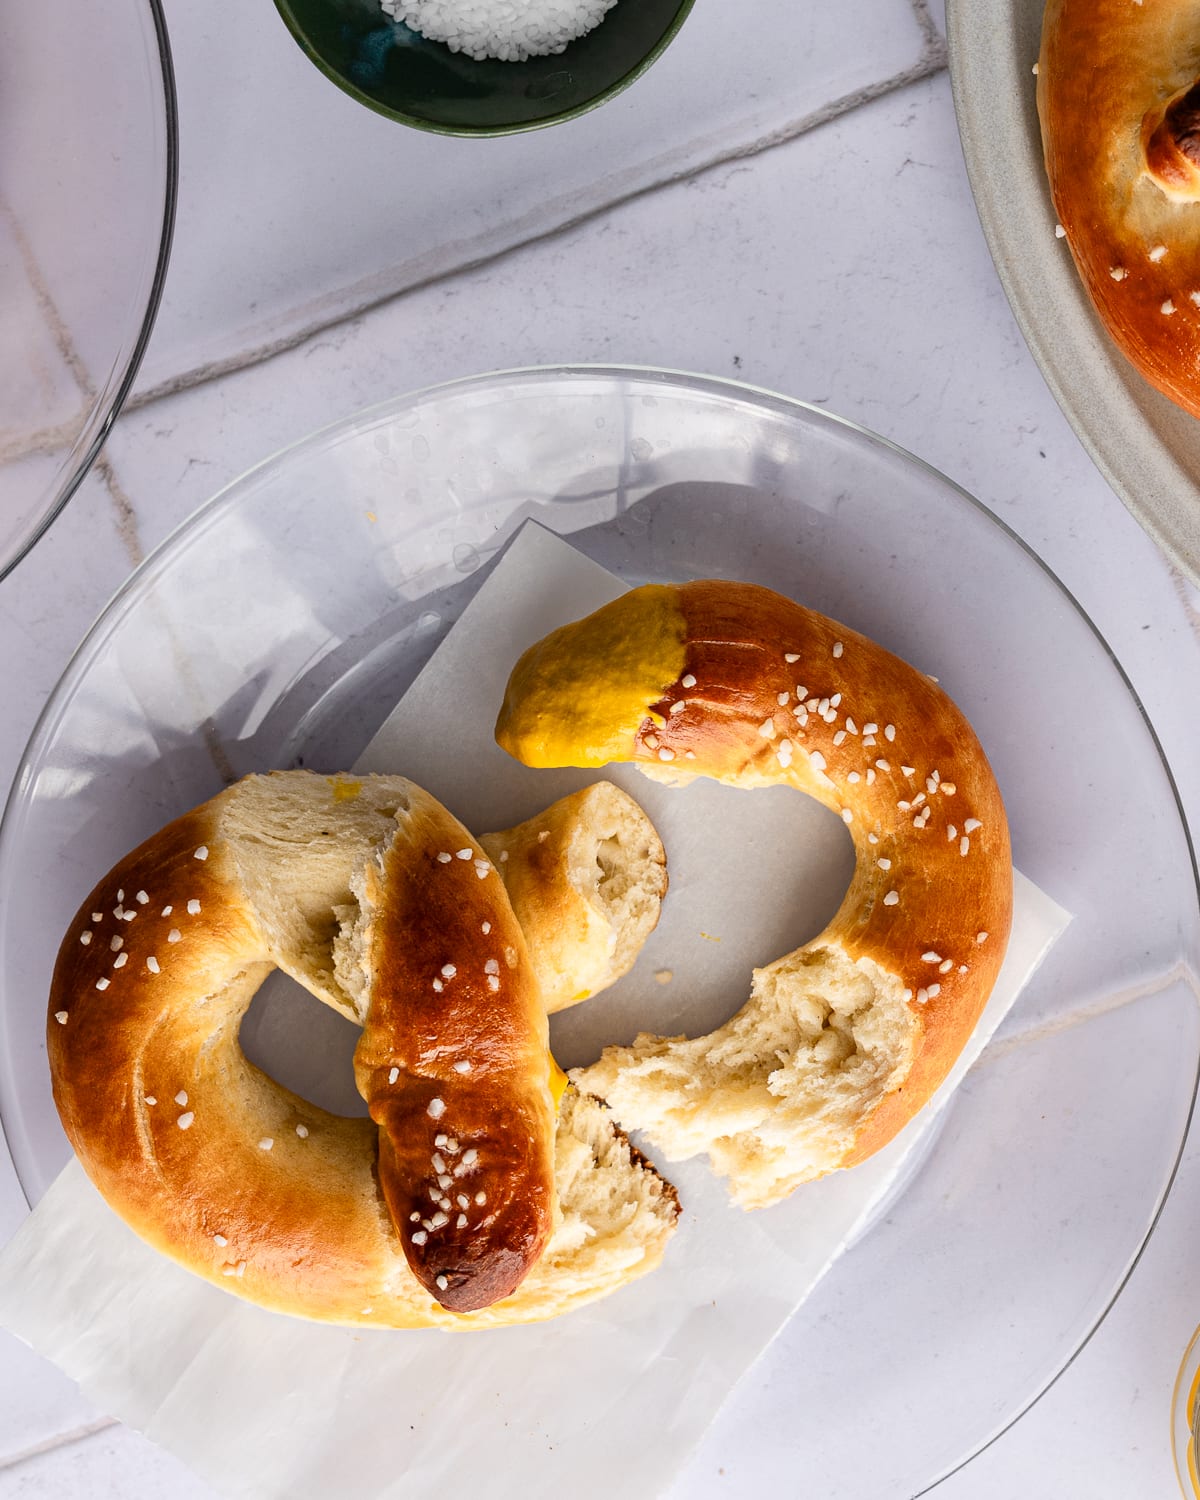
My inspiration for this recipe are Amish pretzels! Unlike a traditional German pretzel, these have a tender, fluffy interior with a soft crust drenched in melted butter. These pretzels also have a lighter, crust compared to the crunchy, deep amber-colored crust of their European counterparts. Both are delicious, just different.
Amish pretzels are also made with dough that's enriched with butter and milk. This gives them a plush brioche-like texture and a much richer flavor that's even more intensified by sourdough discard.
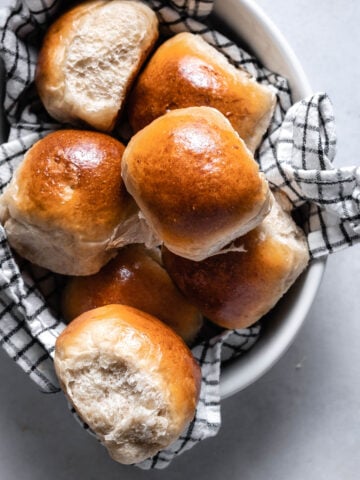
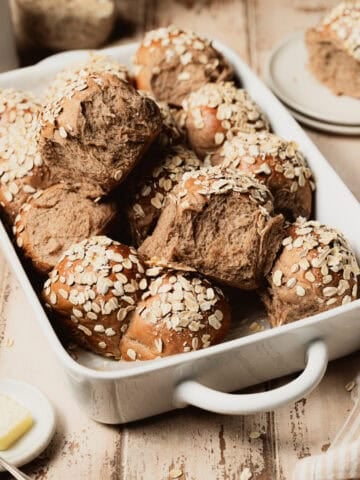
Love soft pretzels? Check out my recipes for Sourdough Discard Pretzel Buns and Sourdough Discard Pretzel Bites.

Want to make chewy, soft German-style pretzels instead? Check out my Sourdough Pretzels Recipe.
Heavenly! Best soft pretzels I've ever had. Thank you for sharing the recipe.
- Chanel Sanders
Why use commercial yeast with sourdough discard?
Adding instant yeast and sourdough discard in a recipe combines convenience and flavor. Commercial yeast shortens the rise time of dough since it's much more efficient at converting starches into sugars and carbon dioxide, which allows fermentation to occur at a much faster rate. For example, the bulk fermentation for this recipe only takes about 20 minutes instead of 3 to 4 hours required for naturally-leavened pretzel dough.
While you won't get the intense flavor development of a two-day fermentation, adding sourdough discard to your homemade pretzels will add a more nuanced, intense flavor than just using instant yeast on its own.
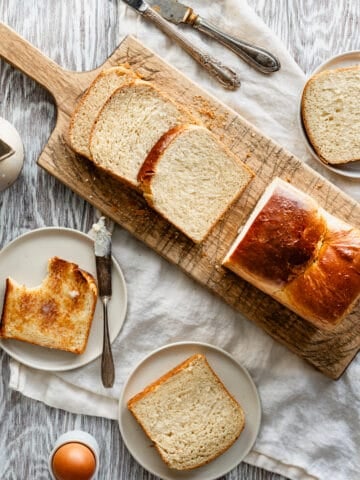
Love quick and easy sourdough recipes that use commercial yeast? Check out my recipes for Sourdough Discard Sandwich Bread, Crusty Sourdough Discard Bread, Sourdough Discard Focaccia, Sourdough Discard Cinnamon Rolls, Sourdough Discard Hot Dog Buns and Sourdough Discard Dinner Rolls.
Why use a baking soda bath?
When mixed with water, baking soda creates an alkaline solution that gelatinizes the outside of the pretzel resulting in a crisp, shiny crust. It also helps constrict oven spring, which prevents the dough from puffing up and keeps the crumb tight. The alkaline bath also imparts a unique flavor that's signature to pretzels. I also use this technique to make my Sourdough Discard Bagels!
While traditional German pretzels are made using food-grade lye, according to my research Amish pretzels (my inspiration for this bake) uses a much milder baking soda bath. This keeps the crust lighter in color and more delicate.
Ingredients and Substitutions
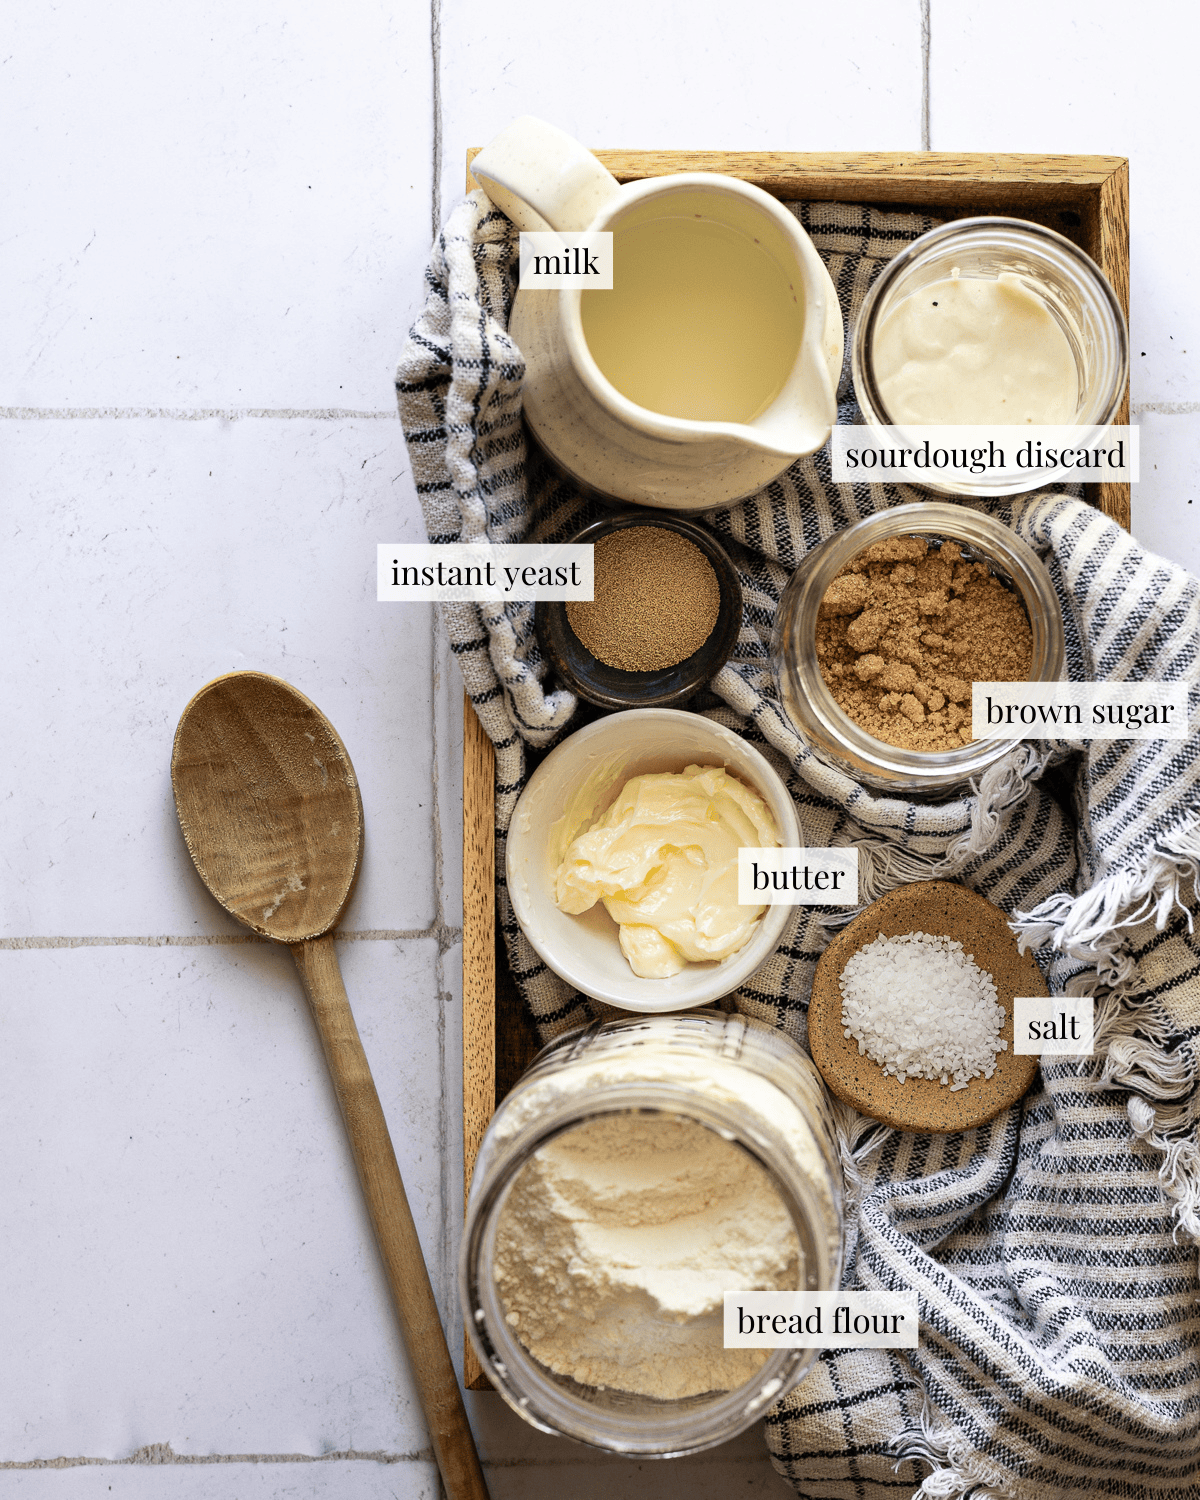
Bread flour: Bread flour has a higher protein content compared to all-purpose flour, this promotes strong gluten development. This allows the dough to stretch easily for shaping and helps it maintain its shape, resulting in fuller and plumper pretzels. Do not substitute whole wheat flour for this recipe.
Sourdough discard: Imparts a delicious, tangy flavor to these pretzels. You can use your starter directly from the fridge for this recipe. Add 38 grams of water and 38 grams of flour to your dough if you don't have any sourdough discard on hand.
Instant yeast: You can use active-dry yeast for this recipe, you'll just need to bloom the yeast before mixing it into your dough.
Salt: Use kosher salt or sea salt for the best results. Different types of salts have varying grain sizes so the amount of salt added to the recipe may differ if you use volume measurements.
Pretzel salt: Optional but highly recommended. Pretzel salt is a large-grain salt that does not melt during baking, there's no substitute for this as even flaky sea salt melts in the oven, feel free to leave this out if you don't have any on hand.
See recipe card for complete ingredient information.
Baking with sourdough discard
Since it's only being used to add flavor to the dough, your sourdough discard doesn't need to be activated and you can use it directly from the refrigerator.
If you're using sourdough that's been in the fridge for weeks it will add more flavor, which you won't get when using a freshly fed starter. Both will work for this recipe but you'll get different results.
How to Make Sourdough Discard Soft Pretzels
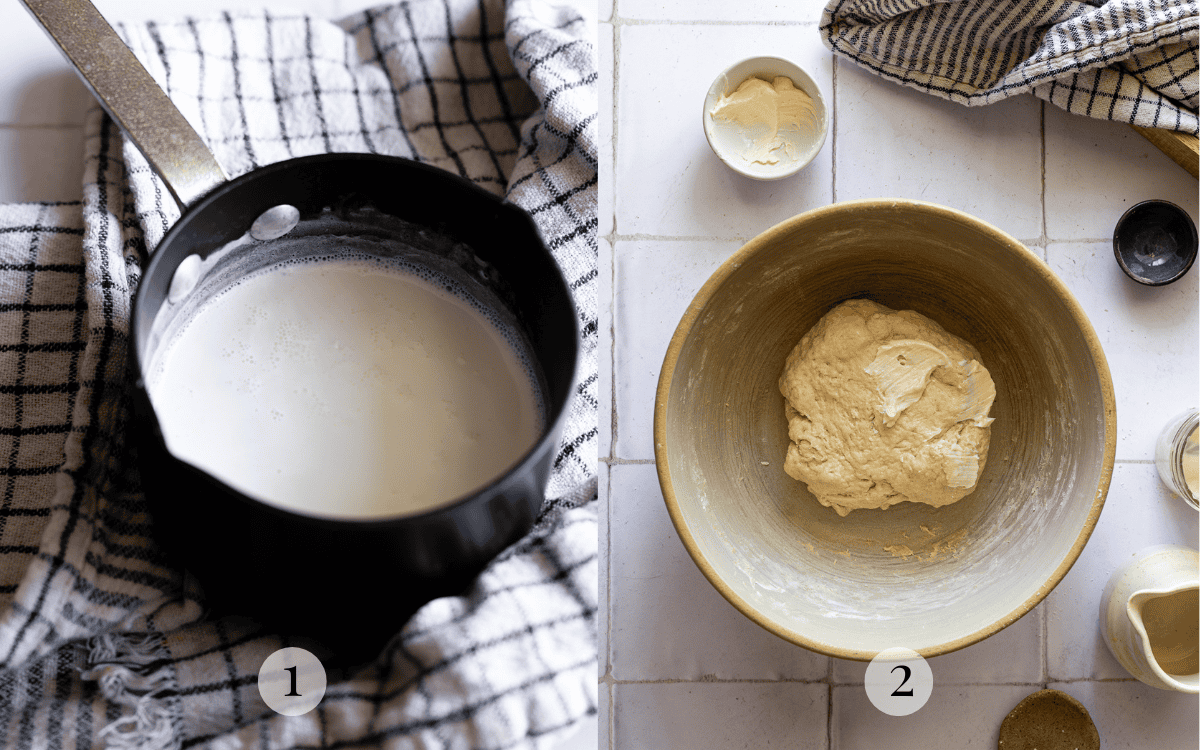
STEP 1: Make the dough
Scald the milk (heat until temp. reaches 180 F) Let milk cool completely. Combine all the ingredients until a shaggy dough forms. Knead the butter into the dough.
Top Tip
Hot temperatures will kill yeast. Let the milk cool completely (at least less than 115 F) before adding it to your dough.
STEP 2: First rise
Knead the dough until completely smooth. Let the dough rise until puffy but not doubled in volume.
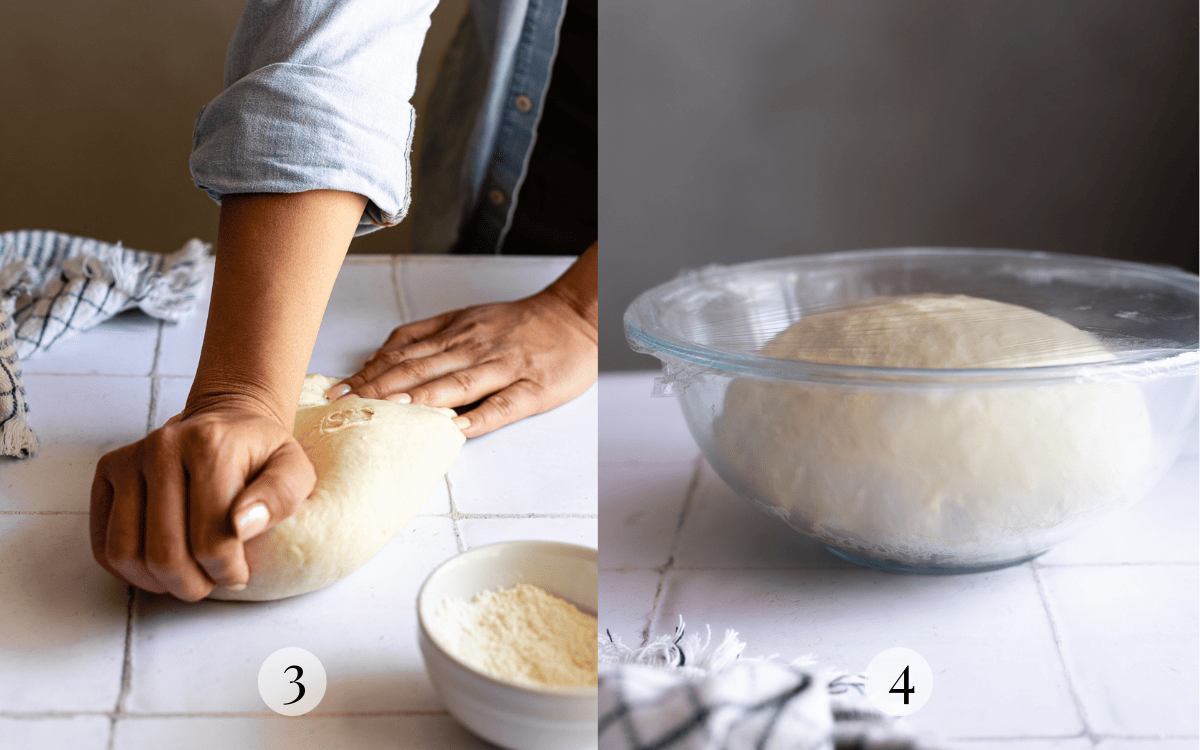
Don't let the dough overproof!
What may seem like a normal proofing period for other types of bread is too long for pretzel dough. Over-proofed pretzels will become puffy, dull, and excessively chewy.
STEP 3: Pre shape the dough
Divide the dough into 10 portions. Round each portion of dough into round balls, cover dough with plastic wrap. Roll each dough ball into a 4-inch baton, cover and let the dough rest for 15 minutes.
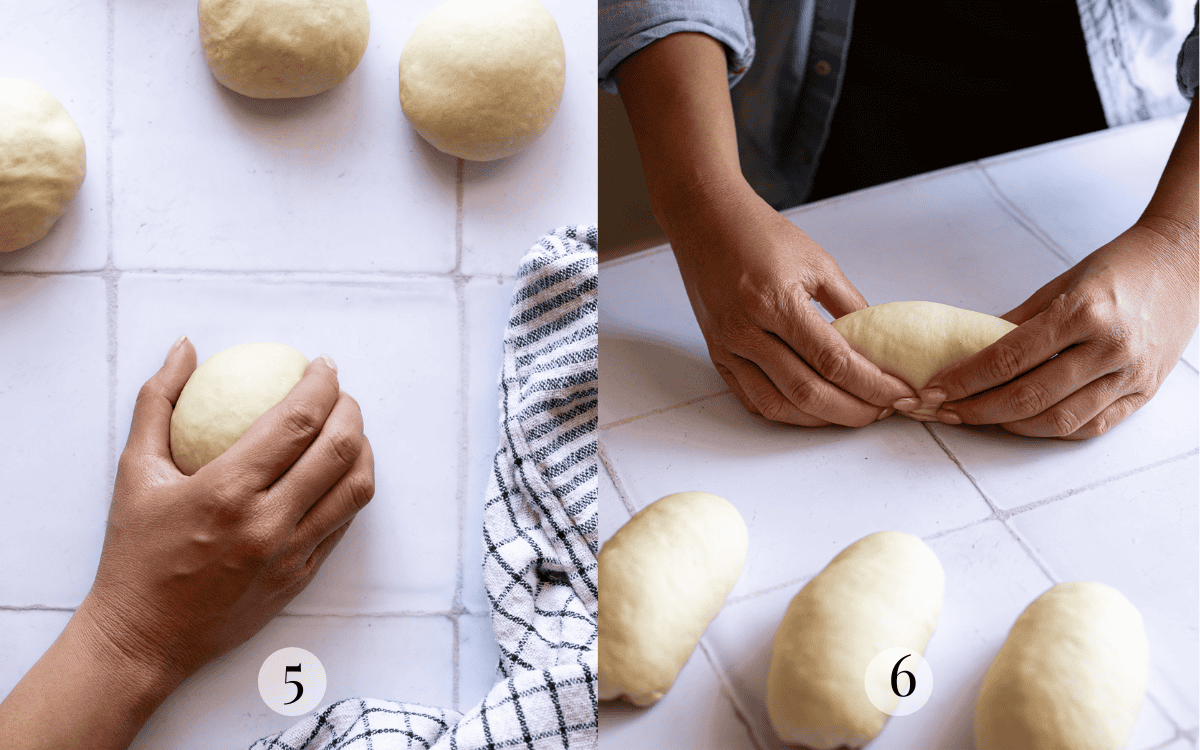
STEP 4: Shape the dough
Roll the dough into a 24 to 30 inch rope. Make a U shape. Twist the ends of the dough together. Fold the ends over and lightly press down to seal.

STEP 4: Water bath
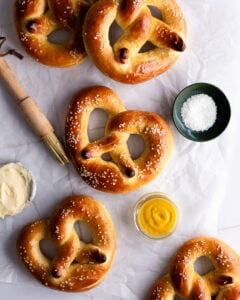
Dip pretzel in baking soda and hot water bath for 1 minute. Sprinkle pretzel salt on dough, if using.

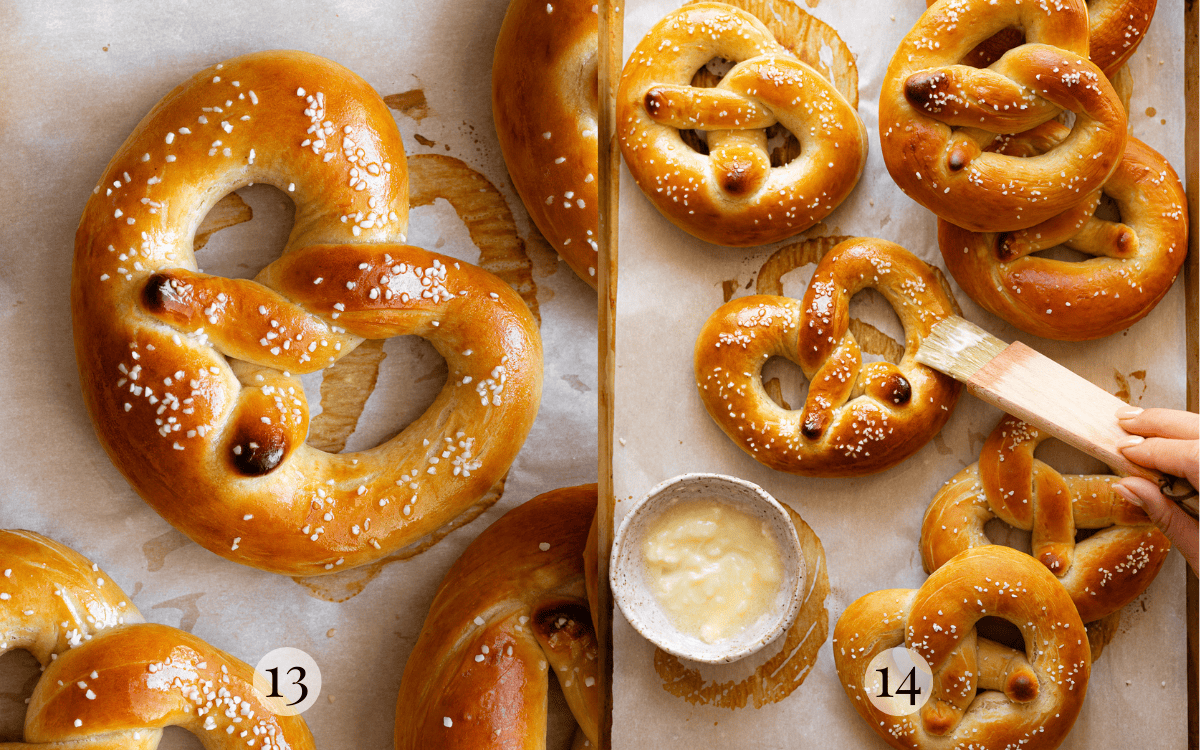
STEP 5: Bake the pretzels
Bake pretzels at 475 F for 10 to 15 minutes. Brush pretzels with butter as soon as you take them out of the oven.
Baker's Tips
Weigh your ingredients: Measuring your ingredients by weight is more accurate than using tablespoons and cups.
Make sure your yeast is fresh: Instant yeast and active-dry yeast have a shelf life, make sure yours is not expired or your dough will not rise.
Do not use an excessive amount of flour during shaping: To effectively stretch your dough, it needs to be a little tacky and adhere to the work surface. Using excessive bench flour can cause the dough to become slippery, making shaping very challenging.
Don't let the dough dry out: Cover unshaped pieces of dough completely with plastic wrap. If the dough's surface dries out, it becomes prone to breaking apart as you roll it out.
Apply downward not outward pressure: Avoid pulling and tearing the dough when stretching it quickly. Instead, gently press down on the dough while moving your hands toward the ends of the rope. This method promotes natural stretching, releases trapped gases, and leads to more uniform pretzels.
Work with dry hands: During my initial test of this recipe, I tried spritzing water on the dough and my hands to aid in shaping, but it had disastrous results. It caused the dough's surface to deteriorate, resulting in rough and uneven pretzels when baked. By following these tips, you can avoid the need for such measures.
Make Ahead Instructions
Want to make these soft pretzels ahead of time?
- Shape the dough as instructed.
- Freeze the dough on a parchment-lined baking sheet for at least 2 hours.
- Transfer dough to a ziplock bag or an airtight container and freeze for at least 3 months.
- Give the dough a water bath and bake as instructed.
Recipe FAQs
Yes, in a pinch you can use all-purpose flour. However, during my tests I found that using all-purpose flour made rolling the dough into long ropes much harder as my dough didn't have a sufficiently strong gluten network that's required for so much stretching. The result was still good, but I had to settle for pretzels that were smaller, puffier, and reminiscent of bread rolls.
Lye is a very important part of making pretzels. It's what gives German-style pretzels their crunchy, amber crust. However, these pretzels have a much fluffier texture and a lighter softer crust. I did some research on Miller's Twist pretzels and found that they eschew caustic lye for milder baking soda to keep the crust delicate.
To keep the crumb tight, these pretzels have a really short bulk fermentation period and completely forgo a second rise. The reason pretzels become too puffy is because the dough proves for too long. What may seem like a normal proofing period for other types of bread is too long for pretzel dough. Over-proofed pretzels will become puffy, dull, and at times excessively chewy.
Another reason is that you simply didn't roll your pretzel dough long enough. This results in thicker ropes which will puff up as they bake in the oven. In this case, your pretzels will still be delicious but they may resemble rolls in both their appearance and texture.
In testing, I've found that dough tearing was caused by dough with a weak gluten network or poor shaping technique. To avoid this, make sure you knead your dough until it is very smooth, and follow my shaping tips above.
There are a few reasons why your pretzels turned out lumpy instead of smooth and shiny. The most common reasons are issues with shaping and proofing. Be gentle while shaping your pretzels. Forcing them into long ropes often causes the skin of the dough to break down. I've also found that over-proofed dough has a tendency to degrade in the baking soda bath, which causes little craters to develop on the surface resulting in rough and lumpy pretzels.
You may also like

Did this recipe rise to the occasion?
★★★★★
Leave a star rating and a comment. Your feedback inspires future recipes and helps others feel confident choosing what to bake next. I read and respond to every message.
If you're looking for additional ways to support my work, share this recipe or buy me a Ko-fi. Every little bit helps me keep creating the recipes and guides you enjoy.
Thank you for your support!
Sourdough Discard Soft Pretzel Recipe
Equipment
This section may contain affiliate links
Ingredients
Dough
- 226 grams whole milk
- 75 grams sourdough discard
- 50 grams brown sugar
- 7 grams instant yeast 1 packet
- 390 grams bread flour
- 28 grams unsalted butter softened
- 8 grams salt
Baking Soda Bath
- 20 grams baking soda
- 452 grams water hot
Toppings
- 20 grams pretzel salt
- 42 grams unsalted butter softened
Click US Customary to view volume measurements
Instructions
- Prep: Preheat the oven to 475 F. Line two 18-by-13 inch baking sheets with parchment paper.
- Scald the milk: Heat milk in a small saucepan to about 180 F, or until tiny bubbles form on the edges. Transfer milk to a large bowl and let it cool completely before proceeding.226 grams whole milk
- Make the dough: Whisk the sourdough discard, instant yeast and sugar into the cooled milk until completely dissolved.75 grams sourdough discard, 50 grams brown sugar, 7 grams instant yeast
- Fold the bread flour and salt into the mixture until all of the flour is hydrated.390 grams bread flour, 8 grams salt
- Knead the butter into the dough one tablespoon at a time. Your dough will gradually feel less oily as the butter is absorbed.28 grams unsalted butter
- Strengthen the dough: Turn the dough out on a clean, lightly-floured work surface and knead for 5 to 10 minutes. Developing gluten is key for smooth and shiny pretzels so make sure your dough is completely smooth before you stop kneading.
- Bulk fermentation: Round the dough into a tight ball and place it in a clean, lightly-oiled bowl. Cover the bowl with plastic wrap and let the dough rise in a warm place, untouched for 20 minutes. Your dough should be slightly puffy but not doubled in volume.
- Preshape the dough: Turn the dough out on a clean work surface and divide it into 10 equal portions. Round each piece of dough into a tight ball. Cover the dough with a large piece of plastic wrap.
- Working with 1 piece at a time, lightly coax the dough into a 4-inch baton. Cover the preshaped dough with plastic wrap, let them rest for 15 minutes.
- Shape pretzels: Working with one portion of dough at a time, roll it into an 24 to 30-inch rope with tapered ends.
- Grab the tips and form a U shape. Twist the ends twice, and flip them over.
- Tack the ends to the sides and place the shaped dough on a baking sheet.
- Place shaped dough on baking sheets. Freeze the shaped dough for 10 minutes.
- Baking soda bath: In a large glass or stainless steel bowl, dissolve baking soda in hot water.20 grams baking soda, 452 grams water
- Working with one portion of dough at a time, carefully submerge frozen dough in the baking soda bath for 1 minute. Transfer to a wire rack to drain.
- Return pretzel dough to baking sheets. Sprinkle pretzel salt on pretzels while the surface of the dough is still wet.20 grams pretzel salt
- Bake: Bake for 10 to 15 minutes or until the pretzels are evenly browned. Transfer the pretzels to a wire rack.
- Brush warm pretzels with butter.42 grams unsalted butter
- Enjoy: These are best eaten fresh from the oven the day they are baked. Enjoy them on their own or with a side of mustard.
- Store: Store any leftover pretzels in an airtight container for up to 3 days.
Tips
These recipes were developed and tested using grams for precise measurements. To increase your chances of success, I recommend investing in a kitchen scale. I've included rough volume estimates (in tablespoons and cups), but they might not be totally accurate.
Remember all ovens are unique, these recipes were tested in my oven which runs cooler than others. You might need to lower the temperature if your bake appears to be browning too quickly. Monitor your bake closely and make adjustments if needed.
Notes
Recipe Video
Nutrition
I am not a nutritionist or dietitian, any nutrition information provided is an estimate.


Kimberly says
Hello! I can’t have dairy so I was wondering if almond or oat milk could be substituted? Thank you!
Hannah Dela Cruz says
Any plant-based option or even water would work well!
Nicholle Slocum says
This is now become a staple at all of our holiday parties. Can this dough be made ahead of time and kept in the freezer until I am ready to put in the boiling water and bake?
Hannah Dela Cruz says
Hi Nicholle! Absolutely, you can either freeze the dough and defrost before shaping. Or if you have the space, you can also shape the pretzels before shaping them. You can also do the alkaline bath and bake the shaped pretzels straight from frozen.
Bel says
These turned out absolutely delicious! Much better than any I've ever purchased anywhere. My husband even likes them and he is not a fan of soft pretzels. He ate the entire pretzel and that's a first!
Thanks for the wonderful recipe!
Hannah Dela Cruz says
I’m so glad your husband enjoyed the recipe! It’s a favorite around here too—my boyfriend asks for them all the time. You might end up making these more often than you think.
Anita says
I made these today as I was looking to make a sourdough discard recipe. It
definitely takes a while but the result is worth it! I have never made bagels before but if I make them again I will 100% use this recipe.
Thankyou!
Hannah Dela Cruz says
Hi Anita! Thank you!