This Sourdough Discard Whole Wheat Sandwich Bread is irresistibly soft, tender, and made entirely from 100 percent whole wheat flour. Adding yeast speeds up the baking process and is so delicious it will make you ditch white bread in your turkey sandwiches and PB&J.

This recipe was originally published on Jan, 2024. I have since updated it with an easy to follow format and more tips for success.
Jump to:
- Making a fluffy whole wheat loaf
- Why I love this recipe
- What you need
- Sourdough Bread vs. Sourdough Discard Bread
- Baking with sourdough discard
- Step-by-step instruction
- Baker's Tips
- Make-ahead Instructions
- Why I developed this recipe
- Recipe FAQs
- You may also like
- Whole Wheat Sourdough Discard Sandwich Bread Recipe
This is a wonderful recipe and now my most favorite sourdough whole wheat bread recipe.. The bread is fluffy and light, tastes good and is so easy to make. It is hard to believe that this bread is 100% whole wheat.
- Joan
Making a fluffy whole wheat loaf

In the past, I've steered clear of 100% whole wheat flour recipes because they usually turn out dense and heavy with a a little bit of a bitter flavor. I didn't want to compromise on flavor and texture in the pursuit of a "healthy recipe."
Imagine my delight when I sliced into this loaf and discovered it was wonderfully pillowy and soft, reminiscent of the fluffiest white bread! To achieve this delightful texture, I increased the water content and added olive oil for a softer crust and interior. The inclusion of maple syrup provides a touch of sweetness that complements the nutty flavor of the whole wheat.
While I used hard red wheat flour in this recipe, you can substitute white wheat flour. However, it's important to note that different types of wheat have distinct molecular structures and varied protein content, so it's best not to substitute flours like einkorn, spelt, rye, etc.
Want to try baking with other types of wheat? Try my recipes for Sourdough Spelt Bread and Sourdough Discard Marble Rye Bread.
Why I love this recipe
- Great way to use up a lot of sourdough discard.
- Soft and fluffy texture with a deep and nutty whole wheat flavor.
- Made with 100 percent whole wheat.
- Delicious sourdough flavor without the long rise times.
- Mixed by hand, no stand mixer required!
What you need

Whole wheat flour: This recipe uses whole wheat flour made with hard red wheat, which contains more protein than flour made with white wheat. This allows the loaf to retain its structure, do not substitute whole wheat pastry flour.
Sourdough discard: Both a whole wheat starter and white starter will work for this recipe. If you don’t keep discard, active sourdough starter or simply adding 56 grams water and 56 grams flour will work.
Active-dry yeast: You can use instant yeast for this recipe, feel free to skip the blooming step.
Maple syrup: Helps activate the yeast, using maple syrup makes this recipe vegan. Substitute cane sugar, brown sugar, molasses or honey (if you do not follow a vegan diet).
Tip
Commercial yeast has a shelf life, make sure yours is not expired before starting this recipe or it will not be able to make your dough rise.
Sourdough Bread vs. Sourdough Discard Bread
Sourdough discard bread combines discarded starter with either active-dry or instant yeast, dramatically reducing proofing time. In contrast, traditional sourdough bread relies solely on an active sourdough starter, leading to a longer fermentation time of about 2 days due to the reliance on wild yeast.
Love quick and easy sourdough recipes that use commercial yeast? Check out my recipes for Sourdough Discard Sandwich Bread, Vegan Sourdough Discard Sandwich Bread and Sourdough Discard Rosemary Olive Oil Bread.
Baking with sourdough discard
The addition of sourdough discard contributes a rich and nuanced flavor to this bread. As the sourdough starter is used solely for flavor enhancement, there's no need to feed it; you can use it directly from the refrigerator.
Using older sourdough discard intensifies the flavor compared to a freshly fed starter, though both work well in this recipe.
Tip
Opting for a white starter means your loaf won't be entirely 100% whole wheat. Don't worry, the addition of a small amount (11%) of white flour from your starter to your dough won't significantly alter its flavor or texture.
Step-by-step instruction
STEP 1: Make the dough
]Bloom the yeast in water and maple syrup. Fold in the sourdough discard and dry ingredients until a cohesive dough forms. Knead the oil into the dough.

STEP 2: Knead the dough
Place the dough on a clean surface, then fold it in half and use the heels of your hands to push and stretch it away. Rotate the dough a quarter turn and repeat. Continue for 5 to 10 minutes until the dough is smooth and elastic. Round the dough into a tight ball.

Tip
If the dough feels too sticky, cover it with plastic wrap and let it rest for another 10 minutes before continuing to knead.
STEP 3: First proof
Return the dough into a lightly greased bowl and cover it with plastic wrap. Let the dough rise, untouched until doubled in size.

STEP 4: Shape the dough
Divide the dough into 5 portions. Round flatten each portion into a rectangle, and fold the corners into the center. Turn the dough over and round it into a tight ball. Brush the top of the dough with water. Roll the dough in a mixture of seeds, optional.

Tip
Feel free to use a different type of seed such as flax seeds, poppy seeds or pumpkin seeds. If you don't like seeds, then simply leave them out.
STEP 5: Final rise
Arrange the dough in a zigzag pattern in a 9 by 4-inch Pullman pan (image 13). Let the dough rise in a warm place until puffy and the dough fills the pan (image 14).

Tip
You can shape this dough however you like, I find that this method helps prevent dough from bursting as it bakes.
STEP 6: Bake
Bake at 400F for 10 minutes, turn down the heat to 350 F for another 30 to 40 minutes. Let the loaf cool for at least 2 hours before slicing.

Baker's Tips
- Weigh your ingredients: Measuring by weight is much more accurate than by volume (with tablespoons and cups).
- Watch the dough not the clock: I’ll be giving time cues throughout the recipe, but since fermentation is highly dependent on temperature, this may differ based on the conditions of your kitchen.
- Be patient: Be patient and wait until your dough is bubbly and well-risen. Otherwise, your bread will be dense and gummy
- Use an instant-read thermometer: The best way to determine whether your loaf is fully baked is to probe the center of the cinnamon loaf with an instant-read thermometer. The internal temperature of your loaf should be between 180F to 190F.
Make-ahead Instructions
The best way to enjoy this bread is by serving it the day after its baked. This allows the crumb of the bread to fully set and prevents the loaf from drying out.
The dough can be made 1 day in advance.
- Shape the dough according to the instructions.
- Cover the pan with plastic wrap and refrigerate the unbaked dough overnight.
- The next day, take the pan out of the refrigerator. Allow the dough to come to room temperature or rise until the dough is puffy and fills the pan.
- Bake as instructed.
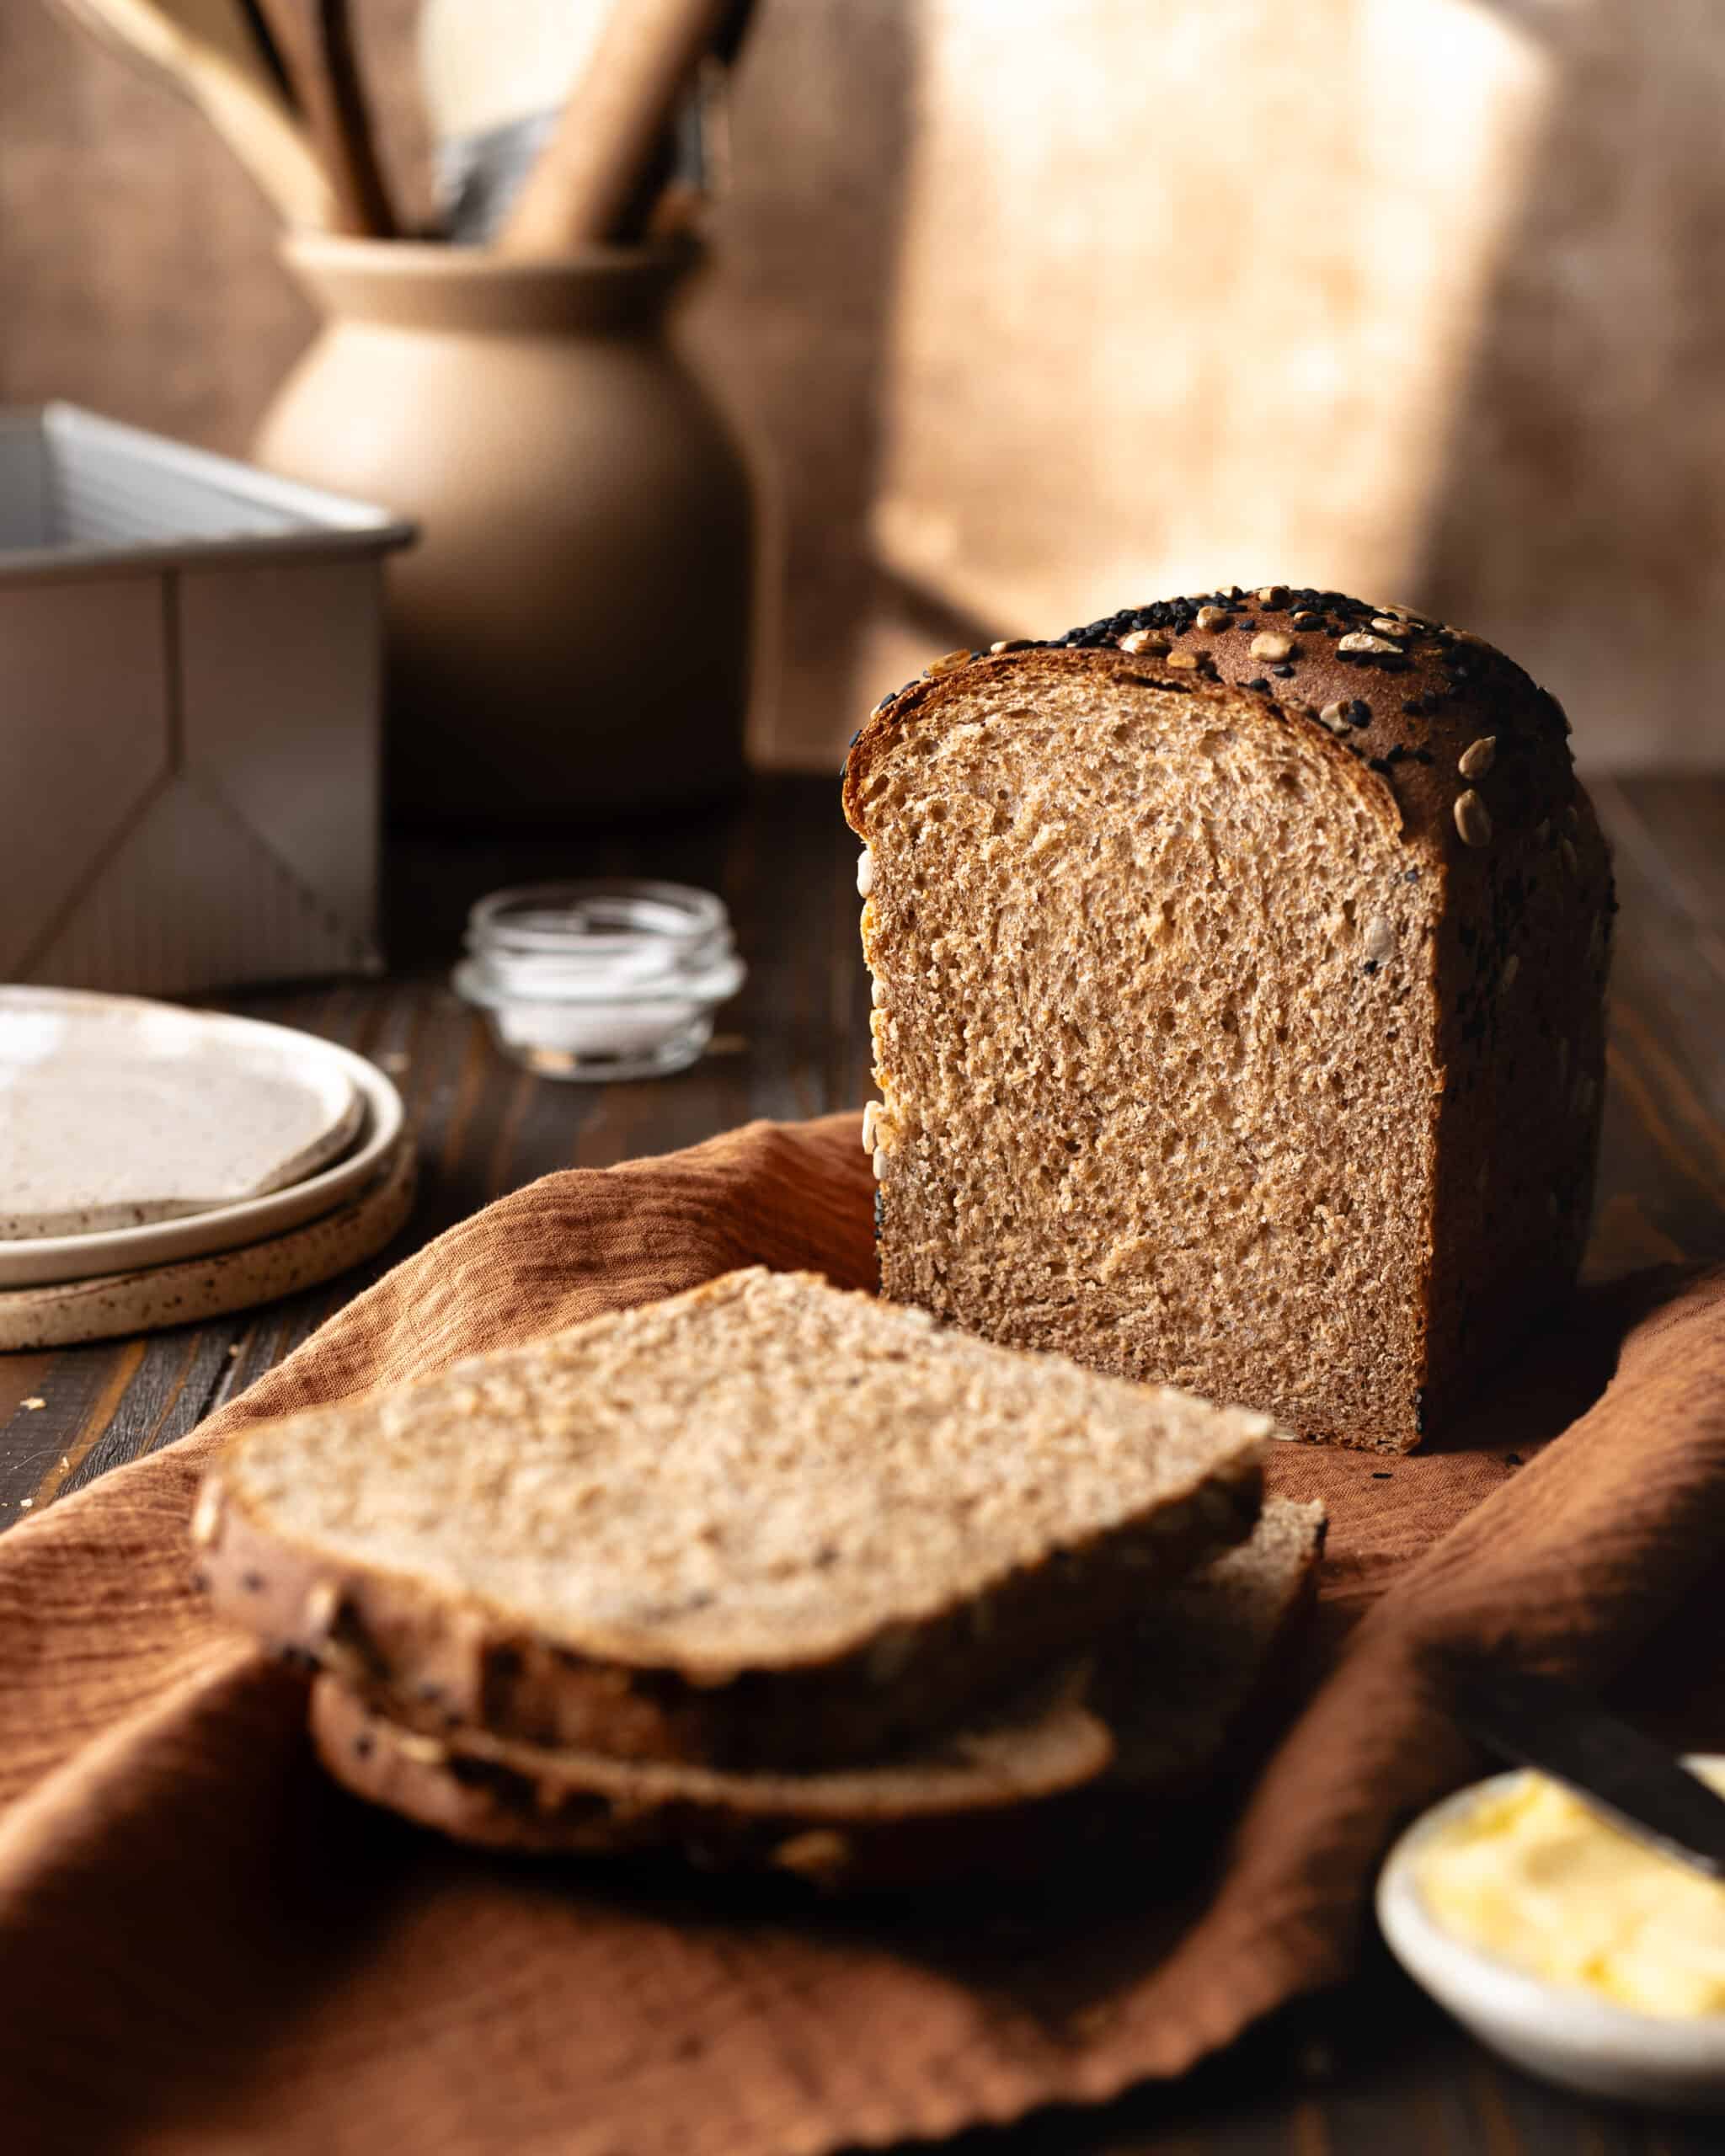
Why I developed this recipe
This Sourdough Discard Whole Wheat Sandwich Loaf recipe is another collaboration with Mimi at Mimi’s Organic Eats. Each month we collaborate on a sourdough recipe we think our readers will love! We wanted to create a healthy, whole grain bread that was just as delicious as Sourdough Discard Sandwich Bread made with white flour.
Check out the other recipes from our collaboration, like Sourdough Wheat Crackers, Sourdough Rosemary Lemon Bread and Sourdough Discard Hot Dog Buns.
Recipe FAQs
Sourdough discard is any portion of your starter removed during the feeding process or any part not used to leaven sourdough bread. You can use it in other bakes and dishes or store it in the refrigerator.
Allow the dough to rest for 10 to 15 minutes before proceeding with kneading. Knead gently, avoiding rough handling that could break down the dough's surface, making it stickier.
If the dough remains excessively sticky, add flour gradually, don’t be tempted to add too much or your loaf may end up too tough and dry.
There are a few reasons why your dough isn’t rising:
Your yeast is expired and can no longer make dough rise. If your yeast has been in your pantry for quite some time, activate it by mixing it with water and sugar first before mixing it in your dough. The mixture will look bubbly and smell yeasty if it’s still viable.
Your kitchen is too cold, cool temperatures will drastically slow down fermentation or the rate at which your dough rises. If your kitchen is too cold your dough will eventually rise, it may just take longer than the times cued in this recipe.
You used hot water and you may have killed your yeast. Water hotter than 115 F will kill yeast, if you accidentally add hot water to your yeast, start over.
You may also like
Did this recipe rise to the occasion?
★★★★★
Please leave a star rating and a comment. Your feedback helps me create more delicious sourdough recipes. I read and truly appreciate every message.
Don't forget to PIN this recipe on Pinterest to save it for later!
Thank you for your support!
Whole Wheat Sourdough Discard Sandwich Bread Recipe
This section may contain affiliate links
Ingredients
Dough
- 282 grams water plus more for brushing
- 56 grams maple syrup
- 7 grams active-dry yeast or instant yeast
- 113 grams sourdough discard white or whole wheat
- 450 grams whole wheat flour
- 9 grams salt
- 56 grams olive oil
Topping (optional)
- 40 grams sunflower seeds toasted (see note)
- 10 grams sesame seeds or poppy seeds
Click US Customary to view volume measurements
Instructions
- Bloom the yeast: Whisk the water, maple syrup and yeast together in a large bowl. Cover the bowl and let the yeast bloom until foamy, about 15 minutes.282 grams water, 56 grams maple syrup, 7 grams active-dry yeast
- Make the dough: Stir the sourdough discard, whole wheat flour and salt into the yeast mixture until no dry bits of flour remain. Switch to your hands and knead until a cohesive dough forms.113 grams sourdough discard, 450 grams whole wheat flour, 9 grams salt
- Knead the dough into the oil until completely absorbed. The dough should start greasy and gradually become smoother and less sticky. Cover the bowl with plastic wrap and let the dough rest for 15 minutes. * If using a stand mixer, mix the dough ingredients except for the oil. Once a cohesive dough forms, knead the dough with a dough hook and slowly stream the oil into the bowl until completely incorporated about 5 minutes.56 grams olive oil
- Strengthen the dough: Turn the dough out onto a lightly floured work surface. Knead the dough by folding it in half, then pressing and pushing with the heel of your hand. Continue this process until the dough becomes smooth and elastic, about 5 to 10 minutes.
- First rise: Round the dough into a tight ball, and transfer it to a clean, lightly oiled bowl. Spread oil on top of the dough to prevent it from drying out.
- Cover the bowl with plastic wrap and set it in a warm place until doubled in volume, about 45 minutes to 1 hour.
- Prep: Preheat the oven to 400 F. Line a 9 by 4-inch Pullman pan (see note) with parchment paper or brush liberally with oil.
- Toss the toasted sunflower seeds and sesame seeds on a plate. Set aside.40 grams sunflower seeds, 10 grams sesame seeds
- Shape the dough: Turn the dough out on a lightly floured work surface. Divide the dough into 5 even portions.
- Working with 1 portion of dough at a time. Flatten the dough into a rough rectangle, and fold the corners towards the center. Turn the dough over, cup the dough and drag it on your work surface in a rounding motion to create a smooth, taut surface.
- Brush the top of the dough with water and coat the top of each ball in the seed mixture. Nestle the dough in the prepared pan. Repeat with the remaining portions of dough, arranging them in a zigzag pattern.
- Final Proof: Cover the loaf pan with plastic wrap. Let the dough rise untouched in a warm place. The dough should fill your pan and rise about ½ an inch above the rim, about 30 to 45 minutes.
- Bake: Bake the dough for 10 minutes at 400 F. Without taking the loaf out of the oven, turn the temperature down to 350 F and continue baking for another 30 to 45 minutes or until the loaf registers at 200 F when probed with an instant-read thermometer.
- Move the bread to a wire rack and let it cool completely, about 2 hours (ideally overnight) before slicing.
Tips
These recipes were developed and tested using grams for precise measurements. To increase your chances of success, I recommend investing in a kitchen scale. I've included rough volume estimates (in tablespoons and cups), but they might not be totally accurate.
Remember all ovens are unique, these recipes were tested in my oven which runs cooler than others. You might need to lower the temperature if your bake appears to be browning too quickly. Monitor your bake closely and make adjustments if needed.
Notes
- Make sure your yeast is not expired before baking these loaf or your dough may not rise.
- Both a white starter or a whole wheat starter for this recipe.
- Give your dough enough time to rise, waiting until it has doubled in volume before shaping or baking. Otherwise, your bread may be dense and gummy.
- Feel free to use active sourdough starter or sourdough discard to make this recipe.
- Both instant yeast and active dry yeast will work to make this recipe.
- This loaf in an 8 by 5-inch loaf pan or make them into rolls.
- Use an instant-read thermometer to make sure your loaf is fully baked. The center of the loaf should measure between 180 F to 190 F when done.
Nutrition
I am not a nutritionist or dietitian, any nutrition information provided is an estimate.




Tiffany says
Amazing! First try at a loaf. And first try with sourdough discard. Sliced perfectly and texture was wonderful! Easy to slice and a beautiful loaf !
I subbed honey for maple syrup simply because that’s all I had.
Hannah Dela Cruz says
So glad you loved this recipe!
Sharon says
Researching before making sandwich bread. I make sourdough using enamel coated Dutch oven and it’s the best!!! Now onto sandwich loaf…..can I use all purpose flour of whole wheat?
Hannah Dela Cruz says
Hi! Not sure what the question is.
Sharon says
Can I use cast iron loaf pans that measure the same as a Pullman? Sharon
Hannah Dela Cruz says
It should work just fine!
Maura says
I just made this for the first time and it came out great! I did use honey instead of maple syrup and all I had was a standard loaf pan. I didn’t shape the five individual pieces beforehand, I just used a standard loaf shaping technique and it cooked up perfectly without any cracks or bursts. It sliced like a dream and has great structure to it. I will make this again, thank you!
Hannah Dela Cruz says
I am so thrilled that you loved it!
Martha says
I have instant potato starter. Have you ever tried this recipe with potato starter?
Hannah Dela Cruz says
I'm not very familiar with potato starters, but if it functions like a regular sourdough starter and you want to avoid using instant yeast, you'll likely need to extend the fermentation time by adding a few extra hours to the proofing stage. However, if you're only using it as discard and plan to include instant yeast in the recipe, the process should remain the same without any additional adjustments.
Denee says
This is the best and easiest whole wheat bread recipe I’ve ever made. I can’t wait to make sandwiches out of it!
Hannah Dela Cruz says
So glad you enjoyed the recipe!
sarah Byrne says
My family and I love this recipe! can I use my stand mixer instead of hand kneading the dough to strengthen it? if so, for how long?
Hannah Dela Cruz says
Yes! Use your dough hook to knead for 3 to 5 minutes until the dough looks smooth and elastic.
Donna says
If using Instant Yeast, when is it added?
Hannah Dela Cruz says
Just add the yeast with the dough ingredients. It doesn't need to be bloomed like active-dry yeast.
Gisella Riva says
Hi I’m making the bread now so far it looks great but I was wondering, can I put the seeds in the bread too? Thank you for this delicious easy step by step recipe!
Hannah Dela Cruz says
Hi - you can add seeds but they do need to be soaked into hot water before being incorporated into the dough. Otherwise they will steal water from your dough and make your bread dense and dry. I'd try to soak the seeds for at least 1 hour before making your bread. Then strain the seeds before adding them in.
Marilyn says
what quantity of bread
for the nutritional info?
Hannah Dela Cruz says
The nutritional info is for 1 slice, if you slice your loaf into 16 slices.
Marcy Evans says
This made a beautiful loaf if bread! And a tasty one, at that! The instructions were easy to follow. I used a loaf pan because I didn't have a a Pullman pan. The texture and cake is so soft; it's hard to believe this 100% whole wheat!
Hannah Dela Cruz says
I love this bread so much and I'm so glad you enjoyed it as well.
Megan Scott says
This is a beautiful, light wheat bread. The instructions are easy to follow and results have been consistently great. I use a 9x5 loaf pan and the traditional method of shaping bread. I lightly oil the shaped loaf and scored it, then sprinkle seeds on the top before baking. The baked loaf slices perfectly, and makes wonderful sandwiches and toast. I’ve been making this weekly and I think I’ve found my perfect bread recipe. Thank you!
Hannah Dela Cruz says
I'm so glad you found a favorite recipe here on my blog! Thank you so much for your feedback.
Sarah Barr says
Hannah, thank you for this recipe! I’ve had zero luck making active yeast breads until making this bread. It’s absolutely delicious and gorgeous! I also love the way you’ve written this recipe to include the weights of the ingredients in each step - so smart and so much easier to follow!
Hannah Dela Cruz says
You're so welcome! I'm glad this recipe was a success for you. It's my favorite recipe I've created in a while.
Tatiana says
I made this recipe and really enjoyed it! The bread was beautiful and tasty, and I plan to do it again! Have you made this without the dry active yeast, using only active starter? Also, is the nutrition information for 1 slice? Thank you!
Hannah Dela Cruz says
I have not! But I have heard people do it successfully. You'll need to adjust your bulk fermentation and rise times but the formula should work. Just use the same amount of active starter as discard in the recipe and don't use any yeast.
Yes the nutrition info is for 1 slice if you cut your loaf up into 16 slices!
Joan says
This is a wonderful recipe and now my most favorite sourdough whole wheat bread recipe.. The bread is fluffy and light, tastes good and is so easy to make. It is hard to believe that this bread is 100% whole wheat. It is a beautiful bread too!. The pullman pan makes this whole wheat bread unique because of the shape. The seeds on the top make this loaf of bread a show piece. The link above to the pullman pan is broken. Can you correct or send me the link? There seems to be a variety of pans and I want to make sure I purchase the right size. I just used a regular bread pan to bake my first loaf, but now that I had just good success I want to use the pullman pan.
Hannah Dela Cruz says
Hi Joan - thanks so much for the kind words. This recipe is my greatest triumph this year and I'm so so glad that you are enjoying it as much as I am. I just updated the link in the recipe so it should work just fine now! Let me know if you have anymore issues!
Erica Randall says
Hello! Is it possible that after using a stand mixer to incorporate the oil that it doesn’t need to be kneaded again? After kneading it felt much stiffer than it did when I took it out of the bowl after incorporating the oil. Also, in the recipe it says the internal temp should be 200°, but in the notes it says the center should be 180-190°. Can you clarify which temp is correct? Thank you so much!
Hannah Dela Cruz says
180 F to 200 F would work for the temp. If the dough feels tight and strong then it doesn't need to be kneaded.
Maria says
Sounds delicious. If I wanted to sub maple syrup for brown sugar, do I adjust the water and sugar ratio? Or is it a 1:1 swap?
Hannah Dela Cruz says
1:1 substitution should be just fine!