Brimming with rich pumpkin flavors, aromatic warm spices, and a buttery, flaky crust, this Sourdough Pumpkin Pie will be the centerpiece of any holiday gathering. With sourdough discard in both the filling and the crust, this delectable treat is a delicious and creative solution to your overflowing discard jar. Since it doesn't use any eggs in the filling it's much easier to make than traditional pumpkin pie.
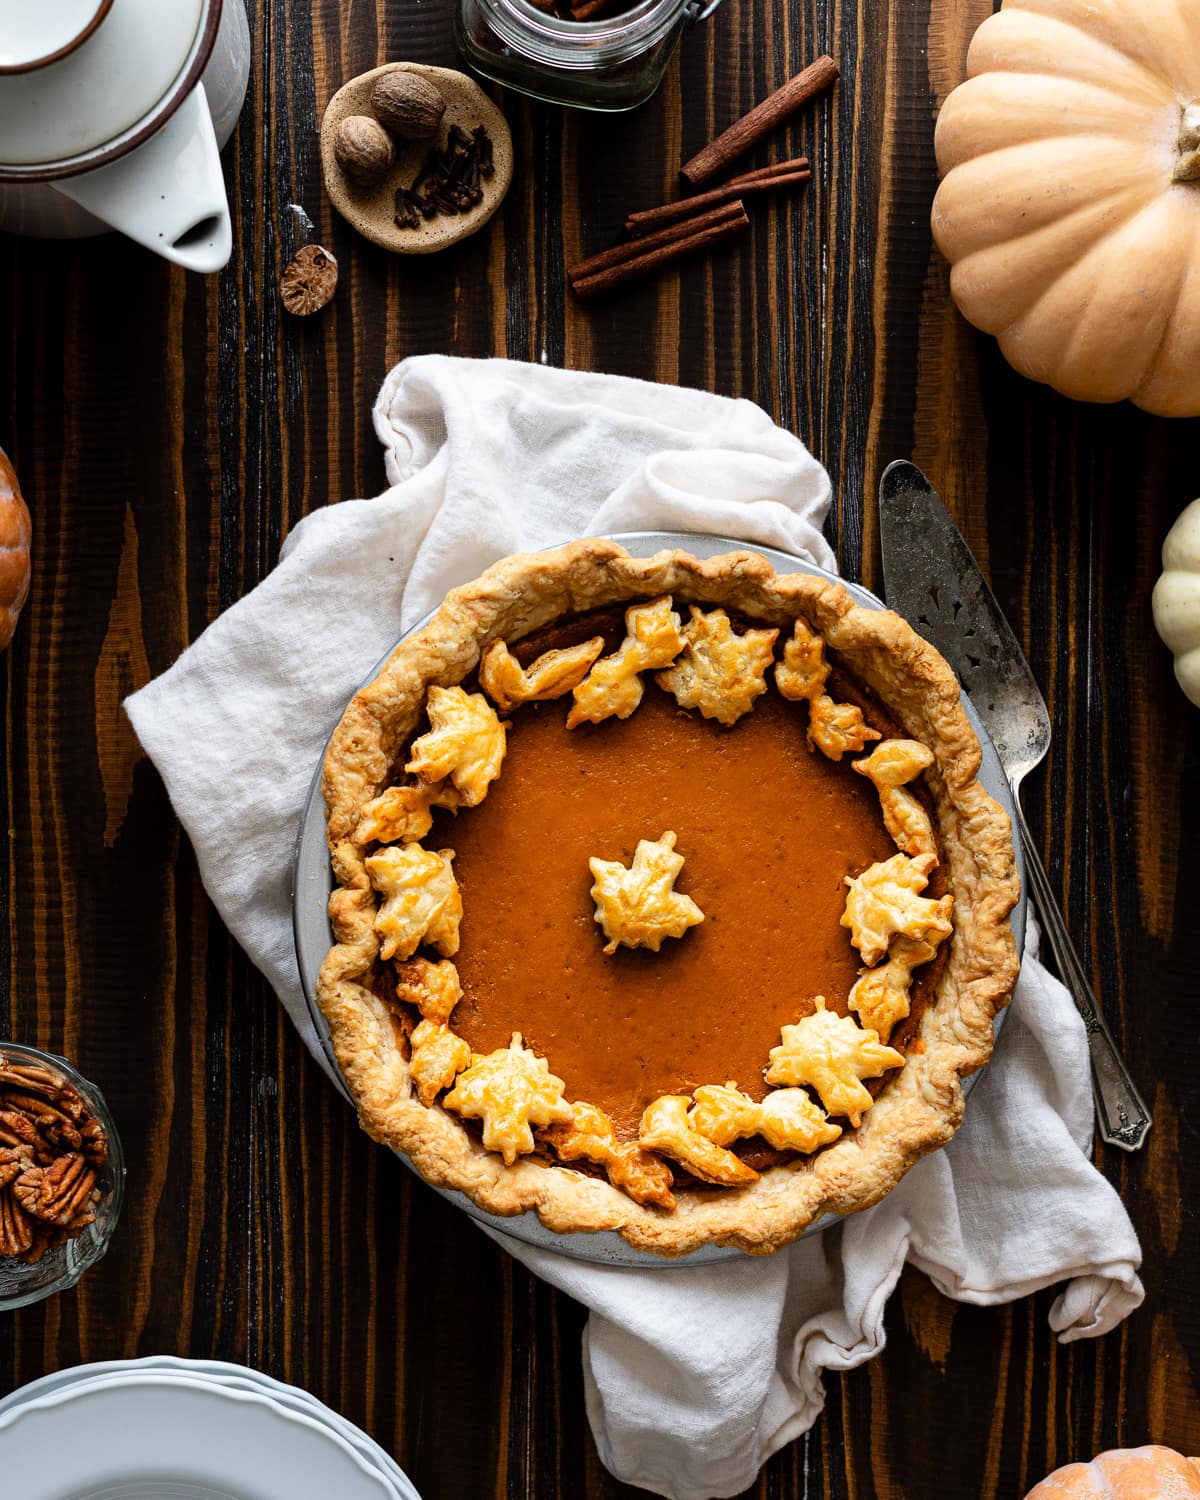
This post is another collaboration with my friend Mimi Council at Mimi’s Organic Eats. We’ve officially collaborated on recipes for an entire year. Working together has allowed us to explore creative and inventive ways to use sourdough starter.
When Mimi came up with the idea to use sourdough starter in the filling for this pumpkin pie, I couldn't wait to try it out!
Check out the other creative recipe ideas from our collaboration like Sourdough Red Velvet Cake Balls, Sourdough Lemon Lavender Bundt Cake and Sourdough Pumpkin Cupcakes.
Jump to:
What makes this pumpkin pie unique
This pie uses sourdough discard in both the filling and the pie crust.
Initially, when Mimi suggested ditching eggs as a thickener in favor of discard, I worried it might compromise the pie's creamy texture. However, my concerns were unfounded as the pie turned out just as luscious and was easier to make without eggs.
Unlike egg-based custards, which are prone to issues like curdling and cracking if over baked, this pumpkin pie relies on the starches in the sourdough discard for thickening. Since starter is primarily made up of flour and water, as the pie bakes, the starches bond with water molecules begin to swell, eventually stabilizing and thickening the filling.
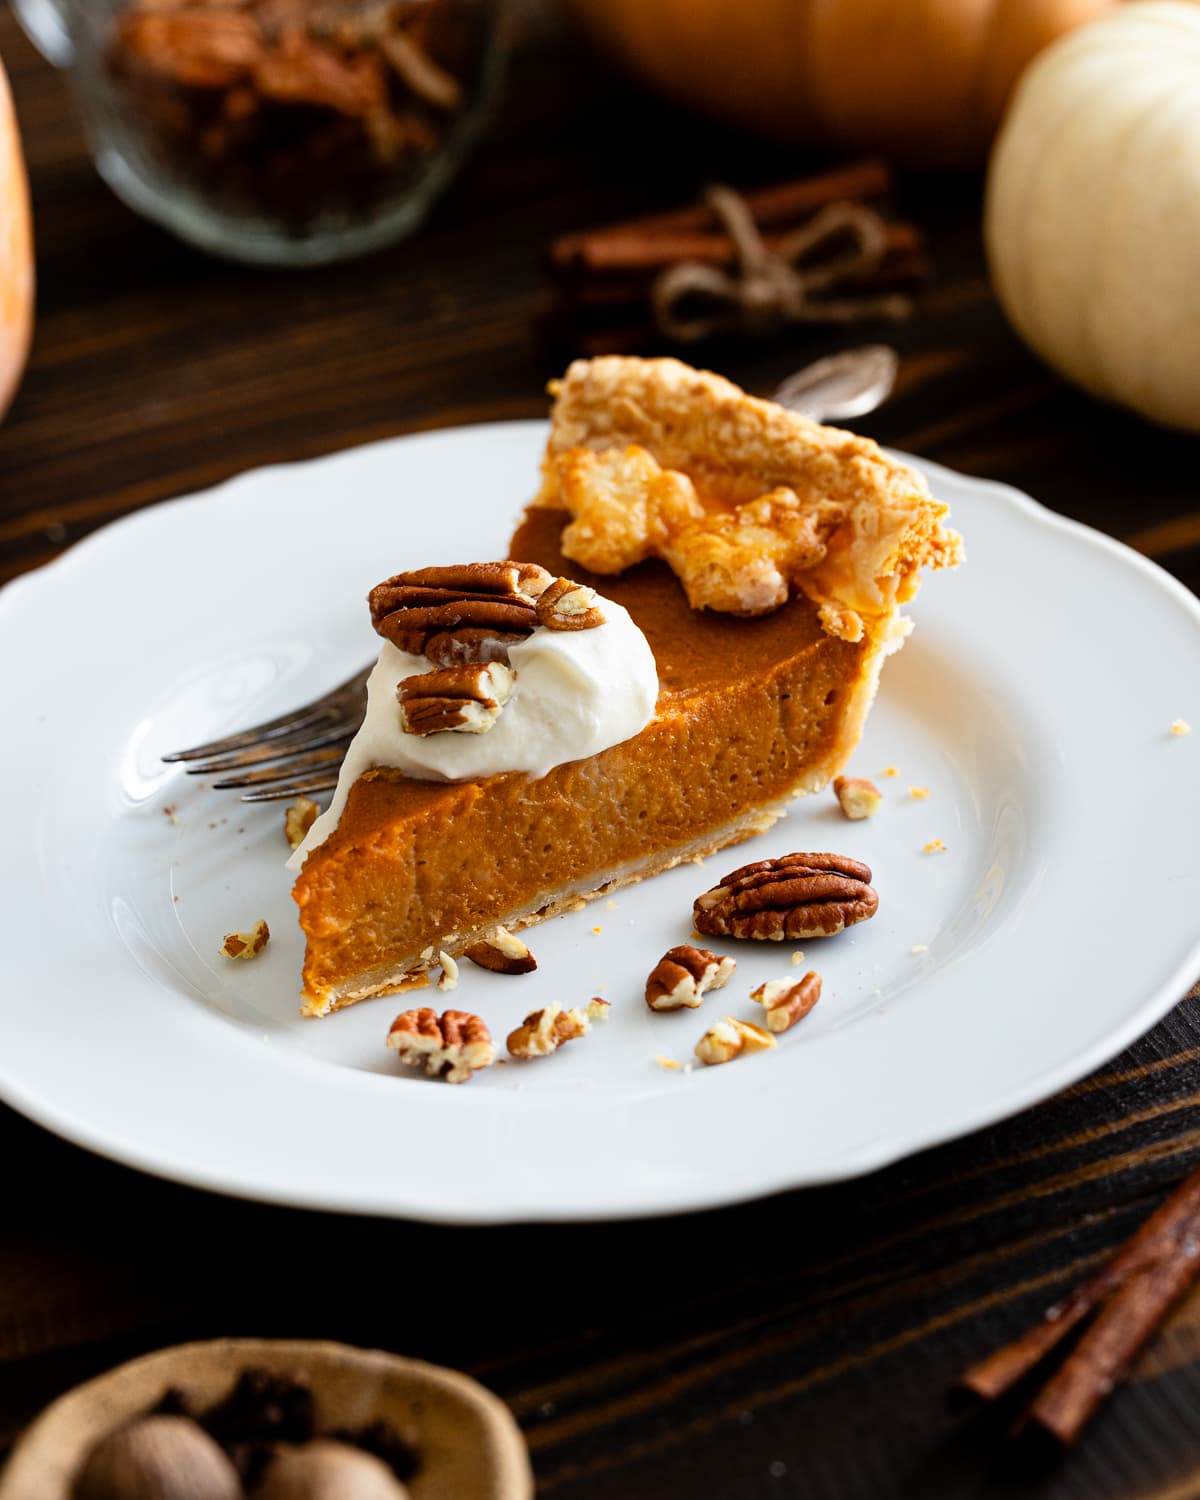
Baking with sourdough discard
Since you won’t use it to make bread rise, you can use unfed sourdough or sourdough discard straight from the refrigerator.
When incorporated into buttery pastry, sourdough discard imparts a delicately cheesy flavor that’s not overly savory. It added a slight tang to the filling, which was delicious and not overpowering.
Active sourdough starter will have a milder flavor than discard that’s been kept in the fridge for weeks, both will work but you’ll get slightly different results.
Looking for more ways to use up excess sourdough starter? Check out this list of my favorite Sourdough Discard Dessert Recipes.
Why I love this recipe
- Recipe can be mixed by hand - no special equipment needed.
- Sourdough discard deepens and enhances the buttery flavor of the crust.
- Eggless pumpkin pie filling is easier to make and less prone to curdling or cracking.
- Great make-ahead recipe!
What you need
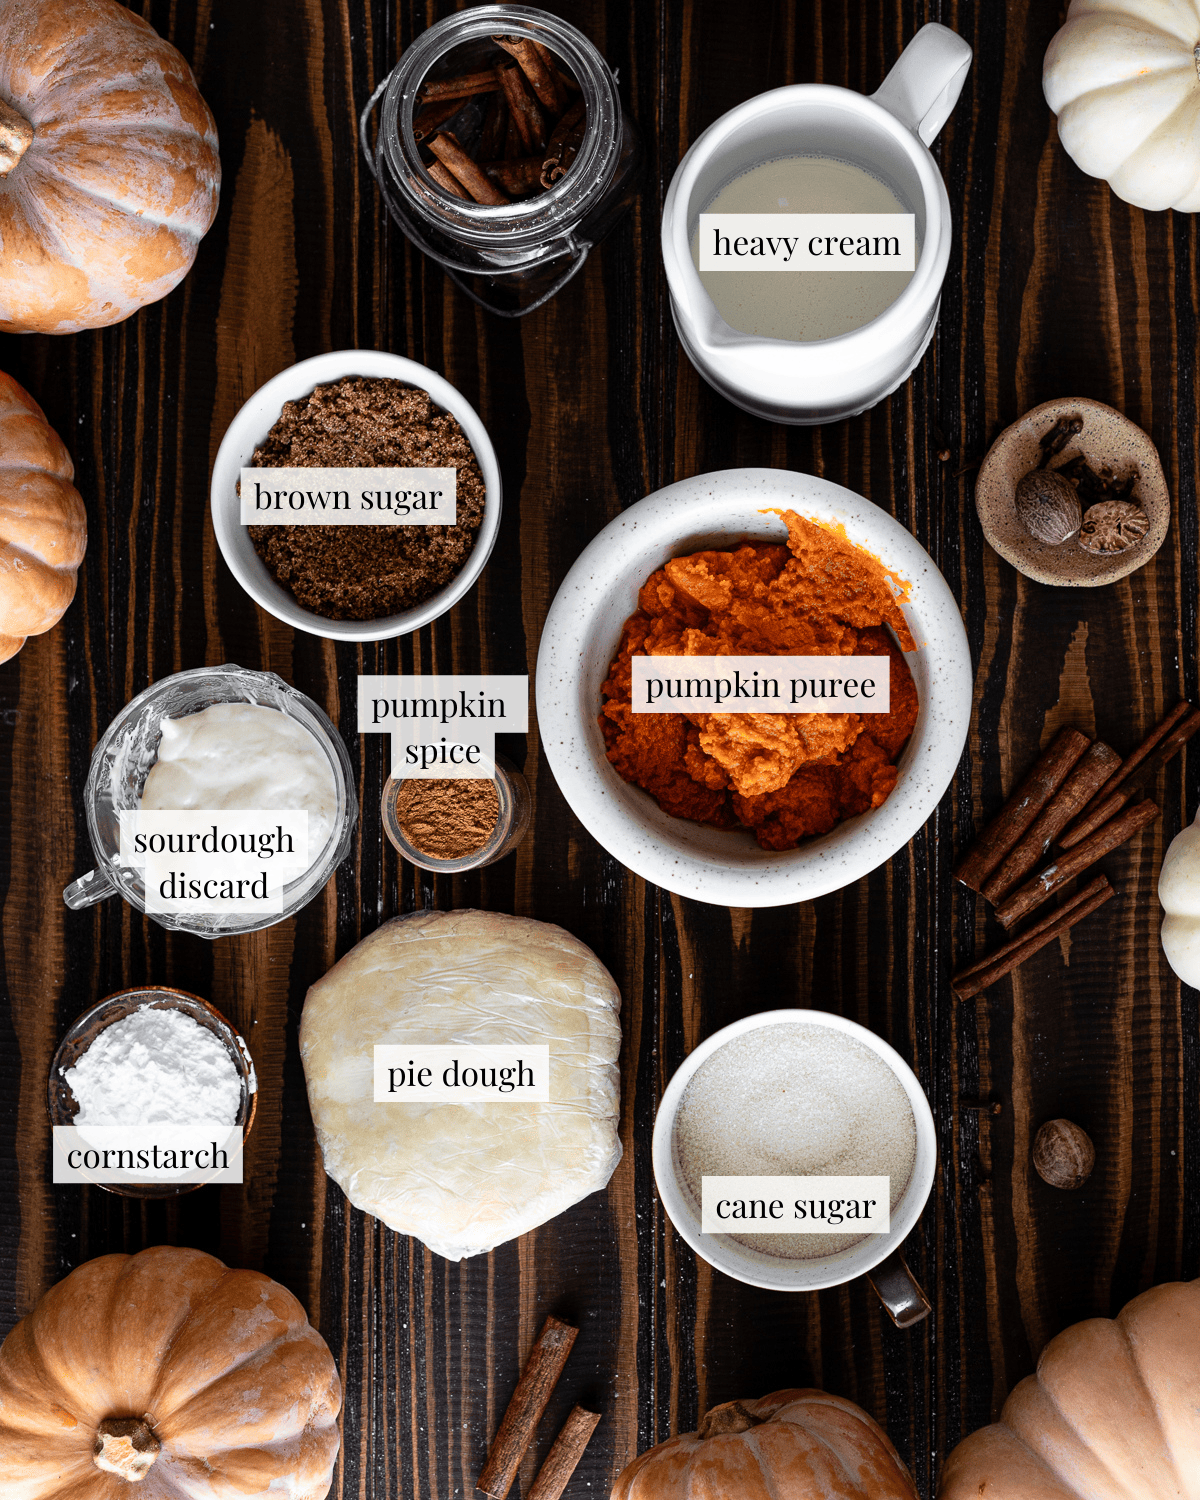
Pumpkin puree: Use canned pumpkin puree, not pumpkin pie filling since it has added spices and sugar. You can use homemade pumpkin puree, but it may change the texture, flavor and color of your pie.
Unsalted butter: Use cold butter, it’s important to keep your dough cool, otherwise your crust will turn out tough instead of flaky.
Cornstarch: Helps thicken the filling, substitute potato starch or tapioca starch.
Sourdough discard: Active starter or sourdough discard will both work with this recipe.
Sugar: I used a mixture of dark brown sugar and cane sugar here, but you can substitute 170 grams (¾ cup) of light brown sugar in the filling.
See the recipe card for detailed ingredient information.
Looking for more delicious pumpkin ideas? Try my Pumpkin Sourdough Bread, Sourdough Pumpkin Whoopie Pies, Sourdough Pumpkin Muffins and Sourdough Pumpkin Bundt Cake.
Step-by-step instructions

STEP 1 Make the crust: Dissolve the sourdough starter in water and rub the butter into the flour (image 1). Stir the dissolved starter in (image 2). Use a piece of plastic wrap to bring the dough together (image 3). Divide the dough in half and wrap in plastic (image 4).
If you have trouble with tough pie crusts, check out my post on how to make an extra flaky sourdough pie crust.
TIP: Refrigerate the dough for at least 2 hours before using. This will prevent the butter from becoming too warm and melting out of your pastry as it bakes.

STEP 2 Roll out the crust: Unwrap the dough and set it out on a lightly floured work surface. Use a rolling pin to flatten the dough out into a thin 12-inch circle (image 5). Measure your pie dough to ensure it will fit into your pan (image 6). Position the dough into the pie pan and use your knuckle to press it into the bottom of the pan (image 7). Tuck any excess dough under the rim, and crimp the edge using your knuckle and fingertips (image 8).
TIP: If your pie dough snaps back, let it rest before continuing to roll it out. Don't force the dough to stretch or it will shrink as it bakes.

STEP 3 Parbake the crust: Using a fork, dock the pie dough (image 9). Line the dough with a piece of parchment paper and fill it with pie weights (image 10). Bake the crust at 400 F for 20 minutes (image 11). Remove the parchment paper with the pie weights and return to the oven to continue baking for another 5 minutes (image 12).
TIP: Docking your dough and using pie weights prevent your crust from shrinking and puffing up as it bakes.
If you don't have ceramic pie weights, you can use dried beans, rice, or lentils (that’s what I used here). You can store your pie weights in a jar once cooled completely and reuse.

STEP 4 Bake the pie: Make the filling (image 13). Pour the filling into the parbaked crust and bake at 350 for 30 to 35 minutes (image 14).
TIP: Fill the crust only to right below the fluted edge! Don’t overfill or your pie may overflow or explode in the oven. If you have too much filling, divide it between small soufflé cups and bake along with the pie.

STEP 5 Make the toppings (optional): Roll out the remaining portion of pie dough and use a cutter to cut out leaf portions. Bake the leaves at 350 F for 10 minutes on a baking sheet lined with parchment paper (image 15). Make the fresh whipped cream (image 16).

STEP 6 Finish the pie: Let the pie cool completely for at least 4 hours, ideally overnight (image 17). Top with baked pie leaves (image 18).
TIP: Letting your pie cool is just as important as baking. If you don't give your pie enough time to set, it won't hold its shape and become runny when you slice it.

Baker's tips
- Weigh your ingredients instead of measuring by volume (tablespoons and cups), it’s more accurate and will help guarantee the success of your bake.
- If your dough starts feeling oily while you are rolling it out, wrap it back up in plastic and refrigerate it for 15 minutes before continuing.
- Use canned pumpkin puree, not pumpkin pie filling which contains added spices and sugar.
- Use an aluminum or cast iron pie dish for the best results. Glass or ceramic pie dishes don't distribute heat evenly and could prevent the crust from baking properly leading to a soggy bottom.
- If your crust bakes with cracks or holes on the bottom, mix a tablespoon of flour with a tablespoon of melted butter. Patch the holes and continue par baking.
- Don’t over bake your pumpkin pie or it may turn out tough and rubbery. It should look set at the edges and slightly wobbly in the center.
Make ahead instructions
It's best to make your pumpkin pie a day in advance since it gives the filling a chance to cool and fully set over night.
You can make the pie dough up to three days in advance. Store the crust in the refrigerator until ready to use.
The pie dough can also be frozen for up to a month. Let it thaw in the refrigerator overnight and roll it out according to the recipe instructions.
Recipe FAQs
Yes! You can use homemade pumpkin puree, but your pie filling may have a different texture, flavor and color. Since this recipe was tested with canned pumpkin puree, I can’t guarantee the results of your bake.
There are a few reasons why your pie crust may have turned out tough:
- You added too much liquid to your dough.
- The butter in your dough got too warm.
- The dough was overworked.
Since this pumpkin pie is not thickened with eggs there’s much less of a chance that it will crack as it bakes.
You may also like
Did this recipe rise to the occasion?
★★★★★
Please leave a star rating and a comment. Your feedback helps me create more delicious sourdough recipes. I read and truly appreciate every message.
Don't forget to PIN this recipe on Pinterest to save it for later!
Thank you for your support!

Sourdough Pumpkin Pie Recipe
Equipment
This section may contain affiliate links
Ingredients
Sourdough Pie Crust
- 56 grams water
- 56 grams sourdough discard
- 226 grams unsalted butter cold, cubed
- 210 grams all-purpose flour
- 6 grams salt
Filling
- 283 grams pumpkin puree
- 70 grams cane sugar
- 100 grams dark brown sugar
- 56 grams sourdough discard
- 226 grams heavy cream
- 20 grams cornstarch
- 2 teaspoons pumpkin spice
Fresh Whipped Cream
- 226 grams heavy cream
- 14 grams cane sugar
- 1 teaspoon vanilla
Egg wash (optional)
- 1 egg
- 7 grams heavy cream
Click US Customary to view volume measurements
Instructions
- Make the pie crust: Dissolve the sourdough discard in the water and set aside.56 grams water, 56 grams sourdough discard
- In a large mixing bowl, toss the butter, salt and all-purpose flour together making sure all the butter pieces are completely coated.226 grams unsalted butter, 210 grams all-purpose flour, 6 grams salt
- Use your fingers to squeeze the butter pieces into flat discs, continue working the butter into the flour by rubbing everything together using your palms.
- Make a well in the center of your flour mixture and pour the discard mixture in the center. Use a stiff spatula or sturdy wooden spoon to toss the flour and discard mixture together.
- Using your hands, begin lightly kneading and bringing the dough together. Transfer any portions of dough that are starting to clump together on a piece of plastic wrap. Sprinkle a few drops of water on any dry portions of flour.
- Use the piece of plastic wrap to bring the dough together until it forms a cohesive mass (it's ok if it appears a little dry). Divide the dough into two portions and wrap each in plastic wrap. Flatten the dough into a disk.
- Chill the dough: Refrigerate the dough for at least 2 hours before using.
- Prep: Preheat the oven to 400 F.
- Roll out the dough: Set the dough out at room temperature for 5 minutes. Unwrap the dough and set it on a lightly floured surface. Dust your rolling pin in flour. Flatten the dough out into a large circle. It’s best to roll away from you, and then perform a quarter turn after each time you pass the rolling pin over the dough. Continue until you've rolled the dough out into a 12-inch circle.
- Carefully transfer the dough to a pie plate, doing your best to center the pie dough on the pan. Press lightly to form against the pan, use your knuckles to prevent your nails from puncturing the dough. Fold the overhanging dough and crimp the edges of the dough.
- Parbake the crust: Dock the bottom of the dough using a fork. Place a piece of parchment paper into the pie pan and form it to the sides. Add rice or pie weights and parbake for 20 minutes. Remove the parchment paper and weights, and bake for another 5 minutes. Press down the crust if it bubbles up in the middle.
- Make the filling: Combine the pumpkin puree, heavy whipping cream, cane sugar, dark brown sugar, and sourdough discard. Whisk together until fully combined.283 grams pumpkin puree, 70 grams cane sugar, 100 grams dark brown sugar, 56 grams sourdough discard, 226 grams heavy cream
- Slowly add the cornstarch while still whisking, this will help prevent it from clumping. Add the pumpkin spice and continue to mix until the mixture looks fully incorporated.20 grams cornstarch
- Bake the pie: Turn down the heat to 350 F.
- Pour the filling into the pie crust. Do not overfill your crust and fill only to right below the fluted edge. Your pie may overflow or explode otherwise.
- Bake for 32 to 36 minutes or until the pie looks somewhat set, it may still be a little jiggly in the middle.
- Transfer the pie to a wire rack and let it cool completely, at least 4 hours, ideally overnight.
- Make the decorative leaves: Unwrap the dough and set it on a lightly floured work surface. Using a rolling pin, flatten the dough out until it’s only about ¼-inch thick (the size doesn’t have to be exact).
- Beat the egg and cream together. Brush the leaves with egg wash and bake for 10 to 15 minutes or until golden brown.
- Make the whipped cream: Whisk together the heavy whipping cream, cane sugar, and vanilla extract using a stand mixer or hand mixer. Whip until stiff peaks form.
- Serve: Arrange the decorative leaves around the cooled pie. Slice and serve with a dollop of fresh whipped cream and pecans.
- Store: Store any leftover pumpkin pie slices in an airtight container at room temperature for up to two days or in the refrigerator for up to a week.
Tips
These recipes were developed and tested using grams for precise measurements. To increase your chances of success, I recommend investing in a kitchen scale. I've included rough volume estimates (in tablespoons and cups), but they might not be totally accurate.
Remember all ovens are unique, these recipes were tested in my oven which runs cooler than others. You might need to lower the temperature if your bake appears to be browning too quickly. Monitor your bake closely and make adjustments if needed.
Notes
- If your dough starts feeling oily while you are rolling it out, wrap it up and chill it for 15 minutes before continuing.
- Use canned pumpkin puree, not pumpkin pie filling which contains added spices and sugar.
- Use an aluminum or cast iron pie dish for the best results, metal is a better conductor of heat than glass or ceramic.
- If your crust bakes with cracks or holes on the bottom, mix a tablespoon of flour with a tablespoon of melted butter. Fill the holes and continue parbaking.
- Don’t overbake your pumpkin pie or it may turn out tough and rubbery. It should look set at the edges and slightly wobbly in the center.
- High Altitude — Bake for 30 to 34 minutes.
Nutrition
I am not a nutritionist or dietitian, any nutrition information provided is an estimate.



Did you make this recipe? Do you have questions? Let me know below!