

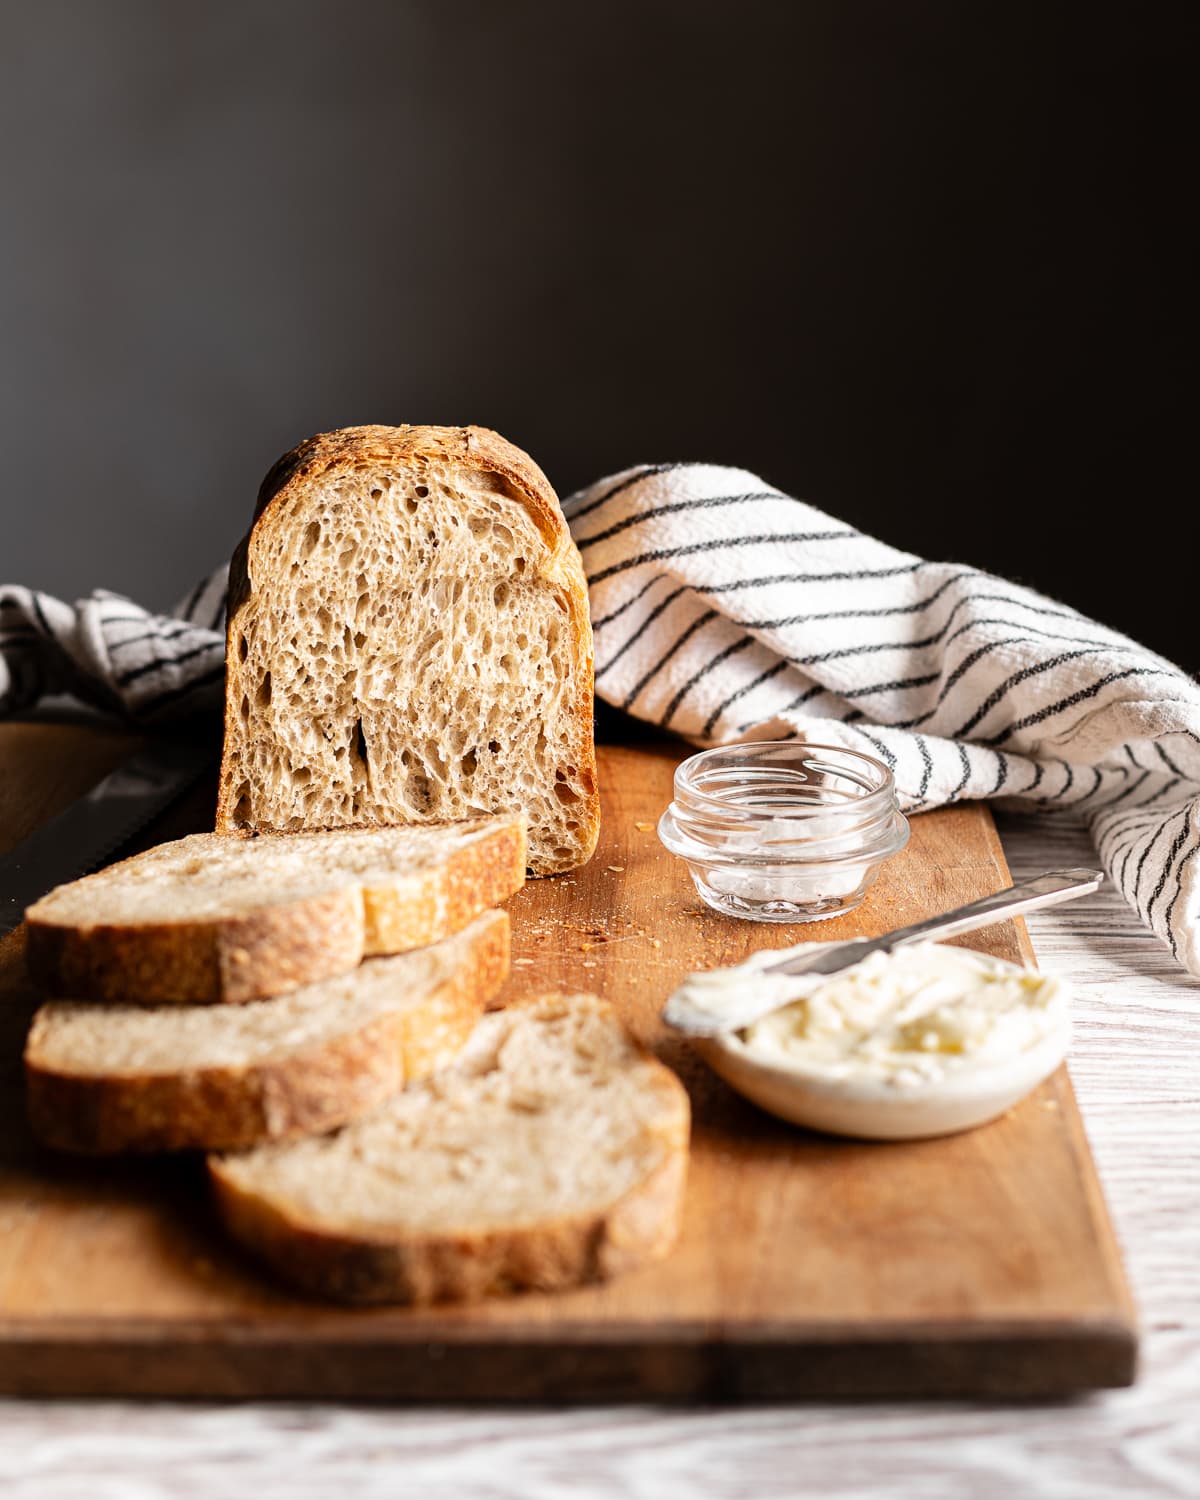
Can you bake sourdough bread in a loaf pan? Absolutely! Using a sandwich loaf tin is a great option for baking sourdough bread. It creates uniform slices that are perfect for sandwiches. If you've just getting into sourdough baking and don't want to invest in special equipment like a Dutch oven, I'll show you how to make the loaf pan you already have work for bread baking!
Jump to:
Why I love using loaf pans for baking sourdough bread
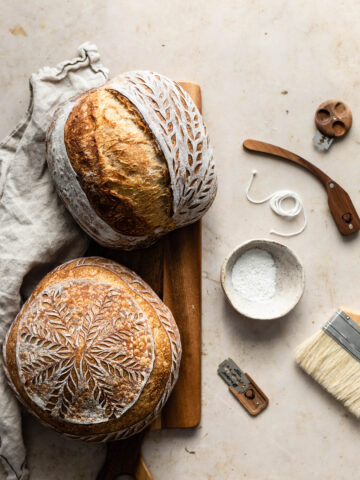
Free form sourdough loaves are undeniably beautiful! But baking them usually requires special equipment like a banneton and a Dutch oven. If you don't want to invest in specialized tools just yet you can use baking equipment you already have in your kitchen to make bread.
In fact, baking sourdough bread in a loaf pan has a few unique advantages:
- Sandwich loaf pans provide structure, dough won't spread and flatten out like free-form loaves. While you can bake any type of bread in a sandwich loaf pan, it's especially great for dough that tends to have a weaker structure like high-hydration bread, or bread that has a higher proportion of whole grain flour like like Sourdough Spelt Bread and Sourdough Discard Whole Wheat Sandwich Bread.
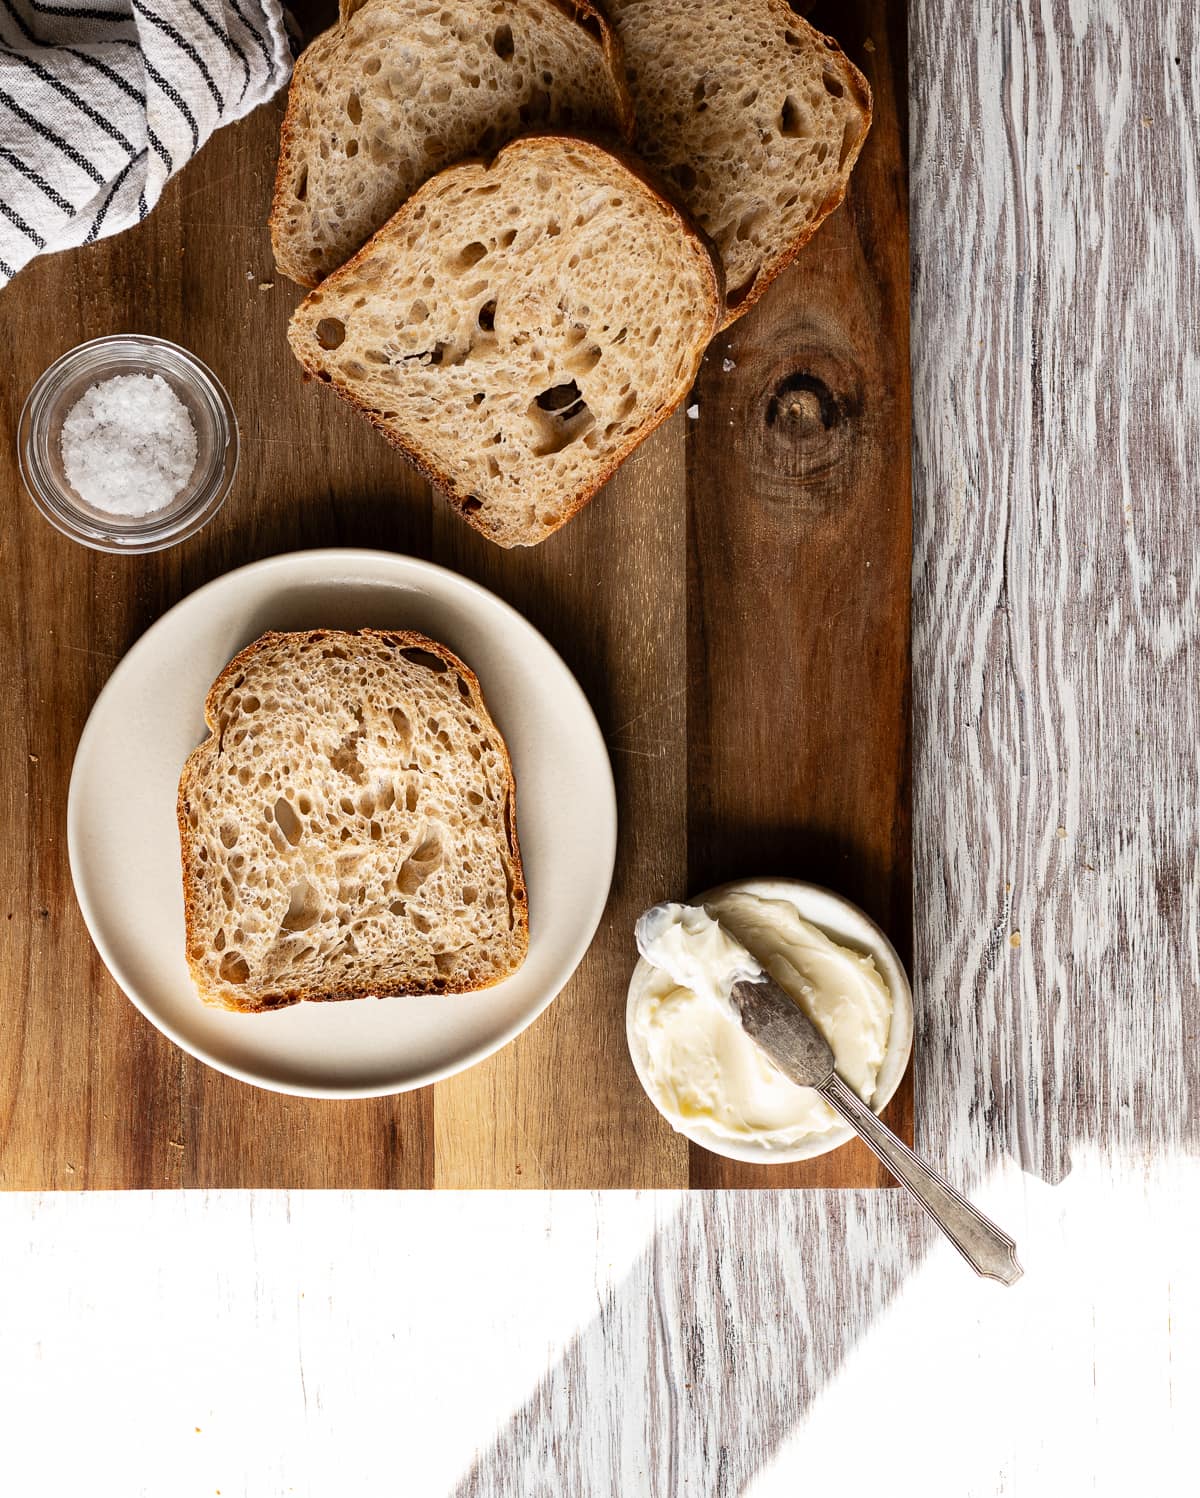
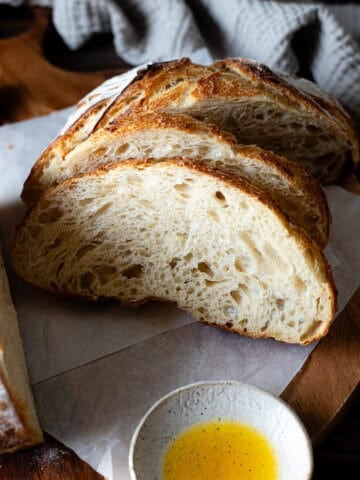
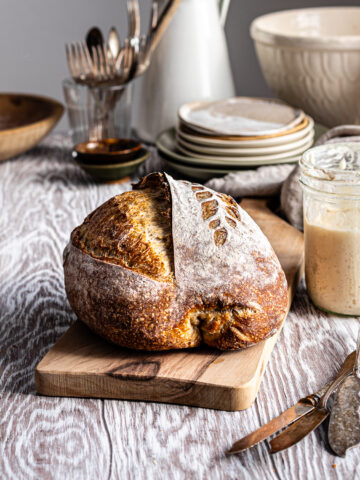
- Makes even slices of bread. Freeform loaves are beautiful but the slices rarely match up. Breads baked in a loaf pan have uniform slices perfect for sandwiches!
- Final proof, scoring, and baking are all done in one container, so there's no need to fiddle with your dough after the second rise.
- Eliminates the need to invest in specialty tools, most home bakers already have a loaf pan, so there's no need to purchase specialized bread equipment such as bannetons, Dutch ovens, or an expensive bread pan.
- Great for newbies! Using a sandwich tin is a great way to bake sourdough for new bakers who are not as comfortable with bread shaping since the loaf pan provides support and structure for the dough.

Looking for more sandwich bread recipes? Try my Sourdough Discard Whole Wheat Bread, Vegan Sourdough Discard Sandwich Bread and Sourdough Potato Bread.
Importance of steam in bread baking
Steam is a vital part of bread baking because it helps maximize oven spring.
Bread bakes at extremely high temperatures and without steam the crust hardens too quickly preventing the dough from expanding completely. Steam keeps the crust soft and elastic, without it bread bakes up compacted with a dense crumb and a very hard, thick crust. Steam allows the dough to rise fully and helps bread develop an open crumb, a beautiful rounded shape and a thin delicate crust.
How to create steam in a home oven
Bakeries and industrial kitchens are injected with steam, however, most conventional home ovens do not have this feature which requires bakers to exercise more creativity.
The easiest way to create steam while baking is to use a Dutch oven. As dough bakes, water in the dough evaporates creating water vapor. The heavy duty cast iron or enamel lid of a Dutch oven provides a seal that naturally traps water vapor in. This mimics the humid environment created by steam-injected ovens. However, you can still introduce steam in your oven and bake homemade sourdough bread even without a Dutch oven!
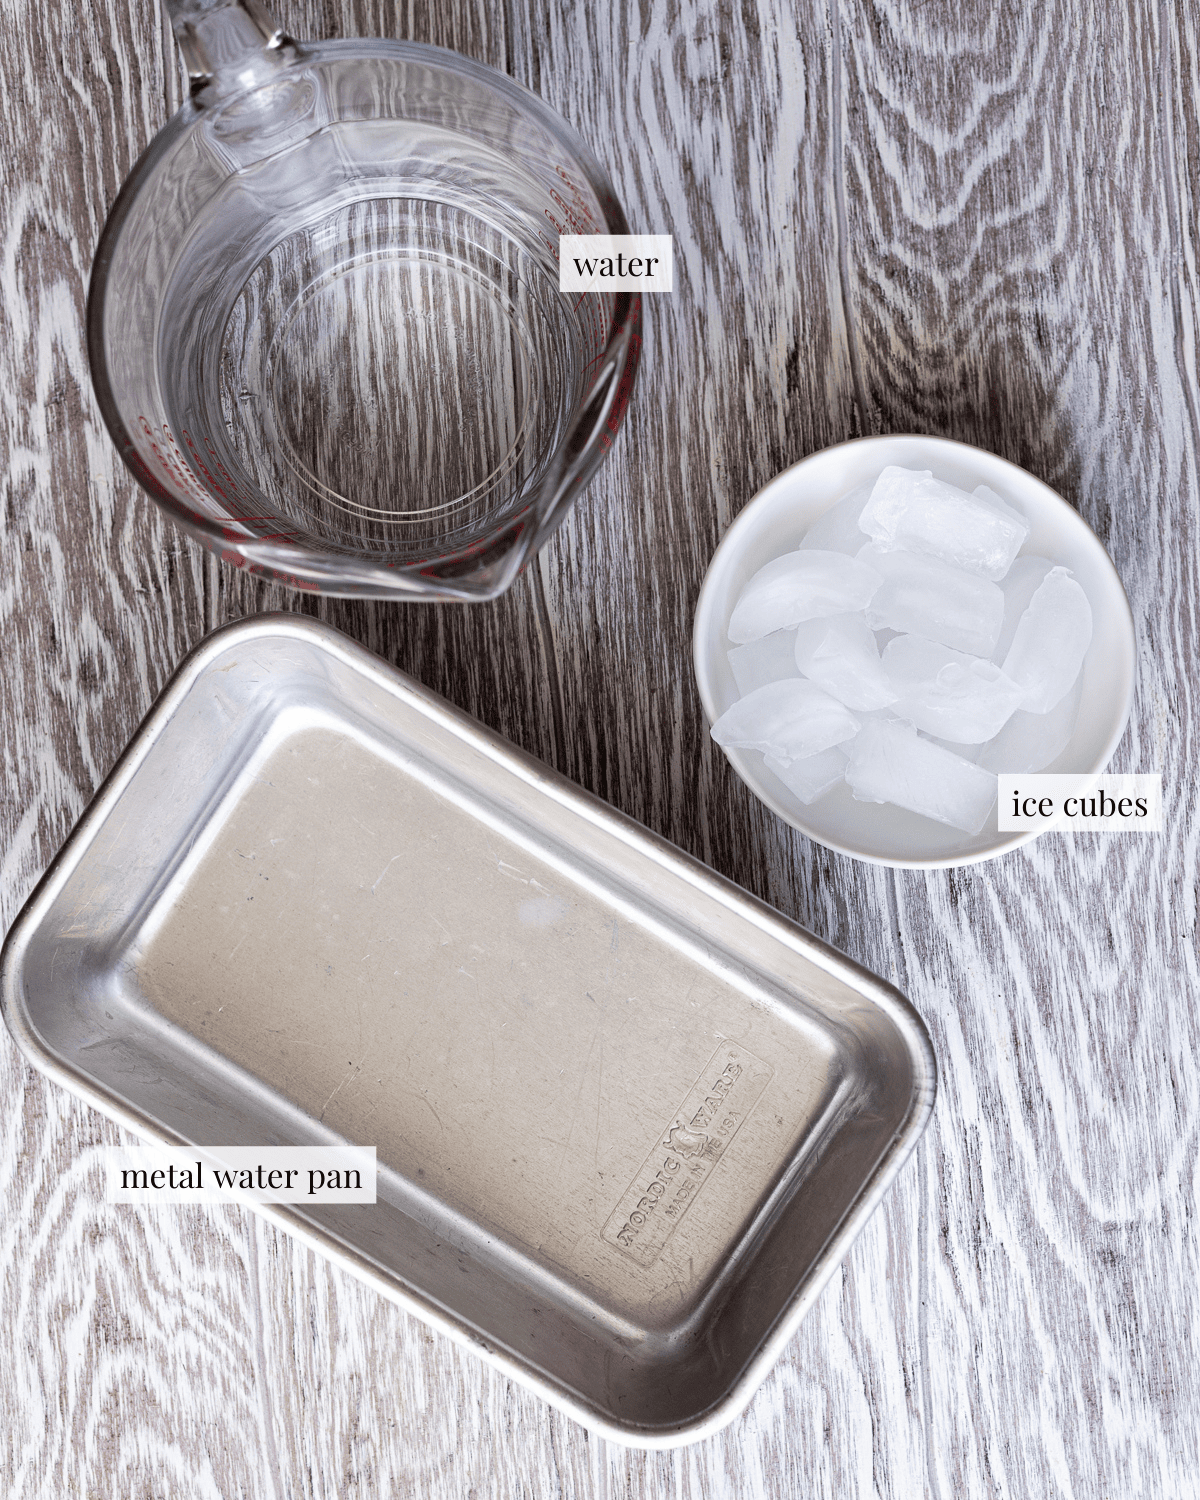
To create steam, all you need to do is add a water pan in your oven while your bread bakes. Ideally a metal baking pan or loaf pan filled with water. This will recreate a moist environment of a commercial steam-injected oven that's ideal for bread baking. You can even add ice cubes into the water pan which will generate extra steam in your oven.
All about oven spring
The rapid rise that bread undergoes during the first moments of baking is known as oven spring. Maximizing oven spring is crucial for a light and airy crumb.
What you need
- A reliable sourdough bread recipe: You can bake any sourdough bread in a loaf pan (try my basic sourdough recipe)
- Pullman pan or loaf pan: The size of the pan you use will depend on the recipe you create. Either a 9 by 4 inch Pullman pan or 8 by 5 inch Loaf pan will work for most standard sourdough bread recipes.
- Water pan: A metal pan works best, avoid using ceramic, glass or clay since adding water or ice cubes to the pan could cause them to break due to thermal shock.
- Ice cubes: Adding ice cubes to hot water increases the amount of steam released by your water pan! If you don't have an ice maker - you can totally them.
- Baking stone or pizza stone (optional): Creates a super heated surface that replicates the radiant heat emitted by the floor of professional ovens. When the loaf pan makes contact with the stone, the intense heat prompts the dough to rise rapidly, resulting in a lighter crumb and taller loaf.
How to shape a sandwich loaf
Shaping is extremely important for the look and structure of freeform loaves. You'll need to create enough surface tension so that your loaf can maintain its form and not collapse as it bakes.
Since a loaf pan provides support both during proofing and baking, your shaping technique becomes less important. The loaf pan also causes the loaf to rise higher. So if you get your proofing right, you'll have a taller loaf that won't flatten out.
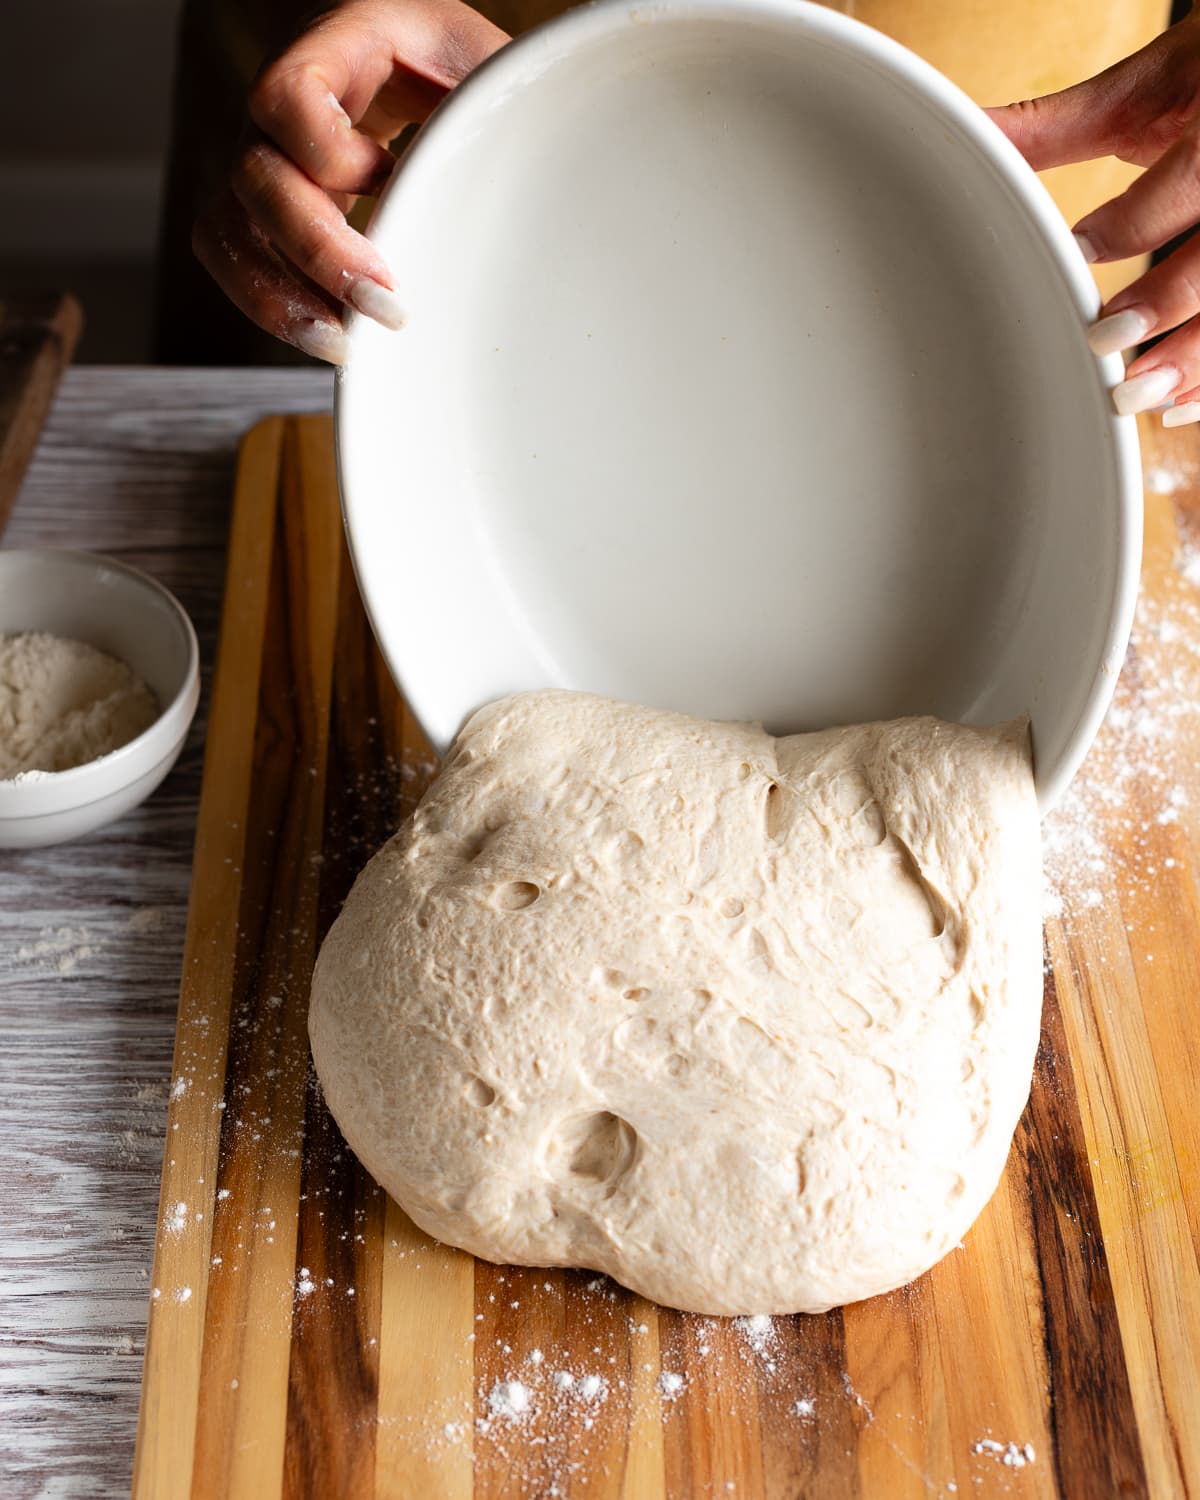
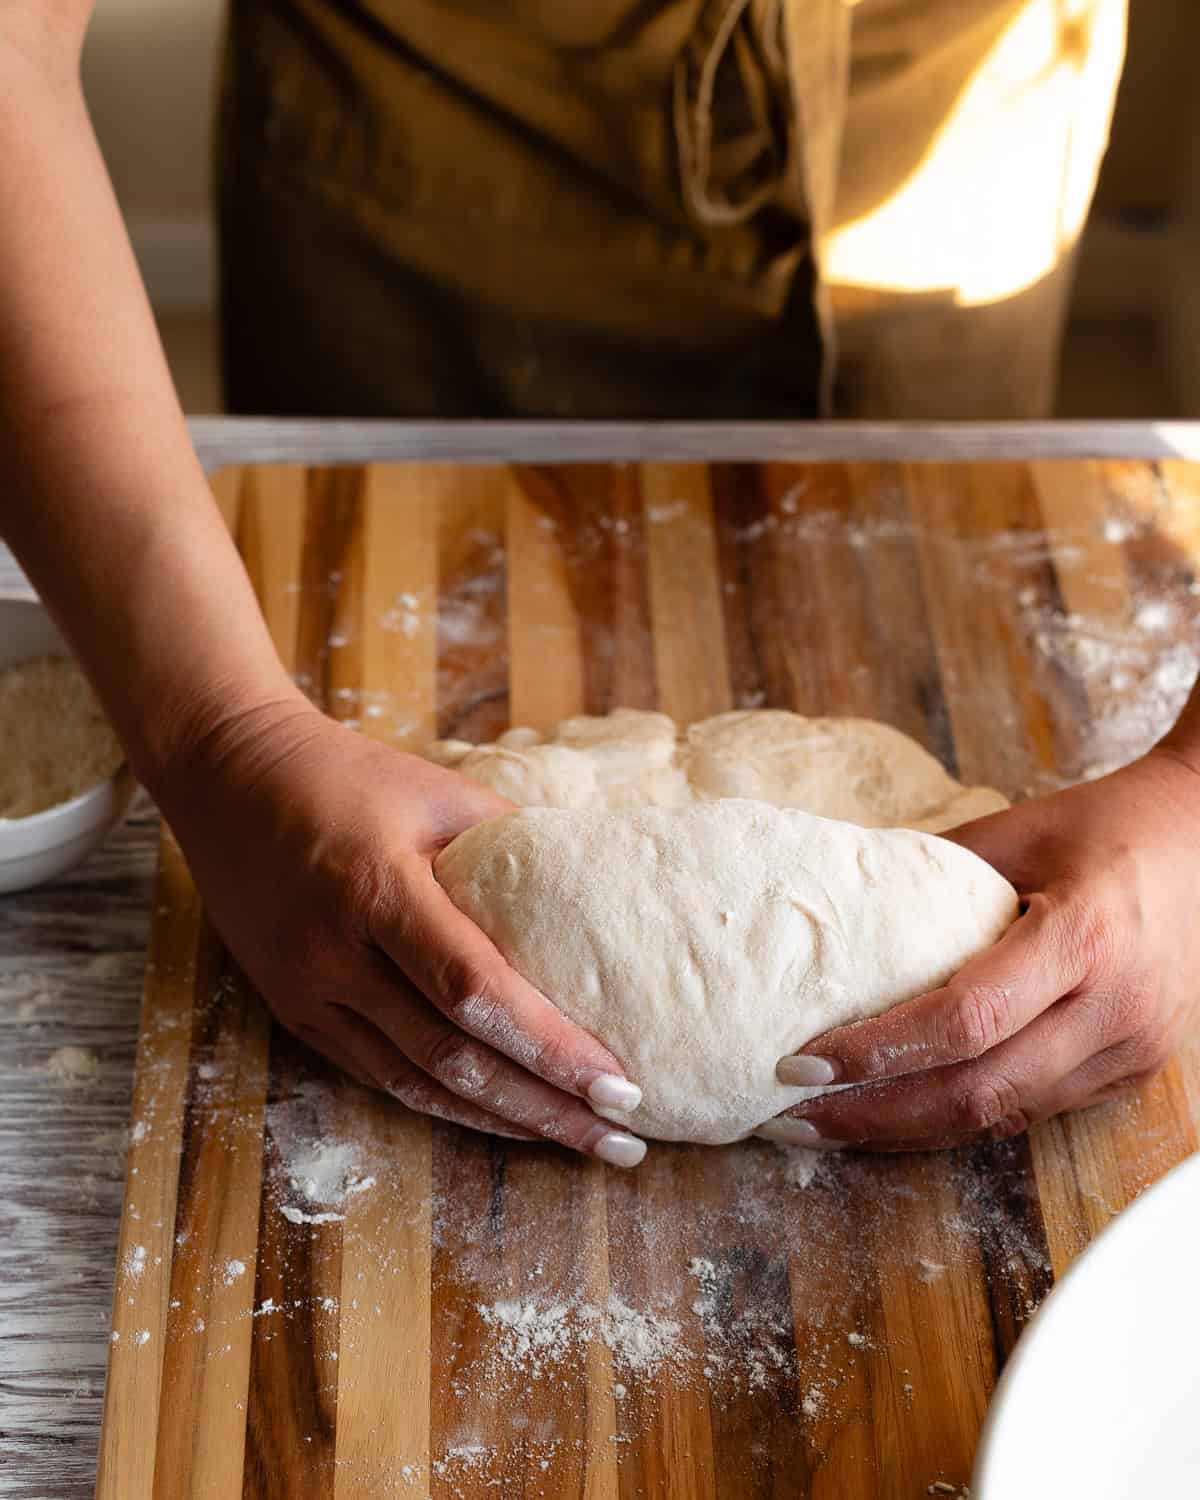
STEP 1. Turn the dough out on a lightly floured work surface
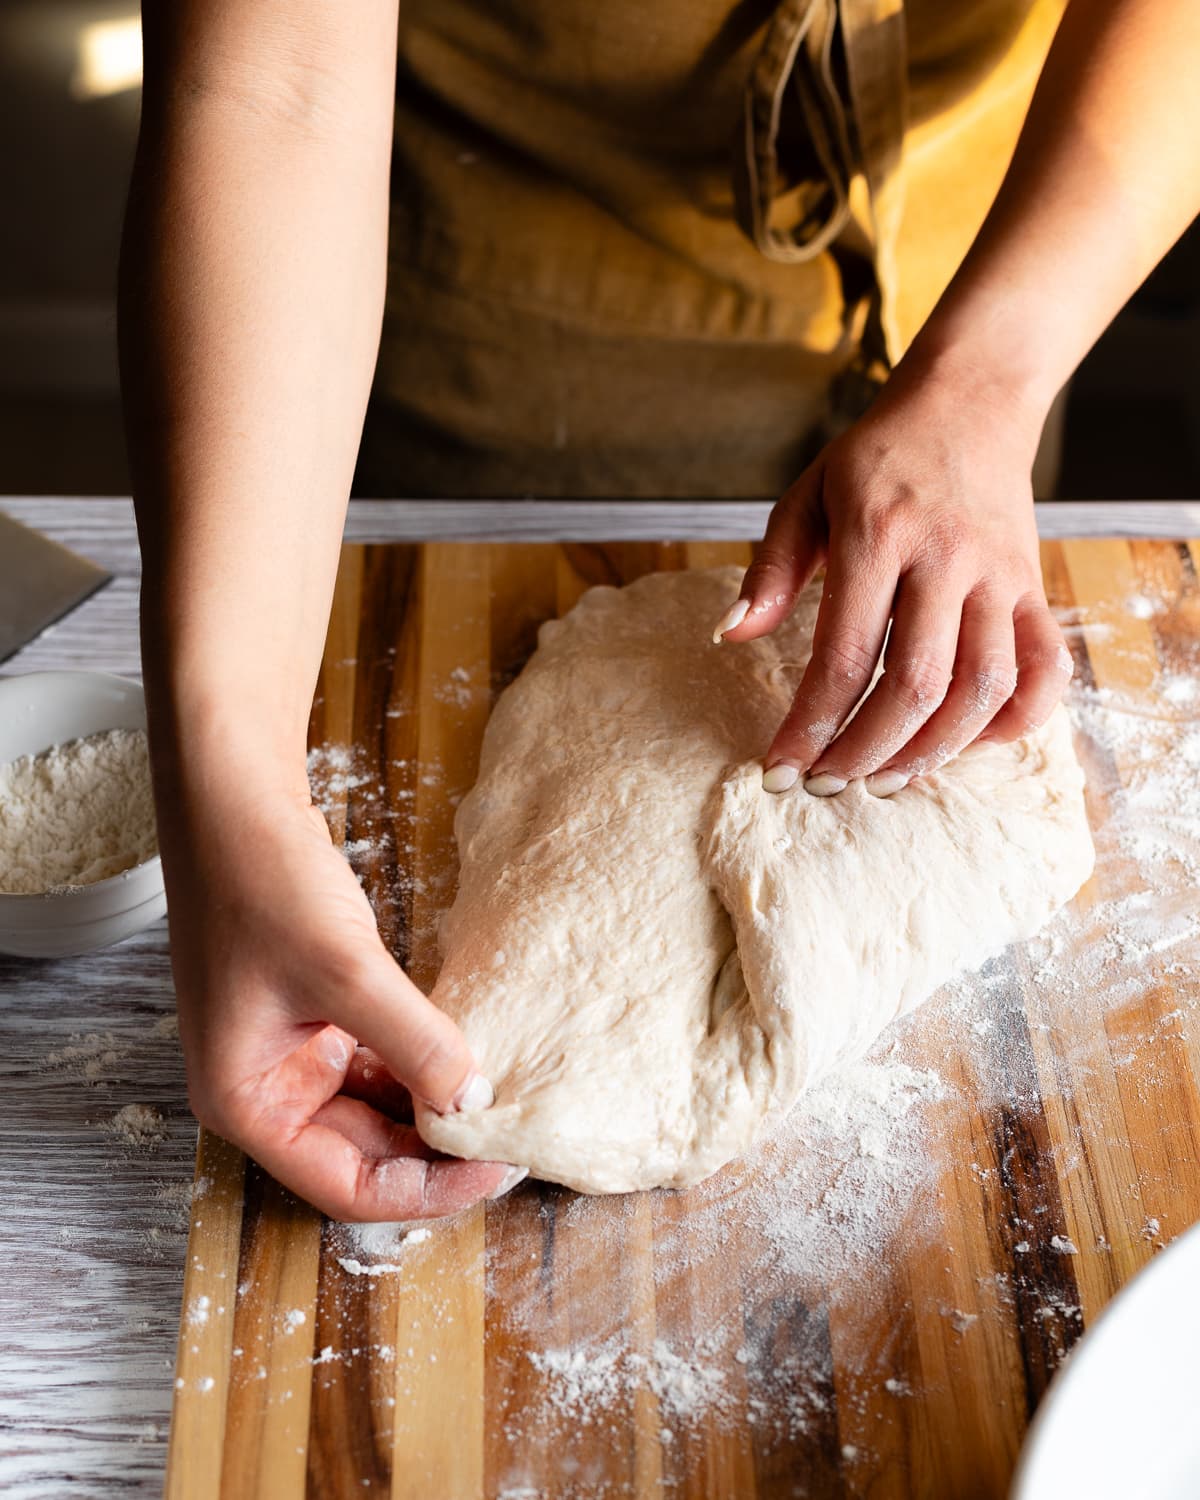
STEP 2. Form a rectangle and fold the top left corner towards the center
Tip
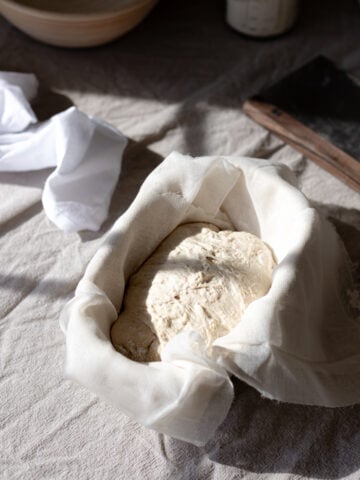
When your dough is fully proofed and ready to shape it should slide out of your proofing vessel very easily.
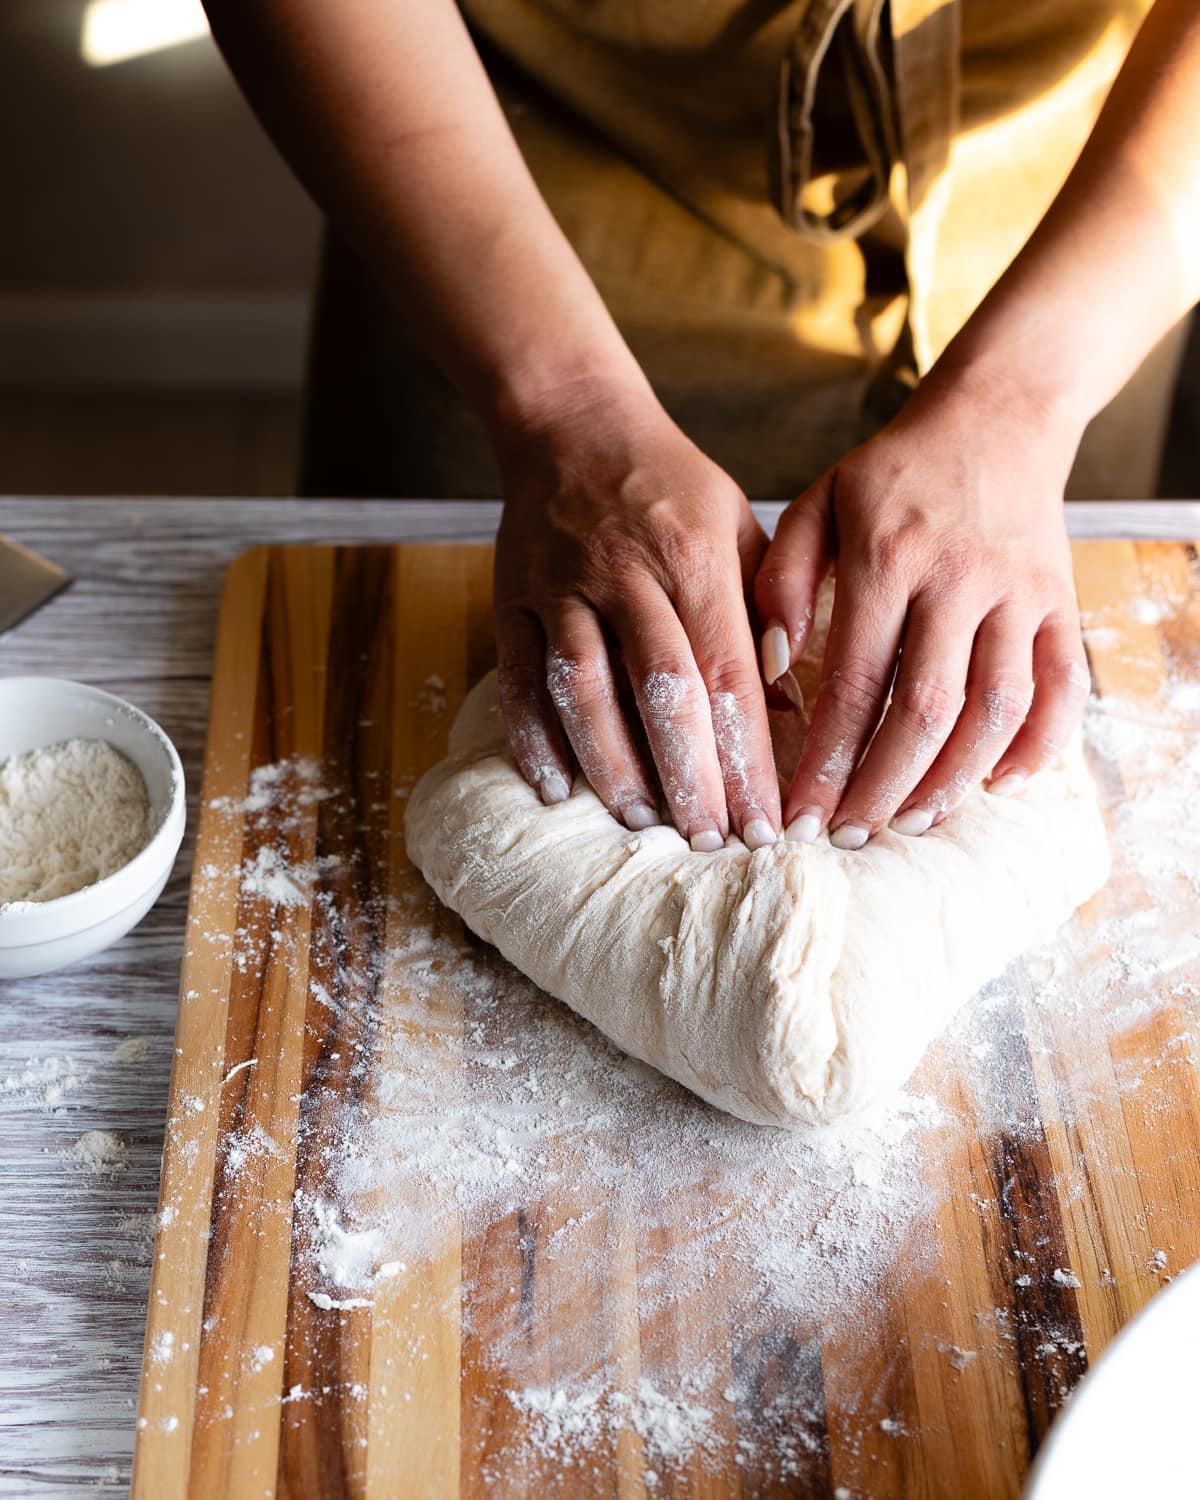
STEP 3. Fold the right corner to meet the left
STEP 4. Fold the top down
Tip
Use just enough flour to prevent sticking; excessive flour can compromise the dough's ability to stick to itself and maintain its shape.
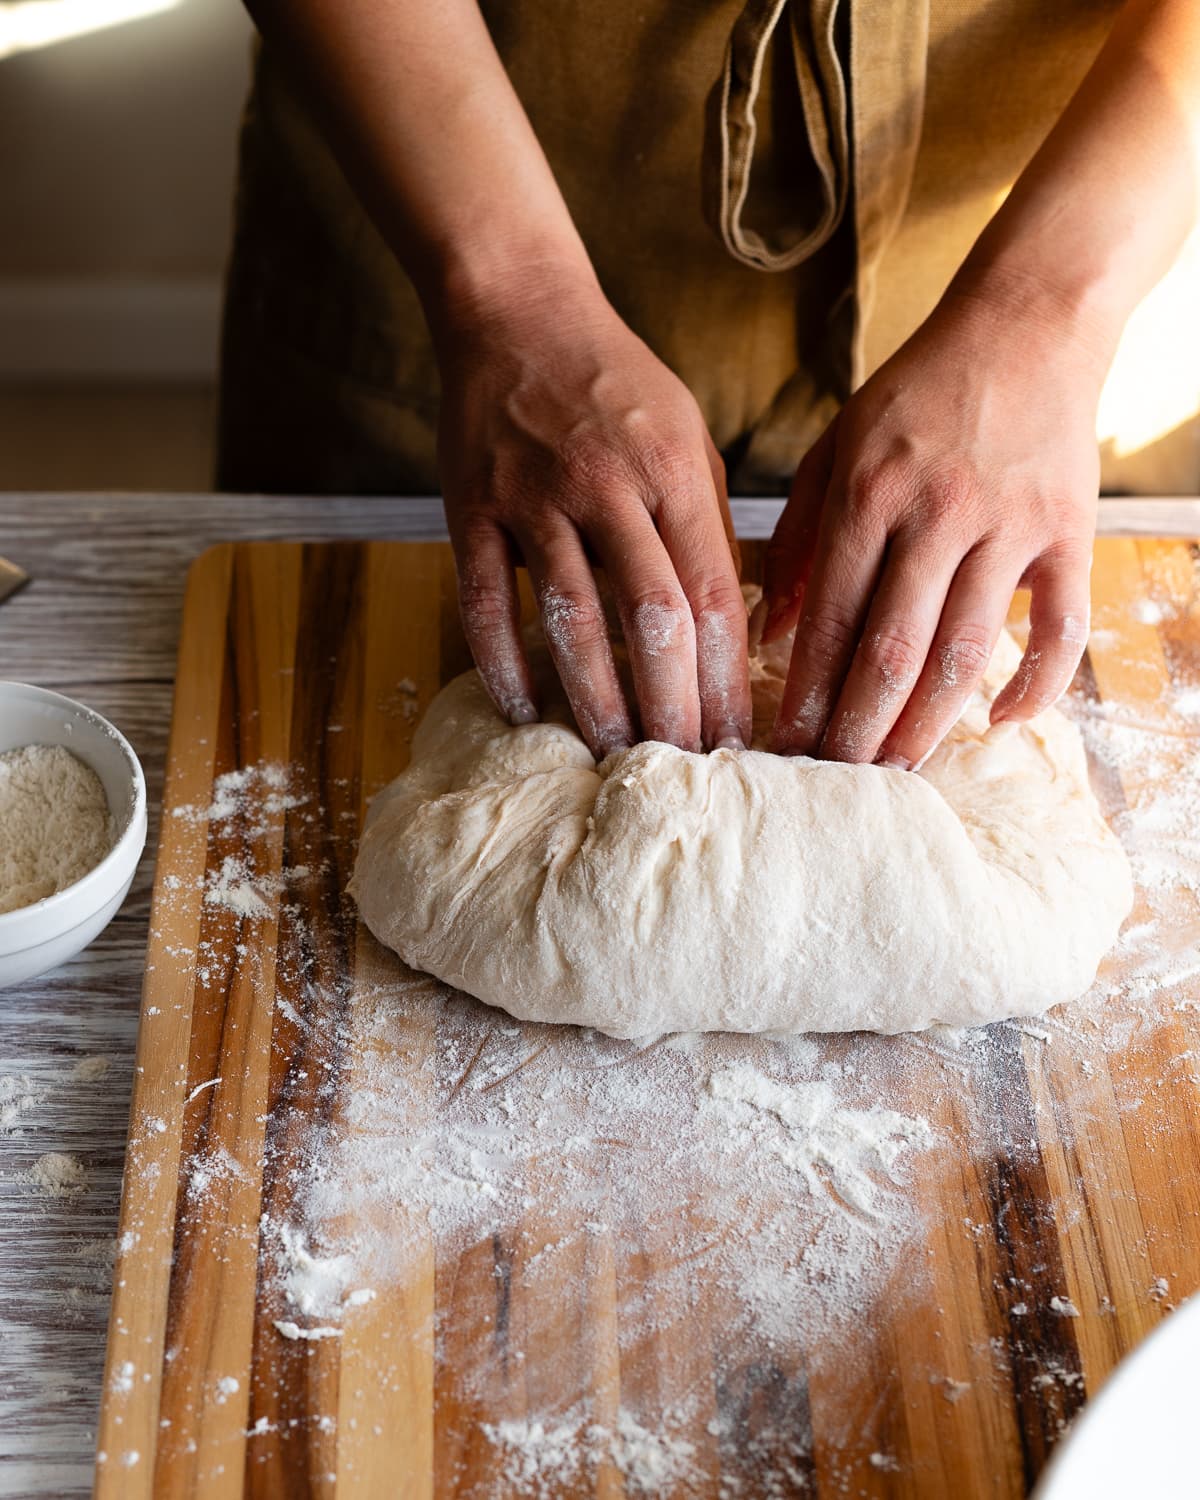
STEP 5. Fold the sides towards the middle
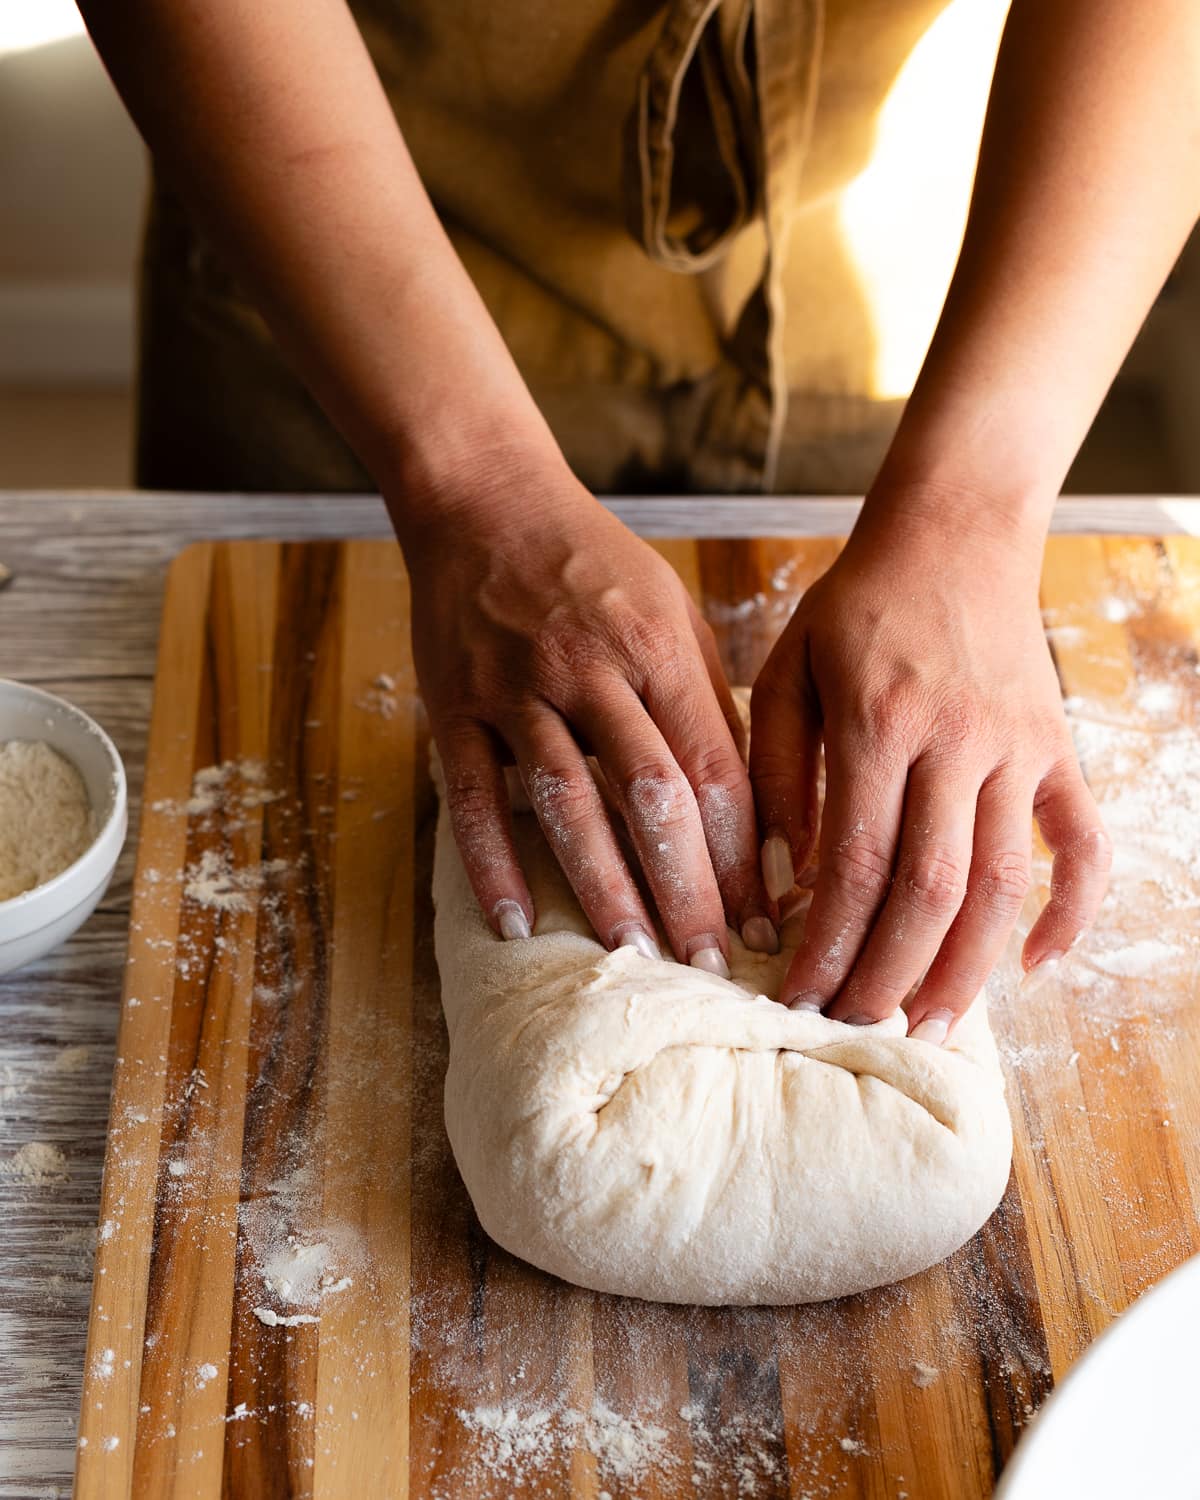
STEP 6. Roll the dough towards yourself
Tip
Handle the dough gently and avoid popping all the bubbles, as this promotes an open and airy crumb structure.
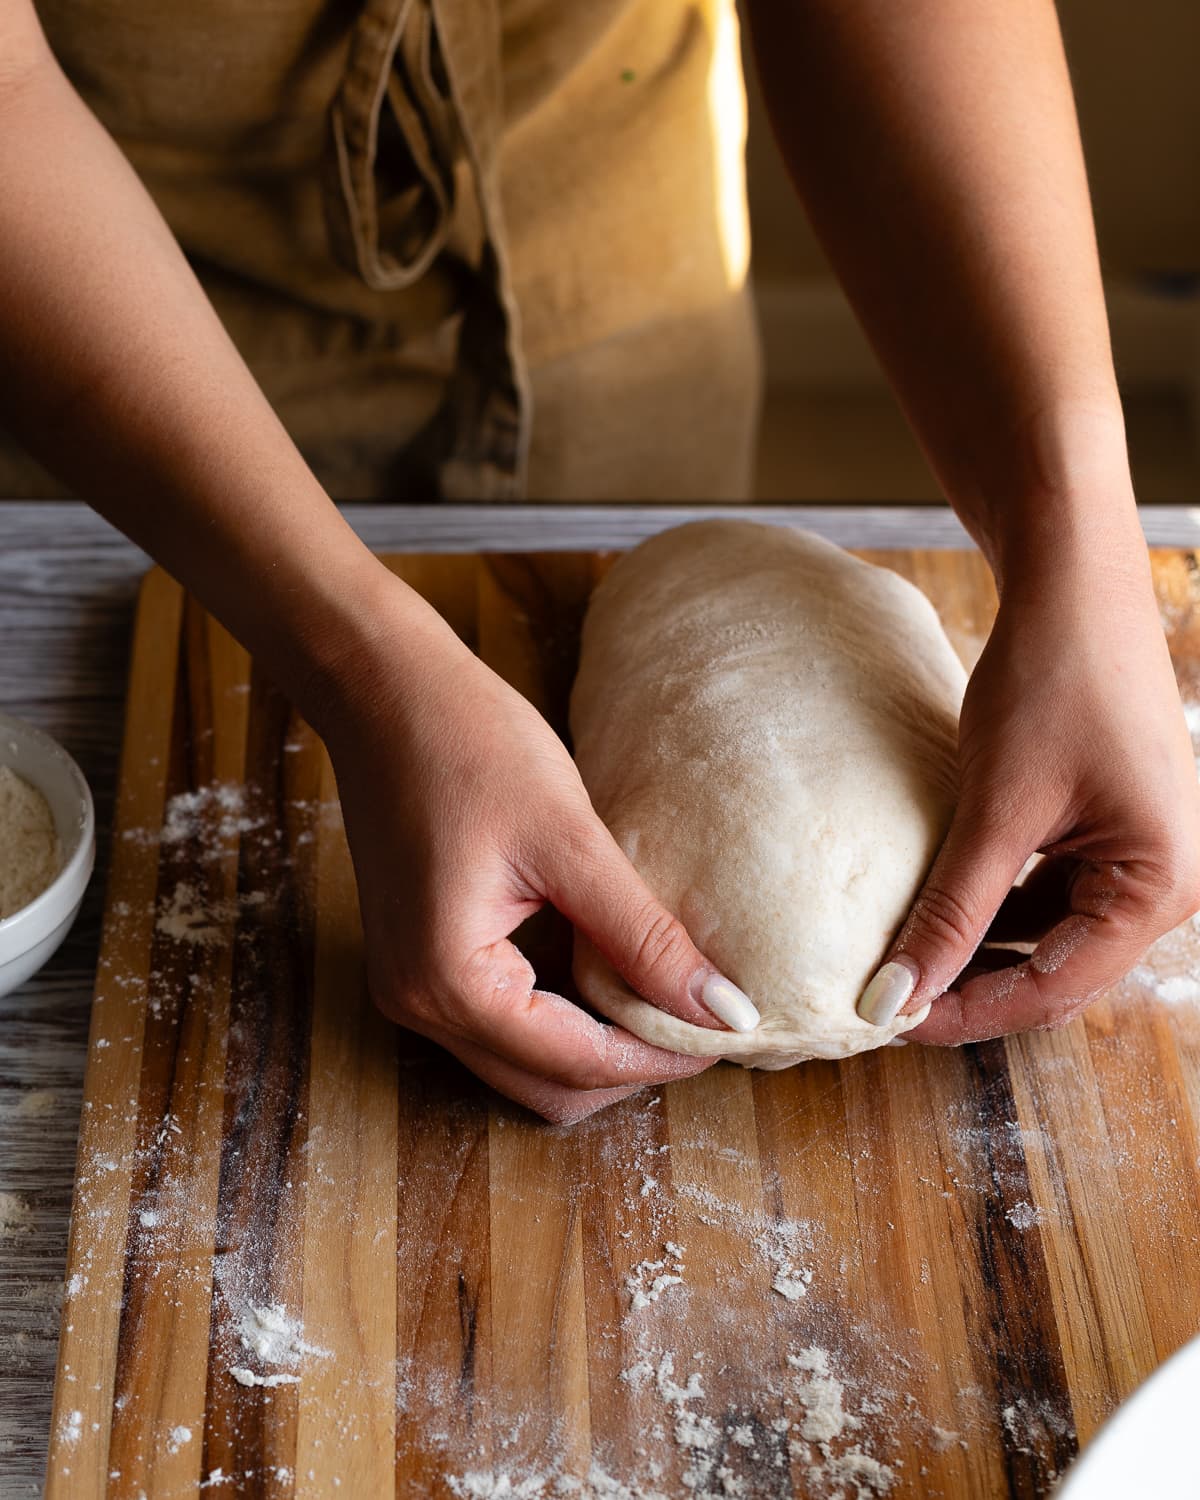
STEP 7. Pinch the ends of the dough
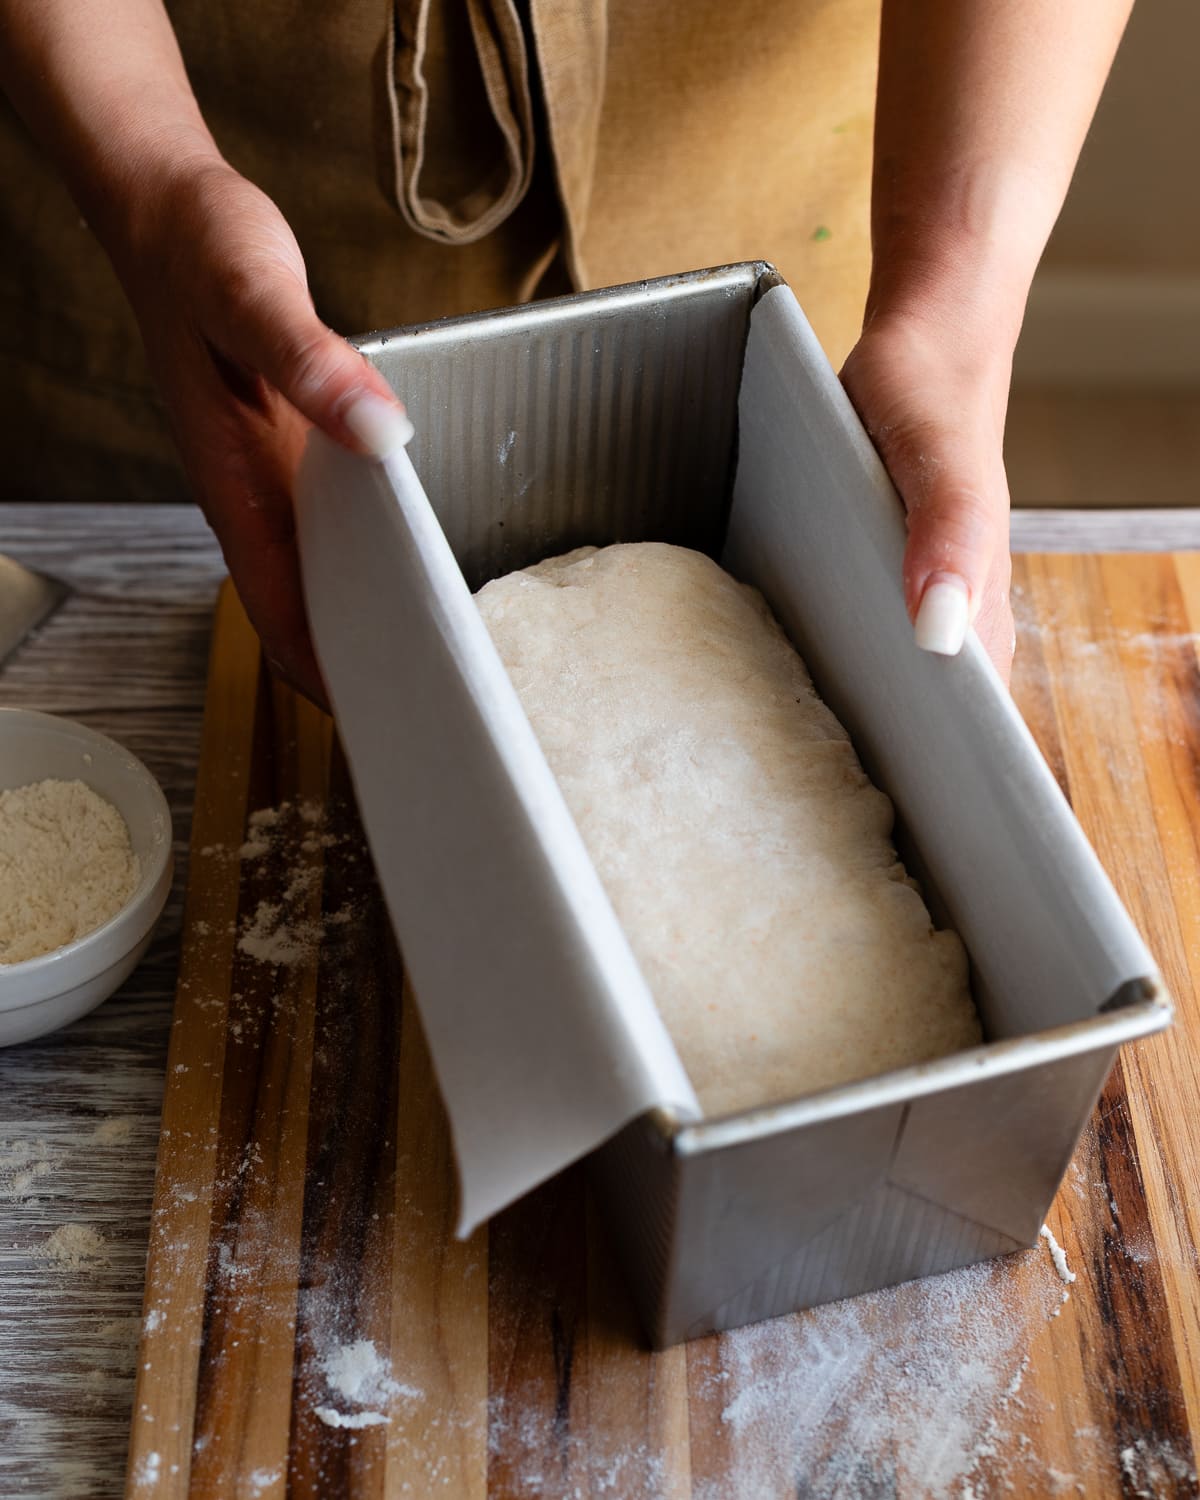
STEP 8. Place the dough into a prepared pan with the seam-side down
How to bake sourdough in a loaf pan
Using a water pan is essential if you want to bake sourdough bread in a loaf pan. Here's how to use one for baking bread:
- Position wire rack in the middle and bottom of the oven. Place pizza stone on the middle rack, if using.
- Preheat oven to 475 F.
- Place a water pan filled with 1-inch of water on the bottom rack.
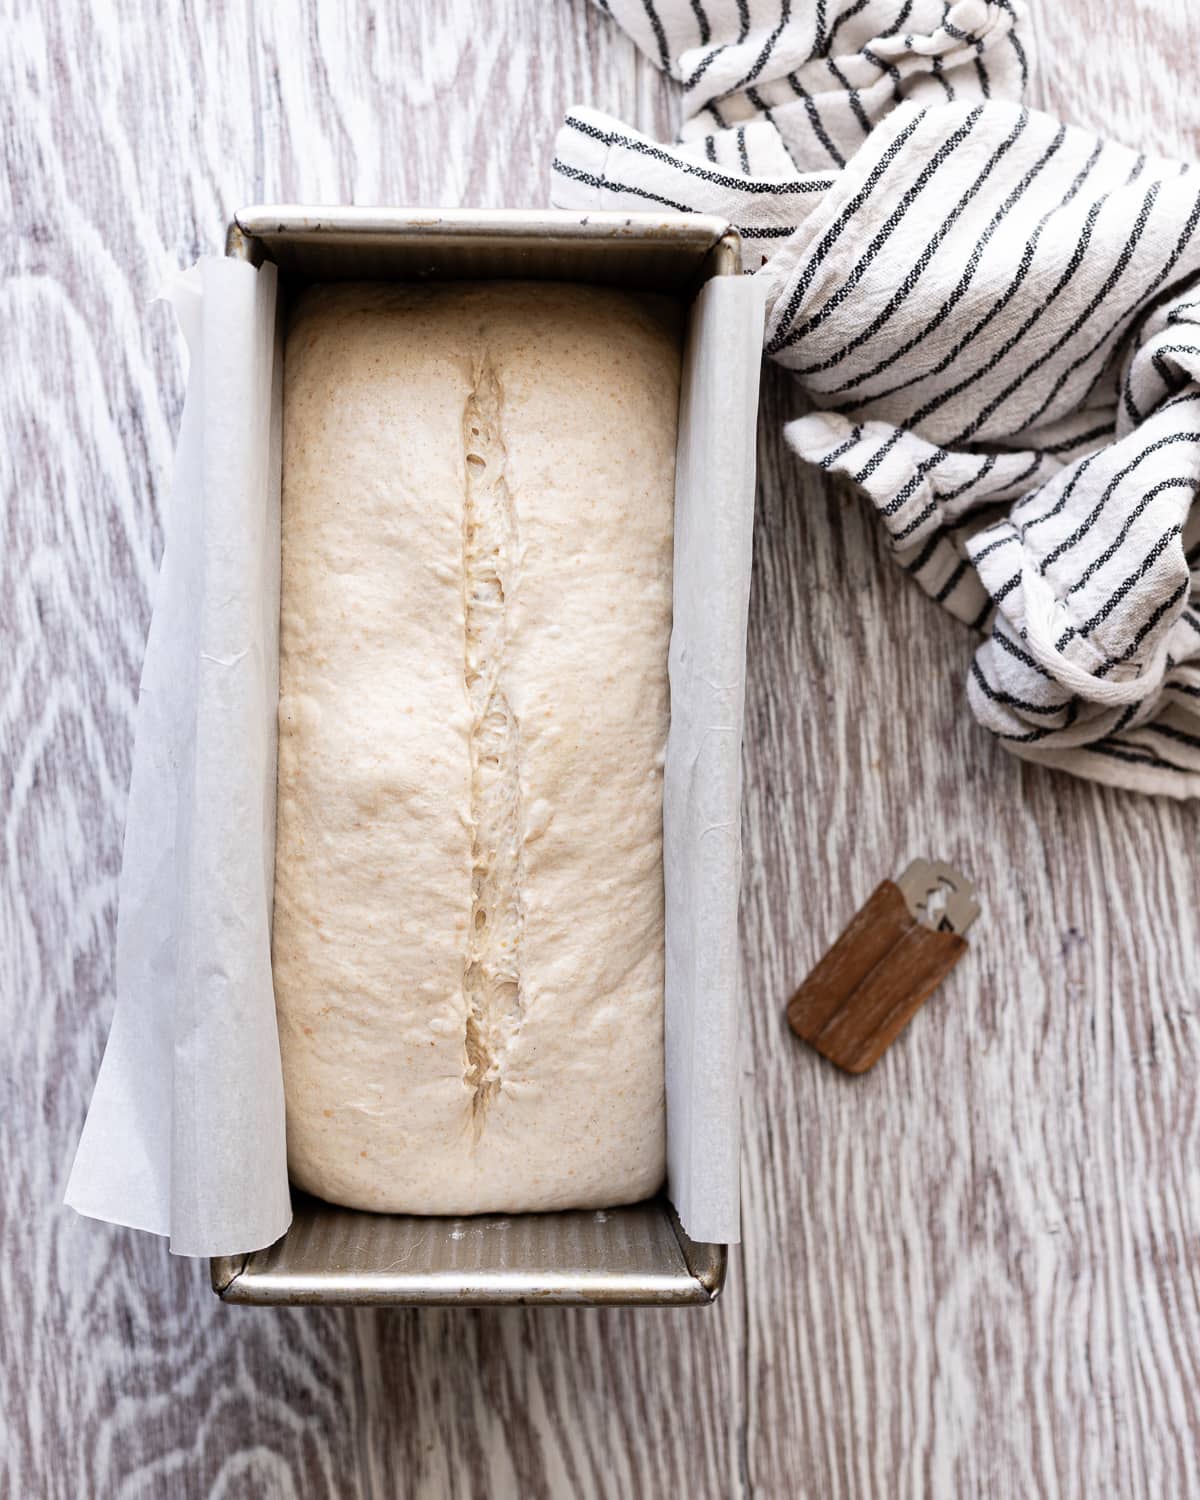
- Score the surface of the dough.
- Transfer loaf pan to the middle rack (on top of baking stone, if using)
- Add ice cubes to the water pan and quickly close the door.
- Bake the bread dough for 20 minutes.
- Remove the water pan
- Continue baking for another 10 to 15 minutes without the water pan
- Remove your bread from the oven once center of the loaf registers at least 190 F when probed with an instant read thermometer and the crust is golden brown or has reached your desired level of color.
Recipe FAQs
No. You can bake the dough straight out of the refrigerator. Fermentation continues in the refrigerator at a very slow rate, but it's enough for the bread dough to rise for baking. Cold dough is much easier to score and helps with oven spring.
As dough bakes, heat speeds up fermentation. This causes carbon dioxide production to go on overdrive, and results in a dramatic rise in your bread during the first moments of baking. This is why an extremely hot oven is important for baking bread, a baking stone intensifies the temperature which results in better oven spring.
Yes! Simply shape your loaf into a cylinder shape instead of a boule or batard. Then proof your dough in a loaf pan instead of a banneton and use a water pan during baking.
The high heat required for bread baking is usually too hot for most glass loaf pans. Using one to bake sourdough bread is not ideal and not recommended, as your glass pan could crack and shatter in the oven. The same goes for a terra cotta bread baker. I would recommend using a metal or aluminum pan.
The size of the pan you need depends on the weight of the dough for your recipe! Pullman pans and loaf pans come in all sizes. Around 600 grams of dough will fit in a 9 by 4-inch loaf pan.
Yes! Scoring creates a weak point in your dough, this gives steam a place to escape as your bread bakes. If it isn't scored, your bread could burst in random places resulting in an uneven loaf.
You may also like

Knead More Help?
Have more questions about this topic? Let me know in the comments!
Pin this post on Pinterest for easy access anytime!
Share your baking triumphs on Instagram - don't forget to tag @makeitdough, I love showcasing your bakes in my stories!
⭐ THANK YOU ⭐
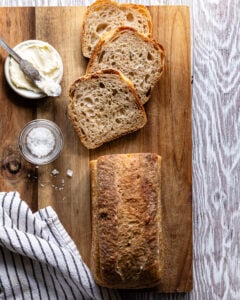
Sourdough Sandwich Loaf Recipe
Equipment
This section may contain affiliate links
Ingredients
Sourdough Starter
- 28 grams sourdough starter mature, unfed
- 56 grams water
- 56 grams all-purpose flour
Dough
- 270 grams bread flour
- 30 grams whole wheat flour
- 200 grams water
- 100 grams sourdough starter active
- 6 grams salt
Click US Customary to view volume measurements
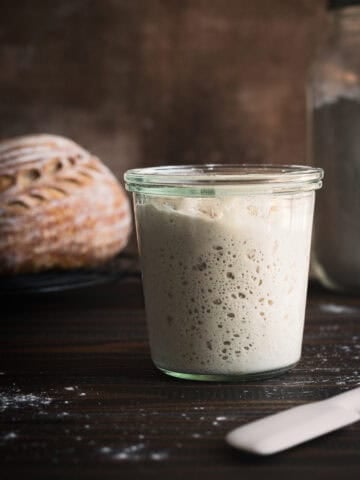
Instructions
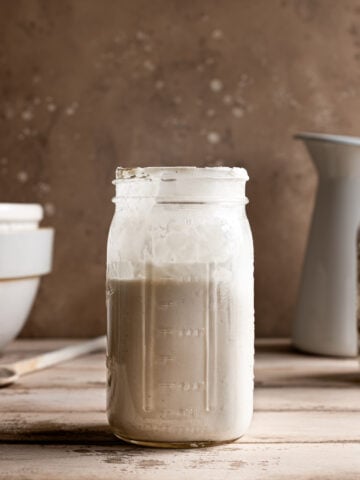
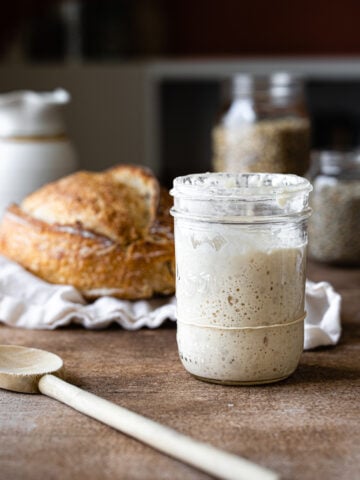
- Activate your starter: Mix the unfed starter, water and all-purpose flour in a small container. Let your starter ferment until doubled or tripled in volume (about 4 to 6 hours).28 grams sourdough starter, 56 grams water, 56 grams all-purpose flour
- Mix your dough: In a large mixing bowl, combine water and active sourdough starter. Stir until the starter is almost completely dissolved. Fold the whole wheat flour into the starter mixture. Add all of the bread flour and salt. Stir using a wooden spoon or your hands until no dry traces of flour remain.270 grams bread flour, 30 grams whole wheat flour, 200 grams water, 100 grams sourdough starter, 6 grams salt
- Fold the dough: Complete a set of stretch and folds by picking up one side of the dough and folding it over itself. Repeat until all sides are folded. Transfer the dough to a lightly-oiled bowl, cover with plastic wrap and let the dough rest for 1 hour.
- Strengthen the dough and bulk ferment: As your dough ferments, perform 3 to 4 sets of coil folds inside the bowl at 30 minute intervals, cover your bowl with plastic wrap after you complete each fold. Your dough should appear smooth and pass the windowpane test after the last fold.
- Bench rest: After your last fold, let the dough rest for 1 hour untouched in a warm place. Your dough should look puffy and should increase in volume during this period.
- Shape the dough: Prepare your Pullman pan or loaf pan by greasing it with olive oil or butter, or lining it with a piece of parchment paper.
- Turn your dough out on a lightly-floured work surface. Lightly flatten the dough out into a rectangle (be gentle so you do not pop the air bubbles build up during fermentation).
- Fold the left and right corner of the dough towards the center.
- Fold the tip down towards the center.
- Roll the dough towards yourself into a tight cylinder.
- Pinch the ends of the cylinder. Place the dough into the prepared pan with the seam-side down.
- Cold proof: Cover the pan with plastic wrap. Place your dough inside the refrigerator and proof overnight.
- Prepare for baking: Preheat your oven to 475 F with the wire racks positioned in the middle and bottom. Place pizza stone in the middle (if using). Allow oven to heat up for at least 1 hour.
- 15 minutes prior to baking, place a water pan filled with at least 1-inch of water on the bottom rack of your oven.
- Score: Take the dough out of the refrigerator, uncover and cut a long slash on the top of the dough with a sharp knife or a lame.
- Bake: Bake the dough cold directly from the refrigerator on the middle rack (on top of the baking stone, if using).
- Add ice cubes into your water pan and quickly close the door. Bake for 20 minutes.
- Remove the water pan and bake for an additional 15 to 20 minutes or until the center of the loaf registers at 190 F when probed with an instant read thermometer and the crust reaches your desired color.
- Cool: Transfer the sandwich tin to a cooling rack. Let the dough cool for at least 15 minutes before turning it out of the pan.
- Serve: Allow the loaf to cool for at least 2 hours, before slicing.
- Store: Store any leftover slices in a ziplock bag for up to 5 days at room temperature.
Tips
These recipes were developed and tested using grams for precise measurements. To increase your chances of success, I recommend investing in a kitchen scale. I've included rough volume estimates (in tablespoons and cups), but they might not be totally accurate.
Remember all ovens are unique, these recipes were tested in my oven which runs cooler than others. You might need to lower the temperature if your bake appears to be browning too quickly. Monitor your bake closely and make adjustments if needed.
Notes
Nutrition
I am not a nutritionist or dietitian, any nutrition information provided is an estimate.
Michelle says
Hi!
I’m so very happy to have found your blog!
I do have 2 questions:
1. I have arthritis. Would it be possible to use my kitchen aid mix master to both mix & “kneed” this dough?
2. Do I have to use bread flour with its higher gluten content, or will unbleached all-purpose flour work?
I want to thank you so very much for all the time you put into this blog & helping us newbies out!!!
Hannah Dela Cruz says
Hi Michelle - yes! You can definitely use your Kitchen Aid with a dough hook knead this dough instead of using the stretch and fold method. All-purpose will work fine!
Michelle says
Thanks for getting back with me Hannah!!!
Hannah Dela Cruz says
You're welcome! I hope this was helpful!
sheryl hussey says
Can I double this recipe?
Hannah Dela Cruz says
Absolutely!
Linda O’Connor says
Hello: I loved the taste of this bread and have made it a couple of times. My only issue is it wasn’t nearly as large as yours. It barely reached the top of the pan after it was baked. Any suggestions what might have gone wrong? I have a very active starter so I don’t think that was the problem. Should I have left it longer on the counter before shaping? Or added a little yeast? My pan was the proper size so I don’t think that was it. I’d appreciate some advice.
Hannah Dela Cruz says
This sounds a little bit like you may need to extend your bulk fermentation. If you're baking in a cold climate, it might be that you need to add a little bit more time to your first proof. Try that and see if it works. If not, try to let your dough proof on the counter, at room temp, until it has noticeably risen and reaches almost the top of your container before baking.
Linda OConnor says
Thanks. I live in Canada, and it’s definitely been cold. Should I shape the loaf in the pan, let it rise then put it in the fridge overnight?
Hannah Dela Cruz says
You can definitely try that. I would focus on bulk first though. A lot of the time that really is the issue for most people. If you bulk for long enough, your loaf should rise slightly in the fridge (this is what happens with mine).
Leslie Grantham says
Good morning!
I’ve used this recipe many times (my whole family loves it) but I don’t get a good rise when baking. I’ve followed your directions exactly because I’m a newbie. Once I’ve finished the sets of coil folds and have my dough resting for an hour (just prior to forming the loaf) should I leave it until I see it double in size before forming the loaf? I don’t see it double after 1 hour I don’t think.. or do you think it is a different issue?
Thank you!
Leslie
Hannah Dela Cruz says
Hi Leslie! I'm glad this recipe is working for you. That could definitely be it.
I give time cues in all the bread recipes, but proofing is highly dependent on temperature so the rise time is variable. It could be that it's a little colder in your kitchen so fermentation is slower and could take longer. Try adding 30 minutes to an hour to your bulk ferment and see if that makes a difference.
Let me know how it goes!
Hannah
Harsangeet says
hello, I am planning on making this recipe. please share what was the temperature of your kitchen and fridge. that will be helpful because I live in very hot climate.
Hannah Dela Cruz says
I use a proofing box that keeps my dough at a constant 78F and our fridge is usually at about 40F.
Regina says
I would love to make this recipe, but I have only 1 rack in my oven con I put the water pan on the same rack as the bread?
Hannah Dela Cruz says
It should work just fine! The goal is just to get your oven nice and steamy for the first part of baking. Then then remove for the second half.
Renee says
So glad I found your blog today! I’m brand new to sourdough - as in, I found a recipe (on a different blog) for a shortcut sourdough starter I needed to make some sourdough oliebollen I’d discovered on yet another different blog - all last week. The oliebollen was for New Years Eve and that starter was just ready that day. Everything went perfectly but I was left with a small loaf worth of dough that I did not want to fry and wasn’t about to throw out. So I went looking for a way to bake it and your post had exactly what I needed. Thank you! We now have a small-but -perfect (and delicious) loaf of sourdough raisin bread. And you now have one more follower, because I now know that I know nothing about sourdough, except that it makes whole grains more digestible (and so much more pleasant to eat!). What I do know from your blog and other searches is that there are ways around lack of equipment, time, experience and knowledge. I also learned already that there are ways to use the discard starter (made cheese crackers NYE) and I see you have several recipes I’d like to try for that. Looks like I’m going to be doing a fair amount of baking this year!
Hannah Dela Cruz says
Baking with sourdough is addictive! Glad to be part of your sourdough adventure.
SA says
Hi, most loaf pans are only rated to 450deg (aluminum or non stick coated carbon steel). Can we just do the initial back at 450 and then lower to 425? Or should we do 450 the entire time?
Hannah Dela Cruz says
Hi! Yes that would work fine. The initial high heat is great for oven spring then you can turn it down for browning.
Dean Blumberg says
Hello, Just getting started with this. I have a 9x5 bread pan. The bread had plenty of air holes, but it barely made it to 1/2 way to the top of the pan. Should I make a larger batch or do I need to do something else. Thank you so much for doing this!
Hannah Dela Cruz says
Hi! My pullman pan is a little smaller at 9 by 4 inches, so that may be why your bread didn't rise as high.
Antoinette says
Do you put the loaf into the oven straight out of the refrigerator, or do you have to allow it to come to room temperature before putting in oven?
Hannah Dela Cruz says
No need to let the dough proof at room temp! You can bake directly from the fridge.
Linda says
After making the rustic sourdough, which came out fantastic, I want to try your sourdough in a loaf pan recipe next.
I will be using an oven with steam mode.
Have a few questions.
I have a 7 1/2” X 4 Pullman pan. Can I use that, if not I have 9” bread pan.
After steaming for the first 20 minutes, I will change to bake mode, should I slide the Pullman cover on or leave it off, if I use it?
Hannah Dela Cruz says
So there's a few things that we have to tackle with your questions.
1. Your Pullman pan may be a little too small to accommodate the amount of dough in this recipe. However, if you have a recipe that you like to use that makes the appropriate amount of dough you could always use that and just follow the steps for baking without a dutch oven.
2. Baking a loaf in a Pullman pan with the lid on is basically the same as using a Dutch oven, since it traps the steam inside the pan for the first portion of cooking. You'd then have to slide it off for the second part of baking so that it browns. In this case, you won't need to use the water pan at all.
3. If you're planning to use your 7 1/2 x 4 Pullman pan with the cover this recipe definitely would make too much dough and it may become too dense as it tries to rise in the pan.
Hope this helps!
Sam says
just wondering if you are baking straight from fridge or pulling out loaf to come to room temperature while oven preheats?
Hannah Dela Cruz says
You can bake it straight from the fridge!
Linda aRech says
My 25 year old electric oven stopped working.
So I had to buy a new one. They no longer make no frill ovens.
There are many different features.
I picked one that has proofing mode, steam mode, convection and a temperature probe.
You can turn it on and off, change temperature, see the temperature reading of the probe by using an app on your phone
Some have a scanner that can read frozen food directions and will set the temperature, timer and notify your phone when it is ready.
My question is since I will be using the steam on the bread should I turn off the steam after the 20 minutes or leave it on the whole time?
Hannah Dela Cruz says
Yes, you should turn off the steam function after 20 minutes or your crust won't brown.
Linda says
Thank you, it came out great! After 20 minutes with the steam, I switched to Bake for 15 minutes. Was tempted to try convection bake but was afraid to try too many new things.
Hannah Dela Cruz says
So glad to hear it turned out great! I've never tried using a steam-injected oven and I'm so jealous.
Maddi says
This is so far the best no dutch oven recipe I can find, and I followed your instructions every step. Turned out really good, but burned a little bit coz my old oven temperature isn’t reliable:( will definitely try again
Crystal Freeman says
The bread is delicious but why does it want to grow really big out of the one side and kind of crack it, I scored it, but maybe I should make a deeper cut?
Hannah Dela Cruz says
Your bread might have been a just a tad bit underproofed. If the dough isn't fermented enough, the yeast bursts in the oven causing the dough to expand vigorously and the crust ruptures as a result. Try fermenting your dough for an hour to an hour and a half more than you normally would and see if that helps matters.
Hannah says
Used the instructions for baking this 3 times in the past couple weeks and it's all over wanted and needed for lunches. Wonderful!
Hannah Dela Cruz says
I'm so thrilled you love the recipe!
Bern says
Thanks for these tips on making your recipe using a tin loaf you've saved me. so much baking time as I don't have a steam oven. all along I would bake your recipe using a Dutch oven and it would take me hours if I wanted to bake more than 4 loaves. so baking in a tin comes so handy for large batches.
was wondering if its possible to mix my dough on a Friday; allow it to bulk ferment in the Fridge on Saturday; then shape it on Sunday; to bake it Monday morning? just looking for a way to have fresh bread on Monday morning without actively working hard over the weekend.
Hannah @ Make It Dough says
Hi Bern! So glad this is helpful for you. I would do bulk fermentation at room temp and just try to keep the dough to cold ferment in the fridge for the weekend. I think the fridge would slow down bulk fermentation too much and won't allow your dough to rise enough.