Change is good, at least when it comes to my new method for baking sourdough bread. Admittedly, I was very apprehensive about changing up my sourdough baking process, but after a string of high hydration flat loaves I knew I had to make some changes if I wanted to enjoy the soft texture and airy crumb that comes with baking wetter doughs.
I'd seen some other bakers on Instagram mention "cold bulking," and got curious. I tried to search for recipes online, but couldn't find too much information so I decided to experiment on my own. Since trying out this new process, I've consistently produced loaves with higher oven spring and softer, more open and tastier crumb.
The different stages in the bake are spread out over the course of 3 days, but is more flexible with long rest periods interspaced between approximately 4 hours of active time working the dough. I use a levain fed with a higher ratio of flour and water (1:4:4), which I find gives me more flexibility because it takes longer for the yeast to exhaust its food source. I've been mixing my levain the night before, and when I am ready to bake the next day, I find that my starter has not "fallen" and is still bubbly and active.
I'll be demonstrating my new method using my recipe for a plain white sourdough made with 100% Bob's Red Mill Artisan Bread Flour at 80% hydration. If you are not comfortable with handling dough at this hydration level, feel free to use your own preferred formula, and simply follow the process I outline below.
Ingredients
Levain
| Quantity | Ingredient | Baker's % |
| 16 grams | Starter | 20% |
| 64 grams | Water | 100% |
| 64 grams | Flour | 100% |
Dough
| Quantity | Ingredient | Baker's % |
| 350 grams | Bread Flour (Bob's Red Mill Artisan Bread Flour) | 100% |
| 268 grams | Water | 76% |
| 144 grams | Levain | 41% |
| 7 grams | Salt | 2% |
Directions
Day 1:
Levain
The night before you're ready to bake, create a levain by combining all the ingredients from the levain section above.
Autolyse
After creating your levain, combine 350 grams flour and 268 grams water in a large mixing bowl. Mix until all flour is properly hydrated and no more dry bits remain. Cover and set aside in a warm place until you're ready to bake.
Day 2:
Dough Mix
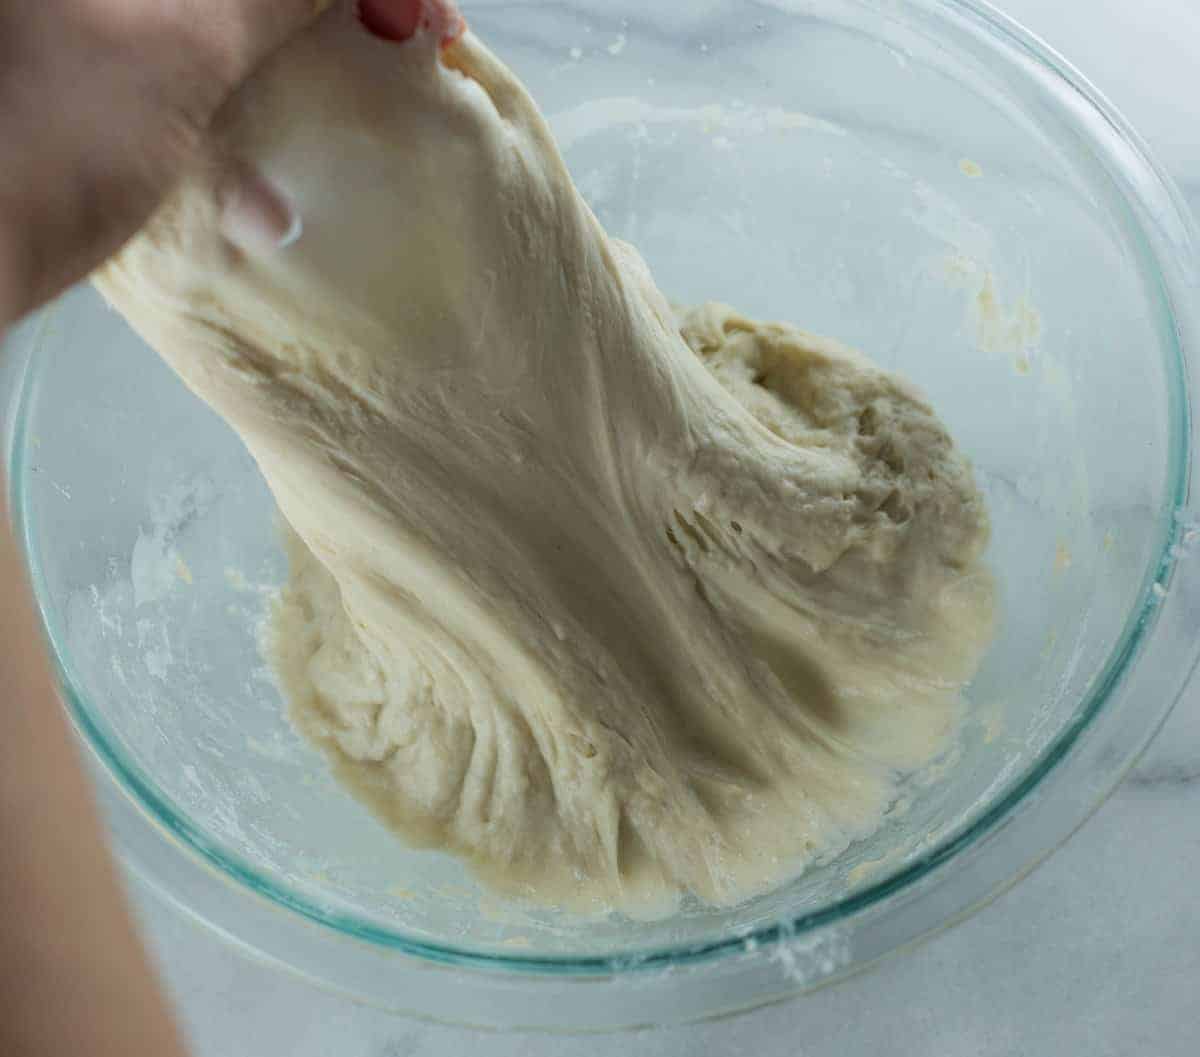
After an overnight autolyse, your flour and water mixture should look wet and feel stretchy when pulled.

Incorporate levain into dough using a pinching motion until everything is well incorporated. Cover and set aside for 30 minutes.
After 30 minutes, add salt to your dough. Slap and fold or stretch and fold your dough until it looks smooth about 10 minutes. Return dough to the bowl and let rest for another 30 minutes.
Stretch and Fold
Perform 3 or 4 sets of stretch and folds, allowing dough to rest for 30 minutes in between each set.
Cold Bulk
Once you've built enough strength into your dough (a good indicator is dough that holds it shape and reaches windowpane stage), place into a container, cover and store in refrigerator overnight.
Day 3:
Pre-Shape
Turn your dough out onto a clean surface, and sprinkle a little bit of flour on top.
To pre-shape, pull on the side of your dough closest to you and fold it towards the center, thinking of an envelop, pull both sides towards the center as well, and finally the top. Flip your dough over, use your hands to gently rotate and tuck the bottom of the dough.
The goal here is is to begin creating tension in your dough which will help it keep its structure for its final rise.
Let the dough rest on the counter covered with a tea towel for 30 minutes.
Shape
Uncover your dough, and shape it however you'd like making sure you create lots of tension without tearing the surface of your dough.
Pick up your dough gently, and place it seem-side up into a banneton or towel-lined bowl dusted with flour.
Final Proof
Allow loaf to proof at room temperature until ready to bake.
This step will be dictated by the temperature in your kitchen and the activity in your dough, remember to pay attention to your dough and not the clock.
Once your dough is close to being properly proofed (this usually takes about 2 to 3 hours for me), preheat your oven to 480 F/248 C, with your Dutch Oven inside.
Score
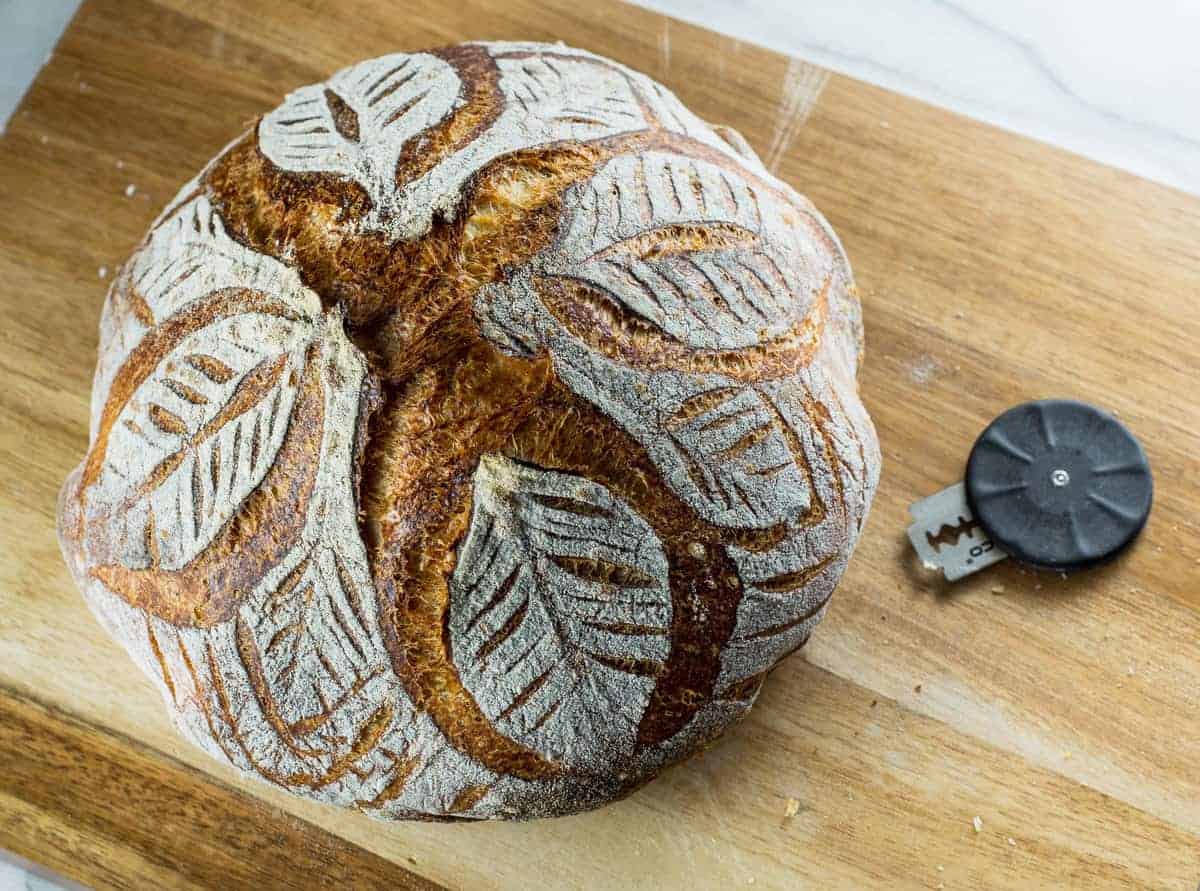
Using a sharp knife, lame or razor blade, cut a large X (or any other design you’d like) on the top of your dough.

Bake:
Place your scored bread inside your preheated Dutch oven and bake covered for 25 minutes and uncovered for another 25 minutes or until the internal temperature reaches 200 F and the crust reaches your desired color.
*** I prefer to bake my bread covered for 30 minutes and uncovered for 20 minutes for a thinner, softer crust. Bake your bread depending on your preference
Cool
Remove bread from the Dutch oven and immediately place on top of a wire rack to cool completely before consuming. While that bread is incredibly tempting, if you cut it too soon it will be gummy and will eventually dry out.
Et Voila!
This bread had such a soft, creamy, sweet crumb, accented by the nutty flavor of its crispy crust. I've been loving the tall loaves, with airy open crumb structures that I've been pulling out of the oven each time I use this method. When I first tried this new process, I thought there was no way my fickle little wild yeasts would be able to make bread rise in my cold fridge, but boy was I wrong. Remember that baking is an experiment, and all results may differ, the important thing is to keep trying new things.
Please share this recipe if you enjoyed it! Follow me on Instagram @MakeItDough or like Make It Dough on Facebook for more sourdough and baking ideas. Remember to post a photo and tag me or use #makeitdough when you make this delicious recipe, so I can check out your bake!
Try my other sourdough recipes:


Marion Tyler says
Do you use parchment paper to transfer shaped dough into preheated Dutch Oven? I thought that parchment paper was only good up to 425 or 450 degrees? If you don't use parchment paper how do you keep from getting burned?
Hannah @ Make It Dough says
I always use parchment and never have issues.
Katie says
I'd like to try this recipe, just need to know if the 16 grams of starter needs to be at room temp before feeding it on night of Day 1 or is it ok to feed it cold straight from the frig?
Also, I'd like to use some white whole wheat flour, maybe 25-30%. Have you tried this and if so, what ratio do you recommend?
Thank you!
Hannah @ Make It Dough says
Your starter needs to be active for this recipe.
Katie says
I'd like to try this recipe, just need to know if the 16 grams of starter needs to be at room temp before feeding it on night of Day 1 or is it ok to feed it cold straight from the frig?
Tressa says
On day 2- I added the levaine and the autolyse and the salt then stretched and folded for 10 min. For the next steps it says to do the stretch and fold 3-4 more times- does that mean to stretch and for 10 min 3-4 for times with 30 min in between? Or to stretch and fold a couple times and then rest 30 min, 3-4 times?
Make It Dough says
Just stretch and fold and let the dough rest for 30 minutes.
Charlotte says
I started making weekly sourdough in January 2020. I watched many You Tube videos and I even bought a couple of expensive books. I had never been able to achieve a consistent open crumb or one as big as the pic you have on this site. I decided to try your recipe since it was different from I had been doing. It turned out just like your pic and it was delicious. Thank you so much for this easy to follow recipe that is less labor intensive than what I had been doing. My husband also makes sourdough with similar recipes as I was previously using. When I cut this one and showed the open crumb to him he said "you cracked the code".
Make It Dough says
So happy it worked for you! With 2 sourdough bakers in the family you guys must have tons of bread at home.
Charlotte Ruiloba says
We do make 1-2 loafs a week. It is therapeutic for my husband, he feels it is a stress release! I eat a piece every day. I feel sorry for the keto diet people! Happy baking.
Margarita says
So on Day 2 - once you've done all your incorporations and folds in the morning, then it is into the fridge from that midday time to the next morning whenever you're ready to go?
Make It Dough says
Yes! Day 2 is when you'll mix your starter into your dough and do your stretch and folds.
Bonita says
Sound like puddling may be caused by over proofing....or you may not have given it enough time to rise after transferring to bowls for b proof
Lay Ean Teoh says
Autolyse step, we do not add in the Levain?
Make It Dough says
No levain in the autolyse step!
Monique says
Thank you for all of your wonderful information. I tried this recipe and I got pretty good open crumb. My only question is that the sides of my bread seem a bit flat. It's strange, I get nice holes but not that much oven spring.
Make It Dough says
May be a shaping issue!
Monique says
Yep, you are right. It my shaping. Thanks for the help!
Make It Dough says
Sourdough is so tricky but that's what makes it fun!
Bonita VanPopta says
I made this recipe.....or at least I tried. My starter was nice and bubbly, the autolyse and stretch and folds all went well, though the dough was quite hydrated. This morning I took the dough out of the fridge within the 24 hour time period of cold bulk and I tried to shape it but it keeps puddleing and won't rise nicely. Could it be that the long rise has exhausted the yeast? I wondered about that as I began. ...and I made the starter as specified.
Please help.
Make It Dough says
What do you mean by "puddleing"? What was the temperature of your kitchen while you were doing the stretch and folds?
Chanlee says
Same thing happened to my dough. While trying to score, it just flattened out and sank. Baked it anyway, it was not as good as first loaf. I’m thinking less water. Anyone else have suggestions?
Brie says
Hello, from what i understand from your post, we make the levain and autolyse dough the night before, and then the next we mix it and let it rest again overnight, it is correct?
Make It Dough says
Yes!
Rachel says
Thanks so much for this recipe! I made it three times over the weekend and all of the loaves rose higher during baking than any I have made before. The texture on the inside was lovely as well! By the third loaf, I did make a couple of modifications: 1) I used about 45% whole wheat four (because I ran out of bread flour..), which still turned out really nice and 2) I noticed that my loaves were getting a bit burnt, so after I took the lid off during baking, I turned the oven down to 430 and they turned out perfect.
I have noticed that this bread isn't very "sour". Do you have any suggestions on how to increase that sour flavor?
Chanlee says
Your procedure with a sourdough loaf sounded intriguing so tried it last weekend. Still skeptical on Monday as getting ready to bake, but so pleased with the results. Only thing is crust baked too dark for me while inside is a bit sticky. Next time I’m thinking I’d decrease the temperature and lengthen the time. Your suggestions would be appreciated. Thank you
Make It Dough says
Hmmm a sticky interior usually means underfermented or underproofed. I'd try for a longer ambient final proof before baking!
Lore Bazemore says
Thank you for this. I got my dough off to a late start and can’t make time for the bulk ferment and shaping tonight, so l am putting it in the refrigerator now, and will remove it at 5:30 AM, bring it to room temperature and hope that by 10:30 AM it will be just about ready to shape and then bake after brief refrigeration (to make scoring easier)! Crossing my fingers!
David Watkins says
This is a great looking bread recipe. Can you tell me what a pinching motion is? How does it differ from additional folds?
Thanks for your help,
David - Dallas
"Incorporate levain into dough using a pinching motion until everything is well incorporated"
Make It Dough says
Hey David -- sorry I'm responding to this comment so late. By pinching motion, I mean squeezing the dough in your hand to easily incorporate the starter into the dough.