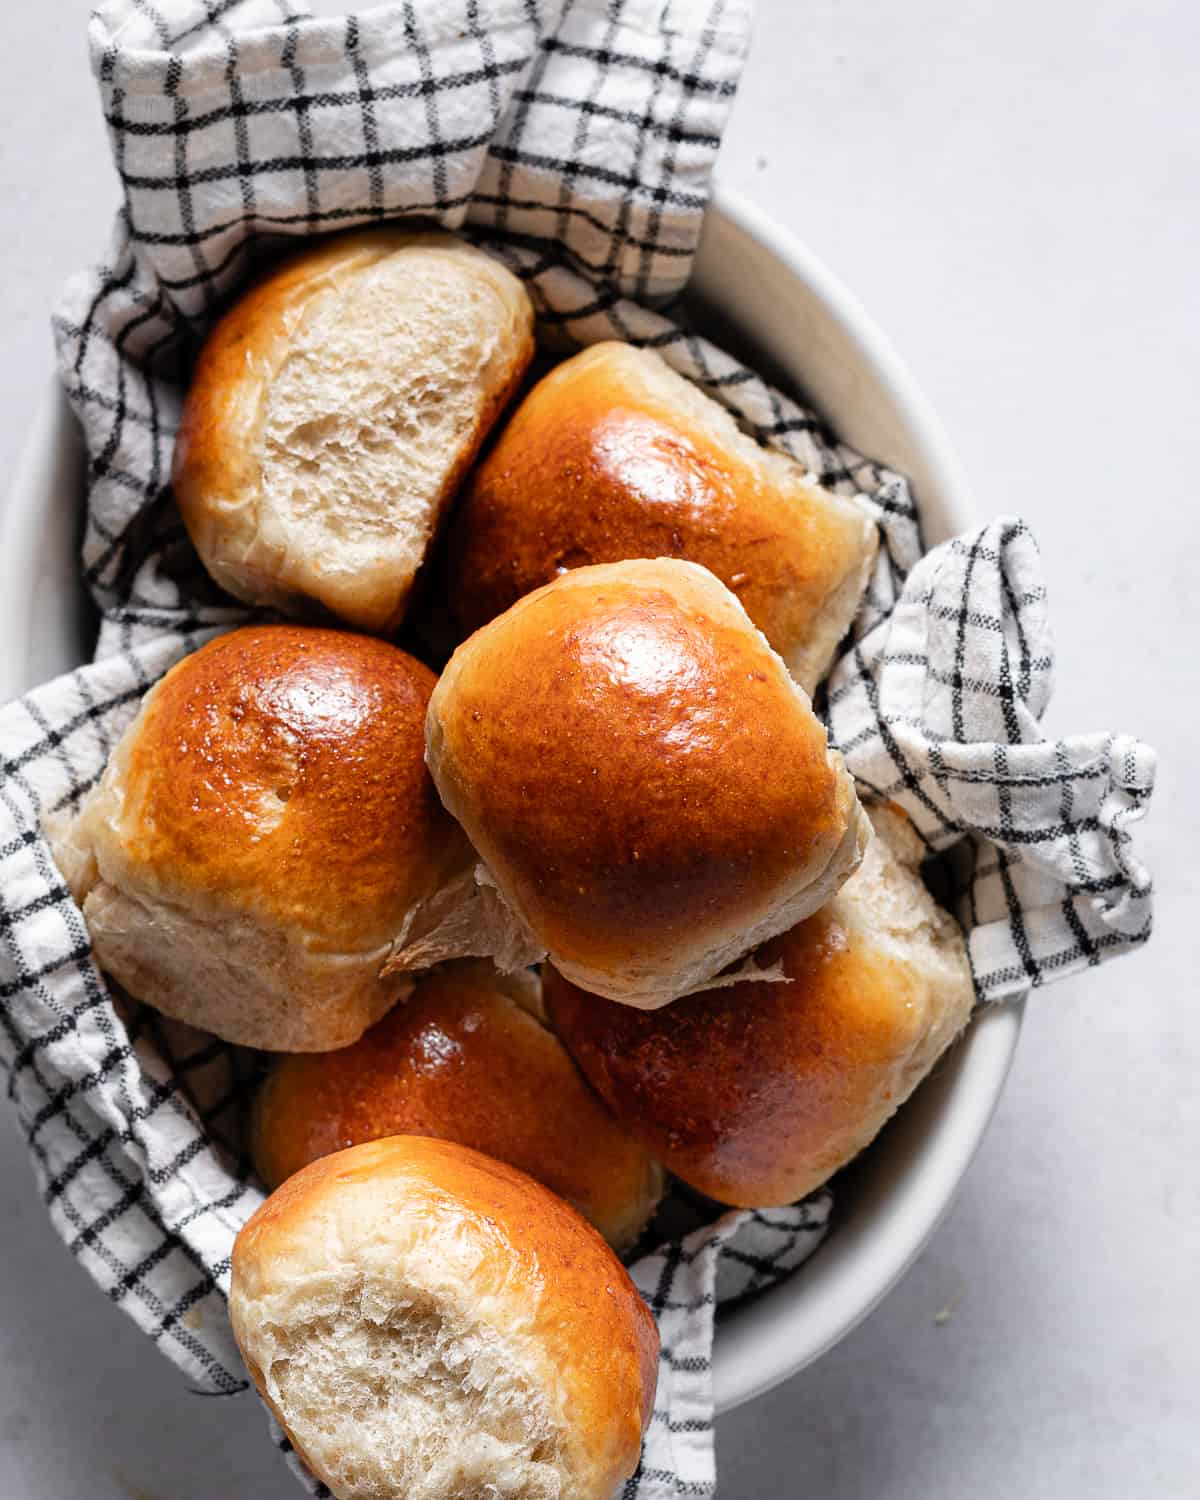
These Sourdough Discard Rolls are so unbelievably soft, pillowy and plush, they might steal the show at your next dinner celebration. I’ll show you how you can have freshly baked homemade sourdough rolls in less than 2 hours by using a combination of sourdough discard and instant yeast.
Jump to:
What is sourdough discard bread?
Sourdough discard bread uses both commercial yeast (active-dry yeast or instant yeast) instead of relying solely on an active sourdough starter for leavening. In contrast, traditional sourdough bread relies on an active sourdough starter, leading to a longer fermentation time of about 2 days due to the reliance on wild yeast.
Short on time but still want delicious freshly-baked bread? Try my recipes for Sourdough Discard Bread, Sourdough Discard Focaccia, Sourdough Discard Challah, Sweet Potato Sourdough Discard Bread or Sourdough Discard Sandwich Bread.
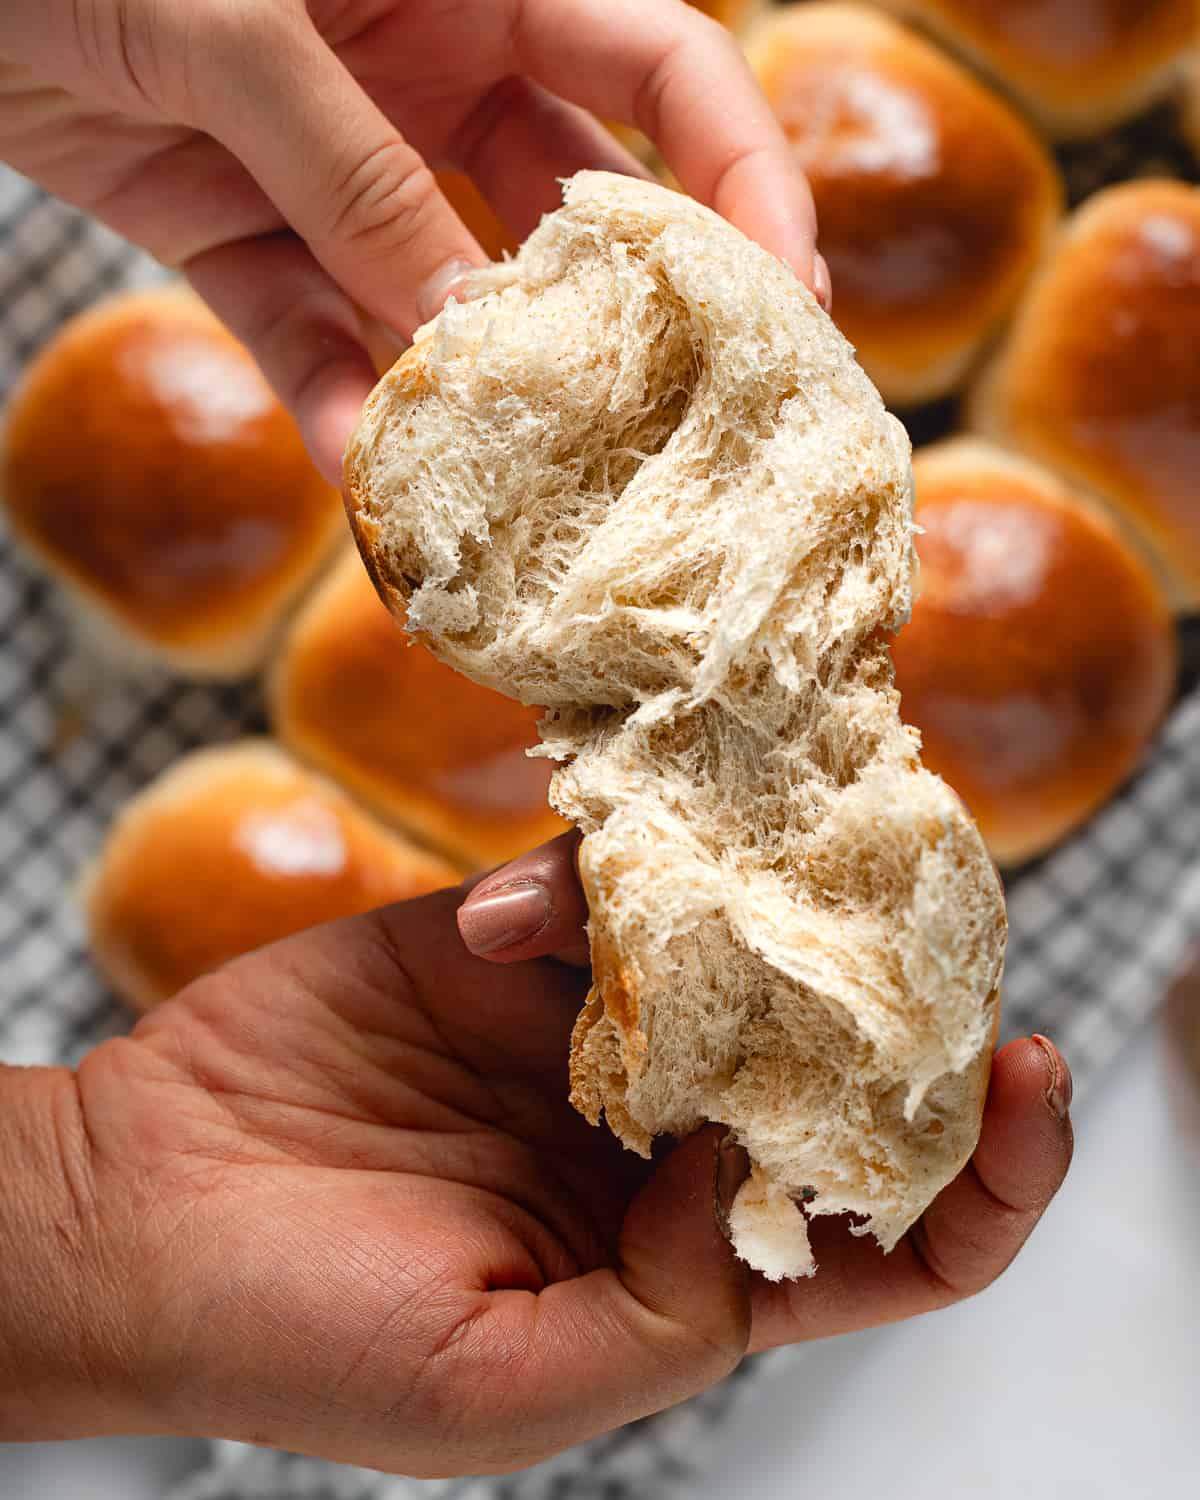
I absolutely love these rolls and so does my family! They store very easily in a container and can be quickly popped into the microwave for a quick roll for dinner or even a snack!
- Hallee
Why use commercial yeast with sourdough discard?
Adding instant yeast and sourdough discard in a recipe combines convenience and flavor. Commercial yeast allows bread to rise much faster, since it’s much more efficient at converting starches into sugars and carbon-dioxide, which allows fermentation to occur at a much faster rate. For example, the first rise for these rolls only takes up to 1 hour instead of 3-4 hours.
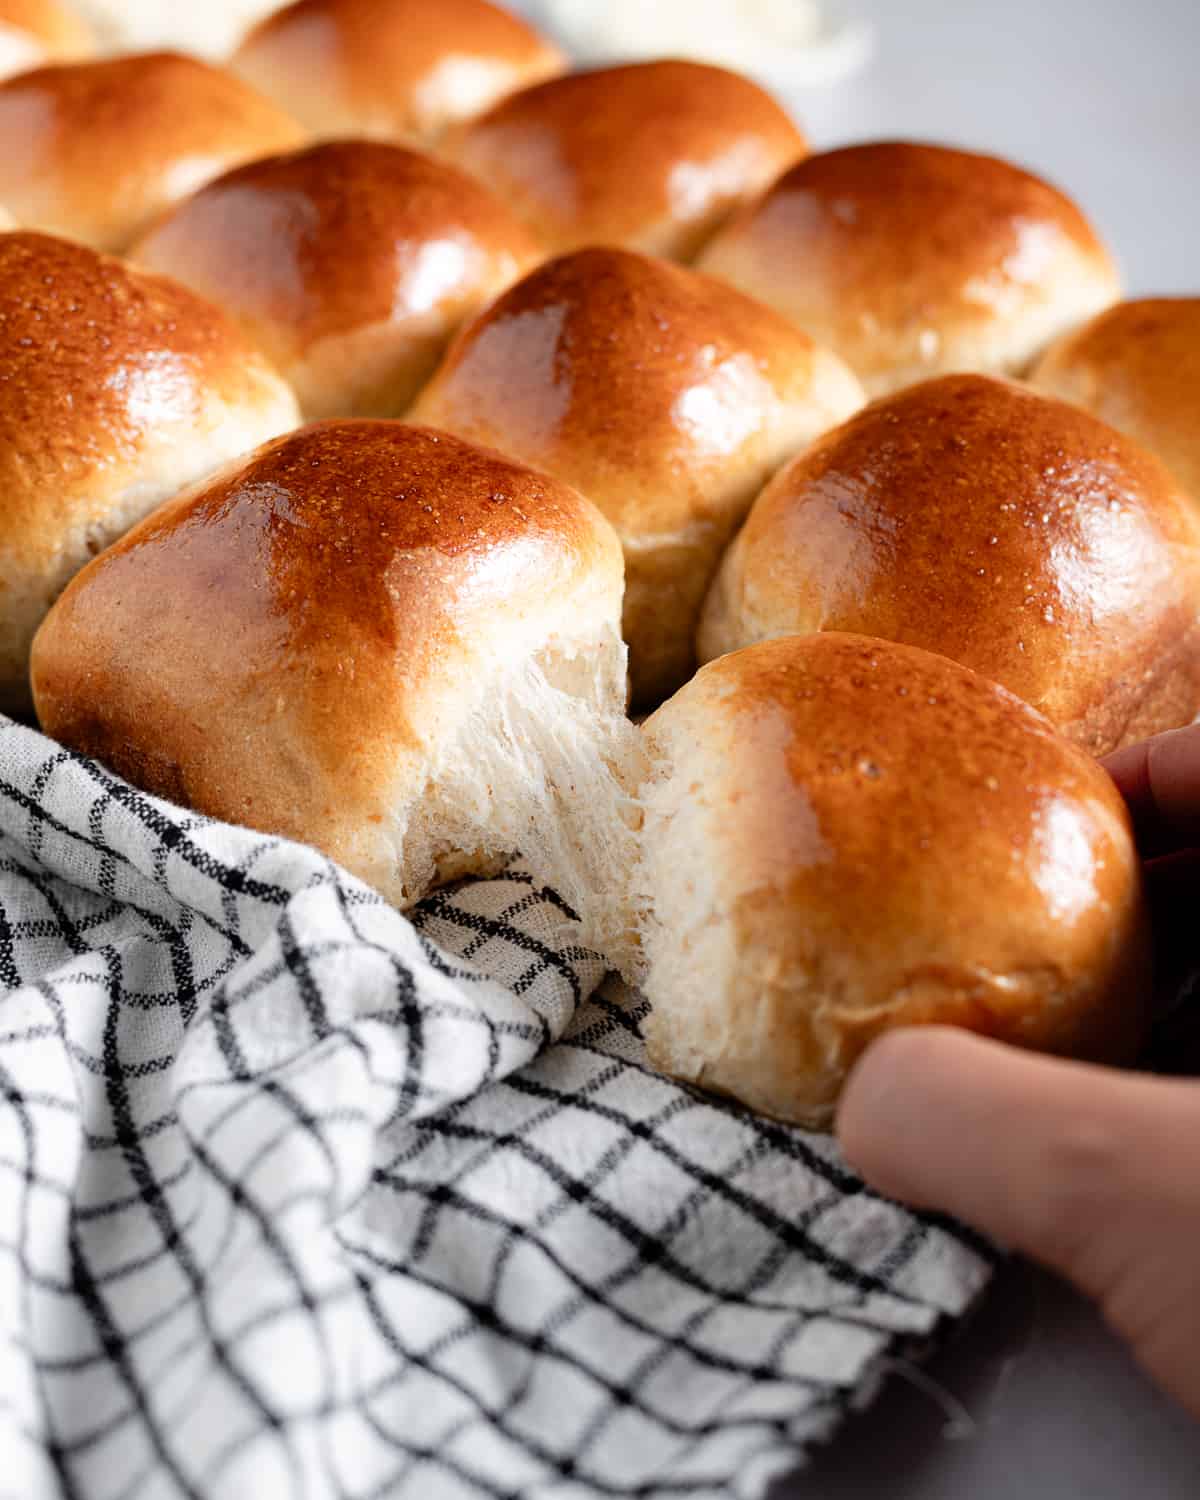
While you won’t get the intense flavor development of a two-day fermentation, adding sourdough discard to your bread rolls will add a more nuanced, intense flavor than just using instant yeast on its own.
Why I love this recipe
- Combines convenience of yeast with flavor discard
- Great way to use up a lot of excess sourdough
- Fluffy pillowy texture with a soft crust
- Mixed by hand - no stand mixer required
- Great for newbie bakers
What you need
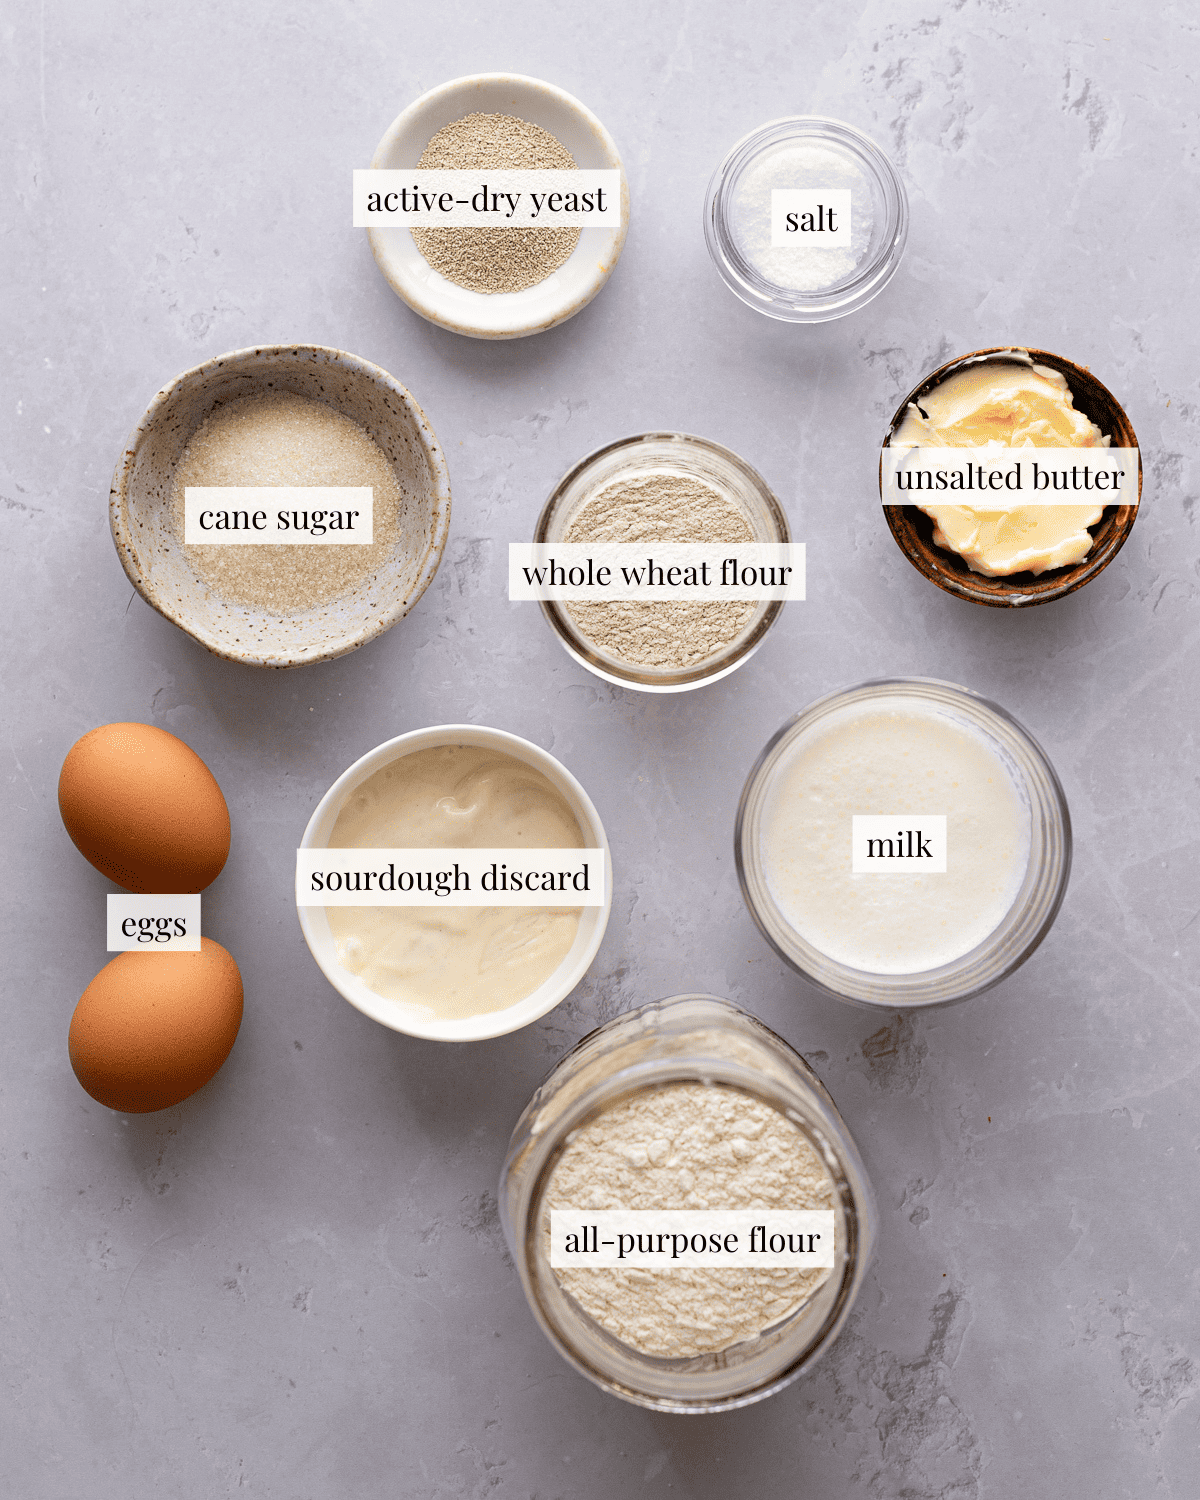
All-purpose: All-purpose flour has a low protein content which imparts the fluffy texture that you want in these rolls. Don't use all whole wheat or your rolls will turn out dense and dry.
Whole wheat flour: A little bit of whole wheat adds nuttiness without affecting the soft texture of these rolls. Feel free to substitute any other type of wheat, such as Kamut, spelt or einkorn or just use all-purpose if you don’t have whole wheat flour in your pantry.
Sourdough discard - If you don’t have any sourdough discard stocked up, you can still use an active sourdough starter or just add 56 grams of water and 56 grams of flour into the recipe. Your starter can be used directly from the refrigerator and you don't need to activate it before using it in this recipe.
Active-dry yeast - Both active dry or instant yeast will work in this recipe.
Tip
Make sure your yeast is not expired before attempting this recipe, otherwise your dough will not rise and your rolls will be too dense and gummy.
Step-by-step instructions
STEP 1: Make the dough
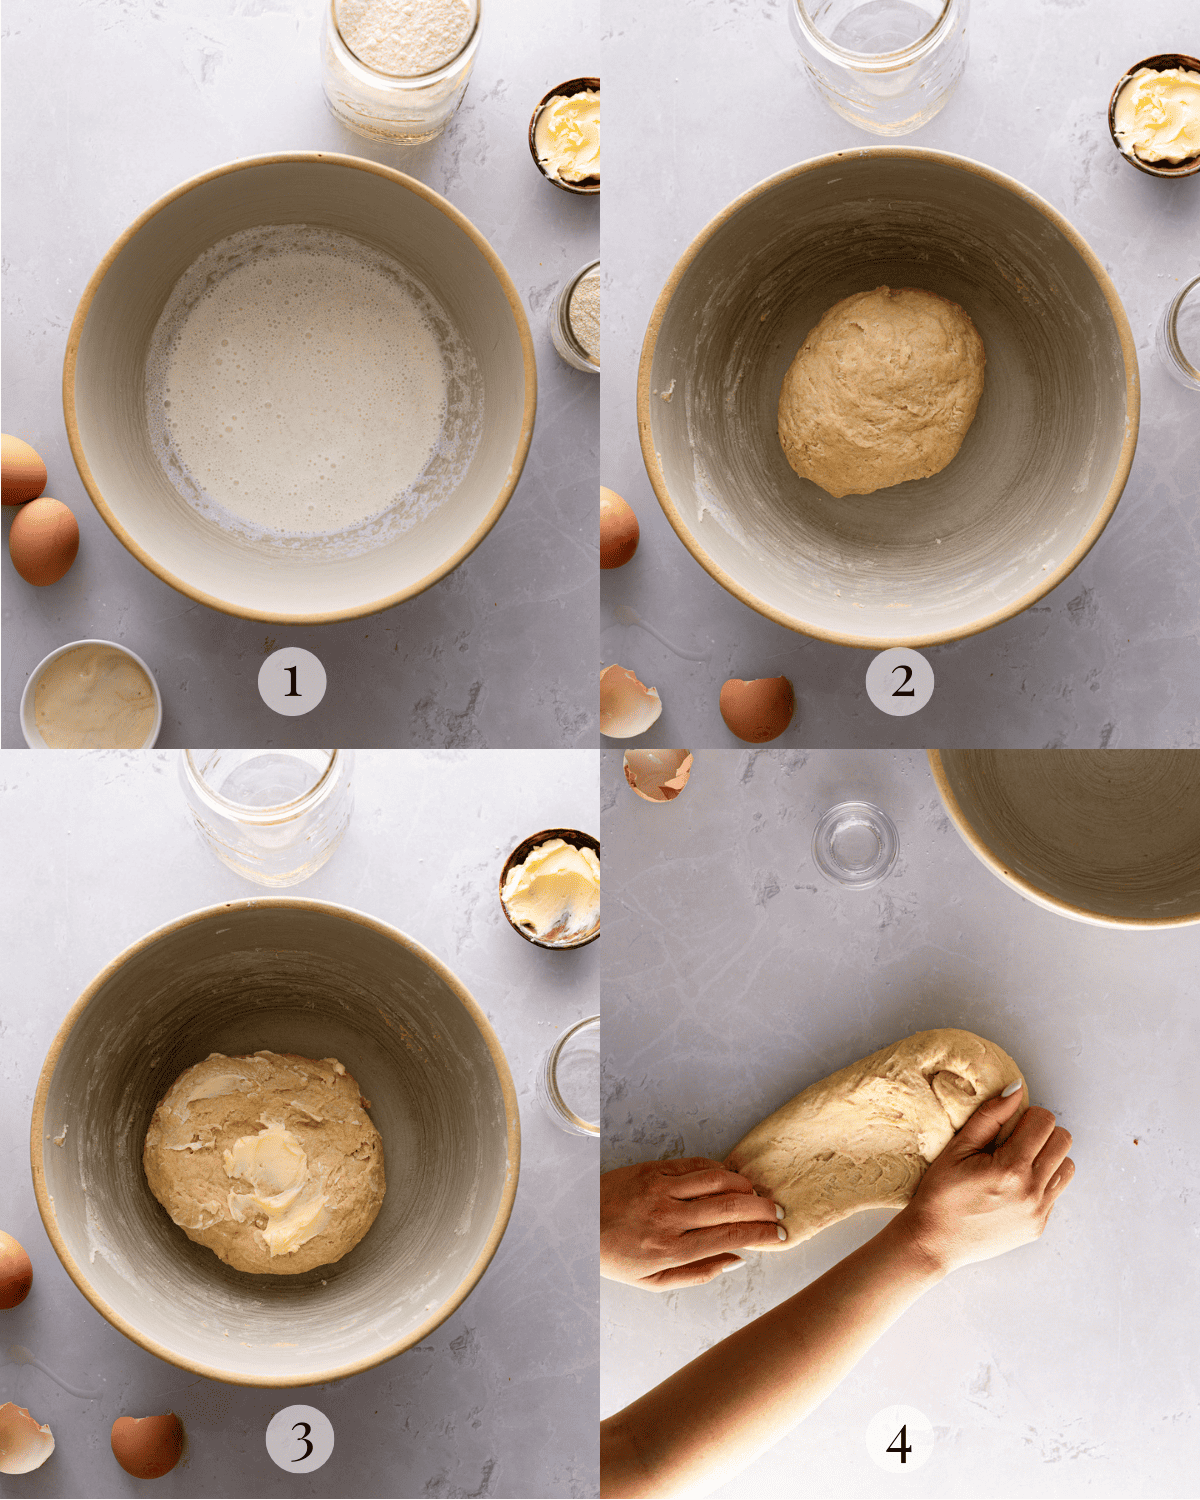
Bloom the active-dry starter for 15 minutes (image 1). Fold the ingredients into the yeast until a cohesive dough forms (image 2). Knead the butter into the dough until completely incorporated (image 3). Turn the dough out on a clean surface and knead until smooth (image 4).
Tip
Knead the butter into the dough one tablespoon at a time. The dough will gradually feel less greasy as it absorbs the butter.
STEP 2: Bulk fermentation
Round the dough into a tight ball and transfer it to a lightly-greased bowl (image 5). Allow the dough to rise in a warm place until doubled in volume (image 6).

Watch the dough, not the clock!
I’ll be giving time cues throughout the recipe, but since fermentation is highly dependent on temperature, this may differ based on the conditions of your kitchen.
STEP 3: Shaping
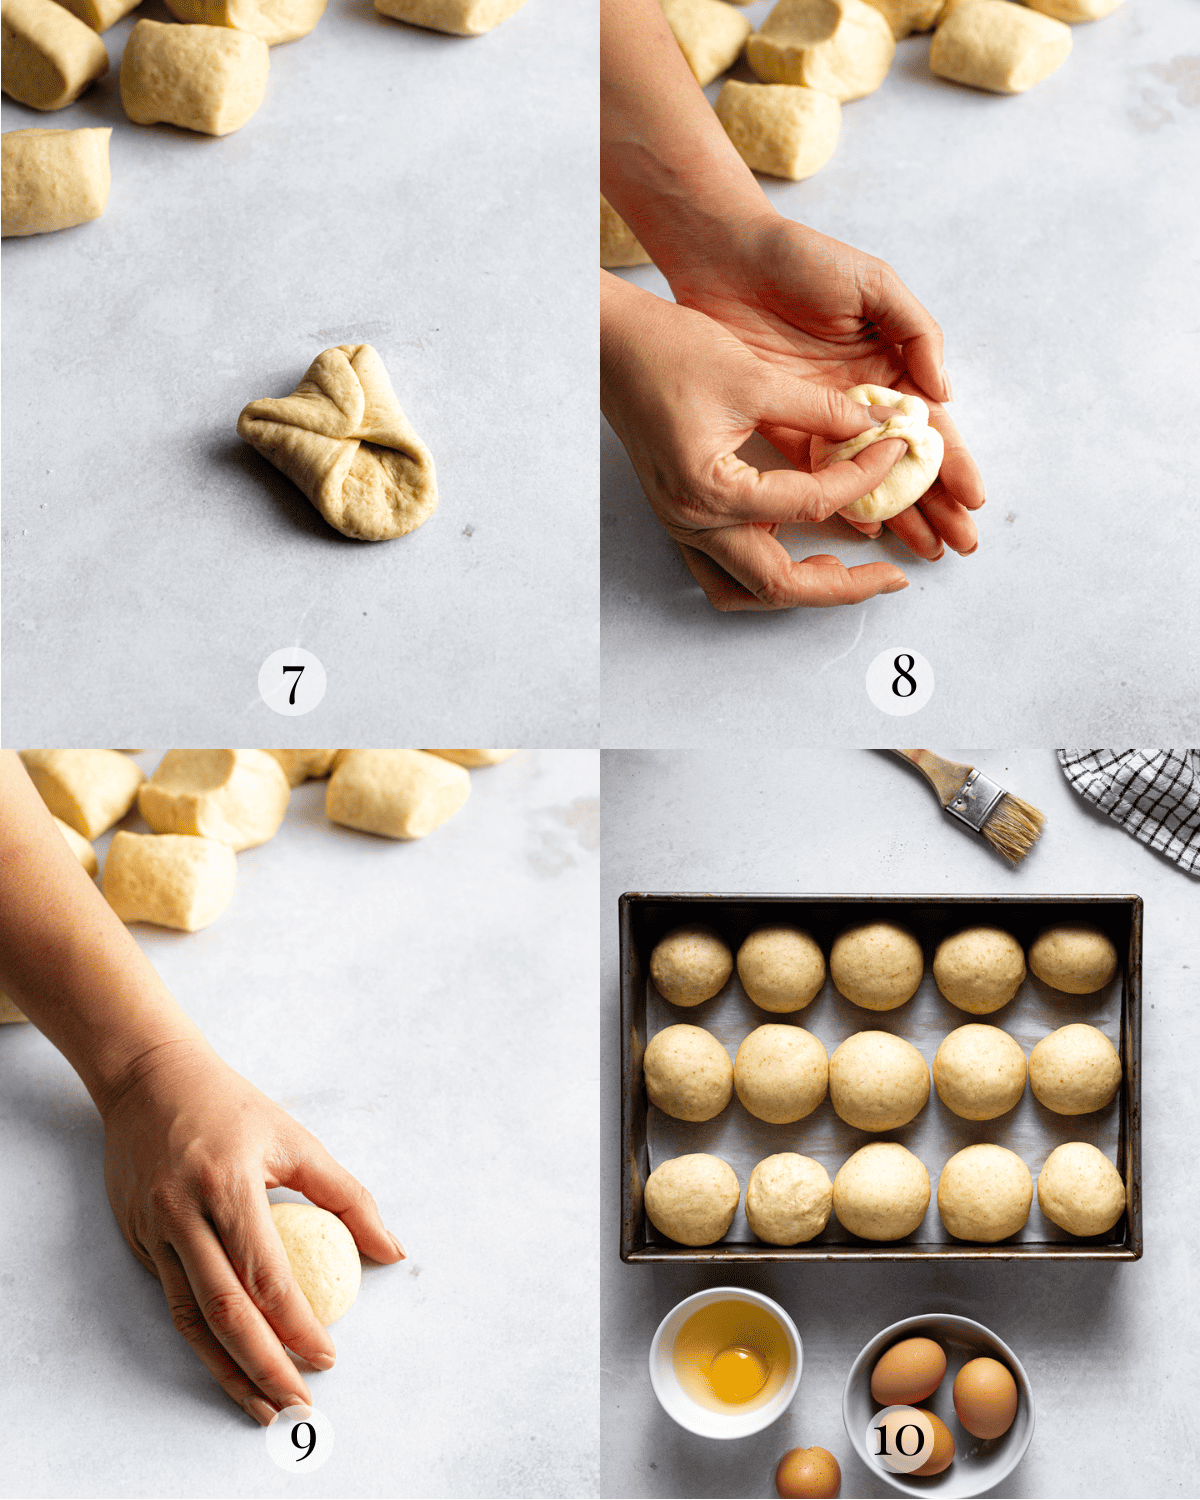
Divide the dough into 15 even portions. Flatten each portion of dough and fold the corners into the center (image 7). Pinch the seam shut (image 8). Turn the dough over and round it into a tight ball (image 9). Arrange the dough in a baking sheet (image 10).
Tip
This recipe was developed using a 9 by 13 inch baking pan. You can use a glass baking dish or a 12-inch skillet to bake these rolls.
STEP 4: Bake
Let the dough rise until puffy and fills the pan. Brush with egg wash (image 11). Bake at 350 F for 20 to 25 minutes (image 12).

Baker's Tips
- Weigh your ingredients. Measuring by weight is much more accurate than by volume (with tablespoons and cups).
- Both sourdough discard and active starter will work with this recipe.
- Be patient and wait until your dough is bubbly and well-risen. Otherwise, your bread will be dense and gummy
- The best way to determine whether your bread is fully baked is to probe the center of the dinner rolls with an instant-read thermometer. The internal temperature of your rolls should be between 190 F to 200 F.
Make ahead instructions
The dough can be made 1 day in advance.
- Shape the dough according to the instructions.
- Cover the pan with plastic wrap and refrigerate the unbaked dough overnight.
- The next day, take the pan out of the refrigerator. Allow the dough to come to room temperature or rise until the dough is puffy and fills the pan.
- Bake as instructed.
Recipe FAQs
Yes! Use the following substitutions to make vegan rolls:
Milk: apple juice, water, plain plant-based milk
Egg: applesauce, pumpkin puree or cooked, mashed potato
Butter: olive oil, vegetable oil, coconut oil or vegan butter
Egg wash: melted butter and maple syrup
Honey: maple syrup or sugar
Dough handling can really depend on the baker. I’m quite used to kneading wet, sticky dough. But if your dough feels too sticky, don’t be afraid to dust a little flour on your work surface. I find that letting the dough rest for 10 to 15 minutes before continuing to knead makes it much easier to handle.
Absolutely! To use a mixer, combine the ingredients in the bowl of a stand mixer. Start with a paddle attachment to stir the ingredients together. Once the dough appears cohesive, switch to a dough hook and mix until the dough clings to the hook and away from pulls away from the sides. Round the dough into a ball and proof.
More sourdough bread recipes
Did this recipe rise to the occasion?
★★★★★
Please leave a star rating and a comment. Your feedback helps me create more delicious sourdough recipes. I read and truly appreciate every message.
Don't forget to PIN this recipe on Pinterest to save it for later!
Thank you for your support!

Sourdough Discard Rolls Recipe
Equipment
- 9 by 13 baking pan
This section may contain affiliate links
Ingredients
Dough
- 226 grams milk
- 28 grams cane sugar
- 7 grams active-dry yeast 1 packet
- 1 large egg
- 113 grams sourdough discard
- 420 grams all-purpose flour
- 60 grams whole wheat flour
- 8 grams salt
- 56 grams unsalted butter softened
Egg wash
- 1 egg
- Pinch of salt
Click US Customary to view volume measurements
Instructions
- Bloom the yeast: Whisk the sugar, milk and yeast in a large bowl. Cover the bowl with plastic wrap and let the yeast bloom until foamy.226 grams milk, 28 grams cane sugar, 7 grams active-dry yeast
- Make the dough: Stir the sourdough discard and egg into the yeast mixture.1 large egg, 113 grams sourdough discard
- Fold the flours and salt in using a stiff spatula or your hands. Bring the ingredients together until a shaggy dough forms and no traces of dry flour remain.420 grams all-purpose flour, 60 grams whole wheat flour, 8 grams salt
- Knead the butter into the dough a tablespoon at a time. The dough will feel gradually less greasy as the butter is absorbed.56 grams unsalted butter
- Cover the bowl with plastic wrap and let the dough rest for 15 minutes, this rest period will make the dough much easier to work with.
- Knead the dough: Turn the dough out on a clean work surface, if your dough feels too sticky feel free to use a little bit of bench flour.
- To knead the dough, hold the bottom of the dough with your fingertips, fold the dough over itself, then push it out using the heel of the palm of your hand. Repeat until the dough looks cohesive, smooth and passes the windowpane test.
- First rise: Round the dough into a tight ball and place it in a clean, lightly-oiled bowl. Cover with plastic wrap and let the dough rise until doubled in volume, about 45 minutes to 1 hour.
- Shape the dough: Punch the dough down to release the air. Divide the dough into 15 equal pieces. Round each portion into a tight ball, and arrange the dough balls on a parchment-lined baking sheet in a 5 by 3 pattern.
- Final proof: Cover the baking sheet with plastic wrap and let the dough rise until the rolls fill the baking pan most of the way, about 30 to 45 minutes.
- Prep: When your rolls are close to being fully proofed, preheat your oven to 350 F.
- Egg wash: Beat the egg and pinch of salt together. Using a pastry brush, brush the tops of your dough with egg wash.1 egg, Pinch of salt
- Bake: Bake the rolls for 20 to 25 minutes or until the rolls are golden brown and register at at least 190 F when probed with an instant-read thermometer.
- Store: Store any leftover rolls in an airtight container at room temperature for up to 3 days.
Tips
These recipes were developed and tested using grams for precise measurements. To increase your chances of success, I recommend investing in a kitchen scale. I've included rough volume estimates (in tablespoons and cups), but they might not be totally accurate.
Remember all ovens are unique, these recipes were tested in my oven which runs cooler than others. You might need to lower the temperature if your bake appears to be browning too quickly. Monitor your bake closely and make adjustments if needed.
Notes
- Make sure your yeast is not expired before baking these rolls or your dough may not rise.
- Give your dough enough time to rise, waiting until it has doubled in volume before shaping or baking. Otherwise, your bread may be dense and gummy.
- Feel free to use active sourdough starter or sourdough discard to make this recipe.
- Both instant yeast and active dry yeast will work to make this recipe.
- Use an instant-read thermometer to make sure your loaf is fully baked. The center of the loaf should measure between 180 F to 190 F when done.
Recipe Video
Nutrition
I am not a nutritionist or dietitian, any nutrition information provided is an estimate.

Bev says
First time using this recipe. Doubled it cause I had lots of discard… buns came out wonderfully! I did use my Kitchenaid!
Hannah Dela Cruz says
So happy you loved it!
Amanda Chen says
Just finished making these and turned out so light and fluffy! I doubled the recipe so I could share some with others. Thank you for all the sourdough discard recipes on your site, so helpful.
Hannah Dela Cruz says
You're so welcome, Amanda! Thanks for sharing the bread with others!
Mee Mee says
Hi, Hannah. I have just made the rolls and they turned out well. And they were easy to prepare too.
However, I have one question. Did you have another recipe of the rolls which was on your blog in 2023?
From my notes, it seems like I tried (twice) a similar discard rolls recipe which differed in the amount of milk (less) and use of honey (same weight) instead of sugar ...?
I had copied down the recipe (first tried on Aug 6, 2023 and again on Dec 9, 2023). When I went to your blog yesterday, I saw the slight differences. I followed the "new" recipe and the rolls turned out well. But because I recall that my guests commented on the fragrance of the honey from my bake last Dec, I felt that yesterday's recipe (with the sugar) lacked the oomph.
Hannah, sorry to go on and on...but I just wanted to confirm if you had modified the rolls recipe, or I am mistaken😁
Hannah Dela Cruz says
Hi Mee Mee! It's so great that you know this recipe so well! I am incredibly touched by this comment actually. I think I may have changed this recipe around when I was reshooting photos for the step-by-step instructions. I ended up adding sugar instead of honey because that's just how I preferred to bake bread at the time. Thank you for the feedback on the flavor of honey vs. sugar. I will add in a note about using honey in the ingredients.
Olivia says
Perfection! I made the dough and immediately sectioned it out (skipped the proofing) , rolled into balls, and placed in the freezer. Today, I took some out of the freezer, placed them in a pan, and allowed them to thaw and rise naturally. They were so soft and fluffy! Everyone loved them! My kitchen smells AMAZING!!! Thank you for sharing this recipe.
Hannah Dela Cruz says
Oooh! It's great to know that this dough can be frozen. Thank you so much for letting me know. Glad the recipe turned out well for you.
Anita says
I don't have any unsalted butter and the closest store is an hour away. Can I use salted butter and add less salt to the dough?
Hannah Dela Cruz says
Absolutely! Just use 4 grams of salt instead of 8.
Hallee says
I absolutely love these rolls and so does my family! I used almond milk instead of normal whole milk and they still turned out wonderful. They store very easily in a container and can be quickly popped into the microwave for a quick roll for dinner or even a snack!
Hannah Dela Cruz says
So happy you loved them!
Julianne Henderson says
hey! i was wondering if this recipe can be double for a big batch? thank you
Hannah Dela Cruz says
Absolutely!
Jill says
Currently in the process of making these and I’m on my first knead! I’ve been going at it for a while and although it’s cohesive and the hydration seems perfect, the dough tears with every push of my palm. Any ideas why that could be happening?
Hannah Dela Cruz says
Try handling the dough more gently!
Emily Cappa says
Hi! Should this dough be light and airy, or more dense? Mine turned out very dense so I’m feeling like something went wrong. I did use vegan butter and almond milk, so I’m wondering if that affected it. However I followed measurements exactly with a scale and am a semi experienced bread maker now.
Hannah Dela Cruz says
Hi Emily - these are supposed to be very light. There's a good chance that the dough just didn't have enough time to proof or was overproofed. As an experienced bread baker, you should be aware that proofing times can vary greatly depending on the freshness of your yeast and the temperature of your kitchen. The dough should be very airy (but not overproofed) before you shape it. I give some time cues in every recipe but bread is pretty dependent on your unique environment so your times at home may vary. Try letting your dough double (even triple) before shaping and make sure it fills the pan (the dough should be touching) before baking!
Colleen says
Mine was similar to Hannah’s. I kneaded for a loooong time and because it didn’t pass the window pane test, put it in the kitchen aid for about 10 minutes. I’m sure it was over handled. But what could have made it fail the test. The measurements were exact. Could the milk or egg temp have affected it?
Hannah Dela Cruz says
It was probably over handled as you said. Next time, instead of throwing it in the mixer, gather it into a ball and let it rest for 15 to 20 minutes. This will allow the gluten bonds to recover.
Dona Hilton says
Mine turned out very dense as well 😩
Hannah Dela Cruz says
Hi Dona - sorry to hear this. There's a few reasons why this might have happened, but I'm guessing it may have been due to proofing issues.
Make sure your yeast is fresh and your dough is really bubbly and airy before shaping and baking!
Carol Ann Rickard says
I too am an experienced baker and bread baker. I made these today and found that I needed to add water to get the correct hydration. I too measured my ingredients exactly and my initial dough was very dry and dense. Once I had the correct "feel" of my dough. It raised wonderfully and I made a loaf of bread and small pan of rolls. They are gorgeous and taste wonderful. I would mention that I used my mixer and dough hook. I definitely would make these again.
Hannah Dela Cruz says
Hi Carol! So sorry your cake sank. Are you at a higher altitude? That could have had an effect on your bake.
Naccota says
Hi! I am wondering if this dough can be frozen after the initial proof and shaping to later be thawed, let rise, and baked?
Hannah Dela Cruz says
Hi - I'm not sure if this would work as I've never tried it! I don't usually freeze dough or bread so I can't speak on how this would affect the bake.
Chelsie says
I came here looking for the same answer, have you since found out?