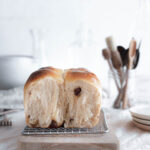
Cinnamon Raisin Sourdough Milk Bread Recipe
Plump cinnamon and vanilla soaked raisins encased by soft, fluffy milk bread. You won’t be able to resist tearing chunks out of this Sourdough Cinnamon Raisin Milk Bread!
Servings: 12 slices
Calories: 199kcal
Ingredients
Filling
- 85 g raisins
- 2 g ground cinnamon
- 7 g vanilla
- 56 g water
Tangzhong
- 21 g bread flour
- 150 g whole milk
Dough
- 113 g active sourdough starter
- 77 g whole milk
- 1 large egg
- 14 g vanilla
- 50 g brown sugar
- 304 g bread flour
- 2 g ground cinnamon
- 6 g salt
- 56 g butter
Instructions
- Soak Raisins: In a small bowl combine filling ingredients. Set aside and leave the raisins to soak for at least 30 minutes.85 g raisins, 2 g ground cinnamon, 7 g vanilla, 56 g water
- Make Tangzhong: Combine bread flour and milk in a large microwave safe bowl. Whisk them together until no lumps remain. Microwave on high for 30 seconds. Take the mixture out and stir again. Return the bowl to the microwave for another 60 seconds. Your mixture should have thickened and have the consistency of thick gravy, if not, stir again and microwave for another 30 seconds. Set the mixture aside and let it cool completely.21 g bread flour, 150 g whole milk
- Make the dough: Add sourdough starter, milk, egg, and vanilla to your cooled tangzhong (make sure the temperature of your tangzhong measures less than 110 F). Stir until the starter has fully dissolved and no streaks of egg remain. Set aside.113 g active sourdough starter, 77 g whole milk, 1 large egg, 14 g vanilla
- In a separate bowl, whisk together bread flour, brown sugar, cinnamon and salt.50 g brown sugar, 304 g bread flour, 2 g ground cinnamon, 6 g salt
- Add half of the flour mixture into the starter mixture. Mix using a wooden spoon or a spatula until a shaggy dough forms. Stir in the remaining flour, and begin lightly kneading the dough in your bowl using your hand. Continue to knead the dough inside the bowl until your dough feels smooth and has built some strength.
- Knead the dough: Knead the butter into the dough one tablespoon at a time, waiting until each portion of butter is fully incorporated before the next addition.56 g butter
- Add the raisins into the dough, and knead until the raisins are evenly distributed throughout. Cover your bowl with plastic wrap or a plastic bag and let the dough rest for an hour. This rest period will allow the gluten to relax and the flour to become fully hydrated, making your dough feel less sticky, more elastic and easier to handle.
- After your dough has rested, turn it out onto a lightly floured surface and knead for 10 minutes or until your dough looks smooth and passes the windowpane test.
- Check gluten development by stretching a portion of your dough using your fingertips, once your dough is ready you should be able to stretch until it is translucent without breaking.
- Bulk fermentation: Once your dough has developed enough strength, place it inside a lightly greased bowl and cover it with plastic wrap.
- Set the dough in a warm place undisturbed until it appears bubbly and has noticeably increased in volume. This may take 4 to 6 hours or longer depending on the temperature of your kitchen and the strength of your starter.
- Overnight proof: Punch the air out of your dough, round it into a tight ball and return it to the bowl. Cover the bowl with plastic wrap and place the dough into the refrigerator to proof overnight.
- Shape: The next morning, line a 9 by 4-inch loaf pan with parchment paper. Turn the dough out onto a lightly floured surface. Divide the dough into 8 equal portions.
- Working with 1 portion at a time, flatten the dough and fold all four corners towards the middle. Turn the dough over and using your cupped hand, gently roll the dough on your work surface until it forms a tight ball. Place the shaped roll into the loaf pan. Repeat with the remaining dough portions. Cover the loaf pan with plastic wrap.
- Final rise: Set your dough in a warm place, and allow the dough to rise until it looks puffy and feels soft to the touch with a texture resembling marshmallows. Your dough is ready to bake when it fills your loaf pan with only half an inch of space on top.
- Bake: Once your dough has proofed, preheat your oven to 375 F. Brush the top of your dough with egg wash and bake for 45 to 50 minutes or until it’s golden brown and the temperature of the dough registers at least 180 F.
- Remove your loaf from the loaf pan and move to a wire rack. Allow your dough to cool for at least 20 minutes before transferring to a cutting board and slicing.
- Enjoy and store: Enjoy warm by itself or with butter. Store leftovers in a ziplock bag or an airtight container at room temperature for up to 5 days.
Notes
When in doubt, use gram over volume measures.
Nutrition
Calories: 199kcal | Carbohydrates: 32g | Protein: 5g | Fat: 5g | Saturated Fat: 3g | Polyunsaturated Fat: 0.4g | Monounsaturated Fat: 1g | Trans Fat: 0.2g | Cholesterol: 26mg | Sodium: 240mg | Potassium: 130mg | Fiber: 1g | Sugar: 5g | Vitamin A: 169IU | Vitamin C: 0.4mg | Calcium: 40mg | Iron: 1mg